2019 DODGE GRAND CARAVAN Radio
[x] Cancel search: RadioPage 103 of 490
NOTE:For vehicles equipped with Keyless Enter-N-Go,
place the ignition in the RUN position with the engine ON.
Make sure while programming HomeLink with the engine
ON that your vehicle is outside of your garage, or that the
garage door remains open at all times.
2. Place the hand-held transmitter 1 to 3 inches (3 to 8 cm) away from the HomeLink button you wish to program
while keeping the HomeLink indicator light in view.
3. Push and hold the HomeLink button you want to program while you push and hold the hand-held trans-
mitter button.
4. Continue to hold both buttons and observe the indicator light. The HomeLink indicator will flash slowly and
then rapidly after HomeLink has received the frequency
signal from the hand-held transmitter. Release both
buttons after the indicator light changes from slow to
rapid.
5. Push and hold the programmed HomeLink button and observe the indicator light.
• If the indicator light stays on constantly, programming
is complete and the garage door/device should acti-
vate when the HomeLink button is pushed. •
To program the two remaining HomeLink buttons,
repeat each step for each remaining button. DO NOT
erase the channels.
Reprogramming A Single HomeLink Button
(Non-Rolling Code)
To reprogram a channel that has been previously trained,
follow these steps:
1. Cycle the ignition to the ON/RUN position.
2. Push and hold the desired HomeLink button until the indicator light begins to flash after 20 seconds. Do not
release the button.
3. Without releasing the button, proceed with “Program-
ming A Non-Rolling Code” step two and follow all
remaining steps.
Canadian/Gate Operator Programming
For programming transmitters in Canada/United States
that require the transmitter signals to “time-out” after
several seconds of transmission:
Canadian radio frequency laws require transmitter signals
to time-out (or quit) after several seconds of transmission,
which may not be long enough for HomeLink to pick up
3
GETTING TO KNOW YOUR VEHICLE 101
Page 106 of 490
General Information
The following regulatory statement applies to all Radio
Frequency (RF) devices equipped in this vehicle:
This device complies with Part 15 of the FCC Rules and
with Industry Canada license-exempt RSS standard(s).
Operation is subject to the following two conditions:
1. This device may not cause harmful interference, and
2. This device must accept any interference received, in-cluding interference that may cause undesired opera-
tion.
NOTE: Changes or modifications not expressly approved
by the party responsible for compliance could void the
user ’s authority to operate the equipment.
INTERNAL EQUIPMENT
Storage
Glove Compartments
The glove compartment is located on the passenger side of
the instrument panel and features both an upper and lower
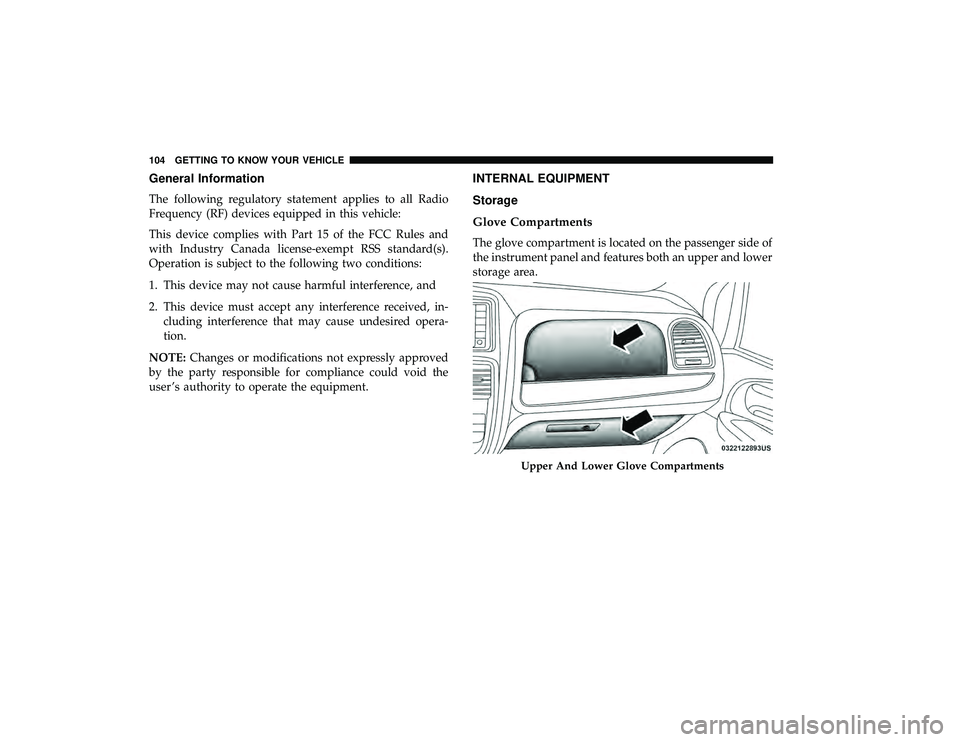
storage area.
Upper And Lower Glove Compartments
104 GETTING TO KNOW YOUR VEHICLE
Page 144 of 490
Headlamps With Wipers (Available With Auto
Headlights Only)
When ON is selected, and the headlight switch is in the
AUTO position, the headlights will turn on approximately
10 seconds after the wipers are turned on. The headlights
will also turn off when the wipers are turned off if they
were turned on by this feature. To make your selection,
push and release therightarrow button until a check-mark
appears next to the setting, showing that the setting has
been selected.
NOTE: Turning the headlights on during the daytime
causes the instrument panel lights to dim. To increase the
brightness, refer to “Interior Lights” in “Getting To Know
Your Vehicle.”
Intermittent Wiper Options — If Equipped
When ON is selected, the system will automatically acti-
vate the windshield wipers if it senses moisture on the
windshield. To make your selection, push and release the
right arrow button until a check-mark appears next to the
feature showing the system has been activated or the
check-mark is removed showing the system has been
deactivated. When the system is deactivated, the system
reverts to the standard intermittent wiper operation. Key-Off Power Delay
When this feature is selected, the power window switches,
radio, Uconnect phone (if equipped), DVD video system (if
equipped), power sunroof (if equipped), and power outlets
will remain active for up to 10 minutes after the ignition
switch is turned OFF. Opening either front vehicle door
will cancel this feature. To make your selection, scroll up or
down until the preferred setting is highlighted, then push
and release the
rightarrow button until a check-mark
appears next to the setting, showing that the setting has
been selected.
Illuminated Approach
When this feature is selected, the headlights will activate
and remain on for up to 90 seconds when the doors are
unlocked with the key fob. To make your selection, scroll
up or down until the preferred setting is highlighted, then
push and release the rightarrow button until a check-mark
appears next to the setting, showing that the setting has
been selected.
Hill Start Assist (HSA) — If Equipped
When on is selected, the HSA system is active. Refer to
“Electronic Brake Control System” in “Safety” for system
142 GETTING TO KNOW YOUR INSTRUMENT PANEL
Page 160 of 490
SAFETY FEATURES
Anti-Lock Brake System (ABS)
The Anti-Lock Brake System (ABS) provides increased
vehicle stability and brake performance under most brak-
ing conditions. The system automatically prevents wheel
lock, and enhances vehicle control during braking.
The ABS performs a self-check cycle to ensure that the ABS
is working properly each time the vehicle is started and
driven. During this self-check, you may hear a slight
clicking sound as well as some related motor noises.
ABS is activated during braking when the system detects
one or more wheels begin to lock. Road conditions such as
ice, snow, gravel, bumps, railroad tracks, loose debris, or
panic stops may increase the likelihood of ABS activa-
tion(s).
You also may experience the following when ABS activates:
•The ABS motor noise (it may continue to run for a short
time after the stop).
• The clicking sound of solenoid valves.
• Brake pedal pulsations.
• A slight drop of the brake pedal at the end of the stop. These are all normal characteristics of ABS.
WARNING!
•
The ABS contains sophisticated electronic equip-
ment that may be susceptible to interference caused
by improperly installed or high output radio trans-
mitting equipment. This interference can cause pos-
sible loss of anti-lock braking capability. Installation
of such equipment should be performed by qualified
professionals.
• Pumping of the Anti-Lock Brakes will diminish their
effectiveness and may lead to a collision. Pumping
makes the stopping distance longer. Just press firmly
on your brake pedal when you need to slow down or
stop.
• The ABS cannot prevent the natural laws of physics
from acting on the vehicle, nor can it increase brak-
ing or steering efficiency beyond that afforded by the
condition of the vehicle brakes and tires or the
traction afforded.
• The ABS cannot prevent collisions, including those
resulting from excessive speed in turns, following
another vehicle too closely, or hydroplaning.
(Continued)
158 SAFETY
Page 171 of 490
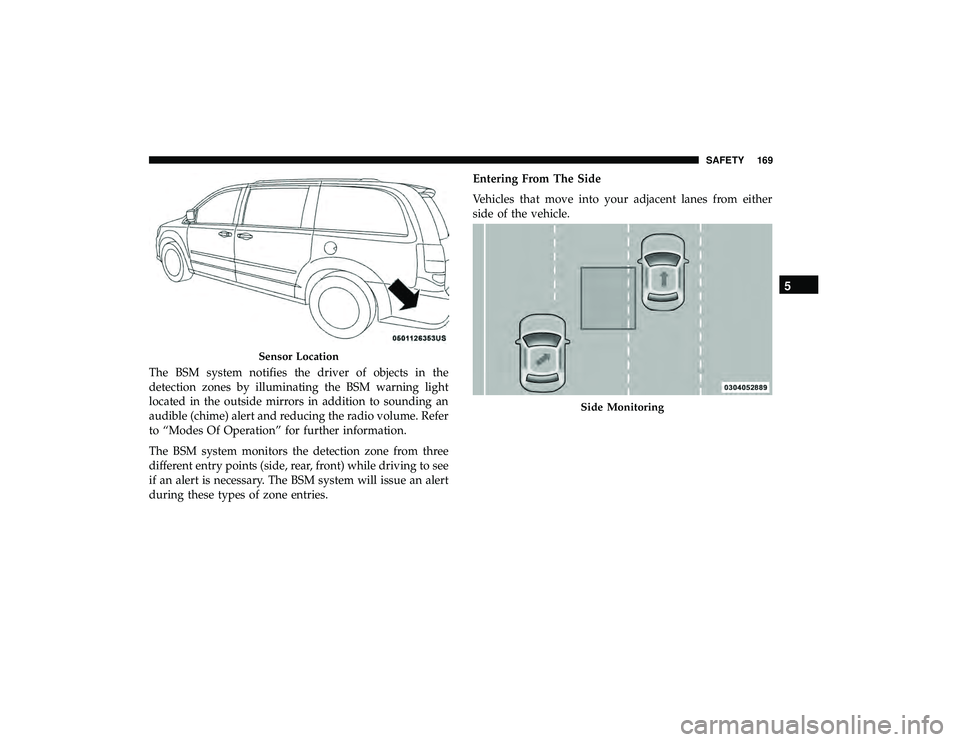
The BSM system notifies the driver of objects in the
detection zones by illuminating the BSM warning light
located in the outside mirrors in addition to sounding an
audible (chime) alert and reducing the radio volume. Refer
to “Modes Of Operation” for further information.
The BSM system monitors the detection zone from three
different entry points (side, rear, front) while driving to see
if an alert is necessary. The BSM system will issue an alert
during these types of zone entries.Entering From The Side
Vehicles that move into your adjacent lanes from either
side of the vehicle.
Sensor Location
Side Monitoring
5
SAFETY 169
Page 175 of 490
(5 km/h), to objects moving a maximum of approximately
20 mph (32 km/h), such as in parking lot situations.
NOTE:In a parking lot situation, oncoming vehicles can be
obscured by vehicles parked on either side. If the sensors
are blocked by other structures or vehicles, the system will
not be able to alert the driver.
When RCP is on and the vehicle is in REVERSE, the driver
is alerted using both the visual and audible alarms, includ-
ing reducing the radio volume.
WARNING!
Rear Cross Path Detection (RCP) is not a back up aid
system. It is intended to be used to help a driver detect
an oncoming vehicle in a parking lot situation. Drivers
must be careful when backing up, even when using
RCP. Always check carefully behind your vehicle, look
behind you, and be sure to check for pedestrians,
animals, other vehicles, obstructions, and blind spots
before backing up. Failure to do so can result in serious
injury or death.
Modes Of Operation
Modes Of Operation With Instrument Cluster Display
Three selectable modes of operation are available in the
instrument cluster display. Refer to “Instrument Cluster
Display” in “Getting To Know Your Instrument Panel” for
further information.
Blind Spot Alert Lights Only
When operating in Blind Spot Alert mode, the BSM system will
provide a visual alert in the appropriate side view mirror based
on a detected object. However, when the system is operating in
RCP, the system will respond with both visual and audible
alerts when a detected object is present. Whenever an audible
alert is requested, the radio volume is reduced.
Blind Spot Alert Lights/Chime
When operating in Blind Spot Alert Lights/Chime mode,
the BSM system will provide a visual alert in the appro-
priate side view mirror based on a detected object. If the
turn signal is then activated, and it corresponds to an alert
present on that side of the vehicle, an audible chime will
also be sounded. Whenever a turn signal and detected
object are present on the same side at the same time, both
the visual and audio alerts will be issued. In addition to the
audible alert the radio (if on) volume will be reduced.
5
SAFETY 173
Page 176 of 490
NOTE:
•Whenever an audible alert is requested by the BSM
system, the radio volume is reduced.
• If the hazard flashers are on, the system will request the
appropriate visual alert only.
When the system is in RCP, the system shall respond with
both visual and audible alerts when a detected object is
present. Whenever an audible alert is requested, the radio
volume is reduced. Turn/hazard signal status is ignored;
the RCP state always requests the chime.
Blind Spot Alert Off
When the BSM system is turned off there will be no visual
or audible alerts from either the BSM or RCP systems.
NOTE: The BSM system will store the current operating
mode when the vehicle is shut off. Each time the vehicle is
started the previously stored mode will be recalled and
used.General Information
The following regulatory statement applies to all Radio
Frequency (RF) devices equipped in this vehicle:
This device complies with Part 15 of the FCC Rules and
with Industry Canada license-exempt RSS standard(s).
Operation is subject to the following two conditions:
1. This device may not cause harmful interference.
2. This device must accept any interference received, in- cluding interference that may cause undesired opera-
tion.
NOTE: Changes or modifications not expressly approved
by the party responsible for compliance could void the
user ’s authority to operate the equipment.
Tire Pressure Monitor System (TPMS)
The Tire Pressure Monitor System (TPMS) will warn the
driver of a low tire pressure based on the vehicle recom-
mended cold placard pressure.
174 SAFETY
Page 180 of 490
Service Tpm System
The TPMS Warning Light will flash on and off for 75
seconds, and remain on solid when a system fault is
detected. The system fault will also sound a chime. If the
ignition switch is cycled, this sequence will repeat, provid-
ing the system fault still exists. The TPMS Warning Light
will turn off when the fault condition no longer exists. A
system fault can occur with any of the following scenarios:
•Jamming due to electronic devices or driving next to
facilities emitting the same radio frequencies as the
TPMS sensors.
• Installing some form of aftermarket window tinting that
affects radio wave signals.
• Accumulation of excessive snow and/or ice around the
wheels or wheel housings.
• Using tire chains on the vehicle.
• Using wheels/tires not equipped with TPMS sensors.
Vehicles With Compact Spare
• The compact spare tire (if equipped) does not have a
TPMS sensor. Therefore the TPMS will not monitor the
pressure in the compact spare tire. •
If you install the compact spare tire in place of a road tire
that has a pressure below the low-pressure warning
limit, upon the next ignition switch cycle, a chime will
sound, a “LOW TIRE PRESSURE” message will be
displayed and the TPMS Warning Light will turn on.
• After driving for up to 20 minutes above 15 mph
(24 km/h), the TPMS Warning Light will flash on and off
for 75 seconds and then remain on solid.
• For each subsequent ignition switch cycle, a chime will
sound, the TPMS Warning Light will flash on and off for
75 seconds and then remain on solid.
• Once you repair or replace the original road tire and
reinstall it on the vehicle in place of the compact spare
tire, the TPMS will automatically update, and the TPMS
Warning Light will turn off as long as no tire pressure is
below the low-pressure warning limit in any of the four
active road tires.
TPMS Deactivation — If Equipped
The TPMS can be deactivated if replacing all four wheel
and tire assemblies (road tires) with wheel and tire assem-
blies that do not have TPMS Sensors, such as when
installing winter wheel and tire assemblies on your vehicle.
178 SAFETY