Page 37 of 490
Manual Adjustment (Rear Seats)
Stow ’n Go Seating
On vehicles equipped with Stow ’n Go seating, the second
and third row seats can be folded into the floor for
convenient storage.
Second Row Stow ’n Go
On vehicles equipped with Stow ’n Go seats, the seats will
fold and tumble in one motion.
1. Move the front seat fully forward.
2. Recline the front seatback fully forward.
3. Raise the armrests on the second row seat.
NOTE:Seat will not stow in the storage bin unless the
armrests are raised. 4. Slide the storage bin locking mechanism to the “lock”
position and then pull up on the storage bin latch to
open the cover.
Storage Bin Cover Lock Release
3
GETTING TO KNOW YOUR VEHICLE 35
Page 40 of 490

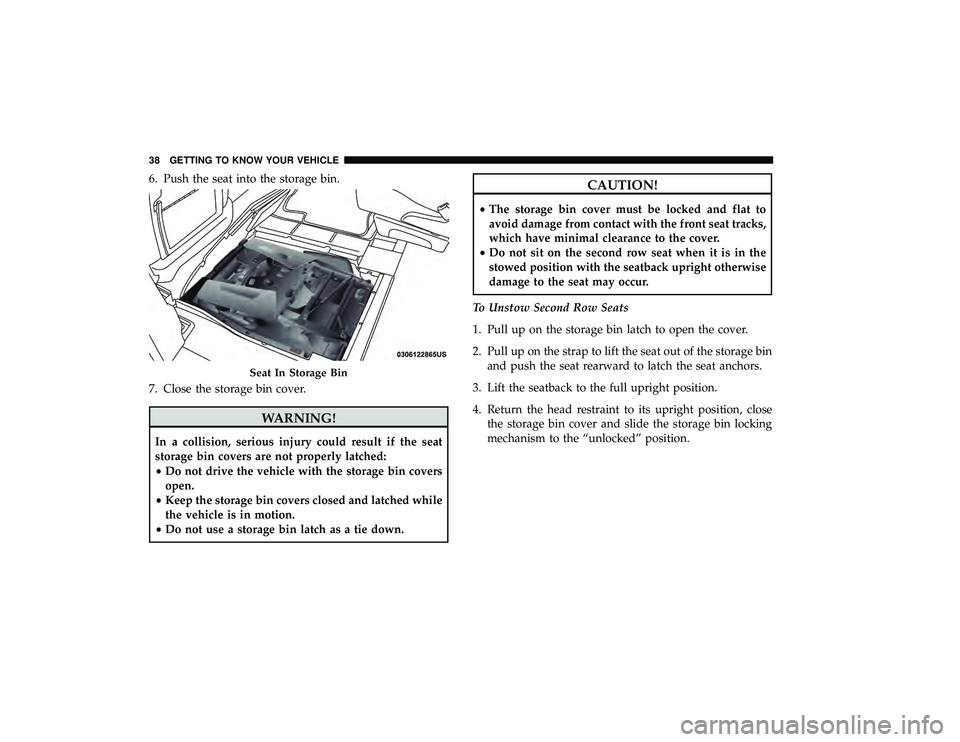
6. Push the seat into the storage bin.
7. Close the storage bin cover.
WARNING!
In a collision, serious injury could result if the seat
storage bin covers are not properly latched:
•Do not drive the vehicle with the storage bin covers
open.
• Keep the storage bin covers closed and latched while
the vehicle is in motion.
• Do not use a storage bin latch as a tie down.
CAUTION!
•The storage bin cover must be locked and flat to
avoid damage from contact with the front seat tracks,
which have minimal clearance to the cover.
• Do not sit on the second row seat when it is in the
stowed position with the seatback upright otherwise
damage to the seat may occur.
To Unstow Second Row Seats
1. Pull up on the storage bin latch to open the cover.
2. Pull up on the strap to lift the seat out of the storage bin and push the seat rearward to latch the seat anchors.
3. Lift the seatback to the full upright position.
4. Return the head restraint to its upright position, close the storage bin cover and slide the storage bin locking
mechanism to the “unlocked” position.
Seat In Storage Bin
38 GETTING TO KNOW YOUR VEHICLE
Page 41 of 490
WARNING!
•In a collision, you or others in your vehicle could be
injured if seats are not properly latched to their floor
attachments. Always be sure the seats are fully
latched.
• Sitting in a seat with the head restraint in its lowered
position could result in serious injury or death in a
collision. Always make sure the head restraints are in
their upright positions when the seat is to be occu-
pied.
Stow ’n Go Seat — Folded And Latched Position
To tumble or stow the seat from the folded and latched
position: return the seatback and head restraint to the
upright position. Then pull up on the seatback recliner
lever on the outboard side of the seat to fold head rest,
seatback, and tumble the seat forward.
1. Return the seatback to the upright position. 2. Return the head restraint to the upright position.
Raising The Seatback
3
GETTING TO KNOW YOUR VEHICLE 39
Page 42 of 490
3. Pull up on the seatback recliner lever on the outboardside of the seat to fold head rest, seatback, and tumble
the seat forward.
Easy Entry Second Row
The second row Stow ’n Go seats allow easy entry to the
third row seat or rear cargo area.
Pull up on the seatback recliner lever on the outboard side
of the seat. The seat will automatically fold into position for easy entry
into the third row.
WARNING!
In the event of a collision you could be injured if the
seat is not fully latched.
Raising The Head RestraintSeatback Recliner Lever
40 GETTING TO KNOW YOUR VEHICLE
Page 43 of 490
Second Row Bench Seat — If Equipped
While the bench seat does not stow in the floor, it is
removable for added cargo space.
Release levers are located on the rear leg assemblies, near
the floor. To remove the seat, squeeze each release handle
and rotate downwards to deploy the wheels. A lock
indicator button pops up when the seat is unlocked. The
seat assembly can now be removed from the vehicle and
moved on its Easy Out Rollers.To reinstall the seat, align the seat into the detent positions
on the floor. Squeeze the release handle and rotate upward
until the lock indicator button returns into the handle.
WARNING!
If not properly latched, the seat could become loose.
Personal injuries could result. After reinstalling these
seats, be sure the red indicator button on the release
handles return into the handles.
Second Row Bench Seat
Release Handles
3
GETTING TO KNOW YOUR VEHICLE 41
Page 46 of 490

NOTE:You may experience deformation in the seat cush-
ion from the seat belt buckles if the seats are left folded for
an extended period of time. This is normal and by simply
opening the seats to the open position, over time the seat
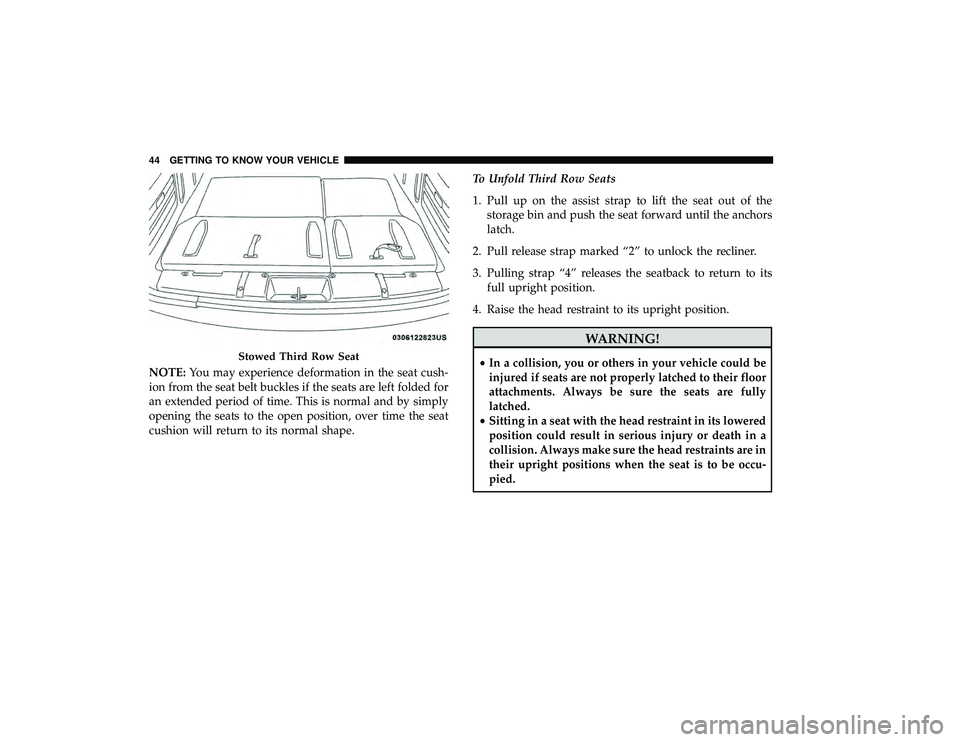
cushion will return to its normal shape. To Unfold Third Row Seats
1. Pull up on the assist strap to lift the seat out of the
storage bin and push the seat forward until the anchors
latch.
2. Pull release strap marked “2” to unlock the recliner.
3. Pulling strap “4” releases the seatback to return to its full upright position.
4. Raise the head restraint to its upright position.
WARNING!
• In a collision, you or others in your vehicle could be
injured if seats are not properly latched to their floor
attachments. Always be sure the seats are fully
latched.
• Sitting in a seat with the head restraint in its lowered
position could result in serious injury or death in a
collision. Always make sure the head restraints are in
their upright positions when the seat is to be occu-
pied.Stowed Third Row Seat
44 GETTING TO KNOW YOUR VEHICLE
Page 54 of 490

WARNING!
•ALL the head restraints MUST be reinstalled in the
vehicle to properly protect the occupants.
• All occupants, including the driver, should not oper-
ate a vehicle or sit in a vehicle’s seat until the head
restraints are placed in their proper positions in
order to minimize the risk of neck injury in the event
of a collision.
• Do not place items over the top of the Active Head
Restraint, such as coats, seat covers or portable DVD
players. These items may interfere with the opera-
tion of the Active Head Restraint in the event of a
collision and could result in serious injury or death.
• Active Head Restraints may be deployed if they are
struck by an object such as a hand, foot or loose
cargo. To avoid accidental deployment of the Active
Head Restraint ensure that all cargo is secured, as
loose cargo could contact the Active Head Restraint
during sudden stops. Failure to follow this warning
could cause personal injury if the Active Head Re-
straint is deployed.
Head Restraints — Second Row Quad Seats
The head restraints on the second row quad seats are
non-adjustable and non-removable. The head restraint will
automatically fold forward when the seat release lever is
pulled during the Stow n’ Go procedure. Refer to “Seats” in
this section for further information.
Head Restraints — Second Row Bench
The second row bench seat is equipped with adjustable
head restraints.
To raise the head restraint, pull upward on the head
restraint. To lower the head restraint, push the adjustment
button, located at the base of the head restraint, and push
downward.
52 GETTING TO KNOW YOUR VEHICLE
Page 99 of 490

Cargo Area Features
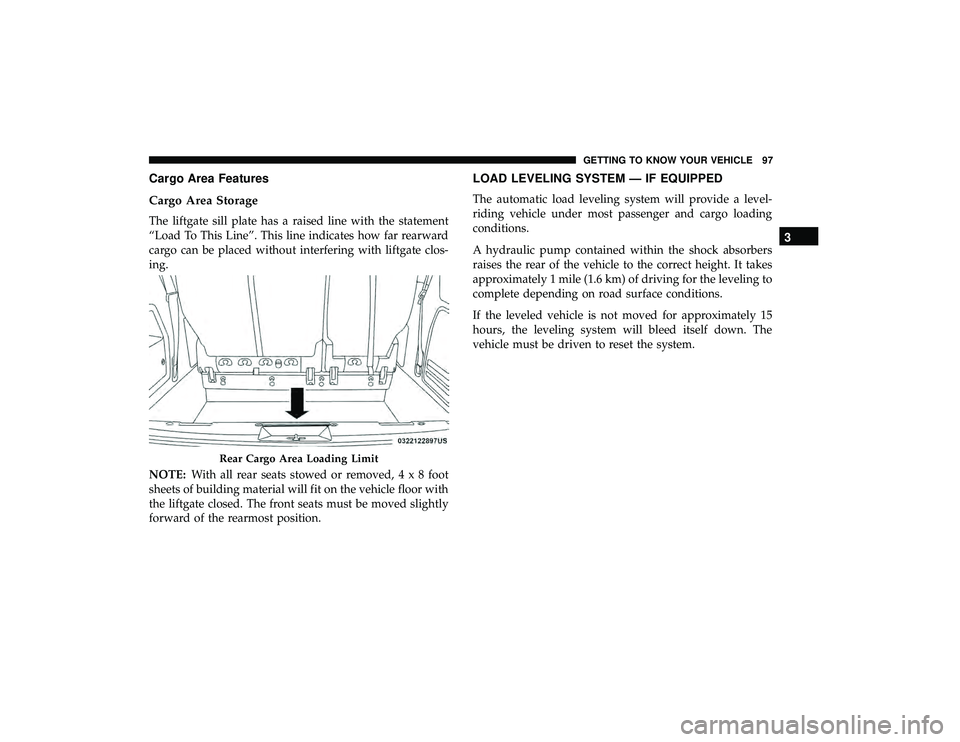
Cargo Area Storage
The liftgate sill plate has a raised line with the statement
“Load To This Line”. This line indicates how far rearward
cargo can be placed without interfering with liftgate clos-
ing.
NOTE:With all rear seats stowed or removed,4x8foot
sheets of building material will fit on the vehicle floor with
the liftgate closed. The front seats must be moved slightly
forward of the rearmost position.
LOAD LEVELING SYSTEM — IF EQUIPPED
The automatic load leveling system will provide a level-
riding vehicle under most passenger and cargo loading
conditions.
A hydraulic pump contained within the shock absorbers
raises the rear of the vehicle to the correct height. It takes
approximately 1 mile (1.6 km) of driving for the leveling to
complete depending on road surface conditions.
If the leveled vehicle is not moved for approximately 15
hours, the leveling system will bleed itself down. The
vehicle must be driven to reset the system.
Rear Cargo Area Loading Limit
3
GETTING TO KNOW YOUR VEHICLE 97