Page 161 of 594

INSTRUMENTS AND CONTROLS
}}
* Option/accessory.159
Operating the panorama roof *
When operating with the control in the roof, the panoramic roof is first opened horizontally to acomfort position. In ventilation position, the front glass cover in the roof is raised at the rear.
WARNING
Children, other passengers or objects may be trapped by the panorama roof's moving parts.
• Always operate the panorama roof with caution.
• Do not allow children to play with thecontrols.
• Remember to always switch off the powersupply to the panorama roof by settingthe car's electrical system in ignition posi- tion
0, and then take the remote control
key with you when leaving the car.
IMPORTANT
Do not open the panorama roof when load carriers are fitted.
In order that the panoramic roof and sun blind can be operated, the car's electrical system must be in at least ignition position I.
Operating with the control in the roof
Opening, manual
Opening, automatic
Closing, manual
Closing, automatic
Manual operation
1. To open the sun blind - press the control
backwards to the position for manual open- ing. The sun blind moves towards maximumopening position for as long as the control isheld depressed rearward. 2. Open the panorama roof - press the control
backwards a second time to the position formanual opening. The panoramic roof first reaches comfort position 29
. In order to open
to maximum opening position - press the control backwards a third time.
Close the roof/blind by repeating the precedingprocedure in reverse order - press the controlforward/downward to the manual closing positioninstead. The movement of the roof is stopped if the con- trol is released or when the glass reaches thecomfort position or the maximum opening orclosing position.
NOTE
For manual opening, the sun blind must be fully open before the panoramic roof can beopened. When the procedure is reversed, thepanoramic roof must be fully closed beforethe sun blind can be closed.
29 Comfort position is an open position for the glass cover, where wind noise and resonance noise are at a comfortably low level while driving.
Page 162 of 594

||
INSTRUMENTS AND CONTROLS
160
Automatic operation
1. Open the sun blind to maximum position -press the control backward to the position for automatic opening and release.
2. To open the panorama roof, press the control backwards a second time to the position forautomatic opening and release. The panor- amic roof first reaches comfort position 29
. To
open to the maximum opening position - press the control a third time backward tothe position for automatic opening andrelease.
Close the roof/blind by repeating the precedingprocedure in reverse order - press the controlforward/downward to the automatic closing posi-tion instead. The movement of the roof is stopped when the glass reaches the comfort position or the maxi-mum opening or closing position. The movementis also stopped if the control is operated again inthe opposite direction to the direction of move-ment in progress. The movement of the roof is not stopped when the glass reaches the comfort position whenclosing from maximum opening position.
Automatic operation - rapid opening/closing
The panorama roof and sun blind can be opened/closed simultaneously:
–To open - press the control rearward to the automatic operation position twice andrelease.
–To close - press the control forward/down- ward to the automatic operation positiontwice and release.
The movement of the roof is stopped when theglass reaches the comfort position or the closingposition. The movement is also stopped if thecontrol is operated again in the opposite directionto the direction of movement in progress. The movement of the roof is not stopped when the glass reaches the comfort position whenclosing from maximum opening position. Themovement of the blind is never stopped when theroof reaches comfort position.
Ventilation position
Ventilation position, vertically at the rear edge.
Open by pressing the control upward.
Close by pressing the control forward/down- ward.
When the ventilation position is selected the frontglass cover is raised at its rear edge. If the sunblind is fully closed when ventilation position isselected, then it opens automaticallyapprox. 50 mm.
Automatic closing of the sun blindWhen the car is parked in sunny/hot weather, thesun blind closes automatically 15 minutes afterthe car is locked. This is in order to lower thepassenger compartment temperature and protectthe car upholstery from being bleached by thesun.
29 Comfort position is an open position for the glass cover, where wind noise and resonance noise are at a comfortably low level while driving.
Page 163 of 594

INSTRUMENTS AND CONTROLS
}}
* Option/accessory.161
The function is deactivated when the car is sup- plied from the factory and can be activated/deac-tivated: 1.
Press
Settings in the top view in the centre
display.
2. Press
My CarLocking.
Select
Auto Close Sunroof Curtain to
activate/deactivate.
Closing using the remote control key, central locking button or door handles
Remote control key
–Give a long press on the remote control key's lock button
until the panorama roof and
sun blind start moving towards the closed position. Then release the lock button.
Movement stops if the remote control key's lockbutton is pressed again or when the roof/blindhas reached the closed position.
Central locking button
Central locking button.
When the car's electrical system is set in at least ignition position I, the central locking button in
the driver's door or passenger door * can be used
to close the panoramic roof.
–Give a long press on the central locking but- ton
until the panorama roof and sun blind
start moving towards the closed position. Then release the button.
Movement stops if the central locking button ispressed again or when the roof/blind hasreached the closed position.
Door handle
Cars equipped with keyless locking/unlocking *
have a touch-sensitive recess on the outer part of the outside door handle.
–Place your finger against the touch-sensitive recess on the outside of one of the doorhandles until the panorama roof and sunblind start moving towards the closed posi-tion. Then remove your finger from door han-dle's recess.
Movement stops if you place your finger againstthe door handle recess again or once the roof/blind has reached the closed position.
WARNING
If the panorama roof is closed with the remote control key, the central locking button or doorhandle, check that no one risks being trapped.
IMPORTANT
Check that the panoramic roof is properly closed when closing.
Pinch protectionThe panorama roof has pinch protection that is triggered if the glass cover or the sun blind isblocked by an object during closing. In the eventof blocking, the glass cover or sun blind stopsand is then opened automatically to approx. 50mm from the blocked position (or to full ventila-tion position). The pinch protection is also activewhen the glass cover or sun blind is opened. If the pinch protection has deployed then it is still possible to operate the glass cover and/or sun
Page 164 of 594

||
INSTRUMENTS AND CONTROLS
* Option/accessory.
162 blind once more in the same direction without pinch protection, if this is done within 10 secondsafter pinch protection deployment. It is thereforepossible to override the pinch protection whenclosing has been interrupted e.g. if ice hasformed around the glass cover, by continuallypressing the control forward/downward until theglass cover and/or sun blind is closed.
Related information
•
Panorama roof
* (p. 158)
• Ignition positions (p. 385)
• Remote control key (p. 236)
• Locking/unlocking from the inside (p. 245)
• Locking/unlocking from the outside (p. 241)
HomeLink ®
*30
HomeLink ®
is a programmable remote control
that is integrated into the car's electrical system.
General
Button 1
Button 2
Button 3
Indicator lamp
HomeLink ®
31
is a programmable remote control
that can remotely control up to three different devices (e.g., garage door openers, alarm sys-tems, outdoor and indoor lighting, etc.) and thus replace their remote controls. HomeLink ®
is sup-
plied built into the interior rearview mirror. The HomeLink
®
panel consists of three programma-
ble buttons and one indicator lamp in the mirror glass. For more information about HomeLink ®
, visit
www.HomeLink.com, www.youtube.com/ HomeLinkGentex or call the toll-free number00 8000 466 354 65 (or the toll number+49 6838 907 277).
WARNING
• If HomeLink ®
is used to control a garage
door or gate, ensure that nobody is near the door or gate while it is in motion.
• While programming HomeLink, thegarage door or gate being programmedmay activate. For this reason, make surethat nobody is in the vicinity of the door orgate while programming is in progress.
• The car should be outside the garagewhile a garage door opener is being pro-
grammed.
• Do not use HomeLink ®
for any garage
door that does not have safety stop andsafety reverse.
Save the original remote controls for future pro-gramming (e.g. when changing to another car orfor use in another vehicle). It is also recom-
30 Applies to certain markets.
31 HomeLink and the HomeLink house symbol are registered trademarks of Gentex Corporation.
Page 165 of 594

INSTRUMENTS AND CONTROLS
}}
* Option/accessory.163
mended that the programming for the buttons is deleted when the car is sold; see the section "Programming HomeLink
®
".
Related information
• Programming HomeLink ®
* (p. 163)
Programming HomeLink ®
*32
Instructions for programming HomeLink ®
.
Programming HomeLink ®
NOTE
In certain vehicles the ignition must be switched on or in "accessory position" before HomeLink
®
can be programmed or used.
Preferably fit new batteries in the remote con-trol that will be replaced by HomeLink ®
for
faster programming and improved transmis-sion of the radio signal. The HomeLink ®
but-
tons should be reset before programming,see the heading "Resetting the HomeLink ®
buttons". When the reset is complete,HomeLink ®
is set in "learn mode" and ready
for programming.
1. Press the 33
button on HomeLink ®
you want
to program. The indicator lamp 33
on
HomeLink ®
should flash yellow once per
second. It is not necessary to hold the button depressed. 2. Aim the remote control towards the
HomeLink ®
button to be programmed and
hold it 2-8 cm from the button. Do not obstruct the indicator lamp on HomeLink ®
.
Note: Some remote controls can program
HomeLink ®
better at a distance of
15-20 cm. Bear this in mind if you encounter problems during programming.
3. Press and hold the button on the original remote control to be programmed on HomeLink ®
and keep an eye on the indicator
lamp. Do not release the button until the indicator lamp has switched from flashingyellow once per second to either flashinggreen 10 times per second or illuminating ina constant green glow. The button on theremote control can be released once theindicator lamp flashes or illuminates in green. Note: For some receivers, programming step
3 may need to be replaced with the instruc- tions in step 4.
4. Press and release the button on the original remote control every other second until theindicator lamp has changed from flashingyellow once per second to either flashinggreen 10 times per second or illuminating ina constant green glow.
32Applies to certain markets.
33 See section "HomeLink ®
*" for the location of buttons and indicator lamp.
Page 166 of 594

||
INSTRUMENTS AND CONTROLS
1645.
Depress the programmed HomeLink ®
button
and check the indicator lamp. > Constant green glow: If the indicator
lamp illuminates in a constant green glow, programming is complete . The garage
door, gate or similar should now be acti- vated when the programmed button isdepressed. Flashes green 10 times per second: Depress the button being programmed, hold it depressed for 2 seconds and then release it . Repeat the sequence of
pressing/holding/releasing a second timeand, depending on the receiver model,even a third time. Programming shouldnow be complete and the garage door,gate or similar should now be activatedwhen the programmed button isdepressed. If the receiver is still not activated: Continue with programming steps 6-8 to complete programming.
6. Locate programming button 34
on the
receiver for the garage door or similar. It is normally located near the antenna bracket onthe receiver.
7. Depress and release the receiver's program- ming button. Step 8 must be completedwithin 30 seconds of the button beingdepressed.
8. Depress the button being programmed, hold
it depressed for 2 seconds and thenrelease it . Repeat the sequence of press-
ing/holding/releasing a second time and,depending on the receiver model, even a third time. Programming is now be com-
plete and the garage door, gate or similar
should now be activated when the pro- grammed button is depressed.
Operation
When HomeLink ®
is fully programmed it can be
used in place of the separate original remotecontrols. Depress the programmed button. The garage door, gate, alarm system or similar is activated(may take a few seconds). The indicator lamp illu-minates or flashes when the button has beendepressed. Naturally the original remote controls can still be used in parallel with HomeLink ®
if
required.
NOTE
If the ignition is switched off, HomeLink ®
will
work for 30 minutes after the driver's door has been opened.
In the event of programming problems, contact HomeLink ®
at www.HomeLink.com,
www.youtube.com/HomeLinkGentex or call the toll-free number 00 8000 466 354 65 (or thetoll number +49 6838 907 277).
Resetting the HomeLink ®
buttons
It is only possible to reset all of the HomeLink ®
buttons at the same time, not each button indi-vidually. However, individual buttons can bereprogrammed; see the section "Programmingindividual buttons" below.
34 Button designation and colour vary depending on manufacturer.
Page 167 of 594

INSTRUMENTS AND CONTROLS
}}
* Option/accessory.165
1.
Depress buttons 1 and 3 on HomeLink ®
and
hold them depressed until the indicator lamp begins flashing green (about 10 seconds).
2. Release the buttons. >HomeLink ®
is now set to "learn mode"
and is ready to be reprogrammed; see the section "Programming HomeLink ®
"
above.
Programming individual buttons
To reprogram an individual HomeLink ®
button,
proceed as follows: 1. Depress the required button and do not
release .
2. After approx. 20 seconds when the indicator lamp on HomeLink ®
starts to flash yellow,
start with step 1 from the section "Program- ming HomeLink ®
" above.
Note: If the button to be reprogrammed is
not programmed with a new unit, it will resume the previously saved programming.
For more information or to provide feedback about HomeLink ®
, visit www.HomeLink.com,
www.youtube.com/HomeLinkGentex or call the toll-free number 00 8000 466 354 65 (or thetoll number +49 6838 907 277).
Related information
• HomeLink ®
* (p. 162)
Trip computer The car's trip computer records and calculates vales such as e.g. distance, fuel consumptionand average speed whilst driving.
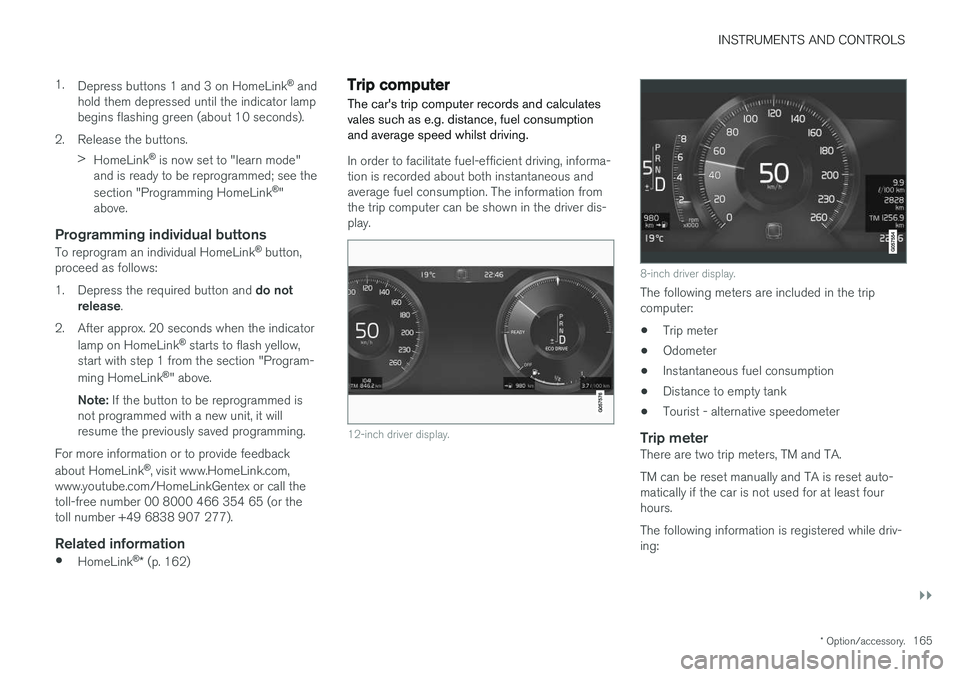
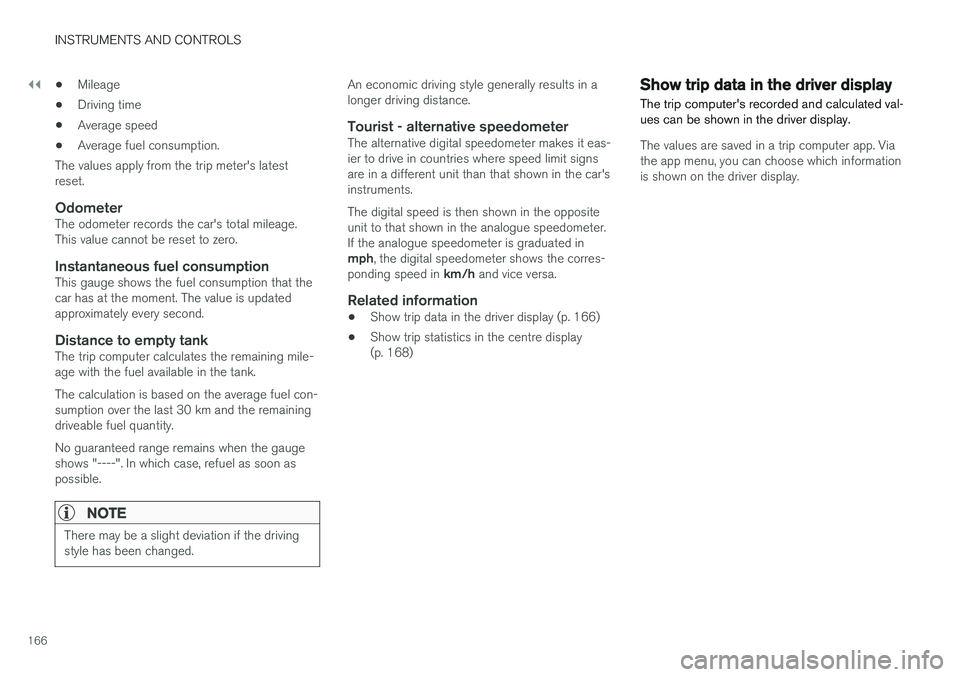
In order to facilitate fuel-efficient driving, informa- tion is recorded about both instantaneous andaverage fuel consumption. The information fromthe trip computer can be shown in the driver dis-play.
12-inch driver display.
8-inch driver display.
The following meters are included in the trip computer:
• Trip meter
• Odometer
• Instantaneous fuel consumption
• Distance to empty tank
• Tourist - alternative speedometer
Trip meterThere are two trip meters, TM and TA. TM can be reset manually and TA is reset auto- matically if the car is not used for at least fourhours. The following information is registered while driv- ing:
Page 168 of 594

||
INSTRUMENTS AND CONTROLS
166•
Mileage
• Driving time
• Average speed
• Average fuel consumption.
The values apply from the trip meter's latest reset.
OdometerThe odometer records the car's total mileage.This value cannot be reset to zero.
Instantaneous fuel consumptionThis gauge shows the fuel consumption that thecar has at the moment. The value is updatedapproximately every second.
Distance to empty tankThe trip computer calculates the remaining mile-age with the fuel available in the tank. The calculation is based on the average fuel con- sumption over the last 30 km and the remainingdriveable fuel quantity. No guaranteed range remains when the gauge shows "----". In which case, refuel as soon aspossible.
NOTE
There may be a slight deviation if the driving style has been changed.
An economic driving style generally results in a longer driving distance.
Tourist - alternative speedometerThe alternative digital speedometer makes it eas-ier to drive in countries where speed limit signsare in a different unit than that shown in the car'sinstruments. The digital speed is then shown in the opposite unit to that shown in the analogue speedometer.If the analogue speedometer is graduated in mph , the digital speedometer shows the corres-
ponding speed in km/h and vice versa.
Related information
•Show trip data in the driver display (p. 166)
• Show trip statistics in the centre display (p. 168)
Show trip data in the driver display
The trip computer's recorded and calculated val- ues can be shown in the driver display.
The values are saved in a trip computer app. Via the app menu, you can choose which informationis shown on the driver display.