Page 129 of 232

Transport and practical equipment
Retaining hooks Fig. 140
In the luggage compartment: retain-
in g hook
s There may be hooks in the upper left and
right
p
ar
t of the luggage compartment. WARNING
Never use these hooks to secure objects. In
ca se of
sudden braking or an accident, they
could rupture. CAUTION
The hooks can support a maximum of 2.5 kg
eac h. Roof carrier
Intr oduction The vehicle roof has been designed to opti-
mise aer
ody
namics. For this reason, conven-
tional roof carrier systems cannot be secured
to the water drains.
Given that the water drains have been incor-
porated into the roof for aerodynamic rea-
sons, only the SEAT approved basic supports
and roof carrier systems can be used.
When the roof carrier system should be re-
moved:
● When they are not used.
● When the vehicle is being washed in a car
wa sh.
● When the
vehicle height exceeds the maxi-
mum height, for ex
ample, in some garages. WARNING
The risk of an accident is increased by trans-
portin g he
avy or bulky loads on the roof,
which affects the car's handling by shifting
the centre of gravity and increasing suscepti-
bility to cross winds.
● Always secure loads correctly with suitable
and undam
aged attachment rope or straps.
● Large, heavy, wide and flat loads negatively
affect the
vehicle aerodynamics, centre of
gravity and handling. ●
Av oid bru
sque manoeuvres and sudden
braking.
● Adjust your speed and driving style to visi-
bility
, road, traffic and weather conditions. CAUTION
● Alw a
ys remove the roof carrier system from
the roof before entering a car wash.
● The height of your vehicle is changed by
the inst
allation of the roof carrier and the
load secured on it. Compare the vehicle
height with the passage height, for example
in underground car parks or for garage doors.
● The roof antenna and the range of the rear
lid should not
be affected by the roof carrier
system or the load being transported.
● Take extra care not to let the hatch strike
the roof lo
ad when opening. For the sake of the environment
The vehicle uses more fuel when the roof car-
rier sys t
em is fitted. 127
Technical data
Advice
Operation
Emergencies
Safety
Page 130 of 232

Operation
Fastening the base supports and the
r oof
c
arrier system Fig. 141
Attachment points for the basic sup-
por ts
and the r
oof carrier system in two-door
vehicles. Fig. 142
Attachment points for the basic sup-
por ts and the r
oof carrier system in four-door
vehicles. The mounts are the basis of a complete roof
c
arrier sy s
tem. Special fixtures must be add-
ed in order to safely transport luggage, bicy- cles, skis, surf boards or boats on the roof.
The suitab
le accessories can be acquired at
SEAT dealerships.
Securing the base supports and roof carrier
system
The roof carrier system must always be instal-
led exactly according to the instructions pro-
vided.
Two-door vehicles: the holes and marks indi-
cating the fitting points for base front sup-
ports are in the lower half of the roof struts
››› Fig. 141 (enlarged left image). The holes
and marks are only seen with the door open.
The fitting marks for base rear supports are in
the upper half of the windows ››› Fig. 141 (en-
larged right image).
Four-door vehicles: the holes or marks indi-
cating the fitting points for base supports are
in the lower half of the roof struts and can on-
ly be seen with the door open ››› Fig. 142.
The base support should only be fitted to the
points indicated in the diagram. WARNING
If the base supports and the roof carrier sys-
tem ar e inc
orrectly fitted or used in an unsuit-
able manner, the entire system could break
free causing accident and injury.
● Always take the manufacturer assembly in-
structions
into account. ●
Only u
se base supports and roof carrier
systems that are not damaged and are cor-
rectly fitted.
● The base support should only be fitted to
the points indic
ated in the diagram
››› Fig. 141.
● Secure the base supports and roof carrier
syst
em correctly.
● Check the screws and attachments before
driving and af
ter a short distance. During
each long journey, check the attachments
during every break.
● Always fit the roof carrier system correctly
for wheels, sk
is and surfboards, etc.
● Never modify or repair the basic supports
or roof c
arrier system. Note
Read and take into account the instructions
included w ith the r
oof carrier system fitted
and keep them in the vehicle. Loading the roof carrier
Loads can only be correctly secured when the
r
oof
c
arrier system is correctly fitted ››› .
M ax
imum authori
sed roof load
The maximum authorised roof load is 50 kg.
The roof load includes the weight of the base
128
Page 131 of 232

Air conditioning
support, the roof carrier system and the load
bein g tr
an
sported ››› .
A lw
a
ys check the weight of the base support,
the roof carrier system and the weight of the
load to be transported and, if necessary,
weigh them. Never exceed the maximum au-
thorised roof load.
If you are using a roof carrier with a lower
weight rating, you cannot transport the maxi-
mum roof load. Do not exceed the maximum
weight limit for the roof carrier given in the
fitting instructions.
Distributing a load
Uniformly distribute loads and secure them
correctly ››› .
Chec k
att
achments
After fitting the base supports and the roof
carrier system, always check the attachments
after a short trip and at regular intervals. WARNING
Exceeding the maximum authorised roof load
can r e
sult in accidents and/or vehicle dam-
age.
● Never surpass the maximum authorised
weight f
or the roof, the maximum authorised
weight on the axles and the total maximum
authorised weight of the vehicle. ●
Never e x
ceed the capacity of the roof carri-
er system even if this is less than the maxi-
mum authorised roof load.
● Secure heavy items as far forward as possi-
ble and di
stribute the vehicle load uniformly. WARNING
Loose and incorrectly secured loads can fall
fr om the r oof
carrier system causing acci-
dents and injury.
● Always use suitable ropes and straps in
good condition.
● A
lways secure loads correctly. Air conditioning
He atin
g,
ventilation and air
conditioning
Introduction Read the additional information carefully
›› ›
page 28
One of the following systems can be installed
in the vehicle:
● Heating and fresh air system
● Manual air conditioning
● Climatronic
The heatin g and fr
esh air system heats and
ventilates the interior. The heating and fresh
air system cannot cool.
The manual air conditioning and the Clima-
tronic cool and dehumidify the air. They oper-
ate most effectively with the windows and
the sunroof closed. If a great deal of heat ac-
cumulates in the interior, ventilating it can
accelerate the cooling process.
Display of active functions
The LEDs that light up on the rotary controls
on the buttons indicate that the function in
question is activated. »
129
Technical data
Advice
Operation
Emergencies
Safety
Page 132 of 232

Operation
In the case of the Climatronic, the control
p anel
s
creen shows the functions that are
currently activated. WARNING
When visibility through the window display is
poor, the ri sk
of collisions and accidents
which may cause serious injury increases.
● To guarantee good visibility, keep all win-
dows
free of ice and snow and properly dem-
isted.
● Adjust the heating, air conditioning and the
heated r
ear window so that the windows do
not mist up.
● Drive off only when you have good visibility
through the windo
ws.
● Do not use the air recirculation for long pe-
riods of
time. When the cooling is switched
off and the air recirculation is on, the win-
dows can mist over very quickly and seriously
impair visibility.
● Switch the air recirculation off when you do
not need it. WARNING
Used air can quickly cause driver tiredness
and reduc e their att
ention span, which could
lead to collisions, accidents and serious in-
jury.
● Never switch off the fan for a long time or
leav
e the air recirculation on for too long, since no exterior air enters the interior during
that
time. CAUTION
If the air conditioning is not working, switch
it off immedi
ately, together with the de-
frost/demist function (in the case of manual
air conditioning) and have a specialised
workshop check it out. This may help to avoid
other possible damage. CAUTION
To avoid damaging the heated rear window,
nev er affi x
adhesives to the electric filaments
on the inside of it. Air recirculation
In air recirculation mode, no fresh air enters
the
v
ehic
le interior.
To switch on the air recirculation, turn the ad-
juster to the right or press the button.
To switch off the air recirculation, turn the ad-
juster to the left or press the button
again ››› .
WARNING
Used air can quickly cause driver tiredness
and reduc e their att
ention span, which could lead to collisions, accidents and serious in-
jury
.
● Nev
er use the air recirculation for too long,
since no e
xterior air enters the interior during
that time.
● When the cooling is switched off and the
air recir
culation is on, the windows can mist
over very quickly and seriously impair visibil-
ity.
● Switch the air recirculation off when you do
not need it. CAUTION
In vehicles with an air conditioner, do not
smoke when air r ec
irculation is switched on.
The smoke taken in could impregnate the
cooling vaporiser and the activated charcoal
cartridge of the dust and pollen filter, leading
to permanent unpleasant odours. Note
● Climatr onic:
When reverse gear is engaged,
the air recirculation switches on briefly to
prevent exhaust gas from entering the interi-
or.
● When the outside temperature is very high,
it is
recommendable to switch the air recircu-
lation on briefly to cool down the interior
faster. 130
Page 133 of 232
Air conditioning
Air vents Fig. 143
On the dash panel: air vents To achieve sufficient heating power, cooling
and
v
enti
lation in the interior, the vents
should be left open.
Key to the Fig. 143:
Adjustable air vents: the vent slats can
be used to open and close the vents and
to adjust air direction. For the air to reach
1 the windows as best as possible, open
the c
orr
e
sponding vent and turn it to the
defrost/demist position, where it will en-
gage.
Non-adjustable air vents
There are more vents in the footwell areas
and at the back of the interior. 2 CAUTION
Never place food, medicines or other temper-
atur e-
sensitive objects close to the air vents.
Food, medicines and other objects sensitive
to heat or cold may be damaged or made un-
suitable for use by the air coming from the
vents. 131
Technical data
Advice
Operation
Emergencies
Safety
Page 134 of 232

Operation
Tips and instructions for use Fig. 144
At the top of the centre console: Clima-
tronic c
ontrols The following tips and instructions for use
w
i
l
l help you to use the systems properly.
Reasons why the cooling switches off auto-
matically or will not switch on
● The engine is not running.
● The fan is switched off.
● The air conditioner fuse has blown.
● The outside temperature is lower than ap-
prox
imately +3°C (+38°F).
● The cooling system compressor has been
temporari
ly switched off because the engine
coolant temperature is too high.
● Another fault in the vehicle. Have the air
conditioner chec
ked by a specialised work-
shop. How to optimise visibility
●
To improve heating or cooling performance
and to prev
ent the windows from misting
over, keep the air intake slots in front of the
windscreen free of snow, ice and leaves.
● To allow the air to move freely through the
interior from the fr
ont to the rear, keep the
ventilation slits located at the back of the
luggage compartment free.
● The highest possible heating power will on-
ly be re
ached and ice removed from the win-
dows as quickly as possible when the coolant
is at its operating temperature.
Recommended settings for the heating and
fresh air system and the manual air condi-
tioning
● Switch off the air recirculation. ●
Set fan s
peed or .
● Turn the temperature control to the inter-
mediate po
sition.
● Open and direct all the air outlets in the
dash p
anel.
● Turn the air distribution control to the re-
quired pos
ition.
● Manual air conditioning: pres
s the but-
ton in the control panel to switch on the cool-
ing. The air is dehumidified in cooling mode.
Recommended Climatronic settings
● Press the button in the control panel.
● Set the temperature to +22°C (+72°F).
● Open and direct the air outlets in the dash
p anel
.
132
Page 135 of 232

Driving
Maximum cooling power or heating power in
the c a
se of
Climatronic
When driving, the maximum cooling power or
heating power can be adjusted by pressing
the 1 or
2
› ››
Fig. 144
b
utton repeatedly.
The temperature is not regulated.
● Maximum cooling power: adjus
t the tem-
perature below +16°C (+60°F). The display
then shows LO.
● Maximum heating power: adjus
t the tem-
perature above +29°C (+84°F). The display
then shows HI.
Dust and pollen filter
The dust and pollen filter should be changed
regularly in order to maintain air conditioner
performance.
If the vehicle is used frequently in areas
where the outside air is highly polluted, it
may be necessary to change the filter before
the next scheduled service.
Water under the vehicle
If the humidity and temperature outside the
vehicle are high, condensation can drip off
the evaporator in the cooling system and
form a small pool underneath the vehicle.
This is normal and does not indicate a leak! Driving
St op
pin
g and starting the en-
gine
Switching on the ignition and starting
the engine Fig. 145
Vehicle key positions Read the additional information carefully
› ›
›
page 20
Immobiliser display
When an invalid key is used or in the event of
a system fault, is displayed on the instru-
ment panel. The engine cannot be started.
Pushing or towing
For technical reasons, the vehicle must not
be push- or tow-started. Jump starting is pref-
erable. Key not authorised for the vehicle
If a key
which is not authorised for this vehi-
cle is inserted in the ignition lock, it can be
removed as follows:
● Automatic gearbox : the key c
annot be re-
moved from the ignition lock. Press and re-
lease the selector lever locking button. Key
can be removed from the vehicle.
● Manual gearbox: Remov
e the key from the
ignition. WARNING
Switching off the engine while driving makes
st op
ping the vehicle difficult. As a conse-
quence you may lose control of the vehicle
and there is a risk of serious accident.
● The assisted braking and steering systems,
the airbag sys
tem, seat belts and certain
safety equipment are only active while the
engine is running.
● The engine should only be switched off
when the vehic
le is at a standstill. WARNING
While the engine is running or starting it
cou l
d help reduce the risk of serious injury.
● Never start or leave the engine running in
poorly v
entilated or closed spaces. Exhaust
gas contains carbon monoxide, a toxic, col-
ourless and odourless gas. Carbon monoxide
can cause people to lose consciousness. It
can also cause death. » 133
Technical data
Advice
Operation
Emergencies
Safety
Page 136 of 232

Operation
●
Never l e
ave the vehicle unattended if the
engine is running. The vehicle could move off
suddenly or something unexpected could
happen resulting in damage and serious in-
jury.
● Never use start boosters. Cold start sprays
coul
d explode or increase the engine speed
unexpectedly. WARNING
The components of the exhaust system reach
v er y
high temperatures. This could cause a
fire and considerable damage.
● Always park your vehicle so that no part of
the exhau
st system can come in contact with
flammable materials (such as wood, leaves,
spilled fuel, dried grass, etc).
● Never apply additional underseal or anti-
corro
sion coatings to the exhaust pipes, cata-
lytic converter or the heat shields on the ex-
haust system. WARNING
Unsuitable or careless use of the vehicle key
cou l
d result in serious injury.
● Always take all the keys with you whenever
you le
ave the vehicle. If not, the engine could
accidentally be started and electrical equip-
ment such as the windows could accidentally
be operated resulting in serious injury.
● Never leave children or disabled people
alone in the car
. Passengers could be trapped in the car in an emergency and not be able to
get
themselv
es to safety. For example, de-
pending on the time of the year, tempera-
tures inside a locked and closed vehicle can
be extremely high or extremely low resulting
in serious injuries and illness or even death,
particularly for young children.
● Never remove the key from the ignition if
the vehic
le is in motion. The steering may
lock and it will not be possible to turn the
steering wheel. CAUTION
● An attempt t
o start the engine while driving
or starting the engine immediately after turn-
ing it off can cause damage to the engine or
starter motor.
● When the engine is cold, avoid high revs
and heavy ac
celeration and do not make the
engine work hard.
● Do not push or tow start the engine. Un-
burnt f
uel could damage the catalytic con-
verter. For the sake of the environment
Do not warm the engine at idle speed; start
drivin g immedi
ately if the visibility is OK.
This helps the engine reach operating tem-
perature faster and reduces emissions. Note
● If the k ey
is left in the ignition lock with the
engine off for long periods, the vehicle bat-
tery will run flat.
● In automatic gearbox vehicles, the key can
only be r
emoved from the ignition lock if the
gear selector lever is in position N. In this
case, press and release the selector lever
locking button.
● Electrical devices with a high power con-
sumption are sw
itched off temporarily when
the engine starts.
● When the engine is started cold, there may
be stron
g vibrations for a few moments for
technical reasons. This is quite normal, and
no cause for concern.
● Natural gas engines always start up with
petrol, a
s a certain operating temperature is
required for running with gas. Once the re-
quired operating temperature is reached, the
engine will change to operate with natural
gas. Stopping the engine
Switching off the engine
– Stop the vehicle ››
›
.
– Turn the ignition key to position 1 ›››
Fig. 145.
134
 1
1 2
2 3
3 4
4 5
5 6
6 7
7 8
8 9
9 10
10 11
11 12
12 13
13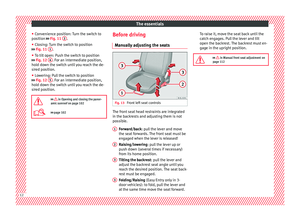 14
14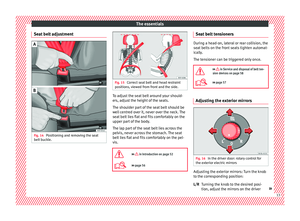 15
15 16
16 17
17 18
18 19
19 20
20 21
21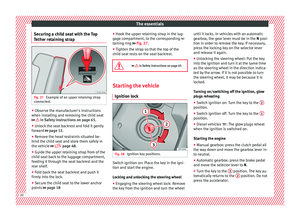 22
22 23
23 24
24 25
25 26
26 27
27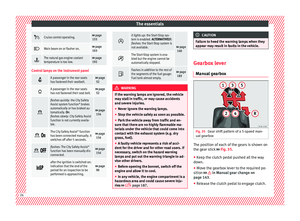 28
28 29
29 30
30 31
31 32
32 33
33 34
34 35
35 36
36 37
37 38
38 39
39 40
40 41
41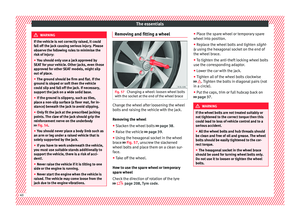 42
42 43
43 44
44 45
45 46
46 47
47 48
48 49
49 50
50 51
51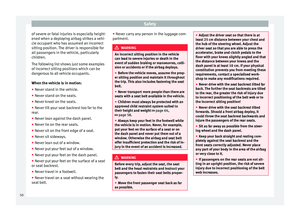 52
52 53
53 54
54 55
55 56
56 57
57 58
58 59
59 60
60 61
61 62
62 63
63 64
64 65
65 66
66 67
67 68
68 69
69 70
70 71
71 72
72 73
73 74
74 75
75 76
76 77
77 78
78 79
79 80
80 81
81 82
82 83
83 84
84 85
85 86
86 87
87 88
88 89
89 90
90 91
91 92
92 93
93 94
94 95
95 96
96 97
97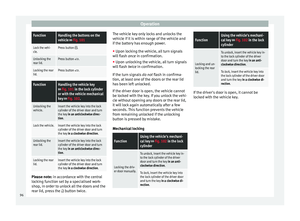 98
98 99
99 100
100 101
101 102
102 103
103 104
104 105
105 106
106 107
107 108
108 109
109 110
110 111
111 112
112 113
113 114
114 115
115 116
116 117
117 118
118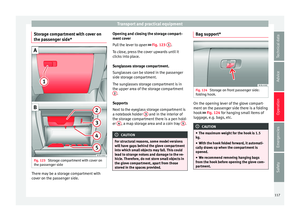 119
119 120
120 121
121 122
122 123
123 124
124 125
125 126
126 127
127 128
128 129
129 130
130 131
131 132
132 133
133 134
134 135
135 136
136 137
137 138
138 139
139 140
140 141
141 142
142 143
143 144
144 145
145 146
146 147
147 148
148 149
149 150
150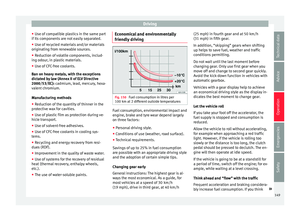 151
151 152
152 153
153 154
154 155
155 156
156 157
157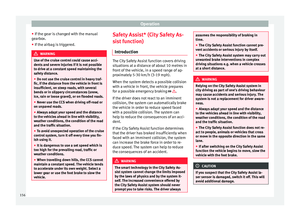 158
158 159
159 160
160 161
161 162
162 163
163 164
164 165
165 166
166 167
167 168
168 169
169 170
170 171
171 172
172 173
173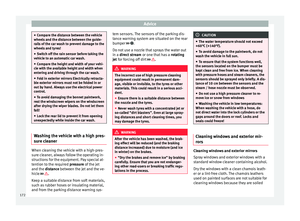 174
174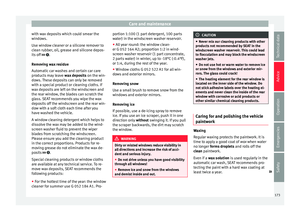 175
175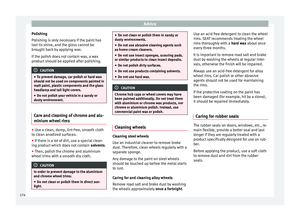 176
176 177
177 178
178 179
179 180
180 181
181 182
182 183
183 184
184 185
185 186
186 187
187 188
188 189
189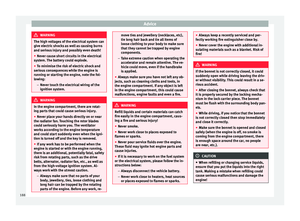 190
190 191
191 192
192 193
193 194
194 195
195 196
196 197
197 198
198 199
199 200
200 201
201 202
202 203
203 204
204 205
205 206
206 207
207 208
208 209
209 210
210 211
211 212
212 213
213 214
214 215
215 216
216 217
217 218
218 219
219 220
220 221
221 222
222 223
223 224
224 225
225 226
226 227
227 228
228 229
229 230
230 231
231