Page 97 of 232

Opening and closing
Description of the central locking sys-
t em The central locking system allows all doors
and the re
ar lid t
o be locked and unlocked
centrally.
● From outside, using the vehicle key.
● From inside, by pushing the central locking
button ›
›› page 97.
The central locking system can be activated
or deactivated at a specialised workshop.
In case of a vehicle key fault or central lock-
ing system fault, all doors can be locked or
unlocked manually.
Locking the vehicle after the airbags have
been deployed
If the airbags are deployed due to an acci-
dent, the vehicle will be automatically and
completely unlocked. Depending on the
amount of damage, it can be locked follow-
ing an accident in the following ways:
FunctionNecessary operations
Lock the vehicle,
by pushing the
central locking
button:– Turn off the ignition and turn it on
again.
– Push the central locking button
.
FunctionNecessary operations
Use the key to lock the vehicle:– Turn off the ignition and turn it on
again.
OR: Remove the key from the igni-
tion.
– Open any door just once.
– Lock the vehicle with the key. Note
If the buttons of the vehicle key are pressed
›› ›
page 92 or one of the central locking but-
tons ››› Fig. 103 is pressed repeatedly in
short succession, the central locking briefly
disconnects as protection against overload-
ing. In this case, the vehicle remains un-
locked for about 30 seconds. If no door nor
the rear lid is opened during this time, the ve-
hicle will then automatically lock. Unlocking and locking the vehicle
fr
om out
s
ide Fig. 101
Buttons on the vehicle key Fig. 102
Vehicle mechanical key Central locking
FunctionHandling the buttons on the
vehicle
››› Fig. 101
Unlocking the
vehicle.Press the button.» 95
Technical data
Advice
Operation
Emergencies
Safety
Page 98 of 232

OperationFunctionHandling the buttons on the
vehicle
››› Fig. 101
Lock the vehi-
cle.Press button .
Unlocking the
rear lid.Press button .
Locking the rear
lid.Press button .
FunctionHandling the vehicle key
››› Fig. 101 in the lock cylinder
or with the vehicle mechanical
key ››› Fig. 102.
Unlocking the
vehicle.Insert the vehicle key into the lock
cylinder of the driver door and turn
the key in an anticlockwise direc-
tion.
Lock the vehicle.Insert the vehicle key into the lock
cylinder of the driver door and turn
the key in a clockwise direction.
Unlocking the
rear lid.Insert the vehicle key into the lock
cylinder of the driver door and turn
the key in an anticlockwise direc-
tion.
Locking the rear
lid.Insert the vehicle key into the lock
cylinder of the driver door and turn
the key in a clockwise direction. Please note: in ac
c
or
dance with the central
locking function set by a specialised work-
shop, in order to unlock all the doors and the
rear lid, press the button twice. The vehicle key only locks and unlocks the
vehicl
e if it is within range of the vehicle and
if the battery has enough power.
● Upon locking the vehicle, all turn signals
wil
l flash once in confirmation.
● Upon unlocking the vehicle, all turn signals
wil
l flash twice in confirmation.
If the turn signals do not flash in confirma-
tion, at least one of the doors or the rear lid
has been left unlocked.
If the driver door is open, the vehicle cannot
be locked with the key. If you unlock the vehi-
cle without opening any doors or the rear lid,
it will lock again automatically after a few
seconds. This function prevents the vehicle
from remaining unlocked if the unlocking
button is pressed by mistake.
Mechanical locking
FunctionUsing the vehicle's mechani-
cal key ››› Fig. 102 in the lock
cylinder
Locking the driv-
er door manually.
To unlock, insert the vehicle key in-
to the lock cylinder of the driver
door and turn the key in an anti-
clockwise direction.
To lock, insert the vehicle key into
the lock cylinder of the driver door
and turn the key in a clockwise di-
rection.
FunctionUsing the vehicle's mechani-
cal key ››› Fig. 102 in the lock
cylinder
Locking and un-
locking the rear
lid.
To unlock, insert the vehicle key in-
to the lock cylinder of the driver
door and turn the key in an anti-
clockwise direction.
To lock, insert the vehicle key into
the lock cylinder of the driver door
and turn the key in a clockwise di-
rection. If the driver's door is open, it cannot be
loc
k
ed w
ith the vehicle key.
96
Page 99 of 232

Opening and closing
Locking or unlocking the vehicle from
the in s
ide Fig. 103
In the driver door: central locking
b utt
on Fig. 104
In the passenger door: door handle
f or mec
h
anical locking. Central locking
Push the button
››› Fig. 103:
Unlocking the vehicle.
Locking the vehicle.
The central locking button is still operative
when the ignition is
sw
itched off.
If the vehicle has been locked with the vehi-
cle key, the central locking button does not
operate.
Please note the following when you use the
central locking button to lock your vehicle:
● The "Safe" security system wil
l not activate
››› page 97.
● It will not be possible to open the doors or
the rear lid fr
om the outside. This may offer
extra safety, for example when stopped at
traffic lights.
● The doors can be opened and unlocked in-
dividually
from the inside by pulling the door
handle. If necessary, pull the door release
lever twice.
● The driver door cannot be locked when
open. This
avoids locking the vehicle key in-
side the vehicle when there is nobody inside. Mechanical locking
The doors ar
e locked by pressing the door
lever, so that the red mark becomes visible
››› Fig. 104 1 .
T o u
n
lock a door, pull its corresponding door
lever.
If the vehicle becomes locked, take note of
the following:
● The "Safe" security system wil
l not activate
››› page 97.
● It will not be possible to open the doors
from the out
side, when stopped at traffic
lights for example.
● The doors can be opened and unlocked in-
dividually
from the inside by pulling the door
handle.
● The driver door cannot be locked using the
central
locking system when it is still open.
This avoids locking the vehicle key inside the
vehicle when there is nobody inside.
“Safe” security system*
FunctionNecessary operations
Lock the vehicle and
activate the “Safe” se-curity system.Press the button once on
the vehicle key.» 97
Technical data
Advice
Operation
Emergencies
Safety
Page 100 of 232

OperationFunctionNecessary operations
Lock the vehicle with-
out activating the
“Safe” security system.
Press the button on the ve-
hicle key twice.
Press the central locking but-
ton on the driver door
once. When the vehicle is locked, the “Safe” secur-
ity sy
s
tem deactivates the door handles, pre-
venting people from opening the vehicle. The
doors cannot be opened from inside ››› .
Upon sw it
ching off the ignition, the instru-
ment panel display will show that the “dead-
lock” is activated or (SAFELOCK or SAFE-
LOCK ).
When the “Safe” security system is deactiva-
ted, the following occurs: ● The vehicle can be opened and unlocked
from the in s
ide using an inside door handle.
Control lamp on the driver door
When the vehicle is
locked:Meaning
The red LED flashes for ap-
proximately 2 seconds at
short intervals and then more
slowly.The "Safe" security
system is switched on.
When the vehicle is
locked:Meaning
The red LED flashes for about
two seconds then turns off. Af-
ter 30 seconds, the LED flash-
es again.The "Safe" security
system is switched off.
The red LED flashes for about
two seconds at short inter-
vals. Subsequently, the light
will remain switched on for
about. 30 seconds.There is a fault in the
locking system. Con-
tact a specialised
workshop. WARNING
Careless use of the "Safe" security system
can c au
se serious injury.
● Never leave anybody inside the vehicle if it
has
been locked using the key. When the
"Safe" security system is activated, doors
cannot be opened from the inside!
● When the doors are locked, it is difficult to
get t
o passengers in the vehicle interior in
case of an emergency. Passengers could re-
main trapped inside and unable to unlock the
doors in case of an emergency. Doors
Intr oduction WARNING
If a door is not correctly closed, it could open
une xpect
edly when driving and cause serious
injuries.
● Always stop immediately and close the
door.
● When clo
sing, ensure that the door has
closed c
orrectly. A closed door should be
flush with the corresponding parts of the
bodywork.
● Open and close doors only when nobody is
in the way
of the door. WARNING
A door held open by its retainer could be
blo wn c
losed by the wind or close if the vehi-
cle is on a hill, causing injury.
● When opening and closing doors, always
use the door handl
e.98
Page 101 of 232

Opening and closing
Childproof lock Fig. 105
Childproof lock on the left hand side
door The childproof lock prevents the rear doors
fr
om bein
g opened fr
om the inside. This sys-
tem prevents minors from opening a door ac-
cidentally while the vehicle is running.
This function is independent of the vehicle
electronic opening and locking systems. It
only affects rear doors. It can only be activa-
ted and deactivated manually, as described
below:
Activating the childproof lock
– Unlock the vehicle and open the door in
which y
ou wish to activate the childproof
lock.
– With the door open, rotate the groove in
the door usin
g the ignition key, anti-clock-
wise for the left-hand side doors ››› Fig. 105 and clockwise for the right-hand side
doors.
De
activating the childproof lock
– Unlock the vehicle and open the door
whose chi
ldproof lock you want to deacti-
vate.
– With the door open, rotate the groove in
the door usin
g the ignition key, anti-clock-
wise for the right-hand side doors, and
clockwise for the left-hand side doors
››› Fig. 105.
Once the childproof lock is activated, the
door can only be opened from the outside.
The childproof lock can be activated or deac-
tivated by inserting the key in the groove
when the door is open, as described above.
Rear lid Introduction WARNING
Careless and unsuitable locking, opening and
clo s
ing of the rear lid can cause accidents
and serious injury.
● Open and close the rear lid only when no-
body is
in the way. ●
Do not c lo
se the rear lid by pushing it down
with your hand on the rear window. This
could break and cause injury.
● Ensure the rear lid is locked after closing,
otherwi
se, it may open unexpectedly while
driving. A closed rear lid should be flush with
the corresponding parts of the bodywork.
● Always keep the rear lid closed while driv-
ing to av
oid toxic gases entering the vehicle
interior.
● Do not open the rear lid when there is a
load in
stalled, for example a carrier system.
Likewise, the boot hatch cannot be opened
when a load is attached to it, for example bi-
cycles. An open rear lid could close itself if
there is an additional weight on it. If necessa-
ry, press down on the rear lid and remove the
load.
● Close and lock both the rear lid and all the
other doors when
you are not using the vehi-
cle. Ensure that nobody remains inside the
vehicle.
● Never allow children to play inside or
around the
vehicle without supervision, espe-
cially if the rear lid is open. Children could
enter the luggage compartment, close the
rear lid and become trapped. Depending on
the time of the year, temperatures inside a
locked and closed vehicle can be extremely
high or extremely low resulting in serious in-
juries and illness or even death, particularly
for young children.
● Never leave children or disabled people
alone in the v
ehicle. If the vehicle key or the » 99
Technical data
Advice
Operation
Emergencies
Safety
Page 102 of 232

Operation
central locking button is used, they may be
lock
ed in the
vehicle. CAUTION
Before opening the rear lid, ensure that there
i s s
ufficient free space to open and close it,
for example if you are in a garage. Opening the rear lid
Fig. 106
On the vehicle key: button to unlock
and open the boot h
at
ch.Read the additional information carefully
› ›
›
page 9
If bicycles are attached to a rack on the boot
hatch, for example, in some cases, it may not
open automatically ››› . Remove the load
fr om the c
arrier and s
upport the open rear
lid. Opening with central locking
●
Press the button on the
vehicle key
››› Fig. 106 for about one second to unlock
the rear lid.
● OR: Press the b
utton on the vehicle key
until the rear lid opens automatically several
centimetres.
● Opening the rear lid with the button.
Opening with the
vehicle mechanical key
● Insert the vehicle key into the lock cylinder
of the driver door and t
urn the key in an anti-
clockwise direction ››› page 94.
● Opening the rear lid with the button. WARNING
Unsuitable or careless unlocking and opening
of the r e
ar lid could cause serious injuries.
● If there is a loaded luggage carrier on the
rear lid, it
could be unlocked or open but not
recognised as such. An unlocked or open rear
lid could open unexpectedly while driving. Note
At outside temperatures of less than 0°C
(+32°F), the pre s
surised gas struts cannot al-
ways automatically lift the rear lid. In this
case, open the rear lid manually. Closing the rear lid
Fig. 107
Rear lid open: hand grip Closing the rear lid
● Grab the handgrip inside the rear lid
› ›
›
Fig. 107 (arrow).
● Push the rear lid downwards until it locks
into pl
ace in the lock.
● Ensure that it is correctly closed by pulling
on it firmly
.
Locking the rear lid with central locking*
If you unlock the vehicle without opening any
doors or the rear lid, it will lock again auto-
matically after about 30 seconds. This func-
tion prevents the vehicle from remaining un-
locked if the unlocking button is pressed by
mistake.
Locking is only possible when the rear lid is
correctly and fully closed.
100
Page 103 of 232

Opening and closing
● The r e
ar lid i
s also locked by a central lock-
ing.
● If the vehicle rear lid is locked or unlocked
usin
g the button of the vehicle key, when
it is closed again it will lock automatically.
● A closed but not locked rear lid will lock au-
tomatic
ally at a speed above about 9 km/h
(6 mph).
Locking the rear lid with the vehicle mechan-
ical key
Locking is only possible when the rear lid is
correctly and fully closed.
● Insert the vehicle key into the lock cylinder
of the driver door and t
urn the key in a clock-
wise direction ››› page 94. WARNING
Unsuitable or careless closing and locking of
the re ar lid c
ould cause serious injuries.
● Never leave the vehicle unattended, or al-
low chi
ldren to play inside or around the vehi-
cle without supervision, especially if the rear
lid is open. Children could enter the luggage
compartment, close the rear lid and become
trapped. A locked vehicle can be subjected to
extremely high and low temperatures, de-
pending on the time of year, thus causing se-
rious injuries/illness and even death. Note
Before closing the rear lid, make sure that the
key h
as not been left inside the luggage com-
partment. Controls for the windows
Opening and c lo
sing the windows
electrically Read the additional information carefully
› ›
›
page 11 WARNING
Careless use of the electric windows can
cau se seriou
s injury.
● Only operate the electric windows when
nobody i
s in the way.
● Never leave children or disabled people
alone in the v
ehicle if the doors are to be
locked. The windows cannot be opened in
case of an emergency.
● Always take all the keys with you whenever
you le
ave the vehicle. After turning off the ig-
nition, the windows can be opened and
closed for a short time using the buttons on
the door as long as the driver door or passen-
ger side door is not open. CAUTION
When the windows are open, rain can enter
the v ehic
le, dampening the interior equip-
ment and causing damage to the vehicle. Side-opening rear windows
Fig. 108
Lever to open and close the rear win-
do w Opening
P
u
l
l the release lever in the direction of arrow
A and press outward until the lever engag-
e s.
C lo
sing
Pull the release lever in the direction of arrow B and then press the lever backward until it
en gag
es.
101
Technical data
Advice
Operation
Emergencies
Safety
Page 104 of 232

Operation
Sliding/tilting electric panor-
amic s
u
nroof
Opening and closing the panoramic
sunroof Read the additional information carefully
›› ›
page 11
The sliding/tilting sunroof only works when
switched on. After switching off, it is still pos-
sible to open or close the sliding/tilting sun-
roof during a short space of time provided
that neither the driver nor passenger door is
opened.
All operations are interrupted when the rotary
knob is actuated.
If it were not possible to close the sliding/tilt-
ing sunroof electrically, it would need to be
closed manually. It is not possible to do an
emergency close of the sliding/tilting sun-
roof without removing components of the ve-
hicle. In such a case, obtain professional as-
sistance.
Sliding blind
With the roof grab handle situated in the rear
part of the roof opening, it is possible to
move the sliding blind to the required posi-
tion. WARNING
If the sliding/tilting electric panoramic sun-
roof i
s used negligently or without paying
due attention, it can cause serious injury.
● The sliding/tilting sunroof should only be
opened or closed when no one i
s blocking its
path.
● After switching off, it is still possible to
open or close the s
liding/tilting sunroof dur-
ing a short space of time provided that nei-
ther the driver nor passenger door is opened. CAUTION
● To pr ev
ent damage, when there are winter
temperatures any ice or snow that there may
be on the roof of the vehicle must be removed
before opening or raising the sliding/tilting
electric panoramic sunroof.
● Before leaving the vehicle or in the case of
heavy r
ain, the sliding/tilting sunroof must
always be closed. With the sliding/tilting
sunroof open or raised, water can enter the
passenger compartment and can cause con-
siderable damage to the electrical system. As
a result, other damage can occur in the vehi-
cle.
● In the case of heavy rain, if the sliding/tilt-
ing su
nroof is open, the interior equipment of
the vehicle may get wet, destroying the seat
heating and damaging the electrical system
of the vehicle. Note
● Le av
es and other loose objects that land in
the guides of the sliding/tilting sunroof
should be removed periodically by hand or
using a vacuum cleaner.
● If the sliding/tilting sunroof does not work
correctly
, the anti-trap function will not work
either. In this case, you should take the vehi-
cle to a specialised workshop.
● The convenience position permits sufficient
ventil
ation with a level of sound produced by
low wind. Anti-trap function of the sliding/tilt-
in
g el
ectric
panoramic sunroof The anti-trap function can reduce the risk of
injur
y
when c
losing the sliding/tilting electric
panoramic sunroof ››› . If the sliding/tilting
s u
nr
oof encounters resistance or an obstacle
when closing, it will immediately reopen.
● Check why the sliding/tilting sunroof has
not clo
sed.
● Try to close it again.
● If it is still not possible to close it due to an
obs
tacle or resistance, it will remain in the
corresponding position. Close it without the
anti-trap function.
102
 1
1 2
2 3
3 4
4 5
5 6
6 7
7 8
8 9
9 10
10 11
11 12
12 13
13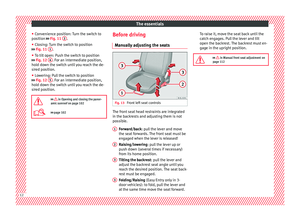 14
14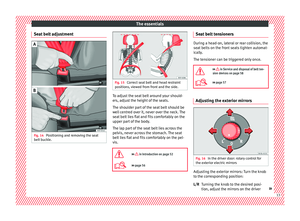 15
15 16
16 17
17 18
18 19
19 20
20 21
21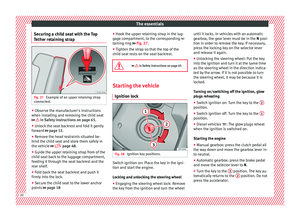 22
22 23
23 24
24 25
25 26
26 27
27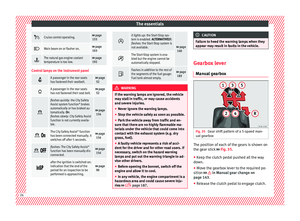 28
28 29
29 30
30 31
31 32
32 33
33 34
34 35
35 36
36 37
37 38
38 39
39 40
40 41
41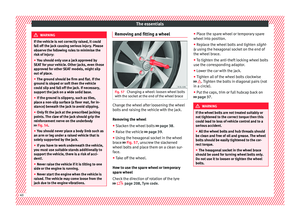 42
42 43
43 44
44 45
45 46
46 47
47 48
48 49
49 50
50 51
51 52
52 53
53 54
54 55
55 56
56 57
57 58
58 59
59 60
60 61
61 62
62 63
63 64
64 65
65 66
66 67
67 68
68 69
69 70
70 71
71 72
72 73
73 74
74 75
75 76
76 77
77 78
78 79
79 80
80 81
81 82
82 83
83 84
84 85
85 86
86 87
87 88
88 89
89 90
90 91
91 92
92 93
93 94
94 95
95 96
96 97
97 98
98 99
99 100
100 101
101 102
102 103
103 104
104 105
105 106
106 107
107 108
108 109
109 110
110 111
111 112
112 113
113 114
114 115
115 116
116 117
117 118
118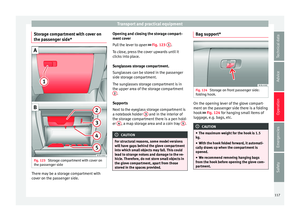 119
119 120
120 121
121 122
122 123
123 124
124 125
125 126
126 127
127 128
128 129
129 130
130 131
131 132
132 133
133 134
134 135
135 136
136 137
137 138
138 139
139 140
140 141
141 142
142 143
143 144
144 145
145 146
146 147
147 148
148 149
149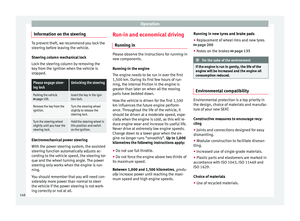 150
150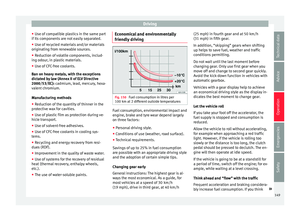 151
151 152
152 153
153 154
154 155
155 156
156 157
157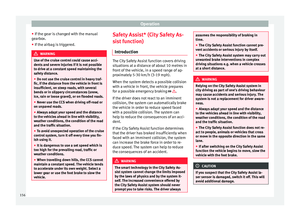 158
158 159
159 160
160 161
161 162
162 163
163 164
164 165
165 166
166 167
167 168
168 169
169 170
170 171
171 172
172 173
173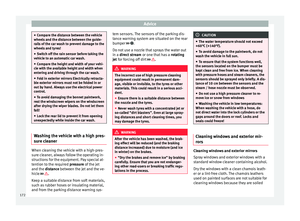 174
174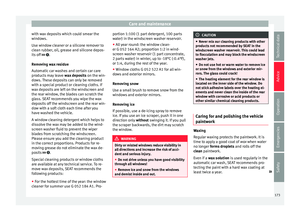 175
175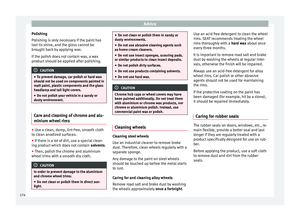 176
176 177
177 178
178 179
179 180
180 181
181 182
182 183
183 184
184 185
185 186
186 187
187 188
188 189
189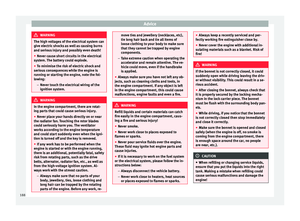 190
190 191
191 192
192 193
193 194
194 195
195 196
196 197
197 198
198 199
199 200
200 201
201 202
202 203
203 204
204 205
205 206
206 207
207 208
208 209
209 210
210 211
211 212
212 213
213 214
214 215
215 216
216 217
217 218
218 219
219 220
220 221
221 222
222 223
223 224
224 225
225 226
226 227
227 228
228 229
229 230
230 231
231