Page 105 of 232

Lights and visibility
Closing the sliding/tilting electric panoramic
s u
nr
oof without the anti-trap function
● Within about 5 seconds of activating the
anti-trap fu
nction, pull knob ›››
Fig. 12
5 until the sliding/tilting sunroof is fully
c lo
sed.
● As
such, the sliding/tilting sunroof will
close w
ithout the anti-trap function!
● If the sunroof still cannot be closed, visit a
speci
alised workshop.
If the knob is released during the closing op-
eration, the sliding/tilting electric panoramic
sunroof opens automatically. WARNING
Closing the sliding/tilting electric panoramic
su nr
oof without the anti-trap function can re-
sult in serious injury.
● The sliding/tilting sunroof should always
be closed c
arefully.
● No person should ever remain in the way of
the sliding/ti
lting sunroof, especially when
closing without the anti-trap function.
● The anti-trap function does not prevent fin-
gers
or other parts of the body from becom-
ing trapped against the roof frame and inju-
ries occurring. Lights and visibility
Light s
C ontr
ol lamps
It lights up
Rear fog light switched on
››› page 21.
It lights up
Front fog lights switched on
››› page 21.
It lights up
Left or right turn signal.
The control lamp flashes twice as fast when a vehicle
turn signal is faulty. If necessary, check the vehicle's
lights.
It lights up
Main beam on or flasher on
››› page 105. Several warning and control lamps light up
f
or a f
ew sec
onds when the ignition is switch-
ed on, signalling that the function is being
verified. They will switch off after a few sec-
onds. WARNING
Observe the safety warnings ›››
in On the
ins trument
panel on page 26. Switching lights on and off
Fig. 109
Next to the steering wheel: diagram
of some of
the type
s of light switch Read the additional information carefully
› ›
›
page 21
The driver is personally responsible for the
correct use and adjustment of the lights in all
situations.
Audible warnings to advise the driver that
the lights have not been switched off
If the key is not in the ignition and the driver
door is open, an audible warning signal is
heard in the following cases: this is a remind-
er to turn off the lights. »
103
Technical data
Advice
Operation
Emergencies
Safety
Page 106 of 232

Operation
● When the light sw
it
ch is in position .
● When the light switch is in position .WARNING
The side lights or daytime running lights are
not bright enough t
o illuminate the road
ahead and to ensure that other road users are
able to see you.
● Always use your dipped beam head lights if
it is
raining or if visibility is poor. WARNING
If the headlights are set too high and not
used c orr
ectly, there is a risk of dazzling or
distracting other road users. This could result
in a serious accident.
● Always make sure that the headlights are
correctly
adjusted. Note
The legal requirements regarding the use of
vehic l
e lights in each country must be ob-
served. Lights and visibility: functions
Parking light remains on both sides
If
when sw
it
ching off the ignition, the light
control remains in the position and the ve-
hicle is closed from outside, both headlights, in addition to the side lights and the rear
lights wi
ll light up.
Daytime running lights
The daytime driving light consists of individu-
al lights in the front headlamps.
When the daytime driving light is switched
on, only the individual lights come on ››› .
The d a
ytime lights
are switched on each time
the ignition is turned on if the light setting is
in position or in position . WARNING
If the road is not well-lit and the vehicle is
not c l
early visible to other drivers, an acci-
dent may occur.
● Never use the daytime driving light if the
roa
d is not well-lit as a result of the weather
conditions and poor visibility. The daytime
driving lights are not bright enough to illumi-
nate the road ahead and to ensure that other
road users are able to see you.
● The rear lights do not come on with the
daytime driv
ing light. A vehicle which does
not have the rear lights on may not be visible
to other drivers in the darkness, if it is rain-
ing or in conditions of poor visibility. Note
The headlights, rear lights and turn signals
ma y
mist up temporarily on the inside in cool
or damp weather. This is normal and in no way effects the useful life of the vehicle light-
ing sy
s
tem. Automatic dipped beam control
* The automatic dipped beam control is merely
intended a
s
an aid and is not able to recog-
nise all driving situations.
When the light switch is in position , the
vehicle lights and the instrument panel and
switch lighting switch on and off automatical-
ly in the following situations ››› in Lights
and v
i
sibility: functions on page 104:
Automatic switching
onAutomatic switching
off
The photo sensor detects
darkness, for example,
when driving through a
tunnel.When adequate lighting is
detected.
The rain sensor detects
rain and activates the
windscreen wipers.When the windscreen wip-
ers have been inactive for
a few minutes. WARNING
If the road is not well lit and other road users
cannot see the
vehicle well enough or at all,
accidents may occur.
● The automatic dipped beam control ( )
only sw
itches on the dipped beam when104
Page 107 of 232
The “Coming Home” and “Le")
Lights and visibility
there are no changes in brightness, and not,
for e
x
ample when it is foggy. “Coming home” and “Leaving home”
fu
nction (guid
ance lights)The “Coming Home” and “Leaving Home”
fu
nction lights
up the vehicle’s immediate
proximity when getting into and out of it in
the dark.
The “Coming home” function is switched on
manually. However, the “Leaving home”
function is automatically controlled by a rain
and light sensor.
Activating the “Coming Home” function
● Switch the ignition off.
● Activates the headlight flasher for approx.
1 second ››
› page 21.
When the driver door is opened, the “Coming
Home” lighting comes on. The delay in
switching off the headlights is counted from
when the last door or rear lid of the vehicle is
closed.
Deactivating the “Coming Home” function
● It is automatically deactivated once the
time set for the light
switch-off delay has
elapsed. ●
OR: it is
automatically deactivated if, 30
seconds after the function has been activa-
ted, any vehicle door or the rear lid is still
open.
● OR: turn the light switch to the po
sition.
● OR: switch on the ignition.
Activ
ating the “Leaving Home” function
● Unlock the vehicle (the light switch must be
at the po
sition and the rain and light
sensor must detect darkness).
Deactivating the “Leaving Home” function
● It is automatically deactivated once the
light swit
ch-off delay time has elapsed.
● OR: lock the vehicle.
● OR: t
urn the light switch to the pos
ition.
● OR: switch on the ignition.
Turn s
ignal and main beam lever Read the additional information carefully
› ›
›
page 21
Convenience turn signals
For the convenience turn signals, move the
lever as far as possible upwards or down-
wards and release the lever. The turn signal
will flash 3 times. The convenience indicators can be deactiva-
ted at a
Specialised workshop. WARNING
Improper or lack of use of the turn signals, or
for g
etting to deactivate them can confuse
other road users. This could result in a seri-
ous accident.
● Always give warning when you are going to
chan
ge lane, overtake or when turning, acti-
vating the turn signal in good time.
● As soon as you have finished changing
lane, ov
ertaking or turning, switch the turn
signal off. WARNING
Incorrect use of the headlights may cause ac-
cident s
and serious injury, as the main beam
may distract or dazzle other drivers. Note
● If the c on
venience turn signals are operat-
ing (three flashes) and the other convenience
turn signals are switched on, the active part
stops flashing and only flashes once in the
new part selected.
● The turn signal only works when the igni-
tion is sw
itched on. The hazard warning
lights also work when the ignition is switch-
ed off ››› page 70. » 105
Technical data
Advice
Operation
Emergencies
Safety
Page 108 of 232

Operation
●
If an y
of both turn signals fails, the warning
lamp will start flashing twice faster than nor-
mal.
● The main beam headligh
ts can only be
switched on if the dipped beam headlights
are already on. Hazard warning lights
Fig. 110
Dash panel: Button for switching the
h az
ar
d lights warning system on and off. Read the additional information carefully
› ›
›
page 22
Always fulfil legal requirements for securing a
broken down vehicle. In a number of coun-
tries it is now obligatory, for example, to turn
on the hazard warning lights and use a re-
flective safety vest ››› page 70.
If your vehicle breaks down: Park the vehicle a safe distance from
traffic and on s
uitable ground ››› .
T urn on the h
az
ard warning lights with
the button ››› Fig. 110.
Apply the handbrake firmly
››› page 135.
Put the gearbox lever in neutral or the
selector lever in position N ››› page 142.
Switch off the engine and remove the
key from the ignition.
Have all occupants leave the vehicle and
move to safety, for example behind a
guard rail.
When leaving the vehicle, take all keys
with you.
Place an emergency warning triangle to
indicate the position of your vehicle to
other road users.
Allow the engine to cool and check if a
specialist is required.
When being towed with the hazard warning
lights on, a change in direction or traffic lane
can be indicated as usual using the turn sig-
nal lever. The hazard lights will be interrup-
ted temporarily.
If the hazard warning lights are not working,
you must use an alternative method of draw-
ing attention to your vehicle. This method
must comply with traffic legislation. 1.
2.
3.
4.
5.
6.
7.
8.
9. WARNING
A faulty vehicle in traffic represents a risk of
acc ident
for the driver and for other road
users.
● Stop the vehicle safely as soon as possible.
Park the
vehicle a safe distance from sur-
rounding traffic to lock all the doors in case of
an emergency. Turn on the hazard warning
lights to warn other road users.
● Never leave children or disabled people
alone in the v
ehicle if the doors are to be
locked. In case of an emergency, passengers
will be trapped inside the vehicle. Individuals
locked in the vehicle can be exposed to very
high or very low temperatures. WARNING
The components of the exhaust system reach
ver y
high temperatures. This could cause a
fire and considerable damage.
● Always park your vehicle so that no part of
the exhau
st system can come in contact with
flammable materials (such as dried grass or
fuel). Note
● The v ehic
le battery will discharge and run
down if the hazard warning lights remain on
for too long (even with the ignition turned
off). 106
Page 109 of 232
 to warn vehicles
travelling behind. If braking continues,")
Lights and visibility
●
In some v ehic
les, the brake lights will flash
when braking abruptly at speeds of approxi-
mately 80 km/h (50 mph) to warn vehicles
travelling behind. If braking continues, the
hazard warning lights system will automati-
cally be turned on at a speed of less than ap-
proximately 10 km/h (6 mph). The brake
lights remain lit. Upon accelerating, the haz-
ard warning lights will be automatically
turned off. Adjusting the headlights
In those countries where vehicles drive on
the other s
ide of
the r
oad to the home coun-
try, the asymmetric dipped beam may dazzle
drivers of oncoming vehicles.
For this reason, stickers may be needed to
cover the headlights when driving abroad.
For further information, please refer to a spe-
cialised workshop. SEAT recommends visiting
a technical service. Note
The use of stickers to cover headlights is only
permitted o v
er a short period. To modify the
direction of the headlamps more permanent-
ly, please take the vehicle to a specialised
workshop. SEAT recommends taking your car
in for technical service. Headlight range control, lighting of
the in
s
trument
panel and controls Fig. 111
Next to the steering wheel: Head-
light r
an
ge control Headlamp height adjustment
The he
a
dlight
range control ››› Fig. 111 is
modified according to the value of the head-
light beam and the vehicle load status. This
offers the driver optimum visibility and the
headlights do not dazzle oncoming drivers
››› .
The he a
dlights
can only be adjusted when
the dipped beam is switched on.
To reset, turn switch ››› Fig. 111:
ValueVehicle load status a)
–Two front occupants, luggage compart-
ment empty
To reset, turn switch
››› Fig. 111:
ValueVehicle load status a)
1All seats occupied, luggage compartment
empty
2All seats occupied, luggage compartment
full.
3Driver only, luggage compartment full
a)
If the vehicle load does not correspond to those shown in the
table, it is possible to select intermediary positions.
Instrument and switch lighting
When the side lights or dipped beam head-
lights are switched on, the lighting for instru-
ments and controls lights up at a constant
brightness. WARNING
Heavy objects in the back of vehicle may
cau se he
adlight dazzle and distract other
drivers. This could result in a serious acci-
dent.
● Adjust the light beam to the vehicle load
stat
us so that it does not blind other drivers. Luggage compartment light
The light is activated when the rear lid is
open, ev
en when the ignition and lights
ar
e
turned off. For this reason, ensure that the
rear lid is always closed. 107
Technical data
Advice
Operation
Emergencies
Safety
Page 110 of 232

Operation
Visibility S u
n
visors Fig. 112
Sun visor Options for adjusting driver and front pas-
sen
g
er s
un visors:
● Lower the sun visor towards the wind-
scr
een.
● The sun visor can be pulled out of its
mounting and t
urned towards the door.
● Swing the sun visor towards the door, lon-
gitudinal
ly backwards.
Vanity mirror*
There may be a vanity mirror in the folded
sun visor on the passenger side and a card-
holder in the driver sun visor. WARNING
Folded sun blinds can reduce visibility.
● Always roll or fold sun blinds and visors
aw a
y when not in use. Heat-insulating glass windscreen
Fig. 113
Windscreen with reflective infrared
and met al
c
oating and small window (red sur-
face) The heat-insulating windscreens include a re-
fl
ectiv
e infr
ared coating. The section above
the rear vision mirror has been left uncoated
(communication window) to allow electric
components from the accessories shop to
operate correctly ›››
Fig. 113. CAUTION
When the uncoated surface is covered or has
a stic k
er on the interior or exterior, malfunc- tions in the electronic components may oc-
cur
. Nev
er cover the uncoated surface on the
interior or exterior. Windscreen wiper and window
wiper sy
s
tems
Window wiper lever Read the additional information carefully
›› ›
page 22 WARNING
Water from the windscreen washer water bot-
tle m a
y freeze on the windscreen if it does
not contain enough anti-freeze, reducing for-
ward visibility.
● In winter, ensure the windscreen washer
contain
s enough anti-freeze.
● In cold conditions, you should not use the
wash/w
ipe system unless you have warmed
the windscreen with the ventilation system.
The antifreeze could freeze on the windscreen
and reduce visibility. WARNING
Worn or dirty wiper blades reduce visibility
and incr e
ase the risk of accident and serious
injury. 108
Page 111 of 232

Lights and visibility
●
Alw a
ys replace damaged or worn blades or
blades which do not clean the windscreen
correctly. CAUTION
In icy conditions, always check that the wiper
b la
des are not frozen to the glass before us-
ing the wipers for the first time. In cold
weather, it may help to leave the vehicle
parked with the wipers in service position
››› page 45. CAUTION
If the ignition is switched off while the wind-
sc r
een wipers are on, the windscreen wipers
carry on wiping at the same level when the
ignition is switched back on. Ice, snow and
other obstacles may damage the windscreen
wiper and the respective motor.
● If necessary, remove snow and ice from the
winds
creen wipers before starting your jour-
ney.
● Carefully lift the frozen windscreen wipers
from the gla
ss. SEAT recommends a de-icer
spray for this operation. Note
● The wind s
creen wipers will only work when
the ignition is switched on.
● The interval wipe speed varies according to
the vehic
le speed. The faster the vehicle is moving, the more often the windscreen is
cl
e
aned.
● The rear wiper is automatically switched on
when the winds
creen wiper is on and the car
is in reverse gear. Windscreen wiper functions
Windscreen wiper performance in different sit-
uations
If the vehicle is at a
standstillThe activated position provision-
ally changes to the previous posi-
tion.
For intermittent wip-
ersIntervals between wipes depend
on the vehicle's speed. The high-
er the vehicle speed the shorter
the intervals.
Note
The wiper will try to wipe away any obstacles
that ar
e on the windscreen. The wiper will
stop moving if the obstacle blocks its path.
Remove the obstacle and switch the wiper
back on again. Rain and light sensor
Fig. 114
Windscreen wiper lever: adjusting
the r ain sen
sor 1 .
Fig. 115
Rain sensor reference surface. When activated, the rain and light sensor au-
t
om
atic
ally controls the windscreen washer
intervals depending on the intensity of the
rainfall. »
109
Technical data
Advice
Operation
Emergencies
Safety
Page 112 of 232

Operation
When the rain and light sensor is deactiva-
t ed, the dur
ation of
the intervals is adjusted
to set levels.
Activating and deactivating the rain and
light sensor
Move the lever to the required position
››› Fig. 114:
● Position A - The rain and light sensor is
de activ
at
ed.
● Position B - The rain and light sensor is
activ at
ed w
ill wipe automatically as needed.
When the ignition is switched off and then
back on again, the rain sensor stays on and
starts operating again when the windscreen
wipers are in position B and the vehicle is
tr av
el
ling at more than 4 km/h (2 mph).
Setting the sensitivity level of the rain and
light sensor
The sensitivity of the rain and light sensor
can be adjusted manually with the control 1on the windscreen wiper lever
››
›
.
● Moving the control to the right: highly sen-
s itiv
e.
● Mo
ving the control to the left: less sensi-
tive.
Ma
lfunction of the rain and light sensor
Some examples of possible causes of faults
and mistaken readings on the reference sur- face
››› Fig. 115 1 of the rain and light sen-
sor:
● Windscreen wiper blades damaged: The
pr e
senc
e of a film or strips of water caused
by damaged blades may cause the wind-
screen wipers to be slower taking effect,
shorten wiping intervals or cause wiping to
be fast and continuous.
● Insects: mosquitoes impacting the wind-
sc
reen can activate the windscreen wiper.
● Traces of salt: in winter
, the windscreen
wiper may work for longer than usual due to
the presence of traces of salt on the almost
dry windscreen.
● Dirt: the presence of dry dust, wax, coating
films
(Lotus effect) or traces of detergent (car
wash) etc., on the windscreen may cause the
rain and light sensor to be less sensitive, re-
act more slowly, later or not at all.
● Cracked windscreen: the impact of
a stone
will trigger a single wipe cycle if the rain and
light sensor is activated. Subsequently, the
sensor detects the reduction in the reference
surface area and adapts accordingly. The be-
haviour of the sensor will vary with the size of
the damage.
Clean the reference surface area of the rain
and light sensor 1 regularly and check that
the w ind
s
creen wiper blades have not been
damaged. CAUTION
The rain and light sensor does not always de-
tect r
ainfall with sufficient accuracy so does
not always switch on the windscreen wiper at
the right moment.
● If necessary, switch on the windscreen wip-
ers m
anually when water on the windscreen
obstructs visibility. Note
We recommend the use of a glass cleaning
product c
ontaining alcohol to remove traces
of wax or polish. Mirror
Int erior r
e
ar vision mirror Fig. 116
Manual anti-dazzle function for rear
v is
ion mirror 110
 1
1 2
2 3
3 4
4 5
5 6
6 7
7 8
8 9
9 10
10 11
11 12
12 13
13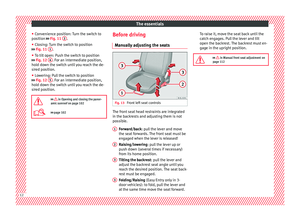 14
14 15
15 16
16 17
17 18
18 19
19 20
20 21
21 22
22 23
23 24
24 25
25 26
26 27
27 28
28 29
29 30
30 31
31 32
32 33
33 34
34 35
35 36
36 37
37 38
38 39
39 40
40 41
41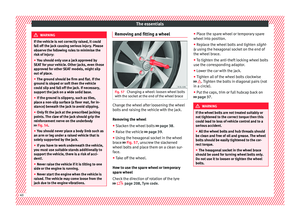 42
42 43
43 44
44 45
45 46
46 47
47 48
48 49
49 50
50 51
51 52
52 53
53 54
54 55
55 56
56 57
57 58
58 59
59 60
60 61
61 62
62 63
63 64
64 65
65 66
66 67
67 68
68 69
69 70
70 71
71 72
72 73
73 74
74 75
75 76
76 77
77 78
78 79
79 80
80 81
81 82
82 83
83 84
84 85
85 86
86 87
87 88
88 89
89 90
90 91
91 92
92 93
93 94
94 95
95 96
96 97
97 98
98 99
99 100
100 101
101 102
102 103
103 104
104 105
105 106
106 107
107 108
108 109
109 110
110 111
111 112
112 113
113 114
114 115
115 116
116 117
117 118
118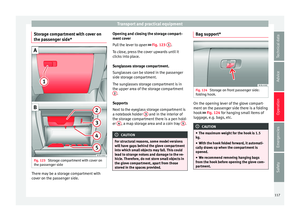 119
119 120
120 121
121 122
122 123
123 124
124 125
125 126
126 127
127 128
128 129
129 130
130 131
131 132
132 133
133 134
134 135
135 136
136 137
137 138
138 139
139 140
140 141
141 142
142 143
143 144
144 145
145 146
146 147
147 148
148 149
149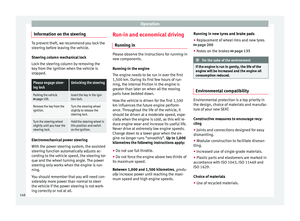 150
150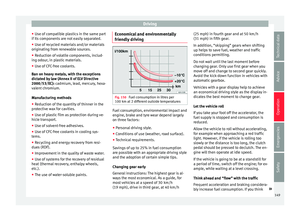 151
151 152
152 153
153 154
154 155
155 156
156 157
157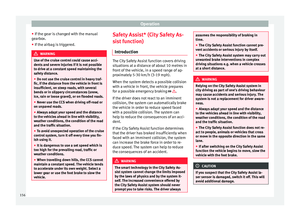 158
158 159
159 160
160 161
161 162
162 163
163 164
164 165
165 166
166 167
167 168
168 169
169 170
170 171
171 172
172 173
173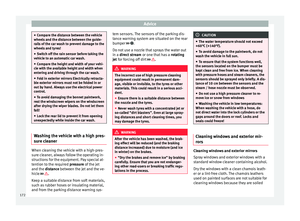 174
174 175
175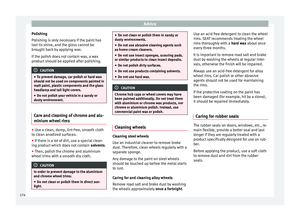 176
176 177
177 178
178 179
179 180
180 181
181 182
182 183
183 184
184 185
185 186
186 187
187 188
188 189
189 190
190 191
191 192
192 193
193 194
194 195
195 196
196 197
197 198
198 199
199 200
200 201
201 202
202 203
203 204
204 205
205 206
206 207
207 208
208 209
209 210
210 211
211 212
212 213
213 214
214 215
215 216
216 217
217 218
218 219
219 220
220 221
221 222
222 223
223 224
224 225
225 226
226 227
227 228
228 229
229 230
230 231
231