Page 169 of 372

(40 km/h) the vehicle height will be auto-
matically lowered to OR1. Refer to “Driv-
ing Tips” in “Starting And Operating” for
further information.
• Aero Mode (Lowers the vehicle approxi-
mately 0.6 inches (15 mm) – This position
provides improved aerodynamics by lower-
ing the vehicle. The vehicle will automati-
cally enter Aero Mode when the vehicle
speed remains between 52 mph (83 km/h)
and 56 mph (90 km/h) for greater than
20 seconds or if the vehicle speed exceeds
56 mph (90 km/h). The vehicle will return
to NRH from Aero Mode if the vehicle
speed remains between 20 mph (32 km/h)
and 25 mph (40 km/h) for greater than
20 seconds or if the vehicle speed falls
below 20 mph (32 km/h). The vehicle will
enter Aero Mode, regardless of vehicle
speed if the vehicle is in “SPORT” mode.
• Entry/Exit Mode (Lowers the vehicle approxi-
mately 1.6 inces (40 mm) – This position
lowers the vehicle for easier passenger
entry and exit as well as lowering the rear
of the vehicle for easier loading and un-
loading of cargo. To enter Entry/Exit Mode,
push the “DOWN” button once from (NRH) while the vehicle speed is below
25 mph (40 km/h). Once the vehicle
speed goes below 15 mph (24 km/h) the
vehicle height will begin to lower. If the
vehicle speed remains between 15 mph
(24 km/h) and 25 mph (40 km/h) for
greater than 60 seconds, or the vehicle
speed exceeds 25 mph (40 km/h) the
Entry/Exit Mode change will be cancelled.
To exit Entry/Exit Mode, press the “Up”
button once while in Entry/Exit Mode or
drive the vehicle over 15 mph (24 km/h).
NOTE:
Automatic lowering of the vehicle into Entry/
Exit Mode can be enabled through the
Uconnect Touch-Screen Radio. If this feature
is enabled, the vehicle will only lower if the
gear selector is in "PARK", the terrain switch
is in "AUTO", the transfer-case is in "AUTO”
and the vehicle level should be either in
Normal or Aero Mode. The Vehicle will not
automatically lower if the air suspension level
is in Off Rd 2 or Off Rd 1. If the vehicle is
equipped with Intrusion Theft Module (ITM),
the lowering will be suppressed when the
ignition is switched OFF and the door is open
to prevent setting the alarm off. The Selec-Terrain switch will automatically
change the vehicle to the proper height based
on the position of the Selec-Terrain switch.
The height can be changed from the default
Selec-Terrain setting by normal use of the air
suspension buttons. Refer to “Selec-Terrain”
in “Starting And Operating” for further infor-
mation.
The system requires that the engine be run-
ning for all changes. When lowering the ve-
hicle all of the doors, including the liftgate,
must be closed. If a door is opened at any
time while the vehicle is lowering the change
will not be completed until the open door(s) is
closed.
The Quadra-Lift air suspension system uses a
lifting and lowering pattern which keeps the
headlights from incorrectly shining into on-
coming traffic. When raising the vehicle, the
rear of the vehicle will move up first and then
the front. When lowering the vehicle, the
front will move down first and then the rear.
167
Page 170 of 372

After the engine is turned off, it may be
noticed that the air suspension system oper-
ates briefly, this is normal. The system is
correcting the position of the vehicle to en-
sure a proper appearance.
To assist with changing a spare tire, the
Quadra-Lift air suspension system has a fea-
ture which allows the automatic leveling to
be disabled. Refer to “Uconnect Settings” in
“Multimedia” for further information.
NOTE:
If equipped with a touch screen radio all
enabling/disabling of air suspension features
must be done through the radio. Refer to
“Uconnect Settings” in “Multimedia” for fur-
ther information.
WARNING!
The air suspension system uses a high
pressure volume of air to operate the sys-
tem. To avoid personal injury or damage to
the system, see your authorized dealer for
service.
Air Suspension Modes
The Air Suspension system has multiple
modes to protect the system in unique situa-
tions:
Tire/Jack Mode
To assist with changing a spare tire, the air
suspension system has a feature which al-
lows the automatic leveling to be disabled.
Refer to “Uconnect Settings” in “Multime-
dia” for further information.
NOTE:
This mode is intended to be enabled with
engine running.
Transport Mode
To assist with flat bed towing, the air suspen-
sion system has a feature which will put the
vehicle into Entry/Exit height and disable the
automatic load leveling system. Refer to
“Uconnect Settings” in “Multimedia” for fur-
ther information.
NOTE:
This mode is intended to be enabled with
engine running.Wheel Alignment Mode
Before performing a wheel alignment this
mode must be enabled. Refer to “Uconnect
Settings” in “Multimedia” for further infor-
mation.
NOTE:
This mode is intended to be enabled with
engine running.
If equipped with a touch screen radio all
enabling/disabling of air suspension features
must be done through the radio. Refer to
“Uconnect Settings” in “Multimedia” for fur-
ther information.
Instrument Cluster Display Messages
When the appropriate conditions exist, a
message will appear in the instrument clus-
ter. Refer to “Instrument Cluster Display” in
“Getting To Know Your Instrument Panel” for
further information.
Operation
The indicator lamps 3 through 6 will illumi-
nate to show the current position of the
vehicle. Flashing indicator lamps will show a
position which the system is working to
STARTING AND OPERATING
168
Page 171 of 372

achieve. When raising, if multiple indicator
lamps are flashing on the “Up” button, the
highest flashing indicator lamp is the posi-
tion the system is working to achieve. When
lowering, if multiple indicators are flashing
on the "Up" button the lowest solid indicator
lamp is the position the system is working to
achieve.
Pushing the “UP” button once will move the
suspension one position higher from the cur-
rent position, assuming all conditions are
met (i.e. engine running, speed below thresh-
old, etc). The “UP” button can be pushed
multiple times, each push will raise the re-
quested level by one position up to a maxi-
mum position of OR2 or the highest position
allowed based on current conditions (i.e. ve-
hicle speed, etc).
Pushing the “DOWN” button once will move
the suspension one position lower from the
current level, assuming all conditions are met
(i.e. engine running, doors closed, speed be-
low threshold, etc). The “DOWN” button can
be pressed multiple times. Each push will
lower the requested level by one positiondown to a minimum of Park Mode or the
lowest position allowed based on current con-
ditions (i.e. vehicle speed, etc.)
Automatic height changes will occur based
on vehicle speed and the current vehicle
height. The indicator lamps and instrument
cluster display messages will operate the
same for automatic changes and user re-
quested changes.
• Off-Road 2 (OR2) – Indicator lamps 4, 5,
and 6 will be illuminated when the vehicle
is in OR2.
• Off-Road 1 (OR1) – Indicator lamps 4 and 5 will be illuminated when the vehicle is in
OR1.
• Normal Ride Height (NRH) – Indicator lamp 4 will be illuminated when the ve-
hicle is in this position.
• Entry/Exit Mode – Indicator lamp 3 will be illuminated when the vehicle is in Entry/
Exit Mode. If Entry/Exit Mode is requested
while vehicle speed is between 15 mph
(24 km/h) and 25 mph (40 km/h), indica-
tor lamp 4 will remain on solid and indi-
cator lamp 3 will flash as the system waits
for the vehicle to reduce speed. If vehicle speed is reduced to, and kept below,
15 mph (24 km/h) indicator lamp 4 will
turn off and indicator lamp 3 will flash
until Entry/Exit Mode is achieved at which
point indicator lamp 3 will go solid. If
during the height change to Entry/Exit
Mode, the vehicle speed exceeds 15 mph
(24 km/h), the height change will be
paused until the vehicle speed either goes
below 15 mph (24 km/h) and the height
change continues to Entry/Exit Mode, or
exceeds 25 mph (40 km/h) and the ve-
hicle height will return to NRH. Entry/Exit
Mode may be selected while the vehicle is
not moving provided that the engine is still
running and all doors remain closed.
• Transport Mode - No indicator lamps will be illuminated. Customer driving will dis-
able Transport Mode.
• Tire/Jack Mode - indicator lamps 3 and 6 will be illuminated. Customer driving
will disable Tire/Jack Mode.
• Wheel Alignment Mode - indicator lamps 3 and 4 will be illuminated. Customer
driving will disable Wheel Alignment
Mode.
169
Page 172 of 372

SELEC-TERRAIN — IF
EQUIPPED
Selec-Terrain Mode Selection
Selec-Terrain combines the capabilities of
the vehicle control systems, along with driver
input, to provide the best performance for all
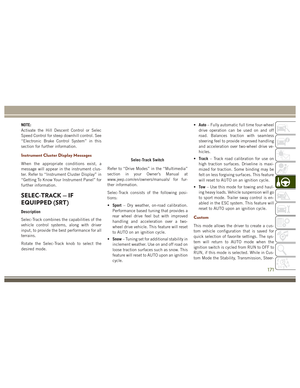
terrains. Selec-Terrain consists of the following posi-
tions:
•
Snow – Tuning set for additional stability
in inclement weather. Use on and off road
on loose traction surfaces such as snow.
When in Snow mode (depending on cer-
tain operating conditions), the transmis-
sion may use second gear (rather than first
gear) during launches, to minimize wheel
slippage. If equipped with air suspension,
the default ride height for Snow is Normal
Ride Height (NRH).
• Auto – Fully automatic full time four-wheel
drive operation can be used on and off
road. Balances traction with seamless
steering feel to provide improved handling
and acceleration over two-wheel drive ve-
hicles. If equipped with air suspension,
the level will change to Normal Ride
Height (NRH).
• Sand – Off road calibration for use on low
traction surfaces such as sand or wet
grass. Driveline is maximized for traction.
Some binding may be felt on less forgiving
surfaces. The electronic brake controls are
set to limit traction control management of throttle and wheel spin. If equipped
with air suspension, the default ride
height for Sand is Normal Ride Height
(NRH).
• Mud – Off road calibration for use on low
traction surfaces such as mud. Driveline is
maximized for traction. Some binding may
be felt on less forgiving surfaces. The
electronic brake controls are set to limit
traction control management of throttle
and wheel spin. If equipped with air sus-
pension, the level will change to Off Road
1.
• Rock – Off road calibration only available
in 4WD Low range. The vehicle is raised (if
equipped with Air Suspension) for im-
proved ground clearance. Traction based
tuning with improved steer-ability for use
on high traction off-road surfaces. Use for
low speed obstacles such as large rocks,
deep ruts, etc. If equipped with air sus-
pension, the vehicle level will change to
Off-Road 2. If the Selec-Terrain switch is
in ROCK mode, and the transfer case is
switched from 4WD Low to 4WD High, the
Selec-Terrain system will return to AUTO.
Selec-Terrain Switch
STARTING AND OPERATING
170
Page 173 of 372

NOTE:
Activate the Hill Descent Control or Selec
Speed Control for steep downhill control. See
“Electronic Brake Control System” in this
section for further information.
Instrument Cluster Display Messages
When the appropriate conditions exist, a
message will appear in the instrument clus-
ter. Refer to “Instrument Cluster Display” in
“Getting To Know Your Instrument Panel” for
further information.
SELEC-TRACK — IF
EQUIPPED (SRT)
Description
Selec-Track combines the capabilities of the
vehicle control systems, along with driver
input, to provide the best performance for all
terrains.
Rotate the Selec-Track knob to select the
desired mode.Refer to “Drive Modes” in the “Multimedia”
section in your Owner’s Manual at
www.jeep.com/en/owners/manuals/ for fur-
ther information.
Selec-Track consists of the following posi-
tions:
•
Sport – Dry weather, on-road calibration.
Performance based tuning that provides a
rear wheel drive feel but with improved
handling and acceleration over a two-
wheel drive vehicle. This feature will reset
to AUTO on an ignition cycle.
• Snow – Tuning set for additional stability in
inclement weather. Use on and off road on
loose traction surfaces such as snow. This
feature will reset to AUTO upon an ignition
cycle. •
Auto – Fully automatic full time four-wheel
drive operation can be used on and off
road. Balances traction with seamless
steering feel to provide improved handling
and acceleration over two-wheel drive ve-
hicles.
• Track – Track road calibration for use on
high traction surfaces. Driveline is maxi-
mized for traction. Some binding may be
felt on less forgiving surfaces. This feature
will reset to AUTO on an ignition cycle.
• To w – Use this mode for towing and haul-
ing heavy loads. Vehicle suspension will go
to sport mode. Trailer sway control is en-
abled in the ESC system. This feature will
reset to AUTO upon an ignition cycle.
Custom
This mode allows the driver to create a cus-
tom vehicle configuration that is saved for
quick selection of favorite settings. The sys-
tem will return to AUTO mode when the
ignition switch is cycled from RUN to OFF to
RUN, if this mode is selected. While in Cus-
tom Mode the Stability, Transmission, Steer-
Selec-Track Switch
171
Page 174 of 372

ing, Suspension, all-wheel drive set up, and
Paddle shifter settings may be configured
through the custom mode set-up.
NOTE:
Refer to “Drive Modes” in the “Multimedia”
section in your Owner’s Manual at
www.jeep.com/en/owners/manuals/ for fur-
ther information.
Active Damping System
This vehicle is equipped with an electronic
controlled damping system. This system re-
duces body roll and pitch in many driving
situations including cornering, acceleration
and braking. There are 3 modes:
•Street Mode (Available in terrain positions
AUTO, SNOW and CUSTOM.) — Used
during highway speeds where a touring
suspension feel is desired.
• Sport Mode (Available in terrain positions
AUTO, SPORT, CUSTOM and TOW.) —
Provides a firm suspension for better han-
dling. •
Track Firm (Available in terrain positions
AUTO, TRACK and CUSTOM.) — Provides
a full firm suspension for an aggressive
track experience.
Refer to “Drive Modes” in the “Multimedia”
section in your Owner’s Manual at
www.jeep.com/en/owners/manuals/ for fur-
ther information.
ELECTRONIC SPEED
CONTROL
When engaged, the Electronic Speed Control
takes over accelerator operations at speeds
greater than 25 mph (40 km/h).
The Electronic Speed Control buttons are
located on the right side of the steering
wheel.
Electronic Speed Control Switches
1 — Push Cancel
2 — Push Set+/Accel
3 — Push Resume
4 — Push On/Off
5 — Push Set-/Decel
STARTING AND OPERATING
172
Page 175 of 372

NOTE:
In order to ensure proper operation, the Elec-
tronic Speed Control System has been de-
signed to shut down if multiple Speed Control
functions are operated at the same time. If
this occurs, the Electronic Speed Control
System can be reactivated by pushing the
Electronic Speed Control ON/OFF button and
resetting the desired vehicle set speed.
Activation
Push the ON/OFF button to activate the elec-
tronic speed control. CRUISE CONTROL
READY will appear on the instrument cluster
display to indicate the electronic speed con-
trol is on. To turn the system off, push the
ON/OFF button a second time. CRUISE CON-
TROL OFF will appear on the instrument
cluster display to indicate the electronic
speed control is off. The system should be
turned off when not in use.
WARNING!
Leaving the Electronic Speed Control sys-
tem on when not in use is dangerous. You
could accidentally set the system or cause
WARNING!
it to go faster than you want. You could
lose control and have an accident. Always
leave the system off when you are not
using it.
Setting A Desired Speed
Turn the Electronic Speed Control ON. When
the vehicle has reached the desired speed,
push the SET (+) or SET (-) button and
release. Release the accelerator and the ve-
hicle will operate at the selected speed. Once
a speed has been set a message CRUISE
CONTROL SET TO MPH (km/h) will appear
indicating what speed was set. A CRUISE
indicator lamp, along with set speed will also
appear and stay on in the instrument cluster
display when the speed is set.
Varying The Speed
Once the Electronic Speed Control has been
activated, the speed can be increased or
decreased.
To Increase Speed
When the Electronic Speed Control is set, you
can increase speed by pushing the SET+
button.
The drivers preferred units can be selected
through the instrument panel settings if
equipped. Refer to “Getting To Know Your
Instrument Panel” in the Owner’s Manual at
www.jeep.com/en/owners/manuals/ for more
information. The speed increment shown is
dependant on the chosen speed unit of U.S.
(mph) or Metric (km/h):
U.S. Speed (mph)
• Pushing the SET +button once will result
in a 1 mph increase in set speed. Each
subsequent tap of the button results in an
increase of 1 mph.
• If the button is continually pushed, the set speed will continue to increase until the
button is released, then the new set speed
will be established.
173
Page 176 of 372

Metric Speed (km/h)
• Pushing the SET+button once will result
in a 1 km/h increase in set speed. Each
subsequent tap of the button results in an
increase of 1 km/h.
• If the button is continually pushed, the set speed will continue to increase until the
button is released, then the new set speed
will be established.
To Decrease Speed
When the Electronic Speed Control is set, you
can decrease speed by pushing the SET -
button.
The drivers preferred units can be selected
through the instrument panel settings if
equipped. Refer to “Getting To Know Your
Instrument Panel” in the Owner’s Manual at
www.jeep.com/en/owners/manuals/ for more
information. The speed increment shown is
dependant on the chosen speed unit of U.S.
(mph) or Metric (km/h): U.S. Speed (mph)
• Pushing the SET
-button once will result
in a 1 mph decrease in set speed. Each
subsequent tap of the button results in a
decrease of 1 mph.
• If the button is continually pushed, the set speed will continue to decrease until the
button is released, then the new set speed
will be established.
Metric Speed (km/h)
• Pushing the SET -button once will result
in a 1 km/h decrease in set speed. Each
subsequent tap of the button results in a
decrease of 1 km/h.
• If the button is continually pushed, the set speed will continue to decrease until the
button is released, then the new set speed
will be established.
Resume Speed
To resume a previously set speed, push the
RES (+) button and release. Resume can be
used at any speed above 20 mph (32 km/h).
Accelerating For Passing
Press the accelerator as you would normally.
When the pedal is released, the vehicle will
return to the set speed.
Deactivation
A soft tap on the brake pedal, pushing the
CANCEL button, or normal brake pressure
while slowing the vehicle will deactivate the
Electronic Speed Control without erasing the
set speed from memory.
Pushing the ON/OFF button or turning the
ignition switch OFF erases the set speed from
memory.
ADAPTIVE CRUISE
CONTROL (ACC)
If your vehicle is equipped with Adaptive
Cruise Control the controls operate exactly
the same as the electronic speed control with
only a couple of differences. With this option
you can set a specified distance you would
like to maintain between you and the vehicle
in front of you.
STARTING AND OPERATING
174