Page 193 of 372

System Overview
This vehicle is equipped with a Diesel Ex-
haust Fluid (DEF) injection system and a
Selective Catalytic Reduction (SCR) catalyst
to meet the emission requirements.
The DEF injection system consists of the
following components:
• DEF tank
• DEF pump
• DEF injector
• Electronically-heated DEF lines
• NOx sensors
• Temperature sensors
• SCR catalyst
The DEF injection system and SCR catalyst
enable the achievement of diesel emissions
requirements; while maintaining outstanding
fuel economy, drivability, torque and power
ratings.
Refer to “Instrument Cluster Display” in
“Getting To Know Your Instrument Panel” for
system messages and warnings.NOTE:
• Your vehicle is equipped with a DEF injec-
tion system. You may occasionally hear an
audible clicking noise from under the ve-
hicle at a stop. This is normal operation.
• The DEF pump will run for a period of time after engine shutdown to purge the DEF
system. This is normal operation and may
be audible from the rear of the vehicle.
Diesel Exhaust Fluid Storage
Diesel Exhaust Fluid (DEF) is considered a
very stable product with a long shelf life. If
DEF is kept in temperatures between 10° and
90°F (-12° and 32°C), it will last a minimum
of one year.
DEF is subject to freezing at the lowest tem-
peratures. For example, DEF may freeze at
temperatures at or below 12° F (-11° C). The
system has been designed to operate in this
environment. NOTE:
When working with DEF, it is important to
know that:
• Any containers or parts that come into
contact with DEF must be DEF compatible
(plastic or stainless steel). Copper, brass,
aluminum, iron or non-stainless steel
should be avoided as they are subject to
corrosion by DEF.
• If DEF is spilled, it should be wiped up completely.Adding Diesel Exhaust Fluid
The DEF gauge (located on the instrument
cluster display) will display the level of DEF
remaining in the tank. Refer to “Instrument
Cluster Display” in “Getting To Know Your
Instrument Panel” for further information.
NOTE:
Driving conditions (altitude, vehicle speed,
load, etc.) will effect the amount of DEF that
is used in your vehicle.
191
Page 194 of 372

DEF Fill Procedure
NOTE:
Refer to “Fluids And Lubricants” in the
“Technical Specifications” section for the
correct fluid type.
1. Remove cap from DEF fill inlet (located infuel door). 2. Insert DEF fill adapter/nozzle into DEF fill
inlet.
NOTE:
• The DEF gauge may take up to five seconds to update after adding a gallon
or more of Diesel Exhaust Fluid (DEF) to
the DEF tank. If you have a fault related
to the DEF system, the gauge may not
update to the new level. See your autho-
rized dealer for service.
• The DEF gauge may also not immedi- ately update after a refill if the tempera-
ture of the DEF fluid is below 12F
(-11C). The DEF line heater will possi-
bly warm up the DEF fluid and allow the
gauge to update after a period of run
time. Under very cold conditions, it is
possible that the gauge may not reflect
the new fill level for several drives.
CAUTION!
•To avoid DEF spillage, and possible dam-
age to the DEF tank from overfilling, do
not “top off” the DEF tank after filling.
• DO NOT OVERFILL. DEF will freeze be- low 12ºF (-11ºC). The DEF system is
designed to work in temperatures below
the DEF freezing point, however, if the
tank is overfilled and freezes, the system
could be damaged.
• When DEF is spilled, clean the area immediately with water and use an ab-
sorbent material to soak up the spills on
the ground.
• Do not attempt to start your engine if DEF is accidentally added to the diesel
fuel tank as it can result in severe dam-
age to your engine, including but not
limited to failure of the fuel pump and
injectors.
DEF Filler Cap And Fuel Fill
1 — Diesel Fuel Filler
2 — Diesel Exhaust Fluid Filler
STARTING AND OPERATING
192
Page 195 of 372

CAUTION!
• Never add anything other than DEF tothe tank – especially any form of hydro-
carbon such as diesel fuel, fuel system
additives, gasoline, or any other
petroleum-based product. Even a very
small amount of these, less than
100 parts per million or less than 1 oz.
per 78 gallons (295 liters) will contami-
nate the entire DEF system and will
require replacement. If owners use a
container, funnel or nozzle when refilling
the tank, it should either be new or one
that is has only been used for adding
DEF. MOPAR provides an attachable
nozzle with its DEF for this purpose. 3. Stop filling the DEF tank immediately
when any of the following happen: DEF
stops flowing from the fill bottle into the
DEF fill inlet, DEF splashes out the fill
inlet, or a DEF pump nozzle automatically
shuts off.
4. Reinstall cap onto DEF fill inlet.
TRAILER TOWING
Trailer Towing Weights (Maximum Trailer
Weight Ratings) — Non SRT
The following chart provides the maximum
trailer weight ratings towable for your given
drivetrain:
Engine ModelFrontal Area Max. GTW (Gross Trailer Wt.) Max. Trailer Tongue Wt. (See
Note)
3.6L (Std Cooling) 4x255 sq ft (5.11 sq m) 3,500 lbs (1587 kgs) 350 lbs (158 kgs)
3.6L (Std Cooling) 4x455 sq ft (5.11 sq m) 3,500 lbs (1587 kgs) 350 lbs (158 kgs)
3.6L (HD Cooling) 4x255 sq ft (5.11 sq m) 6,200 lbs (2812 kg) 620 lbs (281 kg)
3.6L (HD Cooling) 4x455 sq ft (5.11 sq m) 6,200 lbs (2812 kg) 620 lbs (281 kg)
193
Page 196 of 372

EngineModelFrontal Area Max. GTW (Gross Trailer Wt.) Max. Trailer Tongue Wt. (See
Note)
5.7L (Std Cooling) 4x455 sq ft (5.11 sq m) 5,000 lbs (2267kgs) 500 lbs (226 kgs)
5.7L (HD Cooling) 4x455 sq ft (5.11 sq m) 7,200 lbs (3265 kg) 720 lbs (326 kg)
Refer to local laws for maximum trailer towing speeds.
NOTE:
The trailer tongue weight must be considered
as part of the combined weight of occupants
and cargo, and should never exceed the
weight referenced on the Tire and Loading
Information placard. Refer to “Tires” in “Ser-
vicing And Maintenance” for further informa-
tion. The addition of passengers and cargo may require reducing trailer tongue load and
Gross Trailer Weight (GTW). Redistributing
cargo (to the trailer) may be necessary to
avoid exceeding Rear Gross Axle Weight Rat-
ing (GAWR) of 3,700 lbs (1 678 kg).Trailer Towing Weights (Maximum Trailer
Weight Ratings) — Diesel
The following chart provides the maximum
trailer weight ratings towable for your given
drivetrain:
Engine
ModelFrontal Area Max. GTW (Gross Trailer Wt.) Max. Trailer Tongue Wt. (See
Note)
3.0L Diesel 4x255 sq ft (5.11 sq m) 7,400 lbs (3 356 kg) 740 lbs (335 kg)
3.0L Diesel 4x455 sq ft (5.11 sq m) 7,200 lbs (3 265 kg) 720 lbs (326 kg)
Refer to local laws for maximum trailer towing speeds.
NOTE:
The trailer tongue weight must be considered
as part of the combined weight of occupants
and cargo, and should never exceed the
weight referenced on the Tire and Loading Information placard. Refer to “Tires” in “Ser-
vicing And Maintenance” in your Owner’s
Manual at www.jeep.com/en/
owners/manuals/ for further information. The
addition of passengers and cargo may require reducing trailer tongue load and Gross Trailer
Weight (GTW). Redistributing cargo (to the
trailer) may be necessary to avoid exceeding
Rear Gross Axle Weight Rating (GAWR) of
3,700 lbs (1 678 kg).
STARTING AND OPERATING
194
Page 197 of 372

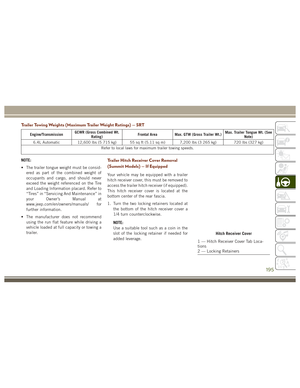
Trailer Towing Weights (Maximum Trailer Weight Ratings) — SRT
Engine/TransmissionGCWR (Gross Combined Wt.
Rating) Frontal Area Max. GTW (Gross Trailer Wt.) Max. Trailer Tongue Wt. (See
Note)
6.4L Automatic 12,600 lbs (5 715 kg) 55 sq ft (5.11 sq m) 7,200 lbs (3 265 kg) 720 lbs (327 kg) Refer to local laws for maximum trailer towing speeds.
NOTE:
• The trailer tongue weight must be consid-ered as part of the combined weight of
occupants and cargo, and should never
exceed the weight referenced on the Tire
and Loading Information placard. Refer to
“Tires” in “Servicing And Maintenance” in
your Owner’s Manual at
www.jeep.com/en/owners/manuals/ for
further information.
• The manufacturer does not recommend using the run flat feature while driving a
vehicle loaded at full capacity or towing a
trailer.Trailer Hitch Receiver Cover Removal
(Summit Models) — If Equipped
Your vehicle may be equipped with a trailer
hitch receiver cover, this must be removed to
access the trailer hitch receiver (if equipped).
This hitch receiver cover is located at the
bottom center of the rear fascia.
1. Turn the two locking retainers located at
the bottom of the hitch receiver cover a
1/4 turn counterclockwise.
NOTE:
Use a suitable tool such as a coin in the
slot of the locking retainer if needed for
added leverage.
Hitch Receiver Cover
1 — Hitch Receiver Cover Tab Loca-
tions
2 — Locking Retainers
195
Page 198 of 372
2. Pull the bottom of the cover outward (to-wards you), pull downwards to disengage
the tabs located at the top of the hitch
receiver cover.
To reinstall the hitch receiver cover after
towing repeat the procedure in reverse order.
NOTE:
Be sure to engage all tabs of the hitch re-
ceiver cover in the bumper fascia prior to
installation.Trailer Hitch Receiver Cover Removal
(SRT Models) — If Equipped
Your vehicle may be equipped with a trailer
hitch receiver cover, this must be removed to
access the trailer hitch receiver (if equipped).
This hitch receiver cover is located at the
bottom center of the rear fascia.
1. Turn the two locking retainers located at the bottom of the hitch receiver cover a
1/4 turn counterclockwise.
NOTE:
Use a suitable tool such as a coin in the
slot of the locking retainer if needed for
added leverage.
Hitch Receiver Cover
1 — Hitch Receiver Cover Tab Loca-
tions
2 — Locking Retainers
STARTING AND OPERATING
196
Page 199 of 372
2. Pull the bottom of the cover outward (to-wards you). 3. Lower back down to disengage the tabs
located at the top of the hitch receiver
cover and then pull outwards to remove.
Hitch Receiver Cover
1 — Hitch Receiver Cover Retaining
Tabs
2 — Hitch Receiver Cover
3 — Locking RetainersHitch Receiver Cover
Hitch Receiver Cover
1 — Hitch Receiver Cover Retaining
Tabs
2 — Hitch Receiver Cover
3 — Locking Retainer
197
Page 200 of 372

To reinstall the hitch receiver cover after
towing repeat the procedure in reverse order.NOTE:
Be sure to engage all tabs of the hitch re-
ceiver cover in the bumper fascia prior to
installation.
RECREATIONAL TOWING (BEHIND MOTORHOME, ETC.)
Towing This Vehicle Behind Another Vehicle
Towing Condition Wheels OFF The Ground Two-Wheel Drive Models
Four-Wheel Drive Models
Without 4–LO Range Four-Wheel Drive Models
With 4–LO Range
Flat Tow NONENOT ALLOWED
NOT ALLOWEDSee Instructions
• Transmission in PARK
• Transfer case in NEU-
TRAL (N)
• Tow in forward direction
Dolly Tow Front
NOT ALLOWED
NOT ALLOWEDNOT ALLOWED
Rear OKNOT ALLOWED
NOT ALLOWED
On Trailer ALLOKOKOK
NOTE:
• When towing your vehicle, always follow
applicable state and provincial laws. Con-
tact state and provincial Highway Safety
offices for additional details. • Vehicles equipped with Quadra-Lift must
be placed in Transport Mode before tying
them down (from the body) on a trailer or
flatbed truck. Refer to “Four Wheel Drive
Operation” in “Starting and Operating” for
more information. If the vehicle cannot be
placed in Transport mode (for example,
engine will not run), tie-downs must be
fastened to the axles (not to the body). Failure to follow these instructions may
cause fault codes to be set and/or cause
loss of proper tie-down tension.
STARTING AND OPERATING
198