Page 129 of 300

..... N
co ~ CX)
..... I.Cl U"I
..... I.Cl ..... The transmission temperature has increased sig
nificantly due to the sporty driving manner. Drive
in a less sporty manner until the temperature re
turns to the normal range and the indicator light
switches of .
rm Transmission malfunction: You can continue
driving
There is a system malfunct ion in the transmis
sion. You may continue driving. Drive to your au
thorized Audi dealer or qualified repair facility
soon to have the malfunction corrected.
rm Transmission malfunction: Limited driving
functionality
There is a system malfunction in the transmis
sion . T he transmission is sw itching to emergency
mode. This mode only shifts into certain gears or
will no longer shift at all. The engine may stall.
Drive to your authorized Audi dea ler or qualified
repair facility immediately to have the malfunc
tion corrected .
rm Transmission malfunction: Stop vehicle and
shift to park.
Do not continue driving. Select the P selector lev
e r position and see your a uthorized Aud i dea ler
or qualified repair facility for assistance .
(D Note
If the transmission switches to emergency
mode, you sho uld take the vehicl e to an au
thorized Audi dealership as soon as possible
to have the condition corrected.
Automatic transmission
Selector lever emergency release
If the vehicle 's power supply fails, the selector
lever can be released in an emergency .
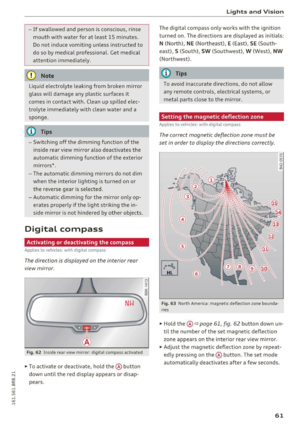
Fig. 139 Front center conso le: Removing the ashtray insert
Fig. 140 Selector lever emergency release
.,. To access the emergency re lease mechanism,
remove the ashtray insert@ using the release
switch @Qfig.139.
.,. Loosen and remove the cap in the ashtray
mount
Q fig. 140.
.,. You now have access to a pin . Using a screw
driver or sim ilar object, press the pin down and
hold it in that position .
.,. Now press the release button and move these-
lector lever to the N position.
The selector lever can only be moved from the P
pos ition if the key is in the lock and the ignition is
switched on. If the power supply fails (for exam
ple, the battery is discharged) and the vehicle
must be pushed or towed, move the selector lev
er to the N position f irst using the emergency re
lease .
127
Page 130 of 300

Parking system
Parking system
Parking system plus with
rearview camera
Introduction
Applies to vehicles: with Audi parking system plus with rear
view camera
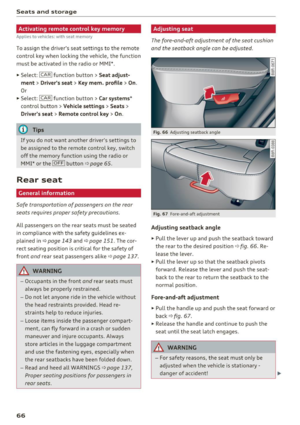
Fig. 141 Parkin g mo de 1 : Back ing i nto a pa rk in g space
Fig. 142 Parkin g mo de 2: par allel parking
Vehicles with the Audi parking system plus with
rearview camera are equipped with a
rearview
ca mera
in addition to the acoustic and visual
parking system .
You can choose between parking modes to help
you when parking your vehicle . Use "parking
mode 1" when park ing in a parking space or ga
rage
Q fig . 141. If you are going to be parallel
parking, use "parking mode 2 "
~ fig. 142.
128
General Information
Applies to vehicles: with Audi parking system plus with rear
view camera
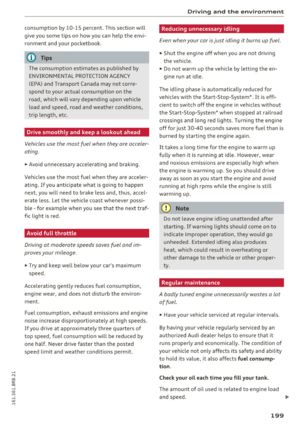
Fig. 143 Area cover ed (!) an d area not covered @by the
rearv iew camera .
-
==== ffl
Fig. 144 Rear lid: Loca tion of the rearview ca mera
Sensors in the bumper
U')
~ ci: CIO m
8 ci: CIO m
Sensors are located in the front and rea r bump
ers . If these detect an obstacle , audible and visu
al signa ls warn you . The range at which the sen
sors begin to measure is approxima tely:
side 3
ft (0.90 m)
front center 4
ft (1.20 m)
s ide 2
ft (0.60 m)
rear center 5.2 ft (1.60 m)
The closer you get to the obstacle , the shorter
the interval between the audible signals . A con
t inu ous tone sounds when the obstacle is less
than approximately
1 foo t (0.30 meters) away .
Do not continue driving farther.
If the distance to an obstacle remains constant ,
the volume of the distance warning gradua lly
drops after about four seconds (this does not ap
ply in the continuous tone range).
Page 131 of 300

,....,
N
co
er::
co
,....,
Rearview camera coverage a rea
The MM I display s hows the area covered by the
rearv iew camera ¢
fig. 143 (!). Objects that a re
not in the area covered @are not shown on the
MMI disp lay .
We recommend that yo u pract ice pa rking with
the rearview camera in a t raff ic-free location o r
parking lot to become familiar w ith the system ,
the orientation lines, and their function . When
doing this, there should be good light and weath
er cond itions.
I n the MMI disp lay, objects or vehicles appea r
closer o r furthe r away if :
- yo u are driving in reverse gea r from a level sur
f ace onto an in cli ne, or a downward s lope,
- yo u are d riving in reverse ge ar toward protr ud
ing objects,
- th e vehi cle is ca rrying too much lo ad in the
re ar .
The accuracy of the o rientation lines and blue
surfaces d imin ishes if:
- the rearv iew camera does not provide a reliab le
i mage, for example, in poor visibility cond itions
or if the lens is d irty,
- the image on the screen is not visib le due to
s u n glare and reflection .
Caring for the rear view c amera lens
The rearview camera is located above the rear li
cense plate bracket. For the parking system to
operate, the lens¢
fig. 144 must be kept clean:
- Dampen the lens with a house hold alcoho l-
based glass cleaner, and then wipe the lens
clean with a dry cloth¢(!).
- Remove snow with a hand brush and ice pref
erab ly w ith a de -icing spray ¢(D .
A WARNING
-The parking system cannot replace the dr iv
er's attention. The driver alone is responsi
ble for parki ng and similar dr iving ma neu
vers.
- Senso rs have blind spots in which objects
cannot be detected . Pay spec ial attention to
Par king sy stem
sma ll children and anima ls because the sen
sors cannot always detect them.
- Always keep your eyes on the vehicle's sur
roundings, using the rearv iew mirror as
wel l.
- Do not allow you rself to be dist racted from
traffic by the rearview camera pictures.
- If the position and the installation angle of
the camera has changed, for example, after
a rear end co llision, do not continue to use
the system for safety reasons. Have it
checked by a qualified dealership .
CI) Note
-Low obstacles a lready signa led by a warning
can disappea r from the system's detection
range as they are approached and w ill not
cont inue to be s ignaled. Objects such as
barrie r cha ins, tra iler draw bars, th in pain t
ed vertical poles or fences may not be de
te cted by the system, posi ng risk of dam
a ge.
- N ever use warm o r hot wate r to remove
snow o r ic e from the rearview camera lens -
t his could ca u se the lens to c ra ck!
- Whe n cleani ng the lens, never use prod ucts
t ha t are abras ive.
129
Page 132 of 300

Parking system
Switching on and off
Applies to veh icles: w ith Aud i park ing system p lus w ith rear
view ca mera
The rearview camera switches on automatically
together with the acoustic and visual park assist
when you put the vehicle in reverse.
F ig. 145 Center console: Pa rking system sw itch
F ig. 146 MM I d isp lay : v isual d istance display
Sw itch ing on
• Switch the MM I on and select reverse gear .
• To use the front parking system, press the
switch
P11A in the center console¢ fig. 145. A
sho rt confi rmation to ne sounds and the indica
tor light in the switch lights up.
Sw itching betwe en th e re arview came ra and
visual display
• Press t he Graphi c control but ton ¢ page 131,
fig. 147
® to see the vis ual d isplay.
• Press the
Re ar view contro l button to see the
rearview camera image¢
fig. 146.
Switching off
• Drive faster than 6 mph (10 km/h), or
• press the switch
P"1A or
• swit ch off the ignition.
130
S egments in the vis ual d isplay
The red segments in front of and behind the vehi
cle
¢ fig. 146 help you to determine the distance
between you and an obstacle . As your vehicle
comes closer to the obstacle, the segments move
closer to the vehicle . The collision area has been
reached when the next to last segment is dis
played . Do not continue dr iving farther ¢.&.
in
General Information on page 129!
,& WARNING
- The MMI display cannot show, or cannot ad
equate ly show, certain objects (such as
sma ll posts or grati ng), re cesses in the
gro und and protrud ing parts on another car.
- On ly use the rearv iew camera to ass ist you if
it shows a good, clear picture . For example,
the image may be affected by the sun shin
ing into the lens, dirt on the lens o r if there
is a defect .
- Use the rearview camera on ly with the rear
lid completely closed. Make sure any ob jects
you may have mounted on the rear lid do
not block the rearview camera.
(D Tips
- The sensors m ust be kept clean and free of
snow and ice for the park assist to operate .
- The visu al display is shown in the illustra
tion of the rearview camera. This display
shows where the sensors have detected an obstacle.
- Yo u can change the vol ume and pitch of the
signals as well as the disp lay ¢
page 133.
-Please follow the instruc tions for tow ing a
trailer
¢ page 133.
- What appears in the display is time -de
layed .
Page 133 of 300

..... N
co ~ CX)
..... I.Cl U"I
..... I.Cl .....
Reverse Parking
Applies to vehicles: with Audi parking system plus with rear
view came ra
Parking mode 1 can be used when parking in a
garage or into a parking space.
Fig. 147 MMI displa y: aiming at a p arkin g spot
Fig. 148 MMI displa y: align ing t he ve hicle
.,. Switch the MMI on and se lect reverse gear .
.,. Turn the steering wheel until the orange orien
tation lines
(D appear in the parking spot
Q fig . 147 . Use the markings @to help you es
t imate the distance from an obstacle . Each
marking represents 3 ft (1 meter). The blue
area represents an extension of the vehicle's
outline by approximately 16
ft (S meters) to
the rear.
.,. While driving in reverse gear, adjust the steer
ing wheel angle to fit the parking space with
the aid of the orange orientation lines
QQ). @
marks the rear bumper . Stop the vehicle when
the red orientation line © borders an object
Q,Lr:i. ,
.8, WARNING
-The rearv iew camera does not show the en
tire area behind the vehicle¢
page 128,
Parking system
fig. 143. Watch out especially for small chil
dren and animals. The rearview camera can
not always detect them, posing risk of an
accident!
- Please note that objects not touching the
ground can appear to be further away than
they really are (for example, the bumper of
a parked vehicle , a trailer hitch, or the rear
of a truck). In this case, you should not use
the help l ines to help with parking, which
poses danger of an accident!
(D Note
In the MMI display, the direction of travel of
the veh icle rear is represented depend ing on
the steer ing wheel angle. The vehicle front
swings out more than the vehicle rear. Main
tain p lenty of distance so that your outside
mirror or a corner of your vehicle does not col
lide with any obstacles . This can damage to
your vehicle.
131
Page 134 of 300

Parking system
Parallel Parking
Applies to veh icles: w ith Aud i park ing system p lus w ith rear
view ca mera
Use parking mode 2 to help you parallel park
along the side of a street.
Fig. 1 49 MMI d isp lay: blue su rface in the pa rking spot
F ig. 150 MMI d isp lay: Blue curve on the cu rb
The fo llowing steps apply only when there is no
obstacle such as a wall near the parking spot .
Otherw ise, please read the information provided
in the "Pa rking Next to Obstacles " section .
.,. Activate the turn signal.
.,. Pos ition your vehicle parallel to the edge of the
street, approx imately 3 ft (1 meter) from a
parked veh icle .
.,. Swi tch the MMI on and se lect reverse gear. The
parking aid turns on and park ing mode 1 ap
pears on the d isplay .
... Press the control button©¢
fig. 149 on the
MMI control console. Parking mode 2 appears.
... Back up and align your vehicle so the blue area
@ borders on the rear end of the vehicle or on
the parking spot line. The b lue area represents
an extension of the veh icle's outline by approx i
mately 16 ft (S meters) to the rear . The long
s ide of the blue area should be on the c urb . T he
entire blue area m ust fit into the parking spot.
132
.,. With the vehicle stopped, t urn the steering
wheel to the right as far as it will go.
... Back into the parking spot until the blue curve
to uches the curb¢
fig. 150. Stop the vehicle.
.,. With the vehicle stopped, turn the steering
wheel to the left as far as it will go .
.,. Continue to back into the parki ng spot unt il the
veh icle is parked paralle l to the curb .@ marks
the rea r bumpe r. Stop the veh icle when the red
orientat ion line @ borders an object¢ & .
Keep an eye on the front of you r vehicle while
doing this ¢(D .
Parking next to obstacles
When there is an obstacle (such as a wall) next to
the pa rking spot, choose a spot with mo re space
o n the s ides. Position the long side of t he b lue
area so that there is sufficient spa ce from the
curb . The area must not be on the curb. You wi ll
also need to start turning the steering wheel
much earlier . There should be a sufficient
amount of space between the curb and the blue
curve, and the blue curve¢ fig. 150 must not
touch the curb.
&_ WARNING
-The rearview camera does not show the en
tire area behind the vehicle ¢
page 128,
fig . 143.
Watch o ut especially fo r small chi l
dren and animals. The re a rv iew came ra can
no t always detect them, posing risk of an
accident!
- P lease note that objects not touching the
gro und can appear to be further away than
they really are (for examp le, the bumpe r of
a parked vehicle, a trailer hitch, or the rear
of a truck). In this case, you shou ld not use
the help lines to help with parking, which poses danger of an accident!
(D Note
In the M MI d isplay, the direction of travel of
the veh icle rear is represented depend ing on
the steer ing whee l ang le. The veh icle front
swings o ut more tha n the vehicle rear. Main
tai n plenty of distance so that yo ur outside
Page 135 of 300

,....,
N
co
er::
co
,....,
mirror or a corner of your vehicle does not co l
lide with any obstacles. This can damage to
your veh icle.
(D Tips
The left or right orientation lines and surfaces
wi ll be displayed, depending on the turn sig
na l being used .
Adjusting the display
and warning tones
Applies to vehicles: with Audi parking system plus with rear
view camera
The display and warning tones can be adjusted in
the MMI.
~ Select: I CARI function button > Parking syste m.
Or
~ Se lect: I CARI funct ion button > C ar sy stem s*
control button > Driver a ssi st > Pa rking aid .
Di sp lay
- Off -
when the parking system is switched on,
only aud ible signals are g iven.
- On -when the parking system is switched on,
either the visual disp lay or the picture from the
rearview camera is displayed.
Warning tones
- Front volu me -
fron t se nso r volume
- Front fr equ ency -front se nsor frequency
- Rea r volum e -rear sensor vol ume
- Rea r frequency -rear sensor frequency
-In -car enterta inment fade r/Mus ic volum e
w hile pa rking -
when the parking system is
switched on, the volume of the active audio
source is lowered .
The new ly adjusted value is briefly heard from
the signal generator .
- The warning tones can also be ad justed d i
rectly by the vis ual disp lay or the picture
from the rearview camera. Simply press the
Sett ings control button.
- Changed settings are activated when park
ing system is switched on again.
Par king system
- The settings are automatically stored and
assigned to the remote control key .
Trailer hitch
Applies to vehicles: with Audi parking system plus with rear
view camera and trailer hitch
Fo r vehicles with a factory installed trailer hitch,
o r a tra ile r hi tch installed according to factory
specifications, the par king system rear sensors
do not come on whenever you shift into reverse
gear or when you press the
P •1~ switch . Remem
ber, there is no war ning for distances to the rear .
The front sensors remain activated. The visual
display switches to the tra iler tow ing mode. The
picture from the rearview camera w ill not show
the or ientat io n lines nor the blue surfaces .
If you insta ll a hitch yourse lf, this f unct ion may
not work.
Error messages
Applies to vehicles: with Audi parking system plus with rear
view camera
T he re is an error in the system if the LE D on the
Pw~ switch is blink ing and yo u hear a continuous
alarm for a few seconds after sw itch ing on the
park ing system or when the parking system is al
ready activated. Have your authorized Audi dealer
correct the error.
(D Tips
If the error is not corrected before you switch
off the ign ition, when you switch on the park
i ng system again, the LED in the
Pw.A sw itch
will blink.
133
Page 136 of 300

Driving sa fe ty
Driving safety
Basics
Safe driving habits
Please remember -safe ty first!
This chapter contains important information,
tips, instruct ions and warn ings that you need to
read and observe for your own safety, the safety
of your passengers and others. We have summar ized here what you need to know about safety
be lts, a irbags, child restra ints as well as child
safety. Your safety is for us
priority number 1 . Al
ways observe the i nfo rmation and wa rn ings in
this section - for your own safety as well as that
of your passengers.
The information i n this section applies to all
model versions of yo ur vehicle . Some of the fea
tures descr ibed in t his sections may be s tanda rd
equipment on some models, or may be optional
equipment on others . If you are not sure, ask
your authorized Audi dealer.
A WARNING
- Always make sure that you follow the in
structions and heed the WARNINGS in th is
Manual.
It is in your interest and in the in
te rest of your passengers .
- Always keep the comp lete Owner's Litera
ture in your A udi when you lend or sell your
vehicle so that this important information
will always be available to the d river and
passenge rs.
- Always keep the Owner 's literature handy so
that you can find it easily if you have ques
t ions.
Safety equipment
The safety features are part of the occupant re
straint system and work together to help reduce
the risk of injury in a wide variety of occident si t
uations.
Your safety and the safety of your passenge rs
should not be left to chance. Advan ces i n tech
nology have made a var iety of features avai lab le
to help reduce t he risk of injury in an accident .
134
The following is a list of just a few of the sa fety
features in your Audi :
- sophis tica ted safety be lts fo r dr ive r and all pas-
senge r seat ing pos itions,
- belt fo rce limi ters for the front seats,
- be lt pretensione rs fo r the seats,
- belt height adjustment for the front seats,
- head restraints for each seating position,
- front airbags,
- side airbags in the front seats and outer rear
seats *,
- side curtain airbags,
- special LAT CH anchorages for ch ild rest rai nts,
- adj ustab le steer ing column.
T hese ind iv idual safety features , can work to
gether as a system to help protect you and your
passengers in a wide range of acc idents. These
features cannot wo rk as a system if they are not
a lways correc tly ad justed a nd cor rect ly used.
Safety i s everybody' s responsibil ity!
Important things to do before driving
Safety is everybody 's job! Vehicle and occupant
safety always depends on the informed and care
ful driver .
For your safety and the safety of your passen
gers,
before driving always:
.,. Make sure that a ll lights and signals are operat
ing correctly .
.,. Make sure that the tire pressure is correct .
.,. Make sure that all windows are clean and afford
good vis ibility to the outs ide .
.,. Secure all luggage and othe r items ca refully
i=> page 77 .
.,. Ma ke sure that noth ing ca n interfere wi th the
pedals.
.,. Adjust front seat, head rest raint and mirrors
correctly for yo ur height.
.,. Instruct passeng ers to adjust the head re
straints according to their he ight.
.,. Make sure to use the rig ht child restraint cor
rectly to protect children
c> page 171 , Child
safety . ..,.