Page 57 of 300

..... N
co ~ CX)
..... I.Cl U"I
..... I.Cl .....
-your vehicle is being towed by a tow truck or
if you are towing another vehicle behind
you .
Turn signal and high beam lever
The lever on the le~ side of the steering column
is used to operate the turn signals and the high
beam as well as the headlight flasher.
Fig. SO Tu rn signal and high bea m lever
The turn s ignal and high beam lever has the fol·
lowing functions:
Turn signals ¢¢
8 N
0
~ IXI
• Lift the lever up all the way¢ fig. 50 (D to use
t h e right turn s ignals, or push the lever down
all the way @to use the left turn signals .
Auto-blink
• Move the lever (up or down) just to the point of
resistance to use the turn signa ls for as long as
you need them, for example when changing lanes .
• Move the lever (up or down) just to the point of
resistance and then release it right away to
make the turn s ignals blink
three times. You
can use this feature for example when changing
l anes on highways.
High beam ~D
• Push the lever forward@ to switch on the high
beam.
• Pull the lever back towa rds yo u to switch off
the high beam .
Headlight flasher ~D
• Pull the lever toward the steering wheel© to
u se the head light flasher .
Lights and V ision
Notes on these features
-The turn signals only work w ith the ignition
turned on. The indicato r lights
II or II in the
instr ument cluster ¢
page 14 also blink.
- After you have turned a corner, the turn signa l
switches off automatically.
- The
high beam wo rks on ly when the headlights
are on. The indicator light
II in the instrument
cluster illuminates when the high beams are
on.
- The
headlight flasher works only as long as yo u
hold the lever· even if there are no lights
turned on . The indicator light
II in the instru
ment cluster illuminates when you use the
headlight flasher .
A WARNING
-Do not use the high beam or head light flasher
i f you know that these could blind oncoming
traffic.
Interior lighting
Front /rear interior lights
_. --=:.
I-~~
._ -- v
8 G
o .. .. c
l
Fig. 51 Front head line r: in ter io r light ing cont rols
Fig. 52 Rear headliner: rear read ing lights
55
Page 58 of 300

Lights and Vision
@ Interior lights
Press the switch
~fig. 51 in the co rresponding
position.
0 -Inte rior lights off
I -Interior lights on
If the sw itch is in the center position, the interio r
lighting is controlled automatically.
@ Front /rear reading lights
To tur n a reading light on/off, press the button
@~ fig. 51 or~fig . 52.
The appearance and location of the rea r read ing
lights may differ depending on the model.
Instrument illumination
The basic brightness of the illum ination for the
instruments, the center console and the display
can be adjusted.
Fi g. 53 Instrument illum inat io n
.. Press the knob to release it .
.. Turn the knob toward"-" or" +" to reduce or in
c rease the brightness .
.. Press t he knob again to retu rn it to its original
pos ition.
(D Tips
T he instrument illumination (fo r dials and
needles) lights o n when the ignition is switch
e d on and the ve hicle lights are turned off. As
t he daylight fades, t he illum ina tion of the di
als likewise dims au tomati ca lly and w ill go
out comp letely when the outside light is very
low. This feature is meant to remind you to
sw itch on the head lights when o utside light
conditions become poor.
56
Vision
Sun visors
Using the sun visors makes driving safer .
Fig. 54 Sun v isor
The sun viso rs fo r th e driver and passenger can
be p ulled out of their brackets in the center of
the ve hicle and turned towa rds t he doors
~ fig. 54@. After the s un v isor has been turned
to the door, it can be extended* lengthwise.
Vanity mirror
The van ity mirrors on t he sun visors are covered.
When the lid is opened @, the mi rror light in the
headliner turns on automatically . It turns off
when the lid is closed and the visor is fo lded up
again.
Sun shade
App lies to vehicles, with sun s had e
Fig . 55 Sun shade pulled up on a rear window
.. Pull the shade out and hang it in the bracket on
the upper door frame~
fig. 55.
Page 59 of 300

..... N
co ~ CX)
.....
"' U"I
.....
"' .....
Windshield wipers
Switching the windshield wipers on
Fig. S6 Windshield wiper lever
Fig. S7 Rea r w ipe r actuation
Move the windshield wiper lever to the corre·
spond ing pos ition:
@ · Windshield wiper off
(D · Interval mode. The windshield w iper auto
matica lly activates when you drive 2 mph (4 km/
h ). The higher the sensitivity of the rain sensor is
set (switch @ to the right), the earlier the wind
shield w ipers react to moisture on the wind·
shie ld. In some models, you can switch rain sen·
sor mode off and sw itch intermittent mode on in
the MMI* . Select:
!CARI function button> Car
sy stem s*
control button > Dri ver assist > Rain
s e nsor .
In inte rm ittent mode, yo u can adjust the
i nte rval time using the @switch.
@ · Slow wiping
® ·Fast wiping
@· Single wipe
® ·Clean the windshield . To e liminate water
d rople ts, the windshield wipe r perfo rms one af
terwipe operat io n after several seconds while
d riving . You can switch this f unction off by mov-
Lights and V ision
ing the lever to posit ion ® within 10 seconds of
the afterwipe operation. The afterwipe function
is react ivated the next time the ignition is sw itch
ed on.
T he rear wiper automatically switches on when
t h e reverse gear is engaged and the front wind ·
shield wipers a re on and in ope ration.
Cleaning the headlights *. The headlight washer
system * operates only when the headlights are
on . If you move the lever to position ®, the
headlights are washed in interva ls.
@ ·W ipe the rear window. The rear w iper moves
about eve ry 4 seconds .
(!)-Clean the rear w indow . T he number of wip·
ing oper ations depends on how long the lever is
held in position 7.
_&. WARNING
-
- The rain sensor is on ly intended to ass ist the
d river. The drive r is st ill respons ible fo r
manually switch ing the wipers on according
to the visibility conditions.
- The win dshield may not be treated w ith wa
ter-repelling w indshield coating agents. Un
favorable condit ions, such as wet ness, dark·
ness, low su n, can result in increased glare.
W iper blade chatte r is also possib le.
- Properly functioning windshield wipe r
b lades are required for a clea r view and safe
driving.
(D Note
- In the case of frost, check w hether the
w indshield wiper blades are frozen to t he
w indshield . Switching on the w indshield
w ipers can damage the w iper blades!
- Pr ior to us ing a car wash , the w indshield
w iper system must be sw itched off (lever in
posi tion 0) . This helps to prevent un inten
ti onal sw itch ing o n and dam age to the
w indshield wiper system.
(D Tips
- T he windshie ld w ipers are switched off
when the ignit io n is tu rned off. Act ivate the
w indshield wipe rs af ter the igni tion is .,.
57
Page 60 of 300

Lights and Vi sion
switched back on by moving the windshield
wiper lever to any position .
- Worn or dirty windshield wiper blades result
in streaking. This can affect the rain sensor
function . Check your windshield wiper
blades regularly.
- The washer fluid nozzles of the windshield
washer system are heated at low tempera
tures when the ignition is on .
- When stopp ing temporarily, e .g . at a traffic
light, the set speed of the windsh ield wipers
i s automatically reduced by one speed .
Cleaning windshield wiper blades
Clean the windshield wiper blades when they be
gin to leave streaks . Use a soft cloth and g lass
cleaner to clea n the windshield wipe r blades .
Front wipe r
.,. Place the windshield wiper arms in the service
pos ition. Refer to¢
page 58.
.,. Lift the wiper arm away from the front window .
Rear wiper
.,. Lift the wiper arm away from the rear window .
A WARNING
Dirty windshield wiper blades can impair your
view. This can lead to accidents.
Replacing windshield wiper blades
F ig. 58 Remov ing the w ipe r blad e
Wiper servic e position /blad e re placem ent
po sit ion
"' ij
a: CX) ID
.,. Switch the ignition off and move the windsh ie ld
wiper lever to position @ ¢
page 57, fig. 56.
58
The windshie ld wipers move into the service po
sition .
.,. To br ing the w ipers back into the origina l posi
tion, switch the ignition on and press the wind
shie ld w iper lever.
You can also turn the service position on or off in
the radio or MMI *:
.,. Switch the windshie ld w ipers off (posit ion @
¢page 57, fig. 56).
.,. Select:
!CAR I function button> Windshield
wiper s
> Servic e po sition > On /Off . Or
.,. Select :
!CAR I function button> Car system s*
control button > Ser vicing & ch eck s > Wiper
s ervi ce po sition
> On /Off .
Removing the wiper blade
.,. Lift the w indshield w iper arm up from the
w indshie ld .
.,. Press the locking knob@¢
fig. 58 on the w iper
blade. Ho ld the wipe r blade firmly .
.,. Remove the w iper blade in the direction of the
arrow .
Attaching the wiper blade
.,. Insert the new wiper blade into the mount o n
the wipe r arm @unt il you hear it latch into
place .
.,. Place t he w iper a rm back on the winds hield.
.,. Tur n the se rvice pos ition off.
A WARNING
F or your safety, you shou ld replace the wiper
b lades once or twice a year. See your author
ized Audi dealer for replacement blades.
(D Note
- The windshie ld wiper blades must only be
replaced when in the service pos ition! Oth
erwise, you r isk damaging the paint on the
hood or the w indshield wiper moto r.
- You should not move your vehicle or press
the windsh ield wiper lever when the wiper
arms are folded away from the windshie ld.
The windshie ld w ipers would move back in
to their or iginal pos ition and could damage
the hood and w indshie ld .
Page 61 of 300

..... N
co ~ CX)
..... I.Cl U"I
..... I.Cl .....
-To help prevent damage to the wiper sys
tem, a lways loosen blades which are frozen
to the windshield before operating wipers .
- To help prevent damage to wiper blades, do
not use gasoline, kerosene, paint thinner, or
other solvents on or near the wiper blades.
- To help prevent damage to the wiper arms
or other components, do not attempt to move the wipers by hand.
@ Tips
- Comme rcial hot waxes applied by automatic
car washes affect the how easi ly the glass
surface can be cleaned.
- You can also use the service position, for ex
ample, if you want to protect the windsh ield
from icing by using a cover.
Replacing the rear wiper blade
C
F ig . 59 Rea r w ip er: Remov ing t he wiper blade
Removing the wiper blade
.. Fold the windshield wiper arm away from the
windshield.
.. Pull the wiper blade and holder out of the
mount.
Attaching the wiper blade
.,. Press the wiper blade ho lder in the arrow direc
tion ¢
fig. 59 into the mount.
.. Fold the windshield wiper arm back onto the
windshield .
.&_ WARNING
-
For safety reasons, the windsh ield wiper
blades should be replaced once or twice each
year .
Lights and V ision
Mirror
Adjusting the exterior mirrors
Fig. 60 Forwa rd sect io n of driver's armr est: powe r mirror
contro ls
Adjusting exterior mirrors
.,. Rotate the knob to the© posit ion (driver's ex
t er ior mir ror) or to t he ® pos ition (passenger's
exterior mirror)¢
fig. 60.
.. Rotate the knob and the mirror so that you
have a clear view to the rear.
Heated mirrors
.,. Rotate the knob to pos it ion @.
Folding both exterior mirrors*
.. Turn the knob to position @.
Depend ing on the outside temperature, the mir
ror surfaces are heated until the ignition is
switched off- even if the knob is no longer in po
sition @.
You are well-advised to fold the exterior m irrors
in when maneuvering in tight spaces or when
leaving the car parked close to other veh icles.
Memory for exterior mirrors*
On vehicles with memory fo r the driver's seat, the
current setting for the exterior mirrors is auto
matically stored along with the seat position
¢ page 65.
Tilt function for the passenger's mirror*
When the reverse gear is engaged, the mirror
surface tilts downward slightly if the setting is
for the passenger's mirror (knob in position®
¢
fig. 60). This allows you to see the curb during
parallel parking. ..,.
59
Page 62 of 300

Lights and Vision
The mirror returns to its initial position as soon
as reverse gear is disengaged and vehicle speed is
above about 9 mph (15 km/h). The mirror also returns to its initial position if the switch is
moved to the driver's exterior mirror© or the ig
nition is switched off .
If the position of the mirror surface is changed
on a tilted mirror, this new position will be auto
matically assigned to the remote key when the
vehicle is taken out of reverse gear .
(D Note
- Curved mirror surfaces (convex or spheri cal*) increase your field of view. Remember
that vehicles or other objects will appear
smaller and farther away than when seen in
a flat mirror. If you use this mirror to esti
mate distances of following vehicles when
changing lanes, you could estimate incor rectly and cause an accident.
- If the mirror housing is moved unintention
ally (for example, while parking your vehi
cle), then you must first fold the mirror
electrically. Do not readjust the mirror
housing manually. You could damage the
motor which controls the mirror.
- If you wash the vehicle in an automatic car
wash, you must fold the exterior mirrors in to reduce the risk of damage to the mirrors.
Never fold power folding exterior mirrors*
by hand . Only fold them in and out using
the power controls.
(D Tips
If there should be a malfunction in the elec
trical system, you can still adjust the exterior
mirrors by pressing the edge of the mirror.
60
Dimming the mirrors
Fig. 61 Auto ma tic dimmin g rearv iew mirro r*
Manual anti-glare adjustment
.,. Move the small lever (located on the bottom
edge of the mirror) to the rear.
Automatically dimming mirrors* .,. To dim the rearview mirror and both exterior
mirrors*, press the @button. The diode @
turns on . The rearview and exterior mirrors*
dim automatically when light shines on them,
for example from headlights on a vehicle to the rear .
& WARNING
Electrolyte fluid can leak from automatic dim
ming mirrors if the glass is broken. Electro
lyte fluid can irritate skin, eyes and respirato
ry system.
- Repeated or prolonged exposure to electro
lyte can cause irritation to the respiratory
system, especially among people with asth
ma or other respiratory conditions. Get
fresh air immediately by leaving the vehicle
or, if that is not possible, open windows and
doors all the way.
- If electrolyte gets into the eyes, flush them
thoroughly with large amounts of clean wa
ter for at least 15 minutes; medical atten
tion is recommended .
- If electrolyte contacts skin, flush affected
area with clean water for at least 15 mi
nutes and then wash affected area with
soap and water; medical attention is recom
mended. Thoroughly wash affected clothing
and shoes before reuse.
Page 63 of 300

..... N
co ~ CX)
..... I.Cl U"I
..... I.Cl .....
-If swa llowed and person is conscious, rinse
mouth with water for at least 15 m inutes.
Do not induce vomit ing unless instructed to
do so by medical professional. Get medical
attent ion immed iately.
(D Note
Liquid electrolyte leaking from broken m irror
glass will damage any plastic surfaces it
comes in contact with. C lean up spilled elec
trolyte immediately w ith clean water and a
sponge.
@ Tips
- Switch ing off the dimming function of the
i nside rear v iew mirror also deact ivates the
automat ic dimming function of the exte rior
mir rors*.
- The automatic d imm ing mirrors do not dim
when the interior lighting is turned on or
the reverse gea r is selected .
- Automat ic dimming for the m irror on ly op
erates prope rly if the light str iking the in
s ide mirror is not hinde red by othe r objects.
Digital compass
Activating or deactivating the compass
A ppl ies to vehicles: with digital compass
The direction is displayed on the interior rear
view mirror.
Fi g. 62 Inside rea r view m irror: d igital compass activated
... To activate or deactivate, hold the @button
down until the red d isplay appears or disap
pears.
Lights and V ision
The digita l compass on ly works with the ignition
turned on. The directions are disp layed as initia ls :
N (North), NE (Northeast), E (East), SE (South
east),
S (South), S W (Southwest), W (West), NW
(Northwest).
(!_) Tips
To avoid inaccurate d irect ions, do not allow
any remote controls, electrical systems, or
metal parts close to the mirror.
Setting the magnetic deflection zone
App lies to vehicles: wi th digita l co mp ass
The correct magnetic deflection zone must be
set in order to display the directions correctly.
®
F ig . 63 No.rth Ame rica: magnetic deflection zone bounda
ri es
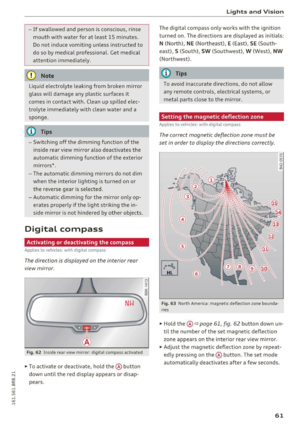
... Hold the@~ page 61, fig . 62 button down un
til the number of the set magnet ic deflection
zone appears on the in ter io r r ear view mirror.
... Adjust the magnetic deflection zone by repea t
ed ly press ing on the@ button. The set mode
automatically deactivates after a few seconds .
61
Page 64 of 300
Lights and Vi sion
Calibrating the compass
Applies to vehicles: with digital compass
The compass has to be recalibrated if the display
is wrong or inaccurate .
.,. Hold the@ button down until the letter C is
displayed on the interior rear view mirror.
.,. Drive in a circle at a speed of about 6 mph (10
km/h) until a d irection is shown on the interior
. . rear view mirror.
A WARNING
The digital compass is to be used as a direc
tional aid only. Even though you may want to
look at it whi le you are driving, you must still
pay attention to traffic, road and weather
conditions as well as other possible hazards.
62