Page 137 of 215

CHECKING AND
RESTORING TYRE
PRESSURE
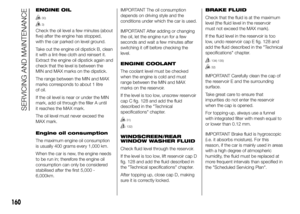
The compressor may also be used for
checking and possibly restoring tyre
pressure.
Proceed as follows:
❒if the spray bottle A fig. 103 is
connected to the compressor, you
need to press the release button L to
remove it;
❒connect the pipe to the tyre valve;
❒check the pressure on the pressure
gauge;
❒if the value of the pressure is too low,
fit the electric plug in the cigar-lighter
socket and switch on the
compressor.
IMPORTANT To adjust the possible
overpressure of the tyre, press the air
release button M.
IMPORTANT
24) Punctures caused by foreign
bodies can be repaired if the
damage does not exceed 4 mm in
diameter on the tread and on
the shoulder of the tyre
.
WARNING
105) Give the booklet to the
technicians who will be handling
the tyre that was treated using
the Fix&Go kit.
106) Punctures on the sides of the
tyre may not be repaired. Do not
attempt to use the Fix&Go kit if
the tyre was damaged as a result
of being used when underinflated.
107) If the wheel rim has been
damaged (bent so as to cause air
to leak), the wheel cannot be
repaired. Do not remove foreign
bodies (screws or nails) from
the tyre.
108) Do not operate the compressor
for longer than 20 minutes
consecutively. Risk of
overheating. The Fix&Go kit is not
suitable for definitive repairs, so
the repaired tyres may only be
used temporarily.
103AB0A0086
133
Page 138 of 215

109) The spray bottle contains
ethylene glycol. It contains latex
that might cause allergic
reactions. It is harmful if
swallowed. Eye irritant. It may
cause sensitisation if inhaled or
on contact. Avoid contact with
eyes, skin and clothes. In the case
of contact, wash immediately
with plenty of water. In the event
that it is swallowed, do not induce
vomiting. Rinse out your mouth,
drink large quantities of water and
seek immediate medical attention.
Keep out of the reach of children.
The product must not be used
by asthmatics. Do not inhale the
vapours during insertion and
suction. Call a doctor immediately
if allergic reactions are noted.
Store the spray bottle away from
heat sources. The sealant has
an expiry date.
110) Wear the protective gloves
provided with the Fix&Go kit.
111) Apply the adhesive label where
it can be easily seen by the driver
as a reminder that the tyre has
been treated with the Fix&Go kit.
Drive carefully, particularly on
bends. Do not exceed 80 km/h. Do
not accelerate or brake suddenly.112) If the pressure falls below 1.5
bar, do not drive any further: the
kit cannot guarantee proper seal
because the tyre is too damaged.
Contact an Abarth Dealership. If
instead a pressure value of at
least 1.5 bar is detected, restore
the correct pressure (with the
engine running and the
handbrake engaged), resume
driving and drive with great care
to the nearest Abarth Dealership.
113) You must always indicate that
the tyre was repaired using the
kit. Give the booklet to the
technicians who will be handling
the tyre that was treated using
the kit.
IMPORTANT
2) Replace the spray bottle
containing the sealant after the
expiry date. Dispose of the bottle
and the sealant properly. Have
them disposed of in compliance
with national and local
regulations.
134
IN AN EMERGENCY
Page 139 of 215
REPLACING A BULB
GENERAL
INSTRUCTIONS
❒Before replacing a bulb check the
contacts for oxidation;
❒burnt bulbs must be replaced by
others of the same type and power;
❒always check the headlight beam
alignment after replacing a bulb;
❒when a light is not working, check
that the corresponding fuse is intact
before replacing a bulb. For the
location of fuses, refer to the
paragraph "Replacing fuses" in this
chapter.
114) 115)
25) 26)
IMPORTANT When the weather is cold
or damp or after heavy rain or washing,
the surface of headlights or rear lights
may steam up and/or form drops of
condensation on the inside. This is
a natural phenomenon due to the
difference in temperature and humidity
between the inside and the outside
of the glass which does not indicate a
fault and does not compromise the
normal operation of lighting devices.
The mist disappears quickly when the
lights are turned on, starting from
the centre of the diffuser, extending
progressively towards the edges.
135
Page 140 of 215
TYPES OF BULBS
Various types of bulbs are fitted to your car:
All-glass bulbs:(type A) press-fitted. Pull to remove.
Bayonet type bulbs:(type B) to remove them press the bulb
and turn it anticlockwise.
Tubular bulbs:(type C) release them from their contacts to
remove.
Halogen bulbs:(type D) to remove the bulb, release the clip
holding the bulb in place.
Halogen bulbs:(type E) to remove the bulb, release the clip
holding the bulb in place.
Gas discharge bulbs (Xenon):(type F) to replace them,
contact an Abarth Dealership.
136
IN AN EMERGENCY
Page 141 of 215
Bulbs
Use Type Power Ref. Figure
Main beam headlights HI 55 W D
Dipped headlights H7 55 W D
Dipped headlights with gas discharge bulbs
(Xenon) (for versions/markets, where provided)DIS 35 W F
Front side lights/daytime running lights W2I/5W 5/2IW A
Front direction indicators WY2IW 21 W B
Front direction indicators (with xenon gas
discharge bulbs)PY24W 24 W B
Side direction indicators W5W 5 W A
Rear direction indicators PY2IW 2IW B
Rear side lights RI0W I0W B
Brake lights P2IW 2IW B
Reversing light P2IW 2IW B
Rear fog light P2IW 2IW B
Roof light C5W 5 W C
Luggage compartment light W5W 5 W A
Number plate light C5W 5 W C
Fog lights HI 55 W E
Third brake lights W5W 5 W A
137
Page 142 of 215
WARNING
114) Changes or repairs to the electrical system carried out incorrectly and without due consideration for the technical
specifications of the system may lead to malfunctioning and generate a fire hazard.
115) Halogen bulbs contain pressurised gas. If they break, glass fragments could fly everywhere.
IMPORTANT
25) Halogen bulbs must be handled by holding the metallic part only. Touching the transparent part of the bulb with
your fingers may reduce the intensity of the emitted light and even reduce the lifespan of the bulb. In the event of
accidental contact, wipe the bulb with a cloth moistened with alcohol and let the bulb dry.
26) Where possible, it is advisable to have bulbs changed at an Abarth Dealership. The correct operation and alignment
of the external lights are absolutely essential for the safety of the car and of compliance with the law.
138
IN AN EMERGENCY
Page 143 of 215

REPLACING AN
EXTERIOR BULB
For the type of bulb and power rating,
see paragraph "Replacing a bulb".
FRONT LIGHT CLUSTERS
The front light clusters contain side
lights, dipped headlights, main beam
headlights and direction indicator bulbs.
Access to the direction
indicator bulbs
Operating from the engine
compartment remove the rubber cap A
fig. 104.
Access to the dipped
headlight bulbs
Remove the rubber cap B fig. 104.Access to the side
light/daytime running
light (DRL) and main
beam headlight bulbs
Completely steer the wheels and open
guard door C fig. 105 (on the wheel
arch at the level of the lights) then
remove the rubber cap D fig. 105.
DIRECTION INDICATORS
Front
To change the bulb, proceed as follows:
❒remove the protective rubber cap
mentioned above;
❒turn the bulb holder A fig. 106
anticlockwise and remove it;
❒remove the pressure-fitted bulb and
replace it;
❒refit the bulb holder A by turning it
clockwise and locking it correctly;❒refit the rubber cap.
Side
104AB0A0088
105AB0A0089
106AB0A0090
107AB0A0091
139
To change the bulb, proceed as follows:
❒apply leverage at the point indicated
by the arrow, in such a way as to
compress the fixing clip and remove
unit B fig. 107
Page 144 of 215

❒turn the bulb holder anticlockwise,
extract the press-fitted bulb and
replace it;
❒refit the bulb holder in the lens, then
position unit B, ensuring that the
fastening clip clicks into place.
DIPPED HEADLIGHTS
To change the bulb, proceed as follows:
❒remove the protective rubber cap
mentioned above;
❒press the fastener A fig. 108 and
remove the bulb holder;
❒remove the pressure-fitted bulb and
replace it;
❒refit the bulb holder locking it
correctly;
❒refit the rubber cap.
116)
MAIN BEAM HEADLIGHTS
To change the bulb, proceed as
follows:
❒remove the protective rubber cap
mentioned above;
❒release the two bulb holding clips A
fig. 109;
❒extract the bulb and replace it;
❒fit the new bulb, making the outline of
the metallic part coincide with the
grooves on the reflector, then
reattach the bulb holding clips;
❒refit the rubber cap.SIDE LIGHTS/DAYTIME
RUNNING LIGHTS
To change the bulb, proceed as follows:
❒remove the protective rubber cap
mentioned above;
❒turn the bulb holder B fig. 109
anticlockwise and remove it;
❒remove the pressure-fitted bulb and
replace it;
❒refit the bulb holder B by turning it
clockwise and locking it correctly;
❒refit the rubber cap.
FOG LIGHTS
(for versions/markets, where provided)
For replacing these bulbs, contact
an Abarth Dealership.
108AB0A0092
109AB0A0093
140
IN AN EMERGENCY