2014 MITSUBISHI OUTLANDER SPORT key
[x] Cancel search: keyPage 273 of 388
System Settings8-36 For pleasant driving
8
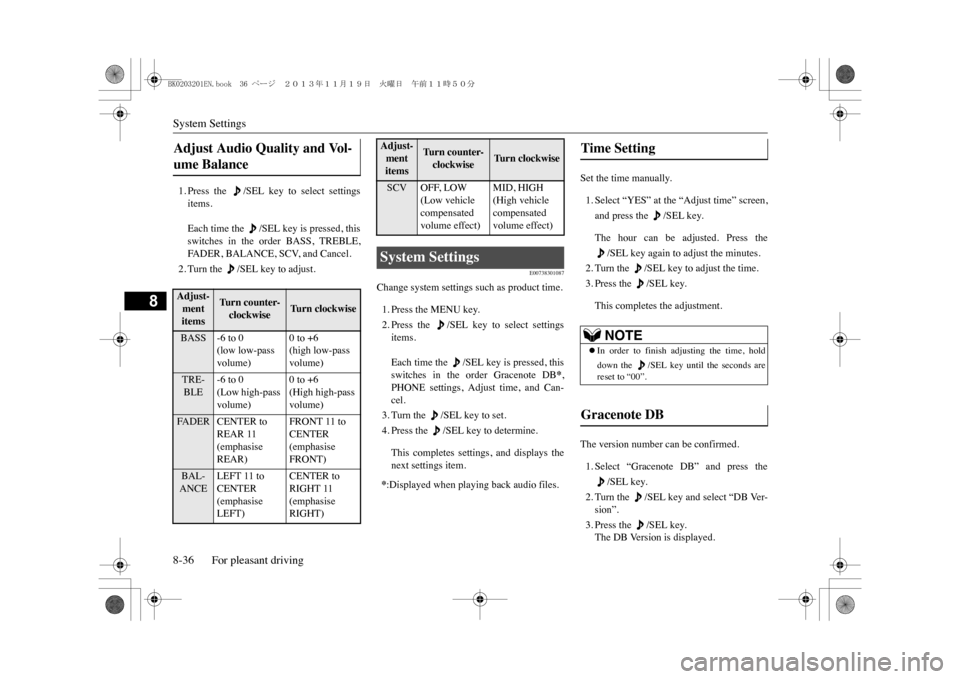
1. Press the /SEL key to select settingsitems.Each time the /SEL key is pressed, thisswitches in the order BASS, TREBLE,FA D E R , B A L A N C E , S C V, a n d C a n c e l .2. Turn the /SEL key to adjust.
E00738301087
Change system settings such as product time.1. Press the MENU key.2. Press the /SEL key to select settingsitems.Each time the /SEL key is pressed, thisswitches in the order Gracenote DB
*,
PHONE settings, Adjust time, and Can-cel.3. Turn the /SEL key to set.4. Press the /SEL key to determine.This completes settings, and displays thenext settings item.
Set the time manually.1. Select “YES” at the “Adjust time” screen,and press the /SEL key.The hour can be adjusted. Press the
/SEL key again to adjust the minutes.
2. Turn the /SEL key to adjust the time.3. Press the /SEL key.This completes the adjustment.
The version number can be confirmed.1. Select “Gracenote DB” and press the
/SEL key.
2. Turn the /SEL key and select “DB Ver-sion”.3. Press the /SEL key.The DB Version is displayed.
Adjust Audio Quality and Vol-ume Balance Adjust-ment items
Turn counter-clockwise
Tu r n c l o c k w i s e
BASS -6 to 0
(low low-pass volume)
0 to +6(high low-pass volume)
TRE-BLE
-6 to 0(Low high-pass volume)
0 to +6(High high-pass volume)
FA D E R C E N T E R t o
REAR 11 (emphasise REAR)
FRONT 11 to CENTER (emphasise FRONT)
BAL-ANCE
LEFT 11 to CENTER (emphasise LEFT)
CENTER to RIGHT 11 (emphasise RIGHT)
SCV OFF, LOW
(Low vehicle compensated volume effect)
MID, HIGH(High vehicle compensated volume effect)
System Settings *:Displayed when playing back audio files.Adjust-ment items
Tu r n c o u n t e r -clockwise
Tu r n c l o c k w i s e
Time Setting
NOTE
�zIn order to finish adjusting the time, holddown the /SEL key un
til the seconds are
reset to “00”.
Gracenote DB
BK0203201EN.book 36 ページ 2013年11月19日 火曜日 午前11時50分
Page 285 of 388
Bluetooth® 2.0 interface8-48 For pleasant driving
8
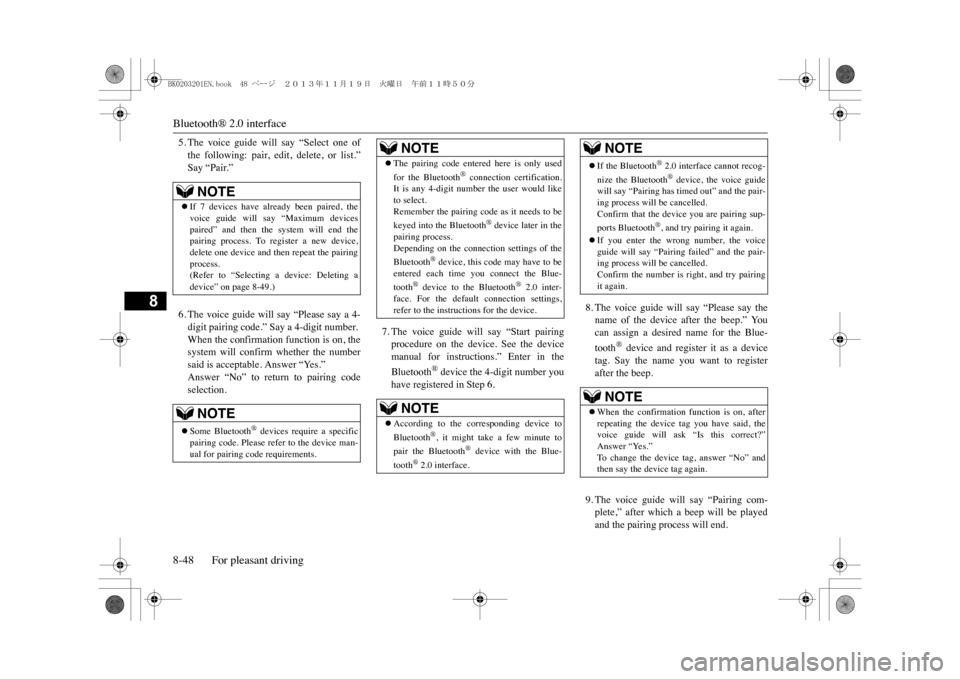
5. The voice guide will say “Select one ofthe following: pair, edit, delete, or list.”Say “Pair.”6. The voice guide will say “Please say a 4-digit pairing code.” Say a 4-digit number.When the confirmation function is on, thesystem will confirm whether the numbersaid is acceptable. Answer “Yes.”Answer “No” to return to pairing codeselection.
7. The voice guide will say “Start pairingprocedure on the device. See the devicemanual for instructions.” Enter in theBluetooth
® device the 4-digit number you
have registered in Step 6.
8. The voice guide will say “Please say thename of the device after the beep.” Youcan assign a desired name for the Blue-tooth
® device and register it as a device
tag. Say the name you want to registerafter the beep.9. The voice guide will say “Pairing com-plete,” after which a beep will be playedand the pairing process will end.
NOTE
�zIf 7 devices have already been paired, thevoice guide will say “Maximum devicespaired” and then the system will end thepairing process. To register a new device,delete one device and then repeat the pairingprocess.(Refer to “Selecting a device: Deleting adevice” on page 8-49.)NOTE
�zSome Bluetooth
® devices require a specific
pairing code. Please re
fer to the device man-
ual for pairing code requirements.
�zThe pairing code ente
red here is only used
for the Bluetooth
® connection certification.
It is any 4-digit number the user would liketo select.Remember the pairing code as it needs to bekeyed into the Bluetooth
® device later in the
pairing process. Depending on the connecti
on settings of the
Bluetooth
® device, this code may have to be
entered each time you connect the Blue-tooth
® device to the Bluetooth
® 2.0 inter-
face. For the default
connection settings,
refer to the instructions for the device.NOTE
�zAccording to the corresponding device toBluetooth
®, it might take a few minute to
pair the Bluetooth
® device with the Blue-
tooth
® 2.0 interface.
NOTE
�zIf the Bluetooth
® 2.0 interface cannot recog-
nize the Bluetooth
® device, the voice guide
will say “Pairi
ng has timed out” and the pair-
ing process will be cancelled.Confirm that the device you are pairing sup-ports Bluetooth
®, and try pairing it again.
�zIf you enter the wrong number, the voiceguide will say “Pairing failed” and the pair-ing process will be cancelled.Confirm the number is right, and try pairingit again.NOTE
�zWhen the confirmation function is on, afterrepeating the device tag you have said, thevoice guide will ask “Is this correct?”Answer “Yes.”To c h a n g e t h e d e v i c e t a g , a n s w e r “ N o ” a n dthen say the device tag again.NOTE
BK0203201EN.book 48 ページ 2013年11月19日 火曜日 午前11時50分
Page 304 of 388
Interior lamps
For pleasant driving 8-67
8
E00712102404
E00712400168
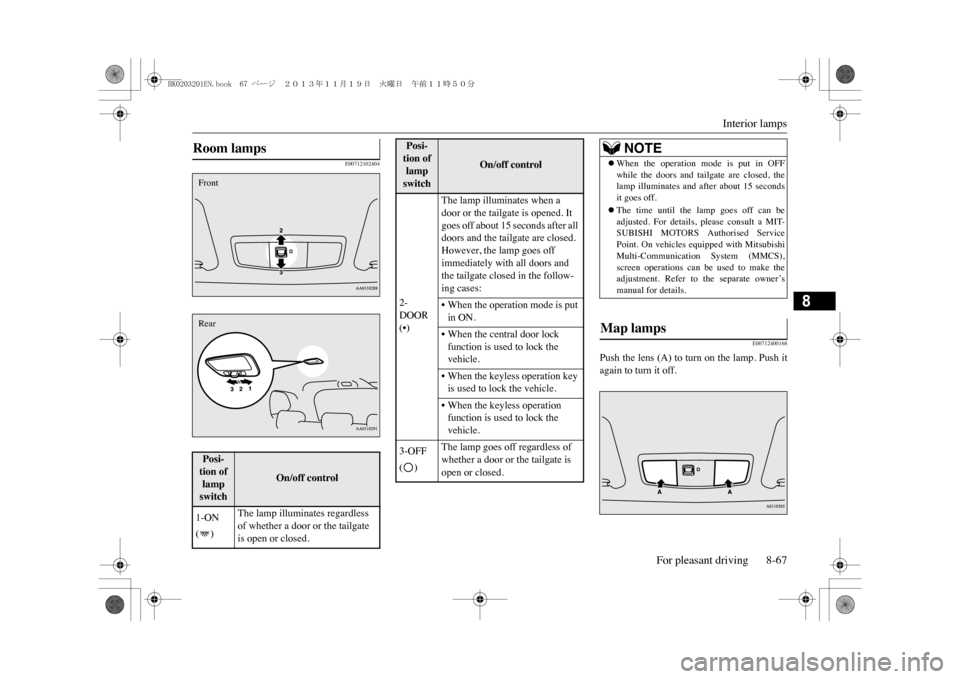
Push the lens (A) to turn on the lamp. Push itagain to turn it off.
Room lamps Posi-tion of lamp switch
On/off control
1-ON ()
The lamp illuminates regardless of whether a door or the tailgate is open or closed.
FrontRear
2-DOOR (•)
The lamp illuminates when a door or the tailgate is opened. It goes off about 15 seconds after all doors and the tailgate are closed.However, the lamp goes off immediately with all doors and the tailgate closed in the follow-ing cases:•When the operation mode is put in ON.•When the central door lock function is used to lock the vehicle.•When the keyless operation key is used to lock the vehicle.•When the keyless operation function is used to lock the vehicle.
3-OFF ()
The lamp goes off regardless of whether a door or the tailgate is open or closed.
Posi-tion of lamp switch
On/off control
NOTE
�zWhen the operation mode is put in OFFwhile the doors and tailgate are closed, thelamp illuminates and after about 15 secondsit goes off.�zThe time until the lamp goes off can beadjusted. For details, please consult a MIT-SUBISHI MOTORS Authorised ServicePoint. On vehicles e
quipped with Mitsubishi
Multi-Communication System (MMCS),screen operations can be used to make theadjustment. Refer to the separate owner’smanual for details.
Map lamps
BK0203201EN.book 67 ページ 2013年11月19日 火曜日 午前11時50分
Page 305 of 388
Storage spaces8-68 For pleasant driving
8
E00712700709E00712902385
If any of the interior lamps are left switchedon with the operation mode in OFF, it goes
off automatically after approximately 30 min-utes.The lamps will illuminate again after theyautomatically go off if the power switch isoperated, if one of the doors or the tailgate isopened or closed, or if the keyless entry sys-tem or keyless operation system is operated.
E00713103046
E00726200268
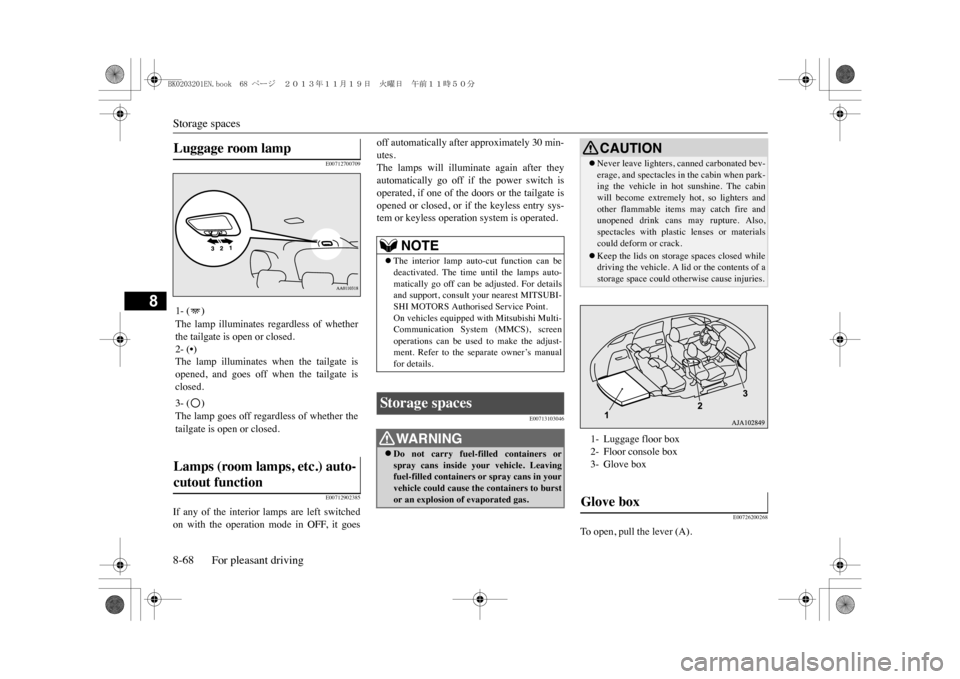
To o p e n , p u l l t h e l e v e r ( A ) .
Luggage room lamp 1- ( )The lamp illuminates regardless of whetherthe tailgate is open or closed.2- (•)The lamp illuminates when the tailgate isopened, and goes off when the tailgate isclosed.3- ( )The lamp goes off regardless of whether thetailgate is open or closed.Lamps (room lamps, etc.) auto-cutout function
NOTE
�zThe interior lamp auto-cut function can bedeactivated. The time un
til the lamps auto-
matically go off can be adjusted. For detailsand support, consult your nearest MITSUBI-SHI MOTORS Authorised Service Point.On vehicles equipped
with Mitsubishi Multi-
Communication System (MMCS), screenoperations can be used to make the adjust-ment. Refer to the se
parate owner’s manual
for details.
Storag e spaces
WA R N I N G�zDo not carry fuel-filled containers orspray cans inside
your vehicle. Leaving
fuel-filled containers or spray cans in yourvehicle could cause the containers to burstor an explosion of evaporated gas.
CAUTION�zNever leave lighters,
canned carbonated bev-
erage, and spectacles in the cabin when park-ing the vehicle in hot sunshine. The cabinwill become extremely hot, so lighters andother flammable items may catch fire andunopened drink cans may rupture. Also,spectacles with plastic lenses or materialscould deform or crack.�zKeep the lids on storage spaces closed whiledriving the vehicle. A lid or the contents of astorage space could otherwise cause injuries.1- Luggage floor box2- Floor console box3- Glove boxGlove box
BK0203201EN.book 68 ページ 2013年11月19日 火曜日 午前11時50分
Page 327 of 388
How to change a tyre9-16 For emergencies
9
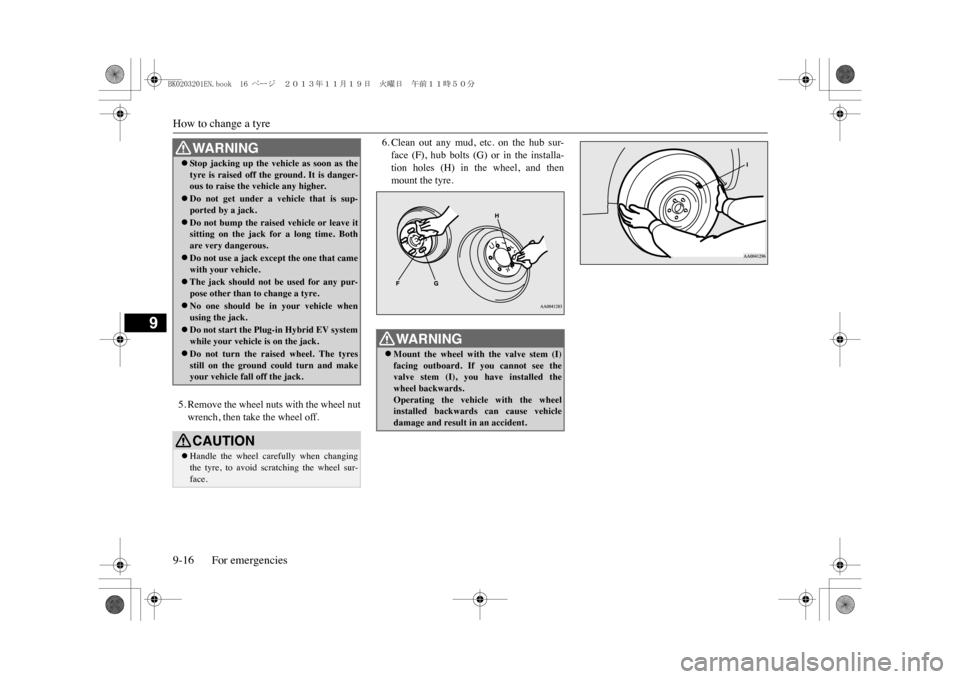
5. Remove the wheel nuts with the wheel nutwrench, then take the wheel off.
6. Clean out any mud, etc. on the hub sur-face (F), hub bolts (G) or in the installa-tion holes (H) in the wheel, and thenmount the tyre.
WA R N I N G�zSt o p j a c k i n g u p th e v e h i
cle as soon as the
tyre is raised off the ground. It is danger-ous to raise the vehicle any higher.�zDo not get under a vehicle that is sup-ported by a jack.�zDo not bump the raised vehicle or leave itsitting on the jack for a long time. Bothare very dangerous.�zDo not use a jack except the one that camewith your vehicle.�zThe jack should not be used for any pur-pose other than to change a tyre.�zNo one should be in your vehicle whenusing the jack.�zDo not start the Plug-in Hybrid EV systemwhile your vehicle is on the jack.�zDo not turn the raised wheel. The tyresstill on the ground could turn and makeyour vehicle fall off the jack.CAUTION�zHandle the wheel carefully when changingthe tyre, to avoid scratching the wheel sur-face.
WA R N I N G�zMount the wheel with the valve stem (I)facing outboard. If you cannot see thevalve stem (I), you have installed thewheel backwards.Operating the vehicle with the wheelinstalled backwards can cause vehicledamage and result in an accident.
BK0203201EN.book 16 ページ 2013年11月19日 火曜日 午前11時50分
Page 384 of 388
Alphabetical index
13-3
13
Headlamps
Bulb capacity
...............................
11-22
Headlamp flasher
............................
6-42
Replacement
......................
11-23
, 11-24
Switch
...........................................
6-40
Heated mirror
.......................................
7-9
Heated seats
.........................................
5-4
Heating
..............................................
8-12
High mounted stop lamp
....................
11-22
Hill start assist
....................................
7-27
Hinges and latches lubrication
............
11-15
Horn switch
........................................
6-54
I
If the vehicle breaks down
.....................
9-2
Indicator lamps
...................................
6-36
Information screen display
...................
6-39
Inside rear-view mirror
..........................
7-6
Inside tailgate release
..........................
4-24
Inspection and maintenance following rough road operation
..................................
7-21
Instruments
..........................................
6-2
Interior lamps
.....................................
8-66
J
Jack
.....................................................
9-7
Storage
............................................
9-6
Jump starting (Emergency starting)
........
9-2
K
Keyless entry system
............................
4-3
Keyless operation system
......................
4-6
Keys
...................................................
4-2
L
Labeling
............................................
12-2
Lamp monitor buzzer
..........................
6-42
Lane Departure Warning (LDW)
.........
7-60
Leakage (Fuel, engine coolant, oil and exhaust gas)
................................................
11-14
Licence plate lamps
Bulb capacity
................................
11-22
Replacement
.................................
11-28
Link System
.......................................
8-40
Low voltage electrical system
..............
12-8
Lubricants
........................................
12-10
Luggage hooks
...................................
8-73
Luggage room lamp
............................
8-68
Bulb capacity
................................
11-23
M
Making a flat seat
.................................
5-8
Making a luggage area
..........................
5-7
Manual transmission oil
.....................
12-10
Map lamps
.........................................
8-67
Bulb capacity
...............................
11-23
Mass
..................................................
12-5
Meter illumination control
.....................
6-2
Mirror
Inside rear-view mirror
......................
7-6
Outside rear-view mirror
...................
7-7
Modification/alterations to the electrical or fuel systems
.....................................
2-15
Multi information display
......................
6-3
O
Oil
Engine oil
...........................
11-5
, 12-10
Manual transmission oil
.................
12-10
Rear differential oil
.......................
12-10
Transfer oil
..................................
12-10
Operation under adverse driving conditions
..
9-22Other specifications
.............................
12-9
Outside rear-view mirrors
......................
7-7
Overheating
..........................................
9-4
P
Parking
................................................
7-5
Parking brake
...................................
7-4
Plug-in hybrid EV system
BK0203201EN.book 3 ページ 2013年11月19日 火曜日 午前11時50分