Page 57 of 244

Digital compass
Activating or deactivating the compass
Applies to vehicles: with d ig ital compass
The direction is displayed on the interior rear
view mirror.
Fi g. 63 Ins ide rearv iew m irror: dig ita l c ompass act iva t
ed
.,.. To activate or deact ivate, hold the ® button
down until the red disp lay appears or disap
pears .
T he digital compass only works with the igni
tion turned on . The directions are displayed as
in itials:
N (North), NE (Northeast), E (East),
S E (Southeast), S (South), SW (Southwest),
W (West), NW (Northwest).
(D Tips
To avo id inaccurate directions, do not al
low any remote controls, electrical sys
tems, or metal parts close to the mirror.
Clear vi sion 55
Setting the magnetic deflection zone
App lies to vehicles: wit h digital compass
The correct magnetic deflection zone must be
set in order to display the directions correctly.
F ig. 64 Magnet ic deflect ion zo ne bo un daries
.,.. Hold the ® button ¢ page 55, fig . 63 down
until the number of the set magnetic deflec
tion zone appears on the interior rear view
m irror .
.,.. Adjust the magnetic deflect ion zone by re
peated ly pressing on the@ button . The set
mode automatically deactivates after a few
seconds .
Calibrating the compass
Applies to vehicles: wit h digi tal co mpass
The compass has to be recalibrated if the dis
play is wrong or inaccurate .
.,.. Hold the@ but ton down unt il the letter C is
disp layed on the interior rearview mirro r .
.,.. Dr ive in a circle at a speed of about S mph
(10 km/h) u ntil a d irectio n is shown on the
interior rearview mirror.
A WARNING
The digital compass is to be used as a di rectional aid only. Even though you may
Page 58 of 244
56 Clear vision
want to look at it w hile you are driv ing, you
m ust still pay attenti on to t raffic, r oad and
weat her conditions as well as other possi
ble hazards .
Page 59 of 244

Seats and storage
General recommen
dations
Why is your seat adjustment so important?
The safety belts and the airbag system can
only provide maximum protection if the front
seats are correctly adjusted.
There are various ways of adjusting the front
seats to provide safe and comfortable support
for the driver and the front passenger. Adjust
your seat properly so that :
- you can easily and quick ly reach all the
switches and controls in the instrument
panel
- your body is properly supported thus reduc ing physical stress and fatigue
- the safety belts and airbag system can offe r
maximum protection
¢ page 111.
In the following sections, you will see exactly
how you can best adjust your seats .
There are special regulations and instructions
for installing a child safety seat on the front passenger's seat. Always heed the informa
tion regard ing child safety provided in
¢ page 132, Child Safety.
A WARNING
Incorrect seating position of the driver and
all other passengers can result in serious
personal injury.
- Always keep your feet on the f loor when
the vehicle is in motion -never p ut your
feet on top of the instrument panel, out
of the w indow or on top of the seat cush
ion! This applies espec ially to the passen
gers . If your seating position is incorrect
you increase the r isk of injury in the case
of sudden braking or an acc ident. If the
airbag inflates and the seating position
is incorrect this could result in personal
injury or even death.
- It is important for bo th the driver and
front passenger to keep a distance of a t
Seat s an d sto rage 57
least 10 inches (25 cm) between them
selves and the steering wheel and/or in
strument panel. If you're s itting any
closer than th is, the airbag system can
not protect you properly. In addition to
this, the front seats and head restra ints
must be adjusted to yo ur body height so
that they can give you max imum prote c
tion.
- Always try to keep as much distance as
possible be tween yourself and the s teer
ing wheel o r instrument pane l.
- Do not adjust the driver's or front pas
senger's seat whi le the vehicle is moving.
Your seat may move unexpected ly, caus
ing sudden loss of vehicle control and
personal injury . If you ad just yo ur seat
while the veh icle is moving, you are out
of posit ion.
Driver's seat
The correct seat position is important for safe
and relaxed driving.
We recommend that you adjust the driver's
seat in the fo llowing manner:
.,. Adj ust the seat in fore and aft direction so
t ha t you can easily push the peda ls to the
floor whi le keeping your knee sligh tly bent
c::> A in Why is your seat adjustment so im
portant? on page
57 .
.,. Adjust the seatback so that when you sit
w ith your back against the seatback, you can
still grasp the top of the steering wheel.
.,. Pos it ion the head restrai nt accord ing to the
occupant 's height
c::> page 59. For maxi
mum protection, the top of the head re
straint shou ld be at least at eye level, pref
erably higher and idea lly level with the top
of the head
¢ page 96, fig. 103 .
A WARNING
Never place any objects in the dr iver's foot
well. An object could get into the pedal
area and interfere with pedal funct ion. In
case of sudden braking or an acc ident, you
would not be able to brake or accelerate!
Page 60 of 244

58 Seats and storage
Front passenger's seat
Always move the front passenger seat into
the rearmost position .
To avoid contact with the airbag while it is de
ploying, do not sit any closer to the instru
ment panel than necessary and always wear
the three-point safety belt provided adjusted
correctly . We recommend that you adjust the
passenger's seat in the following manner:
• Bring the backrest up to an (almost) upright
pos it ion.
Do not ride with the seat reclined .
• The idea l position fo r the head restraint is
with the upper edge of the restraint leve l
with the top of your head ¢
page 59. You
shou ld
not lower the top of the restraint be
low the level of your eyes .
• Place your feet on the floor in front of the
passenger's seat .
Power seats
Adjustment switches
The operating logic for the switches corre
sponds to the construction and function of
the seat.
Fig. 65 Adjust men t swi tc h es : locat io ns on dr iver seat
The operating logic for the switches corre
sponds to the construction, the design and
the function of the seat. Push or pull either
switch in exactly the same d irect ion you want
the corresponding part of the seat to move.
Adjustment switches
CD Adjusting the lumbar support
@ Adjusting seat height and fore-and-aft po
sition @
Adjusting the angle of the seatback
Power seat adjustment
The switches can be moved in various direc
tions to allow precis e adjustment .
Read and heed all warnings before you adjust
your seat.
¢ &_ .
Adjusting the curvature of the lumbar
support
• Push the forward or rear depression on the
switch shell
CD C? page 58, fig. 65 to in
crease or decrease the back rest curvature.
Adjusting the height of the lumbar
support
• Push the top or bottom depression on the
sw itch shell
CD to raise or lower the support
in the backrest.
Moving the front seats forward or
backward
• Press the switch@ forward or backward
horizontally .
Adjusting the seat height
• Pull or p ush the switch @evenly at both
ends to raise or lower the seat.
Angling the seat cushion up and down
(front)
• Pull or push the switch @at the front only
to raise or lowe r the seat.
Angling the seat cushion up and down
(rear)
• Pull or push the switch @at the rear only to
raise or lower the seat.
Adjusting the seatback
• Push or pull the switch @ in the same direc
tion you want the seatback to tilt.
A WARNING "---
- Never adjust the driver's or front passen-
ger seat while the vehicle is moving . If
you do this while the vehicle is moving,
~
Page 61 of 244

you will be out of position. Always adjust
the driver's or front passenger seat when
the vehicle is not moving.
- Be careful when adjusting the seat
height. Check to see that no one is in the
way, or serious injury could result!
- Because the seats can be electrically ad justed with the ignition key removed, never leave children unattended in the
vehicle. Unsuperv ised use of the electr ic
seat adjustments may cause serious in
jury.
- To reduce the r isk of injury in the case of
sudden braking or accident, front pas
sengers must neve r ride in a moving ve
hicle wi th the seatback recl ined. Safety
belts and the airbag system offer maxi
mum protection on ly when the seatback
is upright and the safety belts are prop
erly posit ioned on the body. The more
the seatback is reclined, the greater the
risk of personal injury from an incorrect
seating pos ition and improperly posi
tioned safety belts!
- Always make sure the front seatbacks are
in the upright posit ion and securely
locked in place when dr iv ing .
Head restraints
Adjusting head restraints
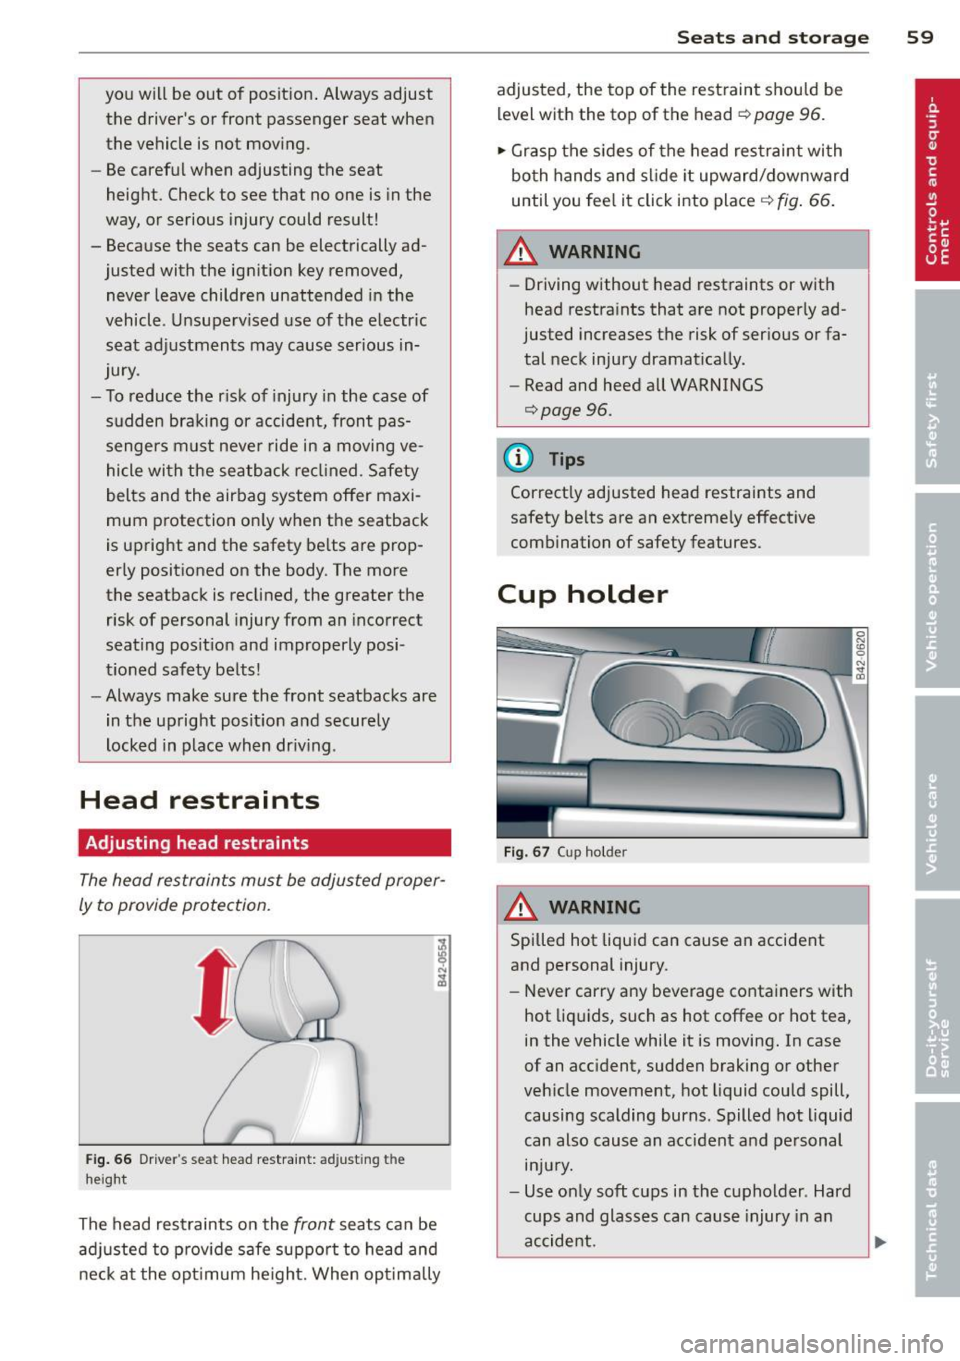
The head restraints must be adjusted proper
ly to provide protection.
Fig . 66 Drive r's seat head restraint: adjusting the
height
The head restraints on the front seats can be
adj usted to p rov ide safe support to head and
neck at the opt imum he ight. When opt imally
S ea ts a nd s to rage 59
adjusted, the top of the restraint should be
level with the top of the head
c::> page 96.
'" Grasp the s ides of the head restraint with
both hands and slide it upward/downward
until you fee l it click into place
c::> fig . 66.
& WARNING ~ -
- Driving without head restraints or with
head restra ints that are not properly ad
justed increases the risk of serious or fa
tal neck injury dramat ically.
- Read and heed all WARNINGS
<=:>page 96.
@ Tips
Correctly adjusted head restraints and
safety be lts are an extremely effective
combination of safety features.
Cup holder
F ig. 67 Cup holder
A WARNING
Spilled hot liquid can cause an accident
and personal injury.
-
- Never carry any beverage containers with
hot liq uids, such as hot coffee or hot tea,
in the vehicle while it is moving. In case
of an acc ident, sudden braking or other
veh icle movement, hot liquid could spill,
causing scalding burns. Spilled hot liquid
can also cause an accident and personal injury.
- Use only soft cups in the cupholder . Hard
cups and glasses can cause injury in an
accident.
Page 62 of 244

60 Seats and st o rage
- Never use the cupho lder or adapter as an
ashtray- risk of f ire.
CD Note
On ly drink containe rs with lids should be
carried in the cupho lder. Liquid could spill
out and damage your vehicle's e lectronic
equ ipment or sta in the upholstery, etc.
Ashtray
Fig . 68 Center console: ashtray
The asht ray is inserted in the cupholder.
Opening the ashtra y
... Fold the cover upward.
Emptying the a shtray
,.. Lift the closed ashtray up o ut of the cu
pholder.
A WARNING
Never put waste paper in the ashtray. Hot
ashes or other hot objects in the ashtray
cou ld set waste paper on fire.
Cigarette Lighter/
socket
N
-"' 0 ..:. ... m
The c igarette lig hte r or socket only wo rk with
the ign ition on.
Using the cigarette lighter
,.. Slide the cover open to reach the cigarette
lighter
qpage 60.
> Push the knob in.
,.. Wait unt il the cigarette lighte r knob pops
out. ,..
Remove the cigarette lighter immediately
and use it .
... Reinsert cigarette lighter into the socket af
ter use.
Connecting an a ppliance
,.. Slide t he cover open to reach the c igarette
lighter .
,.. Remove cigarette lighter .
... Plug in appliance to be used.
T he socket of the c igarette lighter may be
u sed for 12-volt appliances with maximum
consumption of up to 100 watts, such as a
flash light, small vacuum cleaner, etc.
A WARNING
-Improper use of the cigarette lighter can
cause ser ious injury or start a fire.
- Be careful when using the c igarette light
er. If you do not pay attention to what
you are doing when you are us ing the cig
arette lighter you can burn you rself.
CD Note
- To avoid damaging the socket, only use
plugs t hat fit properly.
- Only use the cigarette lighter socket as a
power source for e lectr ica l accessories
for short durations . Use t he sockets in
the vehicle when a power source is need ed for longer du rat ions .
(0 Tips
-When the eng ine is off and accessories
are st ill plugged in and are on, t he vehi
cle battery can still be d ra in ed.
- The ve hicle battery must not be charged
w ith a standard small charger that pl ugs
into the cigarette lighter or outlet .
Storage
, General
A WARNING
- Always remove objects from the instru
men t pa nel. A ny items not put away
-
Page 63 of 244

could slide around inside the vehicle
wh ile driving or when accelerating or
when applying the brakes or when driv
ing around a corner .
- When you are driving make sure that
anything you may have placed in the cen
ter console or other storage locations
cannot fa ll out into the footwells . In case
of sudden braking you would not be able
to brake, depress the clutch or acceler
ate.
- Any articles of cloth ing that you have
hung up must not interfere with the driv
er's v iew. The coat hooks are designed
only for lightweight clothing. Never hang
any clothing with hard, pointed or heavy
objects in the pockets on the coat hooks .
During sudden braking or in an accident -
especially if the airbag is deployed -
these objects could injure any passen
gers inside the veh icle .
Glove compartment
The glove compartment is illuminated and
can be locked.
Fig. 69 Glove compar tme nt
To open glove compartment
• Pull the handle ~ fig . 69 in the direction of
the arrow, push down lid to the fully open
pos it ion .
To close glove compartment
• Push the glove compartment lid upward un
t il the lock engages .
The glove compartment light comes on as the parking or driving lights are switched on and
Seats and storage 61
the compartment is opened . You will find a
glasses case in the lid.
T he glove compartment has a standard
12-
volt socket for connecting electrical accesso
ries. The power consumption at the outlet
must not exceed 100 watts. The socket works
only w ith the ignition switched on.
_& WARNING
To reduce the risk of personal injury in an
accident or sudden stop, always keep the
g love compartment closed while driving.
Storage compartment in the front seats
Applies to vehicles: with storage compartment in the
front seats
There is a fold-out storage compartment in
the front of the seats .
Opening
• Lift the handle and pull the drawer out.
Closing
-
• Push the drawer in completely until it latch
es.
(D Tips
The maximum carrying capacity 2.2 lbs.
(1 kg).
Storage compartments between the
, seat backrests
The storage compartments are illuminated
and can be locked with the vehicle key.
F ig . 70 Storage compartments betwee n the seat
back rests
Page 64 of 244
62 Seats and storage
The CD changer* or the Audi Music Interface*
are located in the lower storage compart
ment.
Opening the upper storage compartment
.,. Fold the lid upward in the direction of the
arrow @"*
fig. 70.
Opening the lower storage compartment
.,. Fold the lid downward in the d irect ion of the
arrow @.
A WARNING
Always keep the storage compartments
closed when driving to help reduce the risk
of injury.
(D Tips
Both lids must be closed in order to lock
the compartments.
-