Page 65 of 183
 Owners Manual Seats and Stowage
64
Closing air inlet
– Push the lock as far as the stop downwards.
On vehicles fitted with air conditioning, the storage compartment is equipped with
a lockable inlet for therma")
Seats and Stowage
64
Closing air inlet
– Push the lock as far as the stop downwards.
On vehicles fitted with air conditioning, the storage compartment is equipped with
a lockable inlet for thermally treated (warmed-up) air.
At open air supply, air flows into the storage with a temper ature which is as high as
the one out of the air outlet nozzle s, depending on temperature setting.
The air inlet in the storage compartment is connected to position
through adjust-
ment of the control dial for air distribu tion. This position causes the maximum
amount of air to flow into the storage co mpartment (depending on the rotary regu-
lator position for the fan).
You can use the storage compartment, for example, to temper drinks cans, etc.
If you do not use the air inlet in the storage compartment, the end cover should
always be kept closed.
Note
Push the lid of the armrest up to stop to the rear before operating the handbrake.Rear seat armrest with storage compartment*A storage compartment* is located in the armrest. You open the compartment by
pressing the button on the front side and raising the cover fig. 76.
Storage compartment in rear centre console*The storage compartment is equipped with a removable insert.
– Open the storage compartment by pulling on the upper edge of the storage
compartment in the direction of arrow fig. 77.
WARNING
The storage compartment is not a substitu te for the ashtray and must also not
be used for such purposes - risk of fire!Seat backrest with opening for skis*Fig. 78 Rear seats: Cover handle/luggage compartment: Unlock buttonAfter folding open the armrest and the lid, an opening in the seat backrest becomes
visible through which you can push long objects e.g. skis etc. You can fold open the
armrest and the lid from the passenger or luggage compartment.
A
Fig. 76 Armrest of rear seats:
Fig. 77 Centre console at rear: Storage
compartment
A
s2lk.2.book Page 64 Monday, April 18, 2011 7:41 AM
Page 66 of 183
 Owners Manual Seats and Stowage65
Using the system
Safety
Driving Tips
General Maintenance
Breakdown assistance
Technical Data
Opening from passenger compartment– Pull down the armrest of the rear seat at the loo")
Seats and Stowage65
Using the system
Safety
Driving Tips
General Maintenance
Breakdown assistance
Technical Data
Opening from passenger compartment– Pull down the armrest of the rear seat at the loop page 52.
– Pull the handle up to the stop in upward direction and fold open the lid down- wards page 64, fig. 78 - left.Opening from luggage compartment– Push the unlock button downwards page 64, fig. 78 - right and fold the lid
(with armrest) to the front.Closing– Fold the cover and the arm rest upwards as far as the stop. The cover must click
into place audibly.
Ensure that the armrest is always locked into place after closing. You can recognise
this on the fact that the red field above the unlocking button of the luggage
compartment is not visible.Clothes hooks*The clothes hooks are located on the middle pillar and on the handle in the head-
liner above each of the rear doors.
WARNING
•
Ensure that any clothes hanging from the hooks do not impair your vision to
the rear.
•
Use the hooks for hanging only light items of clothing and ensure that there
are no heavy or sharp-edge d objects in the pockets.
•
The maximum permissible load of the hooks is 2 kg.
•
Do not use clothes hangers for hanging up items of clothing otherwise this
will interfere with the protecti on offered by the head airbag*.
s2lk.2.book Page 65 Monday, April 18, 2011 7:41 AM
Page 67 of 183
 Owners Manual Heating and air conditioning system
66
Heating and air conditioning systemAir outlet ventsThe information provided is valid for all vehicles.Fig. 79 Air vents at the front
Fig. 80 Air vents at the r")
Heating and air conditioning system
66
Heating and air conditioning systemAir outlet ventsThe information provided is valid for all vehicles.Fig. 79 Air vents at the front
Fig. 80 Air vents at the rearOpen air outlet vents– Turn the vertical thumbwheel (not when in the end position).
Close air outlet vents– Turn the vertical thumbwheel into the end position.Redirecting air flow– Swivel upward or downward the grille of the vents in order to set the height of
the air flow using the vertically arranged thumbwheel.
– Turn the horizontal thumbwheel on the ve nt to the right or left in order to
change the air flow to the appropriate side.
The air outlet vents 3, 4 fig. 79 and 6 fig. 80 can be closed and opened individ-
ually.
The air outlet vents 6 are only fitted on vehicles with higher centre console.
Warmed, unwarmed or cooled air will flow out of the air outlet vents according to
the setting of the regulator of the heating or the air conditioning system* and the
atmospheric conditions.
Note
The air outlet vents 2 ensure in the ventilation and cooling mode for a comfortable
(no-draught) ventilation of th e interior of the vehicle, also if the air outlet vents 4
are closed.
s2lk.2.book Page 66 Monday, April 18, 2011 7:41 AM
Page 68 of 183
 Owners Manual Heating and air conditioning system67
Using the system
Safety
Driving Tips
General Maintenance
Breakdown assistance
Technical Data
HeatingUsing the system
The heating system delivers air into the inte")
Heating and air conditioning system67
Using the system
Safety
Driving Tips
General Maintenance
Breakdown assistance
Technical Data
HeatingUsing the system
The heating system delivers air into the interior of the vehicle and
warms it as required.Fig. 81 Heating: Control elementsSetting temperature– Turn the control dial fig. 81 to the right in order to increase the tempera-
ture.
– Turn the control dial to the left in order to increase the temperature.Controlling blower– Turn the blower switch into one of the po si ti o ns , 1 to 4, in o rd e r t o sw itc h the
blower on.
– Turn the blower switch into position 0 in order to switch the blower off.
– If you wish to shut off the fresh air su pply, use the button - recirculated air
mode .Control for air distribution– You can adjust the direction of the air flow using the air distribution control
page 66.
Rear window heater– Press button . Further information page 44, “Rear window heater”.
The air inlet in front of the windscreen must be free of ice, snow or leaves in order
to ensure that the heating and ve ntilation systems operate properly.
The heating effect depends on the coolan t temperature. The full heating effect
does not kick in until the engine is run in.
The blower should aways be on to prevent the windows from misting up.
WARNING
You should not leave recirculated air mode on over a longer period of time, as
“stale” air may result in fatigue in the dr iver and occupants, divert your attention
and also cause the windows to mist up. Th e risk of having an accident increases.
Switch recirculated air mode off as soon as the windows begin misting up.
Note
•
The whole heat output will be needed to unfrost the windscreen and side
windows. No warm air will be fed to the footwell. This can lead to restriction of the
heating comfort.
•
The used air streams out through the air removal openings in the luggage
compartment.
AABB
1
C
2
s2lk.2.book Page 67 Monday, April 18, 2011 7:41 AM
Page 69 of 183
Heating and air conditioning system
68
Set heatingRecommended settings of heating controls for:
Setup
Setting of the control dial
Button
Air outlet vents 3
Air outlet vents 4
Defrosting the windscreen and
side windows
To the right up to
the stop
3
Do not switch on
Open and align with the side window
Closing
Free windscreen and side win-
dows from mist
Desired tempera- ture
2 or 3
Do not switch on
Open and align with the side window
Closing
The fastest heating
To the right up to the stop
3
briefly switched on
Opening
Opening
Comfortable heating
Desired tempera- ture
2 or 3
Do not switch on
Opening
Closing
Fresh air mode - ventilation
To the left up to the stop
Desired position
Do not switch on
Opening
Opening
1
A
B
C
s2lk.2.book Page 68 Monday, April 18, 2011 7:41 AM
Page 70 of 183
 Owners Manual Heating and air conditioning system69
Using the system
Safety
Driving Tips
General Maintenance
Breakdown assistance
Technical Data
Recirculated air mode
In recirculated air mode air is sucked out of t")
Heating and air conditioning system69
Using the system
Safety
Driving Tips
General Maintenance
Breakdown assistance
Technical Data
Recirculated air mode
In recirculated air mode air is sucked out of the interior of the vehicle
and then fed back into the interior.Recirculated air mode prevents polluted ai r outside the vehicle from getting into the
vehicle, for example when driving through a tunnel or when standing in a traffic jam.Switching recirculated air mode on– Press the button . The warning light in the button page 67, fig. 81 goes
out.Switching recirculated air mode off– Once again press the button . The warning light in the button goes out.
The recirculated air mode is switched off au tomatically if the air distribution control
is in position
page 67, fig. 81 . You can also switch recirculated air mode on
again from this setting by re peatedly pressing pushbutton .
WARNING
You should not leave recirculated air mode on over a longer period of time, as
“stale” air may result in fatigue in the driver and occupants, divert your attention
and also cause the windows to mist up. Th e risk of having an accident increases.
Switch recirculated air mode off as soon as the windows begin misting up.Climatic*Description
The Climatic is a combined cooling and heating system. It makes it
possible to optimally control the air temperature at any season of
the year.Description of the Climatic
It is important for your safety and for your driving comfort that the Climatic is oper-
ating properly.
The cooling only op erates if button page 70, fig. 82 is pressed, and the
following conditions are met:
•
engine running,
•
outside temperature above approx. +2 °C and
•
blower switch switched on (positions 1 to 4).
If the cooling system is switched on, the temperature and air humidity drops in the
vehicle. The wellbeing of the occupants of the car is enhanced as a result of this
particularly at high outside temperatur es and a high air humidity. The system
prevents the windows misting up during the cold season of the year.
The heating effect depends on the coolan t temperature. The full heating effect
does not kick in until the engine is run in.
It is possible to briefly activate recirculated air mode in order to enhance the cooling
effect .
Air at a temperature of about 5 °C may fl ow out of the vents under certain circum-
stances when the cooling system is operat ing. Lengthy and uneven distribution of
the air flow out of the vents and large differences in temperature, for example when
getting out of the vehicle, can resu lt in chills in sensitive persons.
The air inlet in front of the windscreen must be free of ice, snow or leaves in order
to ensure that the heating and cooling systems operate properly.
After switching on the cooling Condensation from the evaporator of the air condi-
tioning may drip down and form a puddle below the vehicle. This is quite normal and
not an indication of a leak!
WARNING
•
For your own safety and that of othe r road users, ensure that all the
windows are free of ice, snow and mistin g. Please familiarize yourself about how
to correctly operate the heating and ve ntilation systems, how to demist and
defrost the windows, as well as with the cooling mode.
•
You should not leave recirculated air mo de on over a longer period of time,
as “stale” air may result in fatigue in the driver and occupants, divert your atten-
tion and also cause the windows to mist up. The risk of having an accident
increases. Switch recirculated air mode off as soon as the windows begin
misting up.Note
•
We recommend that you do not smoke in the vehicle when the recirculating air
mode is operating since the smoke which is drawn at the evaporator from the inte-
rior of the vehicle forms deposits in the evaporator of the air conditioning system.
This produces a permanent odour when th e air conditioning system is operating
C
AC
2
s2lk.2.book Page 69 Monday, April 18, 2011 7:41 AM
Page 71 of 183
 Owners Manual Heating and air conditioning system
70
which can only be eliminated through considerable effort and expense (replace-
ment of compressor).Using the systemFig. 82 Climatic: Control elementsSetting tem")
Heating and air conditioning system
70
which can only be eliminated through considerable effort and expense (replace-
ment of compressor).Using the systemFig. 82 Climatic: Control elementsSetting temperature– Turn the control dial fig. 82 to the right in order to increase the tempera-
ture.
– Turn the control dial to the left in order to increase the temperature.Controlling blower– Turn the blower switch into one of the po si ti o ns , 1 to 4, in o rd e r t o sw it ch the
blower on.
– Turn the blower switch into position 0 in order to switch the blower off.
– If you wish to shut off the fresh air supply, use the button - recirculated air mode page 72.Control for air distribution– You can adjust the direction of the air flow using the air distribution control
page 66.switching cooling on and off– Press the button fig. 82 . The warning light lights up in the button. – When you again press the switch , the cooling system is switched off. The
warning light in the button goes out.
Rear window heater– Press button . Further information page 44, “Rear window heater”.
Note
•
The whole heat output will be needed to unfrost the windscreen and side
windows. No warm air will be fed to the footwell. This can lead to restriction of the
heating comfort.
•
The used air streams out through the air removal openings in the luggage
compartment.
•
If the cooling system has not been switched on for a lengthy period, odours may
be produced at the evaporator because of deposits. Switch the cooling system on
at least once a month for approximately 5 minutes at the highest blower stage -
also during the cold season of the year - in order to remove such odours. Also open
a window for a short time.
•
Please refer to the information regarding recirculated air mode page 72.
AABB
3
C
AC
2
AC
1
s2lk.2.book Page 70 Monday, April 18, 2011 7:41 AM
Page 72 of 183
 Owners Manual Heating and air conditioning system71
Using the system
Safety
Driving Tips
General Maintenance
Breakdown assistance
Technical Data
Set ClimaticRecommended settings of Climatic controls for the respect")
Heating and air conditioning system71
Using the system
Safety
Driving Tips
General Maintenance
Breakdown assistance
Technical Data
Set ClimaticRecommended settings of Climatic controls for the respective operating modes:
Setup
Setting of the control dial
Button
Air outlet vents 3
Defrosting the windscreen and
side windows
To the right up to
the stop
3
Switched off
Do not switch on
Open and align with the side window
Free windscreen and side win-
dows from mist
Desired tempera-ture
2 or 3
switched on
Do not switch on
Open and align with the side window
The fastest heating
To the right up to the stop
3
Switched off
briefly switched on
Opening
Comfortable heating
Desired tempera- ture
2 or 3
Switched off
Do not switch on
Opening
the fastest cooling
T o t h e l e f t u p t o t h e stop
briefly 4, then 2or 3
switched on
briefly switched on
Opening
optimal cooling
Desired tempera- ture
1, 2 or 3
switched on
Do not switch on
open and align to the roof
Fresh air mode - ventilation
T o t h e l e f t u p t o t h e stop
Desired position
Switched off
Do not switch on
Opening
A
B
C
2
3
s2lk.2.book Page 71 Monday, April 18, 2011 7:41 AM
 1
1 2
2 3
3 4
4 5
5 6
6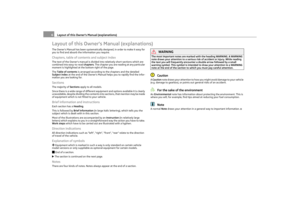 7
7 8
8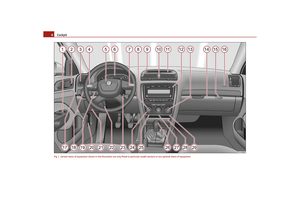 9
9 10
10 11
11 12
12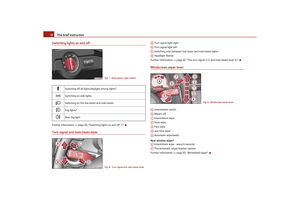 13
13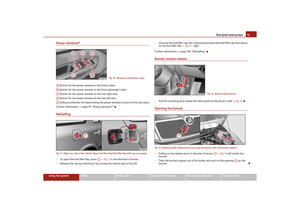 14
14 15
15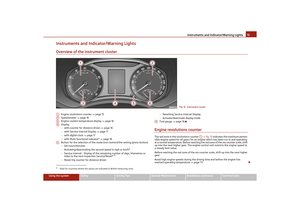 16
16 17
17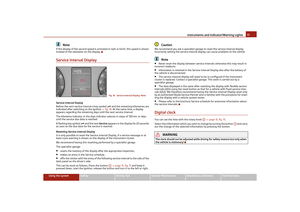 18
18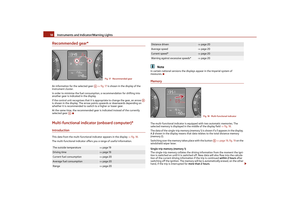 19
19 20
20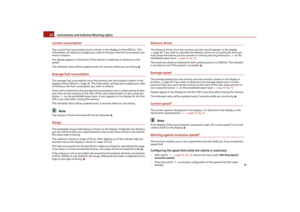 21
21 22
22 23
23 24
24 25
25 26
26 27
27 28
28 29
29 30
30 31
31 32
32 33
33 34
34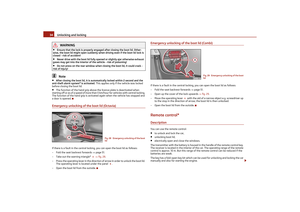 35
35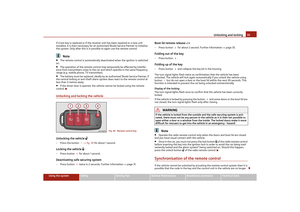 36
36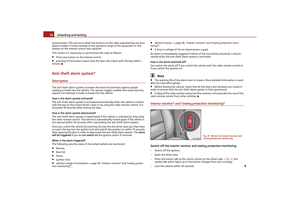 37
37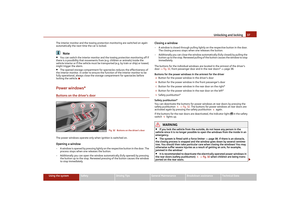 38
38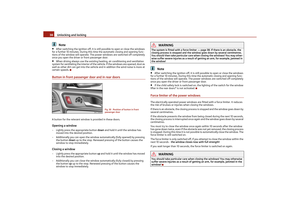 39
39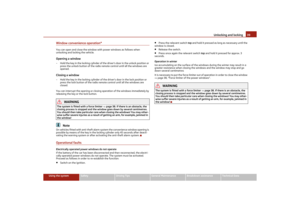 40
40 41
41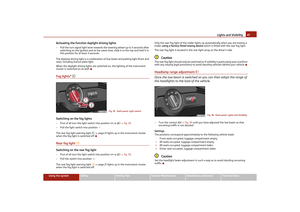 42
42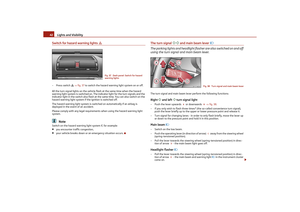 43
43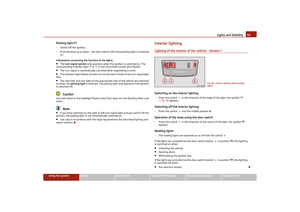 44
44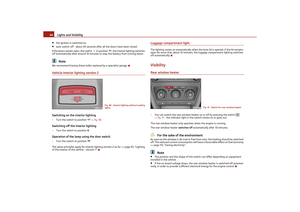 45
45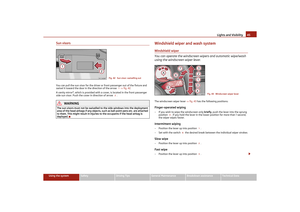 46
46 47
47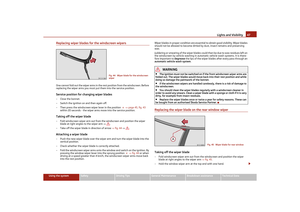 48
48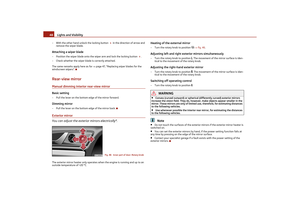 49
49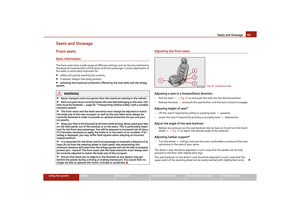 50
50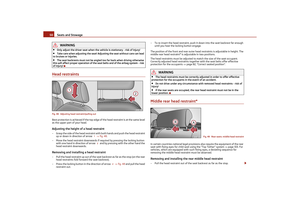 51
51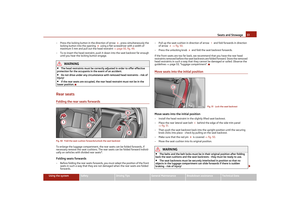 52
52 53
53 54
54 55
55 56
56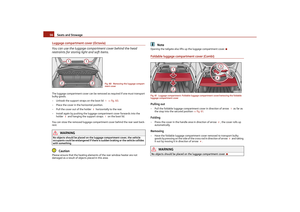 57
57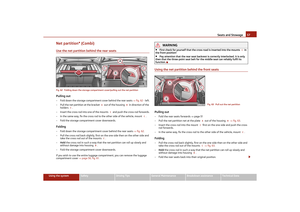 58
58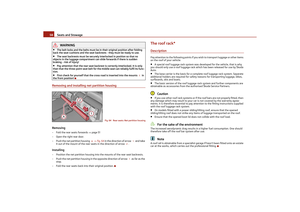 59
59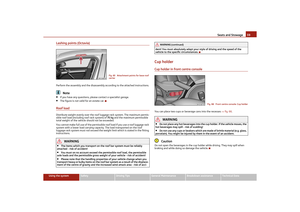 60
60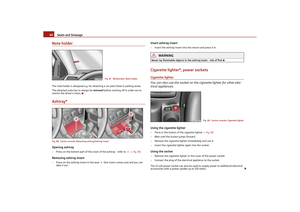 61
61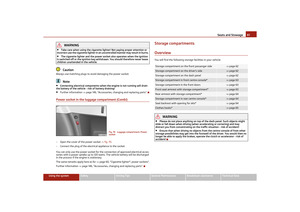 62
62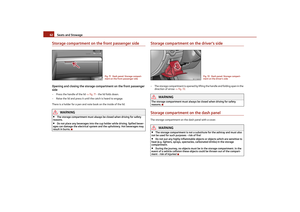 63
63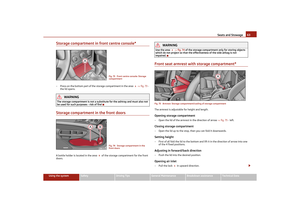 64
64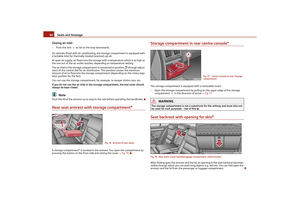 65
65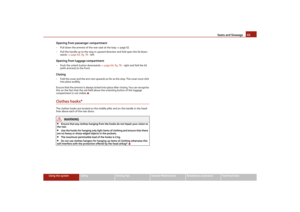 66
66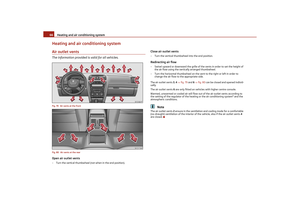 67
67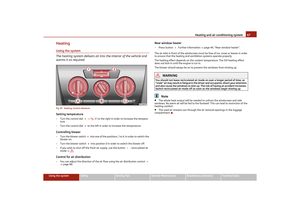 68
68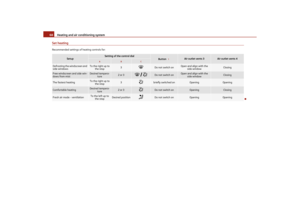 69
69 70
70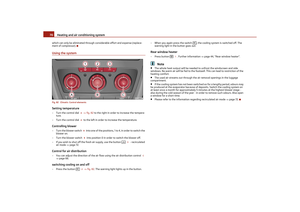 71
71 72
72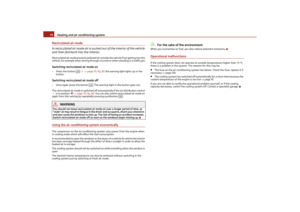 73
73 74
74 75
75 76
76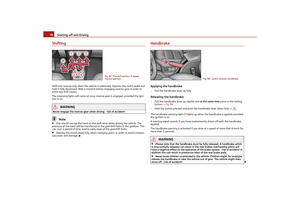 77
77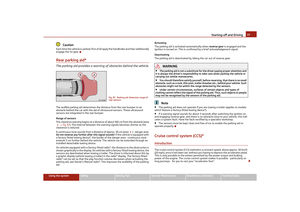 78
78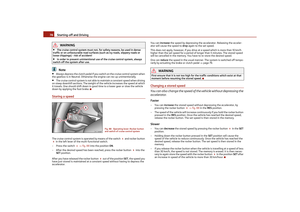 79
79 80
80 81
81 82
82 83
83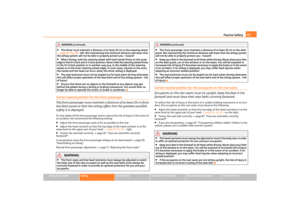 84
84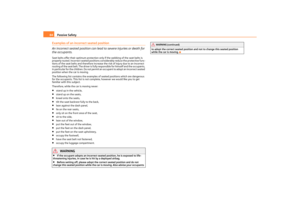 85
85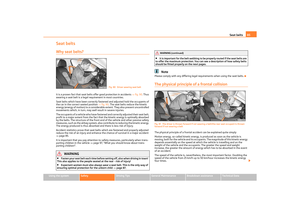 86
86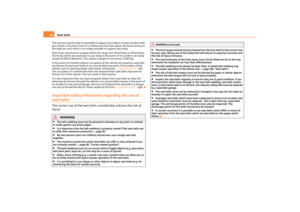 87
87 88
88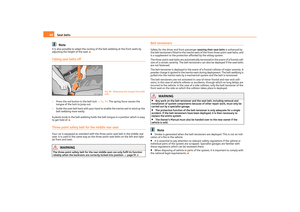 89
89 90
90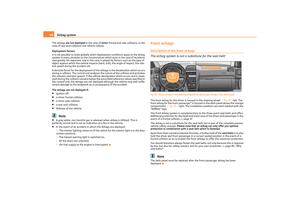 91
91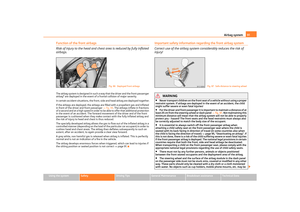 92
92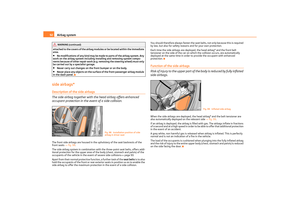 93
93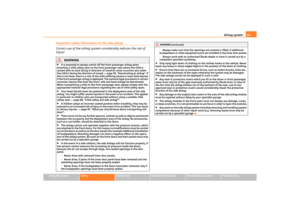 94
94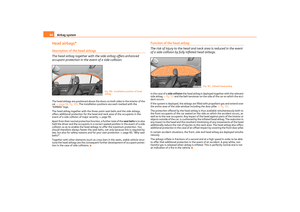 95
95 96
96 97
97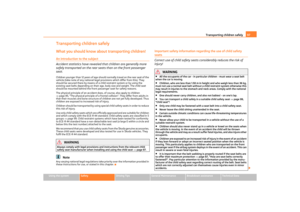 98
98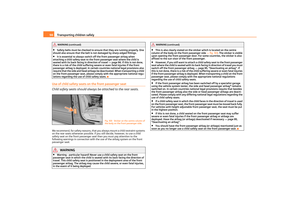 99
99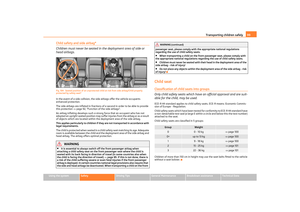 100
100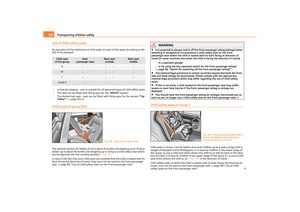 101
101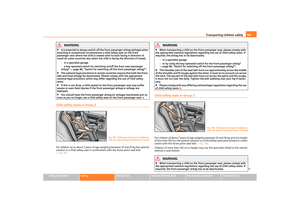 102
102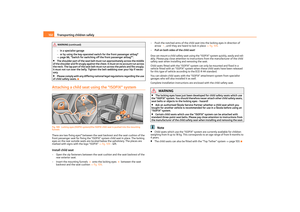 103
103 104
104 105
105 106
106 107
107 108
108 109
109 110
110 111
111 112
112 113
113 114
114 115
115 116
116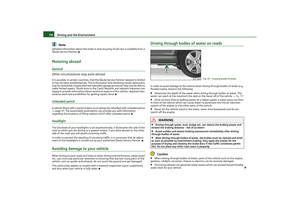 117
117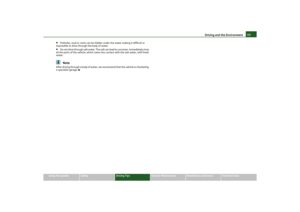 118
118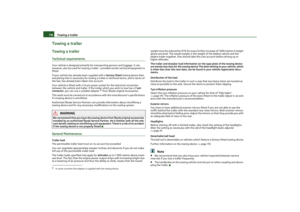 119
119 120
120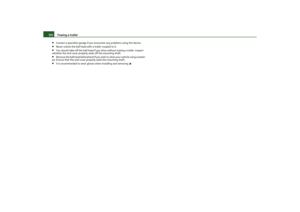 121
121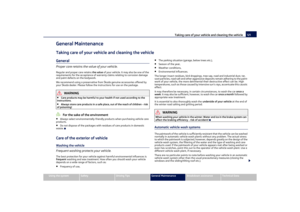 122
122 123
123 124
124 125
125 126
126 127
127 128
128 129
129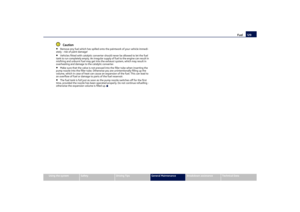 130
130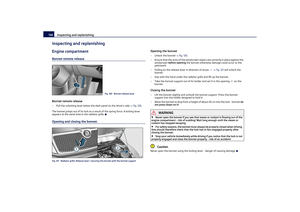 131
131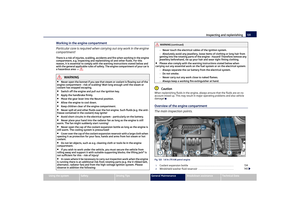 132
132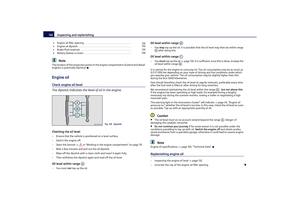 133
133 134
134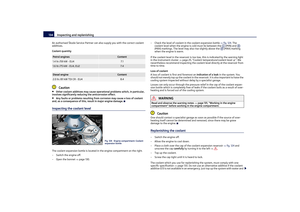 135
135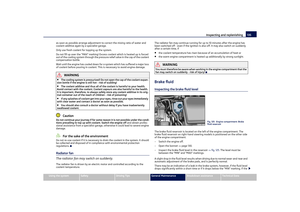 136
136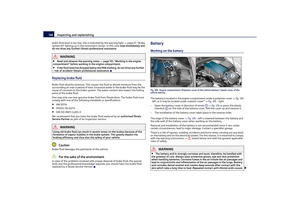 137
137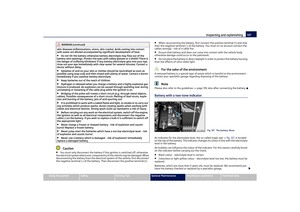 138
138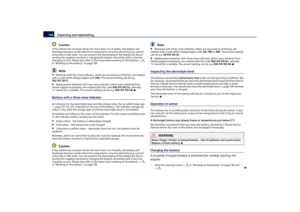 139
139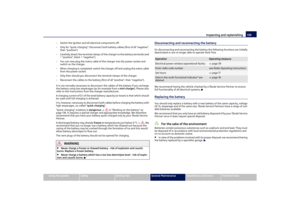 140
140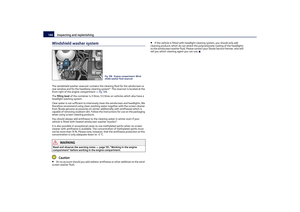 141
141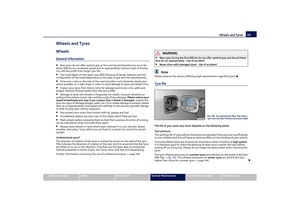 142
142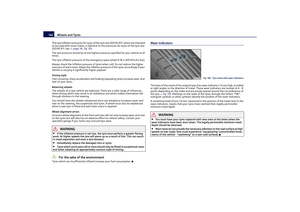 143
143 144
144 145
145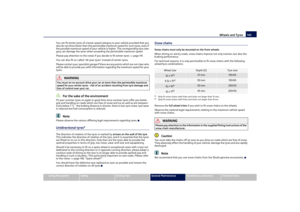 146
146 147
147 148
148 149
149 150
150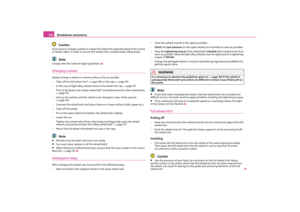 151
151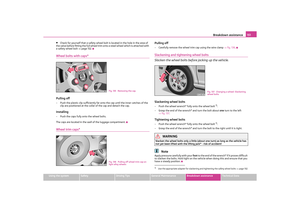 152
152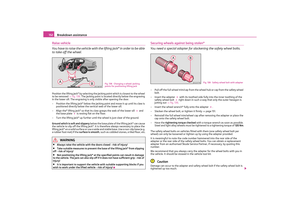 153
153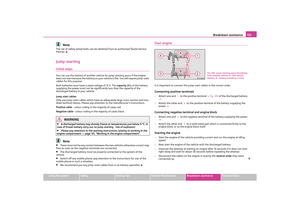 154
154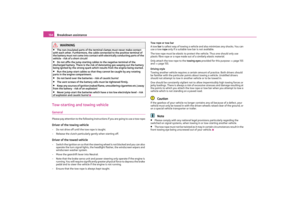 155
155 156
156 157
157 158
158 159
159 160
160 161
161 162
162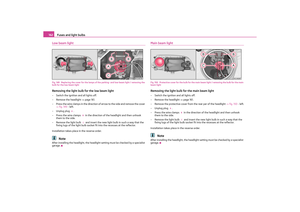 163
163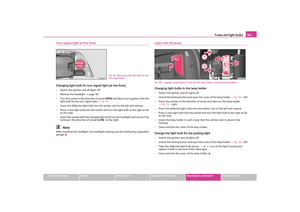 164
164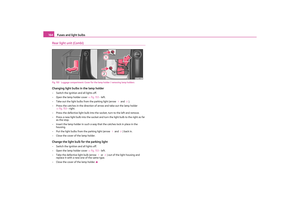 165
165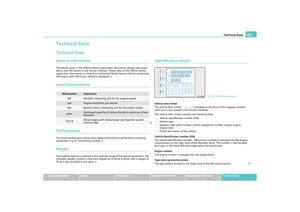 166
166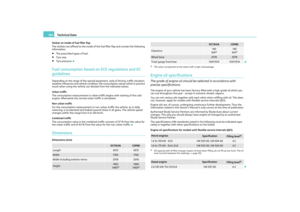 167
167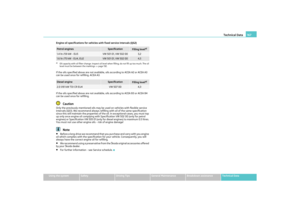 168
168 169
169 170
170 171
171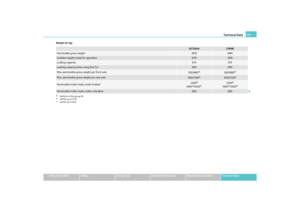 172
172 173
173 174
174 175
175 176
176 177
177 178
178 179
179 180
180 181
181 182
182 Owners Manual Heating and air conditioning system
68
Set heatingRecommended settings of heating controls for:
Setup
Setting of the control dial
Button
Air outlet vents 3
Air outlet vents 4
Defrosting the windscree")