Page 73 of 183
 Owners Manual Heating and air conditioning system
72
Recirculated air mode
In recirculated air mode air is sucked out of the interior of the vehicle
and then fed back into the interior.Recirculated air mode preven")
Heating and air conditioning system
72
Recirculated air mode
In recirculated air mode air is sucked out of the interior of the vehicle
and then fed back into the interior.Recirculated air mode prevents polluted ai r outside the vehicle from getting into the
vehicle, for example when driving through a tunnel or when standing in a traffic jam.Switching recirculated air mode on– Press the button page 70, fig. 82 the warning light lights up in the
button.Switching recirculated air mode off– Once again press the button . The warning light in the button goes out.
The recirculated air mode is switched off au tomatically if the air distribution control
is in position
page 70, fig. 82 . You can also switch recirculated air mode on
again from this setting by re peatedly pressing pushbutton .
WARNING
You should not leave recirculated air mode on over a longer period of time, as
“stale” air may result in fatigue in the dr iver and occupants, divert your attention
and also cause the windows to mist up. Th e risk of having an accident increases.
Switch recirculated air mode off as soon as the windows begin misting up.Using the air conditioning system economicallyThe compressor on the air conditioning system uses power from the engine when
in cooling mode which will effect the fuel consumption.
It recommended to open the windows or the doors of a vehicle for which the interior
has been strongly heated through the effect of direct sunlight in order to allow the
heated air to escape.
The cooling system should not be switched on while travelling when the window is
open.
The desired interior temperature can also be achieved without switching in the
cooling system just by switching to fresh air mode.
For the sake of the environment
When you economize on fuel, you also reduce pollutant emissions.Operational malfunctionsIf the cooling system does not operate at outside temperatures higher than +5 °C,
there is a problem in the system. The reasons for this may be:•
The fuse on the air conditioning system has blown. Check the fuse, replace it if
necessary page 156.
•
The cooling system has switched off automatically for a short time because the
coolant temperature of the engine is too hot page 16.
If you are not able to rectify the operat ional problem yourself, or if the cooling
capacity decreases, switch the cooling system off. Contact a specialist garage.
3
C
s2lk.2.book Page 72 Monday, April 18, 2011 7:41 AM
Page 74 of 183
 Owners Manual Starting-off and Driving73
Using the system
Safety
Driving Tips
General Maintenance
Breakdown assistance
Technical Data
Starting-off and DrivingSetting steering wheel positionFig. 83 Adjustable steer")
Starting-off and Driving73
Using the system
Safety
Driving Tips
General Maintenance
Breakdown assistance
Technical Data
Starting-off and DrivingSetting steering wheel positionFig. 83 Adjustable steering wheel: Lever below steering columnYou can set the height and the forward/back position of the steering wheel to the
desired position.
– Adjust the driver seat page 11.
– Pull the lever below the steering column down fig. 83 - left. Observe the
guidelines .
– Set the steering wheel to the desired position (concerning height and forward/back position).
– Push the lever upwards as far as the stop.
WARNING
•
You must not adjust the steering wheel when the vehicle is moving!
•
The driver must maintain a distance of at least 25 cm to the steering wheel
fig. 83 - right. Not maintaining this minimum distance will mean that the
airbag system will not be able to properly protect you - hazard!
•
For safety reasons the lever must always be firmly pushed up to avoid the
steering wheel altering its position unin tentionally when driving - risk of acci-
dent!
•
If you adjust the steering wheel further towards the head, you will reduce
the protection offered by the driver airbag in the event of an accident. Make sure
the steering wheel is aligned to the chest.
•
When driving, hold the steering wheel with both hands firmly on the outer
edge in the 9 o'clock and 3 o'clock positi on. Never hold the steering wheel firmly
in the 12 o'clock position or in another way (e.g. in the middle of the steering
wheel or at the inner steering wheel edge). In such cases, injuries to the arms,
the hands and the head can occur when the driver airbag is deployed.
Ignition lockPetrol engines
- ignition switched off, engine off, the steering can be locked.
- ignition switched on
- start engine
Diesel engines - interruption of fuel suppl y, ignition switched off, engine off, the steering can
be locked.
- heating glow plugs on, ignition switched on•
You should not switch on any major elec trical components during the heating
period. Otherwise the vehicle battery will be drained unnecessarily.
- start engineWARNING (continued)
Fig. 84 Ignition lock positions
123123
s2lk.2.book Page 73 Monday, April 18, 2011 7:41 AM
Page 75 of 183
 Owners Manual Starting-off and Driving
74
Applies to all models:
Position
To lock the steering , with the ignition key withdrawn, turn the steering wheel until
the steering locking pin is heard to engage. You s")
Starting-off and Driving
74
Applies to all models:
Position
To lock the steering , with the ignition key withdrawn, turn the steering wheel until
the steering locking pin is heard to engage. You should always lock the steering as
a general rule if you leave your vehicle. This acts as a deterrent against possible
theft of your vehicle .
Position
Move the steering wheel back and forward a little if the ignition key cannot, or
cannot easily be turned into this positi on, in order to release the steering lock.
Position
The engine is started in this position. At the same time any switched on low beam
or main beam or other electrical compon ents with major electrical consumers are
briefly switched off. The ignition key moves back into position after being
released.
The ignition key must be turned back into position each time before starting the
engine again. The starter repeat lock in the ignition lock prevents the starter being
engaged when the engine is running and thus getting damaged.
WARNING
•
When driving, the ignition key must al ways be in the position (ignition
switched on) without the engine running. This position is indicated by the
warning lights coming on. If this is not the case, it could result in unexpected
locking of the steering wheel - risk of accident!
•
Do not withdraw the ignition key from the lock until the vehicle has come to
a stop. The steering lock can engage immediately - risk of accident!
•
Always withdraw the ignition key if you are going to leave the vehicle, even
for a short time. This is particularly import ant if children are left in the vehicle.
Children might otherwise start the engine or switch on electrical equipment (e.g.
power windows) - risk of accident or injury!
Starting the engineGeneral
You can only start the engine only using an original ignition key.•
Place the gearshift lever into neutral an d put on the handbrake firmly before
starting the engine.
•
Before starting, it is necessary to depress the clutch pedal and to keep it pressed
down until the engine starts. If you try and start the engine without pressing the
clutch pedal, the engine will not start. A message in the information display of the
instrument cluster will also appear indicate the need to press the clutch pedal.
•
Let go of the ignition key as soon as the engine starts otherwise you may
damage the starter.
The engine running noises may louder at first be louder for a short time after
starting the cold engine until oil pressure can be built up in the hydraulic valve clear-
ance compensation. This is quite norm al and is not an operating problem.
If the engine does not start ...
You can use the battery of anothe r vehicle as a jump-start aid page 153.
It is only possible to tow-start vehicles fitted with a manual gearbox. The tow-
starting distance must not be more than 50 metres. Observe the following
guidelines page 154, “Tow-starting and towing vehicle”.
WARNING
•
Never run the engine in non ventilated or enclosed areas. The exhaust gases
of the engine contain besides the odourless and colourless carbon monoxide a
poisonous gas - hazard! Carbon mono xide can cause unconsciousness and
death.
•
Never leave your vehicle unattended with the engine running.Caution
•
The starter may only be operated (ignitio n key position ), if the engine is not
running. If the starter is immediately operated after switching off the engine, the
starter or the engine can be damaged.
•
Avoid high engine revolutions, full throttle and high engine loads as long as the
engine has not yet reached its normal operating temperature - risk of damaging the
engine!
•
Vehicles which are fitted with an exhaus t gas catalytic converter should not be
tow-started over a distance of more than 50 metres.For the sake of the environment
Never warm up the engine when the vehicle is standing. Drive off right away.
Through this the engine reaches its operating temperature more rapidly and the
pollutant emissions are lower.
123
2
1
2
3
s2lk.2.book Page 74 Monday, April 18, 2011 7:41 AM
Page 76 of 183
 Owners Manual Starting-off and Driving75
Using the system
Safety
Driving Tips
General Maintenance
Breakdown assistance
Technical Data
Petrol enginesThese engines are fitted with a starter system which selects the c")
Starting-off and Driving75
Using the system
Safety
Driving Tips
General Maintenance
Breakdown assistance
Technical Data
Petrol enginesThese engines are fitted with a starter system which selects the correct fuel-air
mixture for every external air temperature.•
Do not operate accelerator before and when starting engine.
•
Interrupt the attempt at star ting after 10 seconds if the engine does not start
right away and wait for about 30 seconds before repe ating the attempt.
•
It is possible that the fuse on the electrical fuel pump is defect if the engine still
does not start. Check the fuse and replace it if necessary page 156.
•
Contact the nearest specialist garage to obtain professional assistance.
It may be necessary, if the engine is very hot, to slightly depress the accelerator
after the engine has started.
Diesel enginesGlow plug system
Diesel engines are equipped with a glow plug system, the preglow period being
controlled automatically in line with the coolant temperature and outside tempera-
ture.
The preglow indicator light
comes on after the ignition has been switched on.
You should not switch on any major elec trical components during the heating
period otherwise the vehicle battery will be drained unnecessarily.
•
You should start the engine immediately after the glow plug warning light
has gone out.
•
The glow plug warning light will come on for about one second if the engine is
at a normal operating temperature or if th e outside temperature is above +5 °C. This
means that you can start the engine right away .
•
Interrupt the attempt at starting after 10 seconds if the engine does not start
right away and wait for about 30 seconds before repe ating the attempt.
•
It is possible that the fuse on the diesel preglow system is defect if the engine
still does not start. Check the fuse and replace it if necessary page 156.
•
Contact the nearest specialist garage to obtain professional assistance.
Starting the engine after the fuel tank has run dry
It may take longer than normal to start the engine after refuelling if the fuel tank
has run completely dry - up to one minute. This is because the fuel system must first
of all be filled while the attempting to start the engine.
Switching off the engine– The engine can be switched off by tur ning the ignition key into position
page 73, fig. 84 .
WARNING
•
Never switch off the engine before the ve hicle is stationary - risk of accident!
•
The brake booster only operates when the engine is running. Greater phys-
ical effort for braking is required when en gine is switched off. Because if you do
not stop as normal, this can caus e an accident and severe injuries.Caution
you should not switch the engine off right away at the end of your journey after the
engine has been operated for a lengthy period at high loads but should be allowed
it to run at idling speed for about 2 minutes . This prevents any accumulation of heat
when the engine is switched off.
Note
•
The radiator fan may continue running for a further 10 minutes or so after the
engine and the ignition have been switched off. The coolant fan may, however, also
switch on again after some time if the coolant temperature rises because of an
a c c um ul a tio n o f he a t i n the en g in e o r i f the engine is warm and the engine compart-
ment is additionally heat ed by strong sunlight.
•
This is why particular care is required when carrying out any work in the engine
compartment page 131, “Working in the engine compartment”.
1
s2lk.2.book Page 75 Monday, April 18, 2011 7:41 AM
Page 77 of 183
 Owners Manual Starting-off and Driving
76
ShiftingShift into reverse only when the vehicle is stationary. Depress the clutch pedal and
hold it fully depressed. Wait a moment be fore engaging reverse gear in order")
Starting-off and Driving
76
ShiftingShift into reverse only when the vehicle is stationary. Depress the clutch pedal and
hold it fully depressed. Wait a moment be fore engaging reverse gear in order to
avoid any shift noises.
The reversing lights will come on once reverse gear is engaged, provided the igni-
tion is on.
WARNING
Never engage the reverse gear when driving - risk of accident!
Note
•
One should not lay the hand on the shift lever while driving the vehicle. The
pressure of the hand will be transferred to the gearshift forks in the gearbox. This
can, over a period of time, lead to early wear of the gearshift forks.
•
Depress the clutch pedal fully when changing gears, in order to avoid unneces-
sary wear and damage.
HandbrakeApplying the handbrake– Pull the handbrake lever up fully.Releasing the handbrake– Pull the handbrake lever up slightly and at the same time press in the locking
button fig. 86.
– Hold the button pressed and push the handbrake lever down fully .
The handbrake warning light
lights up when the handbrake is applied, provided
the ignition is on.
A warning signal sounds if you have inadvertently driven off with the handbrake
applied.
The handbrake warning is activated if you drive at a speed of more than 6 km/h for
more than 3 seconds.
WARNING
•
Please note that the hand brake must be fully released. A handbrake which
is only partially released can result in the rear brakes overheating which will
have a negative effect on the operation of the brake system - risk of accident! In
addition this can result in premat ure wear of the rear brake pads.
•
Never leave children unattended in the vehicle. Children might, for example,
release the handbrake or take the vehicl e out of gear. The vehicle might then
move off - risk of accident!
Fig. 85 The shift pattern: 5-speed
manual gearbox
Fig. 86 Centre console: Handbrake
s2lk.2.book Page 76 Monday, April 18, 2011 7:41 AM
Page 78 of 183
 Owners Manual Starting-off and Driving77
Using the system
Safety
Driving Tips
General Maintenance
Breakdown assistance
Technical Data
Caution
Each time the vehicle is parked, first of all apply the handbrake and th")
Starting-off and Driving77
Using the system
Safety
Driving Tips
General Maintenance
Breakdown assistance
Technical Data
Caution
Each time the vehicle is parked, first of all apply the handbrake and then additionally
engage the 1st gear.Rear parking aid*The parking aid provides a warnin g of obstacles behind the vehicle.The audible parking aid determines the distance from the rear bumper to an
obstacle behind the car with the aid of ultrasound sensors. These ultrasound
sensors are integrated in the rear bumper.
Range of sensors
The clearance warning begins at a distance of about 160 cm from the obstacle (area
fig. 87 ). The interval between the warning signals becomes shorter as the
clearance is reduced.
A continuous tone sounds from a distance of approx. 30 cm (area ) - danger area.
Do not reverse any further after this signal sounds! If the vehicle is equipped with
a factory-fitted towing device*, the border of the danger area - continuous tone -
extends 5 cm further behind the vehicle. The vehicle can be extended through an
installed detachable towing device.
On vehicles equipped with a factory-fitted radio*, the distance to the obstruction is
shown graphically in the display. On vehicl es with a factory-fitted towing device, the
sensors are deactivated when towing a trailer. The driver is informed about this by
a graphic display (vehicle towing a trailer) in the radio* display. The factory-fitted
radio* can be set so that the play function volume decreases when activating the
parking aid, see Owner's Manual radio*. This improves the audibility of the parking
aid. Activating
The parking aid is activated automatically when
reverse gear is engaged and the
ignition is turned on. This is confirmed by a brief acknowledgement signal.
Deactivating
The parking aid is deactivated by taking the car out of reverse gear.
WARNING
•
The parking aid is not a substitute for the driver paying proper attention and
it is always the driver's responsibility to take care when parking the vehicle or
carrying out similar manoeuvres.
•
You should therefore satisfy yourself, before reversing, that there is no small
obstacle, such as a rock, thin post, traile r drawbar etc., behind your vehicle. Such
obstacles might not be within the range detected by the sensors.
•
Under certain circumstances, surfaces of certain objects and types of
clothing cannot reflect the signal of the pa rking aid. Thus, such objects or people
may not be recognised by the sensors of the parking aid.Note
•
The parking aid does not operate if you are towing a trailer (applies to models
which feature a factory-fitted towing device*).
•
If a warning signal sounds for about 3 seconds after switching the ignition on
and engaging reverse gear, and there is no obstacle close to your vehicle, this indi-
cates a system fault. Have the fault rectified by a specialist workshop.
•
The sensors must be kept clean and free of ice to enable the parking aid to
operate properly.
Cruise control system (CCS)*IntroductionThe cruise control system (CCS) maintains a constant speed, above approx. 30 km/h
(20 mph), once it has been set, without yo u having to depress the accelerator pedal.
This is only possible to the extent pe rmitted by the power output and braking
power of the engine. The cruise control syst em makes it possible - particularly on
long journeys - for you to rest your “accelerator foot”.
Fig. 87 Parking aid: Detection range of
rear sensors
A
B
s2lk.2.book Page 77 Monday, April 18, 2011 7:41 AM
Page 79 of 183
 Owners Manual Starting-off and Driving
78WARNING
•
The cruise control system must not, for safety reasons, be used in dense
traffic or on unfavourable road surfaces (such as icy roads, slippery roads or
loose")
Starting-off and Driving
78WARNING
•
The cruise control system must not, for safety reasons, be used in dense
traffic or on unfavourable road surfaces (such as icy roads, slippery roads or
loose chippings) - risk of accident!
•
In order to prevent unintentional use of the cruise control system, always
switch off the system after use.Note
•
Always depress the clutch pedal if you switch on the cruise control system when
the gearbox is in Neutral. Otherwise the engine can rev up unintentionally.
•
The cruise control system is not able to maintain a constant speed when driving
on steep downhill sections. The weight of the vehicle increases the speed at which
it travels. One should shift down in good time to a lower gear or slow the vehicle
down by applying the foot brake.
Storing a speedThe cruise control system is operated by means of the switch and rocker button in the left lever of the multi-functional switch.
– Press the switch fig. 88 into the position ON.
– After the desired speed has been reached, press the rocker button into the SET position.
After you have released the rocker button out of the position SET, the speed you
have just stored is maintained at a cons tant speed without having to depress the
accelerator. You can
increase the speed by depressing the accelerator. Releasing the acceler-
ator will cause the speed to drop again to the set speed.
This does not apply, however, if you driv e at a speed which is more than 10 km/h
higher than the set speed for a period of longer than 5 minutes. The stored speed
will be cancelled in the memory. You have to re-store the desired speed.
One can reduce the speed in the usual manner. The system is switched off tempo-
rarily by actuating the brake or clutch pedal page 79.
WARNING
First ensure that it is not too high for the traffic conditions which exist at that
moment before resuming the stored speed.Changing a stored speed
You can also change the speed of the vehicle without depressing the
accelerator.Faster–You can increase the stored speed without depr essing the accelerator, by
pressing the rocker button fig. 88 in the RES position.
– The speed of the vehicle will increase continuously if you hold the rocker button pressed in the RES position. Once the vehicle has reached the desired speed,
release the rocker button. The set speed is then stored in the memory.Slower–You can decrease the stored speed by pressing the rocker button in the SET
position.
– Holding down the rocker button pressed in the SET position will cause the
speed of the vehicle to reduce continuously. Once the vehicle has reached the
desired speed, release the rocker button. The set speed is then stored in the
memory.
– If you release the rocker button when the vehicle is travelling at a speed of less than 30 km/h, the speed is not stored. The memory is erased. It is then neces-
sary to again store the speed with the rocker button in the position SET after
an increase in speed of the ve hicle to more than 30 km/hour.
Fig. 88 Operating lever: Rocker button
and switch of cruise control system
A
B
A
B
B
B
B
B
s2lk.2.book Page 78 Monday, April 18, 2011 7:41 AM
Page 80 of 183
Starting-off and Driving79
Using the system
Safety
Driving Tips
General Maintenance
Breakdown assistance
Technical Data
Switching off the cruise control system temporarily–You can switch off temporarily the cruise control syst em, if you depress the
brake or clutch pedal.
– You can switch off temporarily the cruise control system, if you press the switch
in the middle position.
The set speed remains stored in the memory.
You can resume the stored speed by releasing the brake or clutch pedal and by
pressing the button page 78, fig. 88 in the position RES.
WARNING
First ensure that it is not too high for the traffic conditions which exist at that
moment before resuming the stored speed.Switching off the cruise control system completely– Press the switch page 78, fig. 88 to the right into position OFF.
A
BA
s2lk.2.book Page 79 Monday, April 18, 2011 7:41 AM
 1
1 2
2 3
3 4
4 5
5 6
6 7
7 8
8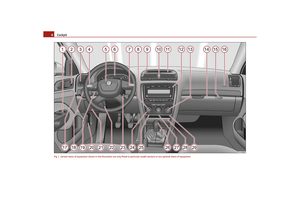 9
9 10
10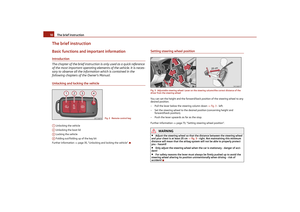 11
11 12
12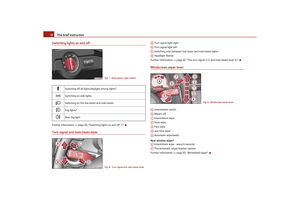 13
13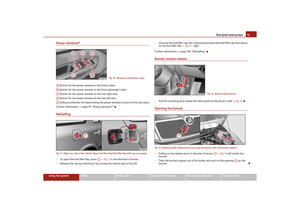 14
14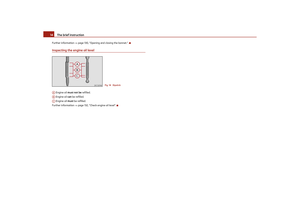 15
15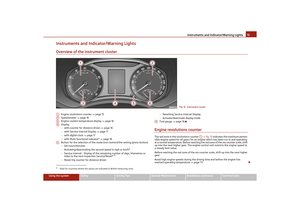 16
16 17
17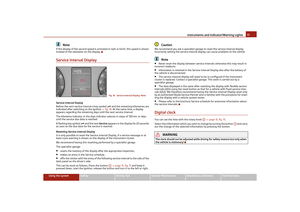 18
18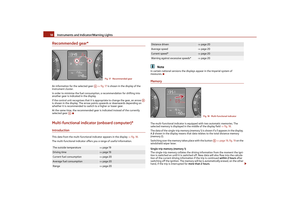 19
19 20
20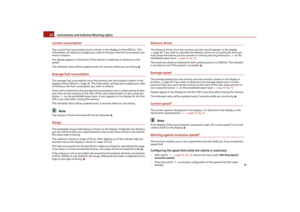 21
21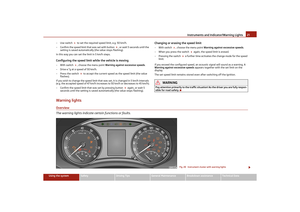 22
22 23
23 24
24 25
25 26
26 27
27 28
28 29
29 30
30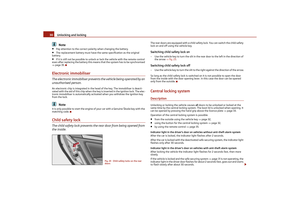 31
31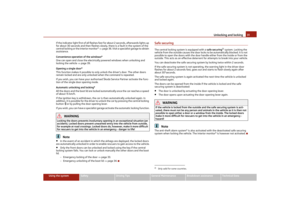 32
32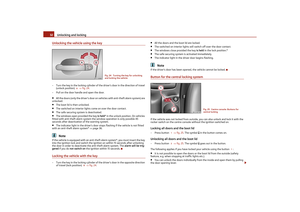 33
33 34
34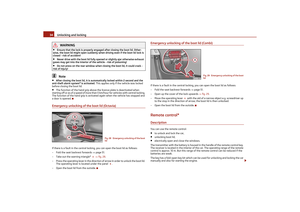 35
35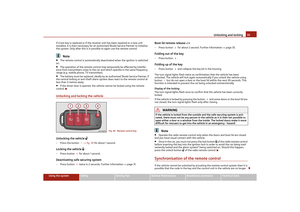 36
36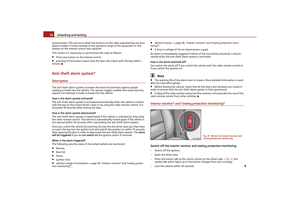 37
37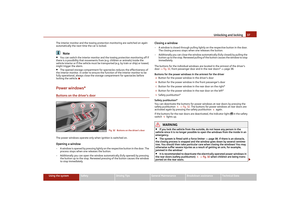 38
38 39
39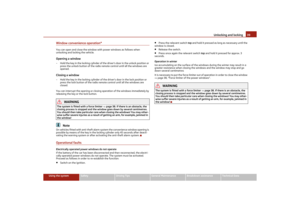 40
40 41
41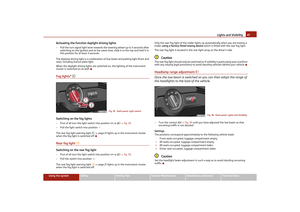 42
42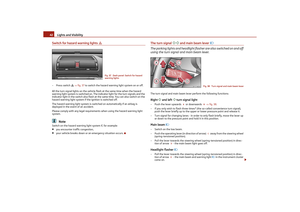 43
43 44
44 45
45 46
46 47
47 48
48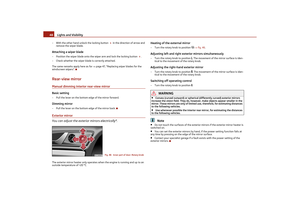 49
49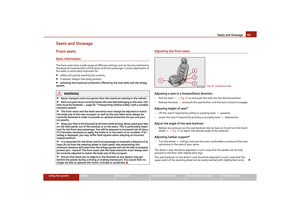 50
50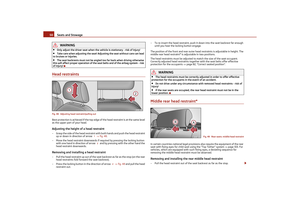 51
51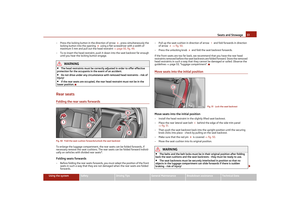 52
52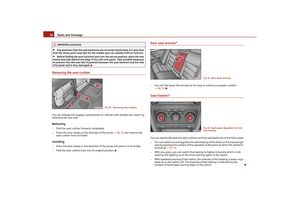 53
53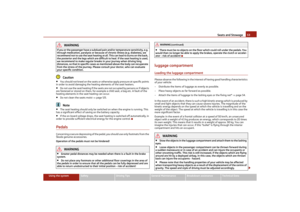 54
54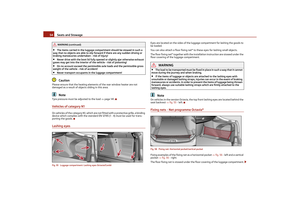 55
55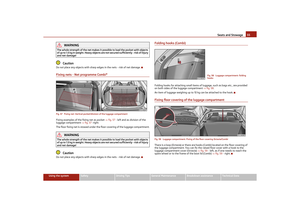 56
56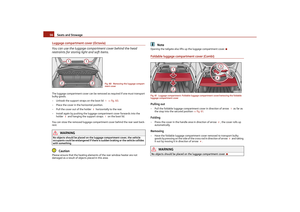 57
57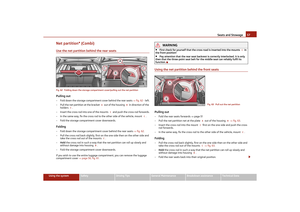 58
58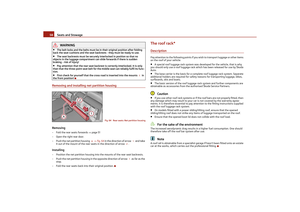 59
59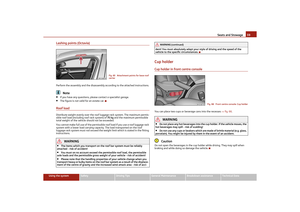 60
60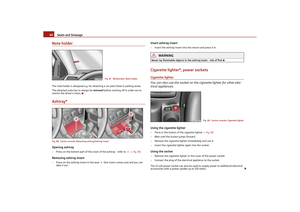 61
61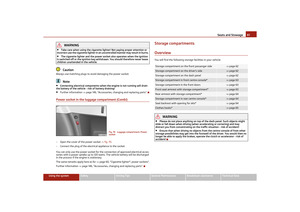 62
62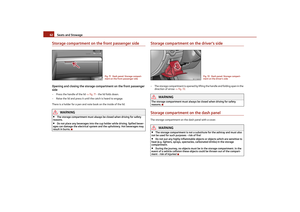 63
63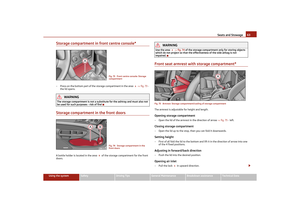 64
64 65
65 66
66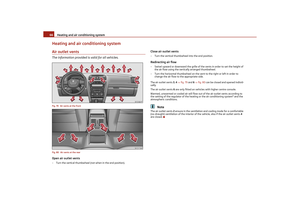 67
67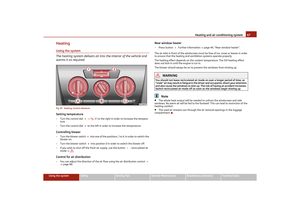 68
68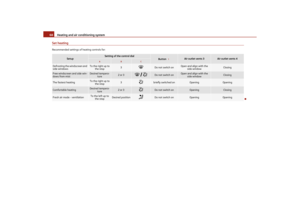 69
69 70
70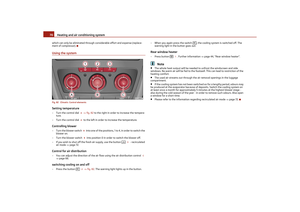 71
71 72
72 73
73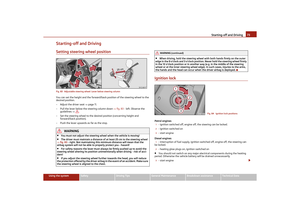 74
74 75
75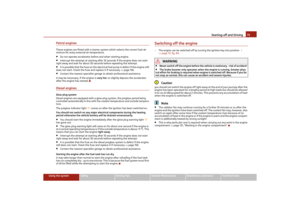 76
76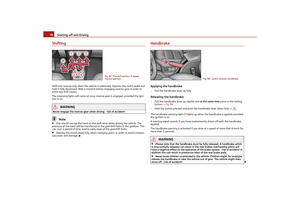 77
77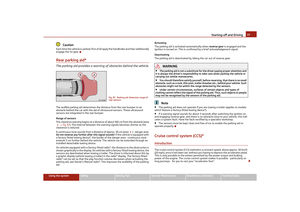 78
78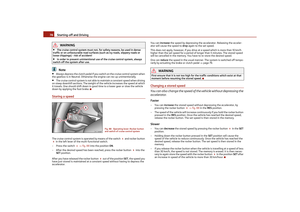 79
79 80
80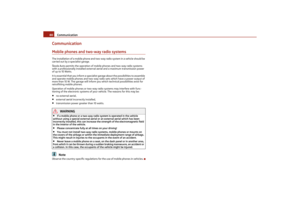 81
81 82
82 83
83 84
84 85
85 86
86 87
87 88
88 89
89 90
90 91
91 92
92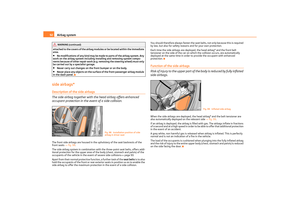 93
93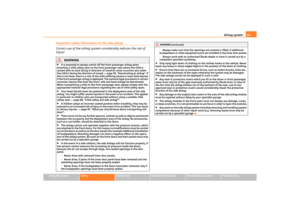 94
94 95
95 96
96 97
97 98
98 99
99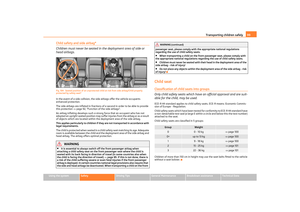 100
100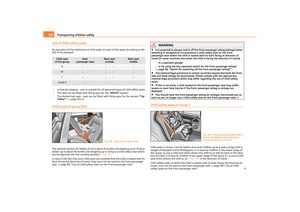 101
101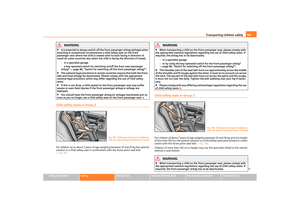 102
102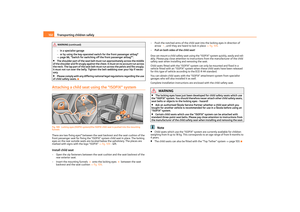 103
103 104
104 105
105 106
106 107
107 108
108 109
109 110
110 111
111 112
112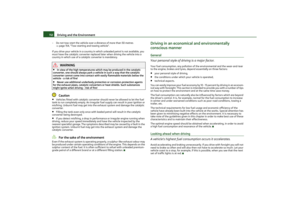 113
113 114
114 115
115 116
116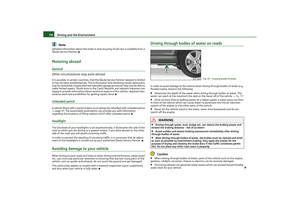 117
117 118
118 119
119 120
120 121
121 122
122 123
123 124
124 125
125 126
126 127
127 128
128 129
129 130
130 131
131 132
132 133
133 134
134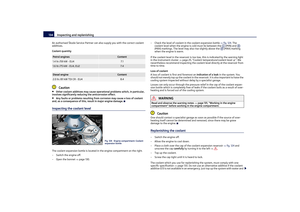 135
135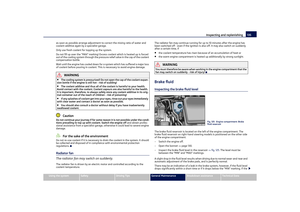 136
136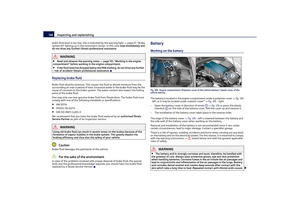 137
137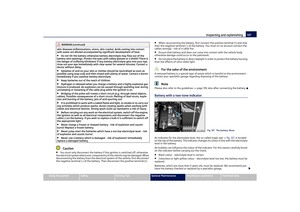 138
138 139
139 140
140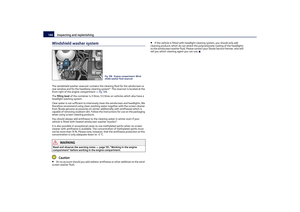 141
141 142
142 143
143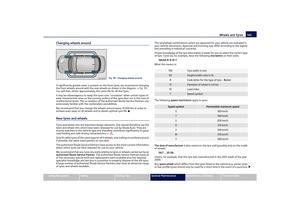 144
144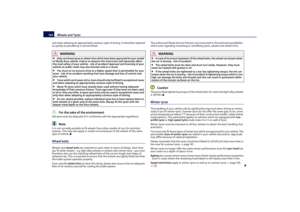 145
145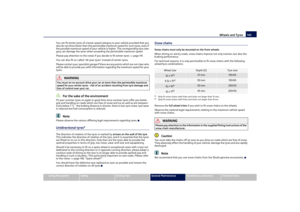 146
146 147
147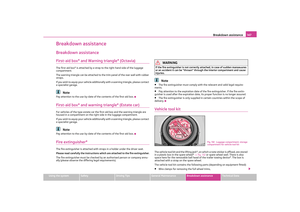 148
148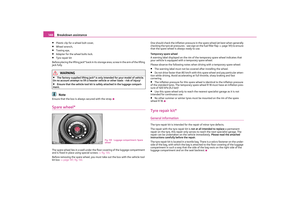 149
149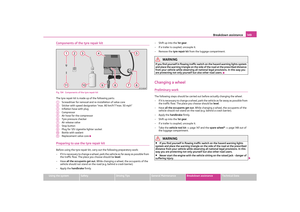 150
150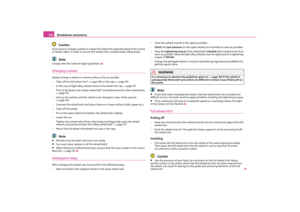 151
151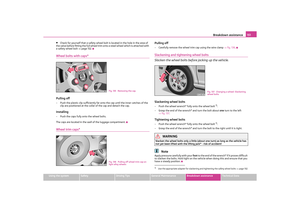 152
152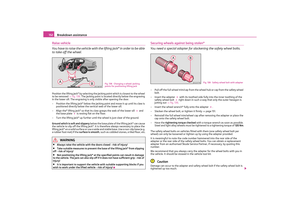 153
153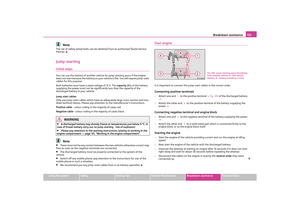 154
154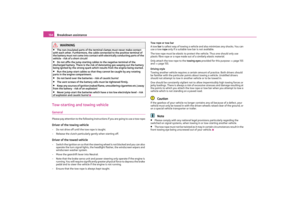 155
155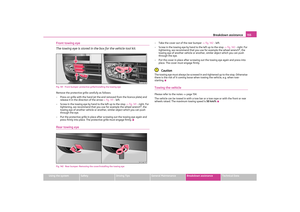 156
156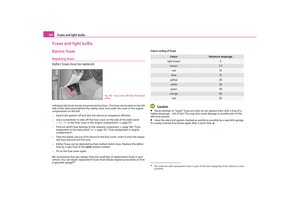 157
157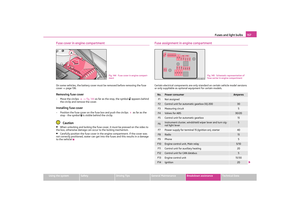 158
158 159
159 160
160 161
161 162
162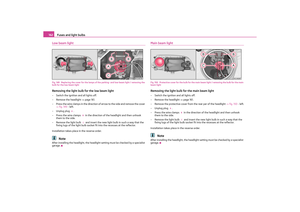 163
163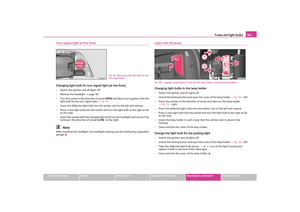 164
164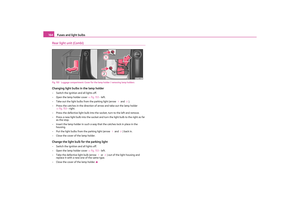 165
165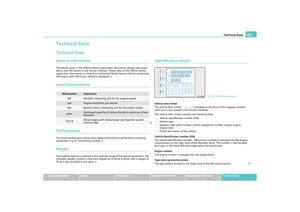 166
166 167
167 168
168 169
169 170
170 171
171 172
172 173
173 174
174 175
175 176
176 177
177 178
178 179
179 180
180 181
181 182
182 Owners Manual Starting-off and Driving79
Using the system
Safety
Driving Tips
General Maintenance
Breakdown assistance
Technical Data
Switching off the cruise control system temporarily–You can switch off tempora")