Page 137 of 183
 Owners Manual Inspecting and replenishing
136
brake fluid level is too low, this is indicated by the warning light page 27, “Brake
system ” lighting up in the instrument cluster. In this case stop imm")
Inspecting and replenishing
136
brake fluid level is too low, this is indicated by the warning light page 27, “Brake
system ” lighting up in the instrument cluster. In this case stop immediately and
do not drive any further! Ob tain professional assistance.
WARNING
•
Read and observe the warning notes page 131, “Working in the engine
compartment” before working in the engine compartment.
•
If the fluid level has dropped below the MIN marking, do not drive any further
- risk of accident! Obtain professional assistance.
Replacing brake fluidBrake fluid absorbs moisture. This causes the fluid to absorb moisture from the
surrounding air over a period of time. Excessive water in the brake fluid may be the
cause of corrosion in the brake system. The water content also lowers the boiling
point of the brake fluid.
One may only use new genuine brake fluid from Škoda Auto. The brake fluid must
comply with one of the followin g standards or specifications:•
VW 50114
•
FMVSS 116 DOT4
•
DIN ISO 4925 CLASS 4
We recommend that you have the brake fluid replaced by an authorised Škoda
Service Partner as part of an Inspection Service.
WARNING
Using old brake fluid can result in severe stress on the brakes because of the
formation of vapour bubbles in the br ake system. This greatly impairs the
braking efficiency and thus also the safety of your vehicle.
Caution
Brake fluid damages the paintwork of the vehicle.
For the sake of the environment
In view of the problems involved with proper disposal of brake fluid, the special
tools and the professional knowledge requ ired, you should have the brake fluid
replaced by a Škoda Service Partner.
BatteryWorking on the batteryFig. 126 Engine compartment: Polyester cover of the vehicle battery / plastic cover of the
vehicle batteryThe battery is located in the engine compartment under a polyester cover fig. 126
- left, or it may be located under a plastic cover* fig. 126 - right.
– Open the battery cover in direction of arrow fig. 126 or press the elastic
interlock on the side of the battery co ver, fold the cover up and remove it.
– The installation of the battery co ver takes place in the reverse order.
The edge of the battery cover fig. 126 - left is inserted between the battery and
the side wall of the battery cover when working on the battery.
Removal and installation of the battery is not recommended since it can, under
certain circumstances, lead to major damage. Contact a specialist garage.
There is a risk of injuries, scalding, accidents and burns when carrying out any work
on the battery and on the electrical system. For this reason, it is essential to comply
with the warning instructions stated below and with the general applicable
rules of safety.
WARNING
•
The battery acid is strongly corrosiv e and must, therefore, be handled with
the greatest of care. Always wear protective gloves, eye and skin protection
when handling batteries. Corrosive fumes in the air irritate the air passages and
lead to conjunctivitis and inflammation of the air passages in the lungs. Battery
acid corrodes dental enamel and create s deep wounds after contact with the
skin which take a long time to heal. Re peated contact with diluted acids causes
A1
A2
s2lk.2.book Page 136 Monday, April 18, 2011 7:41 AM
Page 138 of 183
 Owners Manual Inspecting and replenishing137
Using the system
Safety
Driving Tips
General Maintenance
Breakdown assistance
Technical Data
skin diseases (inflammations, ulcers, sk
in cracks). Acids coming into conta")
Inspecting and replenishing137
Using the system
Safety
Driving Tips
General Maintenance
Breakdown assistance
Technical Data
skin diseases (inflammations, ulcers, sk
in cracks). Acids coming into contact
with water are diluted accompanied by significant development of heat.
•
Do not tilt the battery otherwise batt ery electrolyte may flow out of the
battery vent openings. Protect the eyes wi th safety glasses or a shield! There is
the danger of suffering blindness! If any battery electrolyte gets into your eye,
rinse out your eye immediately with clear water for several minutes. Contact a
doctor without delay.
•
Splashes of acid on your skin or clot hes should be neutralised as soon as
possible using soap suds and then rinsed with plenty of water. Contact a doctor
immediately if you swal low battery electrolyte.
•
Keep batteries out of the reach of children.
•
Hydrogen is released when you charge a battery and a highly explosive gas
mixture is produced. An explosion can be caused through sparkling over during
unclamping or loosening of the cable plug while the ignition is on.
•
Bridging of the poles will create a short circuit (e.g. through metal objects,
cables). Possible consequences of a short circuit: Melting of lead struts, explo-
sion and burning of the battery, jets of acid spurting out.
•
It is prohibited to work with a naked fl ame and light, to smoke or to carry out
any activities which produce sparks. Avoid creating sparks when working with
cables and electrical devices. Strong spar k build-up represents a risk of injury.
•
Before carrying out any work on the electrical system, switch off the engine,
the ignition as well as all electrical components and disconnect the negative
cable (-) on the battery. If you wish to repl ace a bulb it is sufficient to switch off
the appropriate light.
•
Never charge a frozen or thawed batt ery - risk of explosion and caustic
burns! Replace a frozen battery.
•
Never jump-start the batteries which have a too low electrolyte level - risk
of explosion and caustic burns!
•
Never use a battery which is damaged - risk of explosion! Immediately
replace a damaged battery.Caution
•
You must only disconnect the battery if the ignition is switched off, otherwise
the electrical system (electronic componen ts) of the vehicle may be damaged. When
disconnecting the battery from the electrical system of the vehicle, first disconnect
the negative terminal (-) of the battery. Then disconnect the positive terminal (+).
•
When reconnecting the battery, first connect the positive terminal (+) and only
then the negative terminal (-) of the batt ery. You must on no account connect the
cables wrongly - risk of a cable fire.
•
Ensure that battery acid does not come into contact with the vehicle body
otherwise damage could occur to the paintwork.
•
Do not place the battery in direct daylight in order to protect the battery housing
from the effects of ultra-violet light.For the sake of the environment
A removed battery is a special type of wa ste which is harmful to the environment -
contact your specialist garage regarding disposing of the battery.
Note
Please also refer to the guidelines page 139, also after connecting the battery.Battery with a two-tone indicatorAn indicator for the electrolyte level, the so-called magic eye fig. 127, is located
on the top of the battery. The indicator changes its colour in line with the electrolyte
level in the battery.
Air bubbles can influence the colour of the indicator. For this reason carefully knock
on the indicator before carrying out the check.•
Black colour - electrolyte level is correct.
•
Colourless or light yellow colour - electrolyte level too low, the battery must be
replaced.
Batteries, which are more than 5 years ol d, must be replaced. We recommend you
have the battery checked or replaced by a specialist garage.
WARNING (continued)
Fig. 127 The battery: Show
s2lk.2.book Page 137 Monday, April 18, 2011 7:41 AM
Page 139 of 183
 Owners Manual Inspecting and replenishing
138Caution
If the vehicle has not been driven for more than 3 to 4 weeks, the battery will
discharge because certain electrical components consume electricity (e.g. contro")
Inspecting and replenishing
138Caution
If the vehicle has not been driven for more than 3 to 4 weeks, the battery will
discharge because certain electrical components consume electricity (e.g. control
units) also in idle state. You can prevent the discharging of the battery by discon-
necting the negative terminal or charging the battery constantly with a very low
charging current. Please also refer to the notes when working on the battery
in “Working on the battery” on page 136.
Note
•
Batteries with two-tone indicator, which are mounted as of factory, are marked
with a code which always begins with 5K0. The actual marking can be e.g.
5K0 915 105 D.
•
Replacement batteries with two-tone indicator, which were obtained from
Škoda original accessories, are marked with the code 000 915 105 Dx, whereby
“x” stands for a variable. The actual marking can be e.g. 000 915 105 DB.
Battery with a three-tone indicatorAn indicator for the electrolyte level and the charge state, the so-called magic eye
page 137, fig. 127 , is located on the top of the battery. The indicator changes its
colour in line with the charge state of and the electrolyte level in the battery.
Air bubbles can influence the colour of the indicator. For this reason carefully knock
on the indicator before carrying out the check.•
Green colour - the battery is adequately charged.
•
Dark colour - the battery has to be charged
•
Colourless or yellow colour - electrolyte level too low, the battery must be
replaced.
Batteries, which are more than 5 years old, must be replaced. We recommend you
have the battery checked or replaced by a specialist garage.Caution
If the vehicle has not been driven for more than 3 to 4 weeks, the battery will
discharge because certain electrical components consume electricity (e.g. control
units) also in idle state. You can prevent the discharging of the battery by discon-
necting the negative terminal or charging the battery constantly with a very low
charging current. Please also refer to the notes when working on the battery
in “Working on the battery” on page 136.
Note
•
Batteries with three-tone indicator, which are mounted as of factory, are
marked with a code which always begins with 1J0, 7N0 or 3B0 . The actual marking
can be e.g. 1J0 915 105 AC .
•
Replacement batteries with three-tone indicator, which were obtained from
Škoda original accessories, are marked with the code 000 915 105 Ax, whereby
“x” stands for a variable. The actual marking can be e.g. 000 915 105 AB.
Inspecting the electrolyte levelThe battery is practically maintenance-free under normal operating conditions. We
do, however, recommend that you have the electrolyte level inspected from time to
time by a Škoda Service Partner when outside temperatures are high or when
driving on long trips. You should also have the electrolyte level page 138 checked
each time the battery is charged.
The electrolyte level of the battery will also be checked as part of the Inspection
Service.Operation in winterThe battery has to provide gr eater amounts of electricity during the winter. It also
has only part of the initial power output at low temperatures that it has at normal
temperatures.
A discharged battery may already freeze at temperatures just below 0 °C.
We therefore recommend that you have the battery checked by a Škoda Service
Partner before the start of the winter and recharged if necessary.
WARNING
Never charge a frozen or thawed battery - risk of explosion and caustic burns.
Replace a frozen battery.Charging the battery
A properly charged battery is essential for reliably starting the
engine.– Read the warning notes in “Working on the battery” on page 136 and
.
s2lk.2.book Page 138 Monday, April 18, 2011 7:41 AM
Page 140 of 183
 Owners Manual Inspecting and replenishing139
Using the system
Safety
Driving Tips
General Maintenance
Breakdown assistance
Technical Data
– Switch the ignition and all electrical components off.
– Only for “q")
Inspecting and replenishing139
Using the system
Safety
Driving Tips
General Maintenance
Breakdown assistance
Technical Data
– Switch the ignition and all electrical components off.
– Only for “quick-charging”: Disconnect both battery cables (first of all “negative”,
then “positive”).
– Carefully attach the termin al clamps of the charger to the battery terminals (red
= “positive”, black = “negative”).
– You can now plug the mains cable of the charger into the power socket and
switch on the charger.
– When charging is completed: switch the charger off and unplug the mains cable from the power socket.
– Only then should you disconnect th e terminal clamps of the charger.
– Reconnect the cables to the battery (first of all “positive”, then “negative”).
It is not normally necessary to disconnect the cables of the battery if you recharge
the battery using low amperages (as for example from a mini-charger). Please also
refer to the instructions fr om the charger manufacturer.
A charging current of 0.1 of the total batter y capacity (or lower) is that which should
be used until full charging is achieved.
It is, however, necessary to disconnect both cables before charging the battery with
high amperages, so-called “ quick-charging”.
“Quick-charging” a battery is dangerous in “Working on the battery” on
page 136. It requires a special charger and appropriate knowledge. We therefore
recommend that you have yo ur battery quick-charged only by your Škoda Service
Partner.
A discharged battery may already freeze at temperatures just below 0 °C . We
recommend that you no longer use a battery which has thawed out because the
casing of the battery may be cracked thro ugh the formation of ice and this would
allow battery electrolyte to flow out.
The vent plugs of the battery should not be opened for charging.
WARNING
•
Never charge a frozen or thawed batt ery - risk of explosion and caustic
burns. Replace a frozen battery.
•
Never charge a battery which has a too low electrolyte level - risk of explo-
sion and caustic burns.
Disconnecting and reconnecting the batteryOn disconnecting and reconnecting the batt ery the following functions are initially
deactivated or are no longer able to operate fault-free.
We recommend having the vehicle checked by a Škoda Service Partner to ensure
full functionality of all electrical systems.Replacing the batteryYou should only replace a battery with a new battery of the same capacity, voltage
(12 V), amperage and of the same size. Škoda Service Partners have a range of suit-
able batteries available.
We recommend that you only have an old battery disposed of by your Škoda Service
Partner since it does require special disposal.
For the sake of the environment
Batteries contain poisonous substances such as sulphuric acid and lead. They must
be disposed of in accordance with loca l environmental protection regulations and
on no account as domestic waste.•
I n v i e w o f t h e p r o b l e m s i n v o l v e d w i t h i t s p r o p e r d i s p o s a l , w e r e c o m m e n d h a v i n g
the battery replaced by a specialist garage.Operation
Operating measure
Electrical power window (operational faults)
page 39
Enter radio code number
see Radio Operating Instructions
Set hours
page 17
Data in the multi-functional indicator* are
deleted.
page 18
s2lk.2.book Page 139 Monday, April 18, 2011 7:41 AM
Page 141 of 183
 Owners Manual Inspecting and replenishing
140
Windshield washer systemThe windshield washer reservoir contains the cleaning fluid for the windscreen or
rear window and for the headlamp cleaning system*. The reserv")
Inspecting and replenishing
140
Windshield washer systemThe windshield washer reservoir contains the cleaning fluid for the windscreen or
rear window and for the headlamp cleaning system*. The reservoir is located at the
front right of the engine compartment fig. 128 .
The filling level of the container is 3 litres, 5.5 litres on vehicles which also have a
headlight washing system.
Clear water is not sufficient to intensively clean the windscreen and headlights. We
therefore recommend using clean washing water together with the screen cleaner
from Škoda genuine accessories (in winter additionally with antifreeze) which is
capable of removing stubborn dirt. Follow the instructions for use on the packaging
when using screen cleaning products.
You should always add antifreeze to the cleaning water in winter even if your
vehicle is fitted with heated windscreen washer nozzles*.
It is also possible in exceptional cases to use methylated spirits when no screen
cleaner with antifreeze is available. The concentration of methylated spirits must
not be more than 15 %. Please note, howeve r, that the antifreeze protection at this
concentration is only ad equate down to -5 °C.
WARNING
Read and observe the warning notes page 131, “Working in the engine
compartment” before working in the engine compartment.
Caution
•
On no account should you add radiator an tifreeze or other additives to the wind-
screen washer fluid.
•
If the vehicle is fitted with headlight cleaning system, you should only add
cleaning products which do not attack the polycarbonate coating of the headlights
to the windscreen washer fluid. Please contact your Škoda Service Partner, who will
tell you which cleaning agent you can use.
Fig. 128 Engine compartment: Wind-
shield washer fluid reservoir
s2lk.2.book Page 140 Monday, April 18, 2011 7:41 AM
Page 142 of 183
 Owners Manual Wheels and Tyres141
Using the system
Safety
Driving Tips
General Maintenance
Breakdown assistance
Technical Data
Wheels and TyresWheelsGeneral information•
New tyres do not offer optimal grip at fi")
Wheels and Tyres141
Using the system
Safety
Driving Tips
General Maintenance
Breakdown assistance
Technical Data
Wheels and TyresWheelsGeneral information•
New tyres do not offer optimal grip at fi rst and should therefore be run in for
about 500 km at a moderate speed and an appropriately cautious style of driving.
You will also profit from longer tyre life.
•
The tread depth of new tyres may differ because of design features and the
configuration of the tread (depending on the type of tyre and the manufacturer).
•
Drive over curbs on the side of the road and other such obstacles slowly and,
where possible, at a right angle in order to avoid damage to tyres and wheel trims.
•
Inspect your tyres from ti me to time for damage (punctures, cuts, splits and
bulges). Remove foreign bodies from the tyre profile.
•
Damage to tyres and wheels is frequently not visible. Unusual vibrations or
pulling of the vehicle to one side could be a sign of tyre damage. Please reduce your
speed immediately and stop if you suspect that a wheel is damaged. Inspect the
tyres for signs of damage (bulges, splits, etc.) If no visible damage is present, please
drive at an appropriately slow speed and ca refully to the nearest specialist garage
in order to have your vehicle inspected.
•
Also protect your tyres from contact with oil, grease and fuel.
•
Immediately replace any dust caps of the valves which have got lost.
•
Mark wheels before removing them so that their previous direction of running
can be maintained when mounted them again.
•
Always store wheels or tyres which been removed in a cool, dry and, where
possible, dark place. Tyres which are not fixed to a wheel trim should be stored
upright.
Unidirectional tyres*
The direction of rotation of the tyres is marked by arrows on the wall of the tyre.
This indicates the direction of rotation of the tyre, and it is essential that the tyres
are fitted on to run in this direction. Only then are the tyres able to provide the
optimal properties in terms of grip, lo w noise, wear-and-tear and aquaplaning.
Further information concerning the use of unidirectional tyres page 145.
WARNING
•
New tyres during the first 500 km do not offer optimal grip and should there-
fore be run appropriatel y - risk of accident!
•
Never drive with damaged tyres - risk of accident!Note
Please observe the various differing legal requirements regarding tyres.Tyre lifeThe life of your tyres very much depends on the following points:
Tyre pressure
The working life of tyres will be shortened considerably if the tyres are insufficiently
or over-inflated and this will have an adverse effect on the handling of your vehicle.
Correctly inflated tyres are of partic ular importance when travelling at high speeds.
It is therefore good to check the pressure at least once a month and also before
setting off on a long trip. Please do not forget the spare wheel when checking the
tyres.
The tyre inflation pressures for summer tyres are indicated on the inside of the fuel
filler flap fig. 129 . The inflation pressures for winter tyres are 20 kPa (0.2 bar)
higher than those for summer tyres page 144.
Fig. 129 An opened fuel filler flap with a
tyre size and tyre inflation pressure table
s2lk.2.book Page 141 Monday, April 18, 2011 7:41 AM
Page 143 of 183
 Owners Manual Wheels and Tyres
142
The tyre inflation pressures for tyres of the tyre size 205/50 R17, which are intended
to be used with snow chains, is identical to the pressures for tyres of the tyre size
225")
Wheels and Tyres
142
The tyre inflation pressures for tyres of the tyre size 205/50 R17, which are intended
to be used with snow chains, is identical to the pressures for tyres of the tyre size
225/45 R17, see page 141, fig. 129 .
The tyre pressure should be at the highest pressure specified for your vehicle at all
times.
The tyre inflation pressure of the emergency spare wheel R 18 is 420 kPa (4.2 bar).
Always check the inflation pressure of tyres when cold. Do not reduce the higher
pressure of warm tyres. Adap t the inflation pressure of the tyres accordingly if your
vehicle is carrying a significantly higher payload.
Driving style
Fast cornering, sharp acceleration and braking (squealing tyres) increase wear-and-
tear on your tyres.
Balancing wheels
The wheels of a new vehicle are balanced. There are a wide range of influences
when driving which may result in an imbalance and which makes themselves felt
through vibration in the steering.
You should have the wheels rebalanced since any imbalance increases wear-and-
tear on the steering, the suspension and tyres. A wheel must also be rebalanced
when a new tyre is fitted and each time a tyre is repaired.
Wheel alignment errors
Incorrect wheel alignment at the front and re ar will not only increase wear-and-tear
on the tyres but will also has an adverse effect on vehicle safety. Contact your
specialist garage if you no tice any unusual tyre wear.
WARNING
•
If the inflation pressure is too low, the tyre must perform a greater flexing
work. At higher speeds the tyre will warm up as a result of this. This can result
in tread separation and even a tyre blowout.
•
Immediately replace the damaged rims or tyres.
•
T y r e s w h i c h a r e 6 y e a r s o l d o r m o r e s h o u l d o n l y b e f i t t e d i n e x c e p t i o n a l c a s e s
and when adopting an appropriately cautious style of driving.For the sake of the environment
Tyres which are insufficiently inflated increase your fuel consumption.
Wear indicatorsThe base of the tread of the original tyres has wear indicators 1.6 mm high, installed
at right angles to the direction of travel. These wear indicators are located at 6 - 8
points depending on the make and are evenly spaced around the circumference of
the tyre fig. 130. Markings on the walls of the tyres through the letters “TWI”,
triangular symbols or other symbols identify the posi tion of the wear indicators.
A remaining tread of just 1.6 mm, measured in the grooves of the tread next to the
wear indicators, means that your tyres have reached their legally permissible
minimum tread depth.
WARNING
•
You must have your tyres replaced with new ones at the latest when the
wear indicators have been worn down. The legally permissible minimum tread
depth should be observed.
•
Worn tyres do not provide the necessary adhesion to the road surface at high
speeds on wet roads. One could experien ce “aquaplaning” (uncontrolled move-
ments of the vehicle - “swimming” on a wet road surface).
Fig. 130 Tyre tread with wear indicators
s2lk.2.book Page 142 Monday, April 18, 2011 7:41 AM
Page 144 of 183
 Owners Manual Wheels and Tyres143
Using the system
Safety
Driving Tips
General Maintenance
Breakdown assistance
Technical Data
Changing wheels aroundIf significantly greater wear is present on the front tyres, we r")
Wheels and Tyres143
Using the system
Safety
Driving Tips
General Maintenance
Breakdown assistance
Technical Data
Changing wheels aroundIf significantly greater wear is present on the front tyres, we recommend changing
the front wheels around with the rear wheels as shown in the diagram fig. 131.
You will then obtain approximately the same life for all the tyres.
It may be advantageous to swap the tyres over “crosswise” when certain types of
wear characteristic arise on the running surface of the tyres (but not in the case of
unidirectional tyres). The co -workers of the authorised Škoda Service Partners are
extensively familiar with the combination possibilities.
We recommend that you change the wheels around every 10 000 km in order to
achieve even wear on all wheels and to obtain optimal tyre life.New tyres and wheelsTyres and wheel rims are important design elements. One should therefore use the
tyres and wheel rims which have been released for use by Škoda Auto. They are
exactly matched to the vehicle type and th erefore contribute significantly to good
road holding and safe driving characteristics .
Only fit radial tyres of the same type on all 4 wheels, size (rolling circumference) and,
if possible, the same tr ead pattern on one axle.
The authorised Škoda Service Partners have access to the most current information
about which tyres we have released for use on your vehicle.
We recommend that you have any work relating to tyres or wheels carried out by an
authorised Škoda Service Partner . The authorised Škoda Service Partners have all
of the necessary special tools and replac ement parts available plus the required
specialist knowledge and are al so in a position to properly dispose of the old tyres.
A large number of authorised Škoda Service Partners also have an attractive range
of tyres and wheels available. The tyre/wheel combinations which are approved for your vehicle are indicated in
your vehicle documents. Approval and licensing may differ according to the legisla-
tion prevailing in individual countries.
Proper knowledge of the tyre data makes it easier for you to select the correct type
of tyre. Tyres do, for example, have the following
inscription on their walls:
195/65 R 15 91 T
What this means is:
The following speed restrictions apply to tyres.
The date of manufacture is also stated on the tyre wall (possibly only on the inside
of wheel):
DOT ... 20 09...
means, for example, that the tyre was manufactured in the 20th week of the year
2009.
Any spare wheel which differs from the tyres fitted to the vehicle (e.g. winter tyres
or low-profile tyres) should only be used for a short time in the event of a puncture
Fig. 131 Changing wheels around
195
Tyre width in mm
65
Height/width ratio in %
R
Code letter for the type of tyre - Radial
15
Diameter of wheel in inches
91
Load index
T
Speed symbol
Speed symbol
Permissible maximum speed
S
180 km/h
T
190 km/h
U
200 km/h
H
210 km/h
V
240 km/h
W
270 km/h
Y
300 km/h
s2lk.2.book Page 143 Monday, April 18, 2011 7:41 AM
 1
1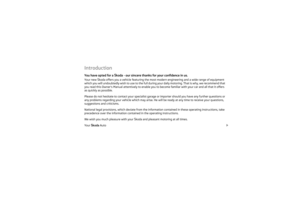 2
2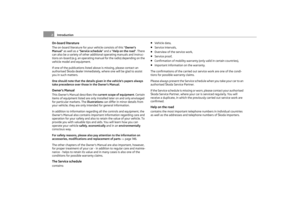 3
3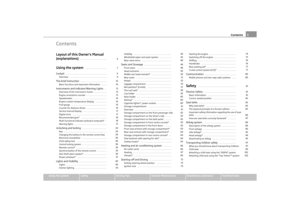 4
4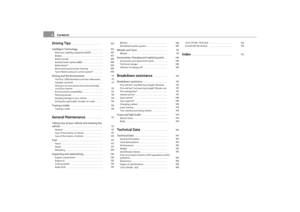 5
5 6
6 7
7 8
8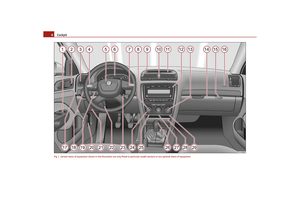 9
9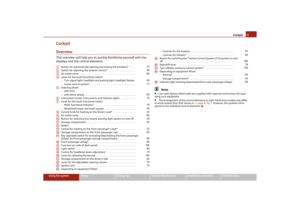 10
10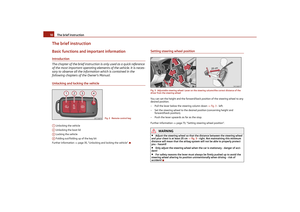 11
11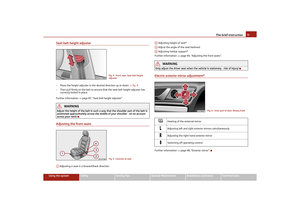 12
12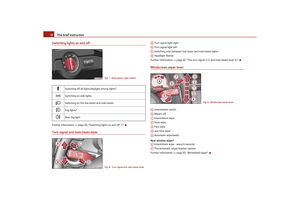 13
13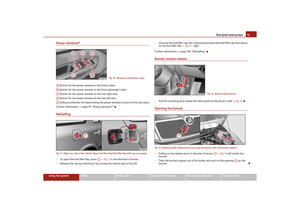 14
14 15
15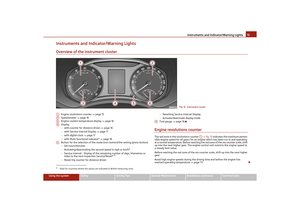 16
16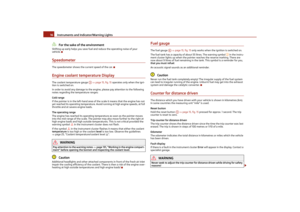 17
17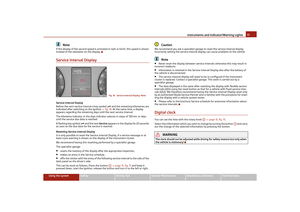 18
18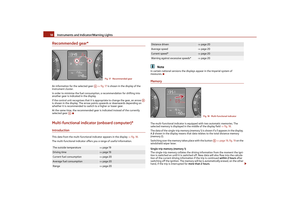 19
19 20
20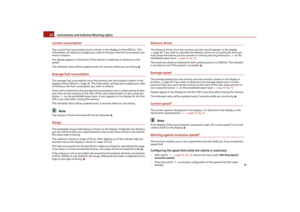 21
21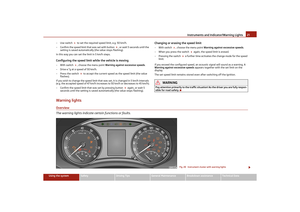 22
22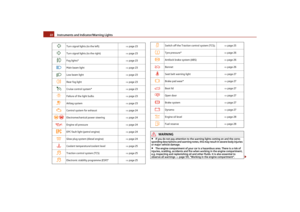 23
23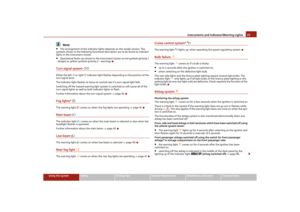 24
24 25
25 26
26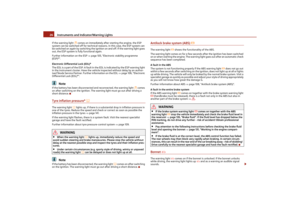 27
27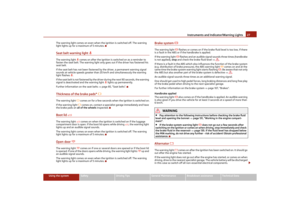 28
28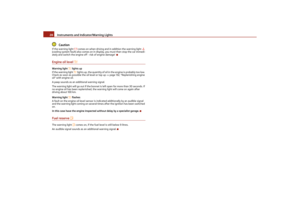 29
29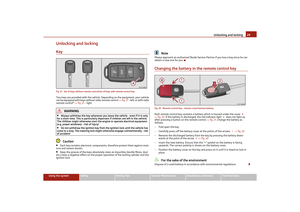 30
30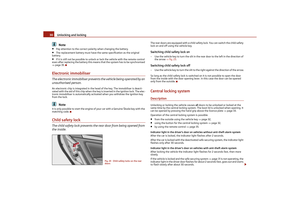 31
31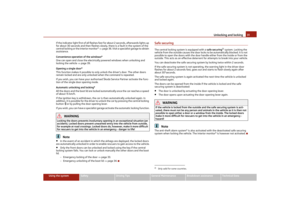 32
32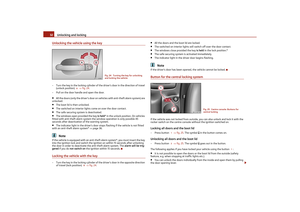 33
33 34
34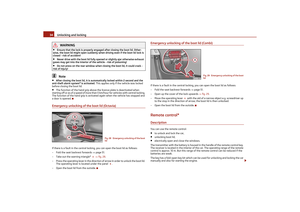 35
35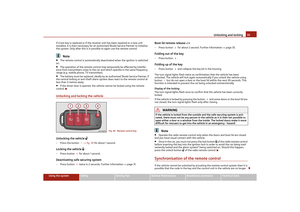 36
36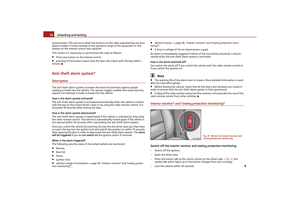 37
37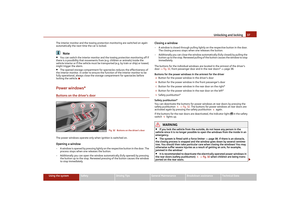 38
38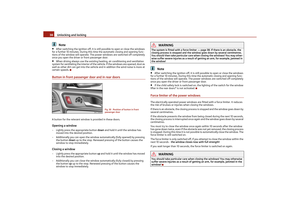 39
39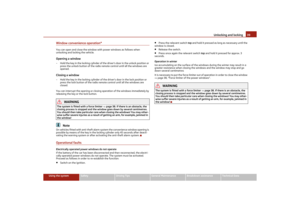 40
40 41
41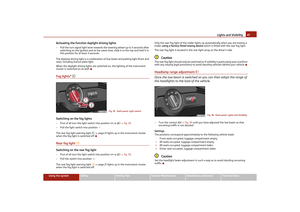 42
42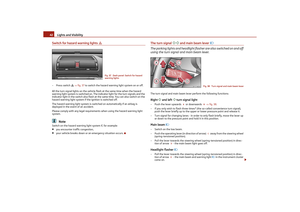 43
43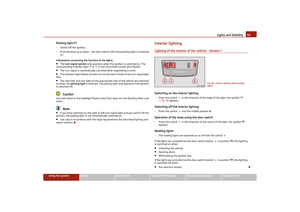 44
44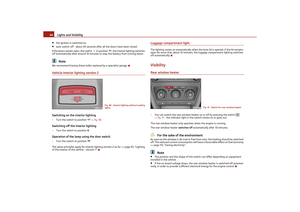 45
45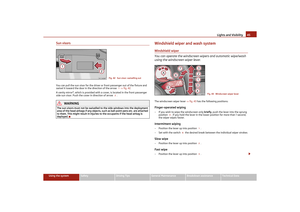 46
46 47
47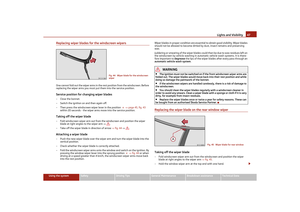 48
48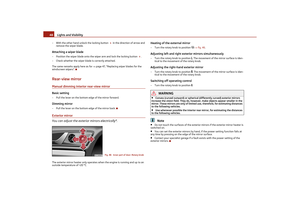 49
49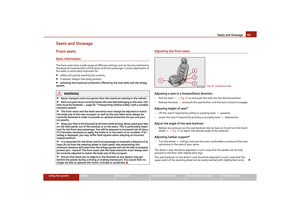 50
50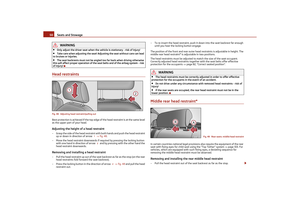 51
51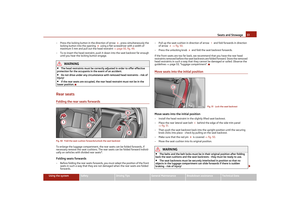 52
52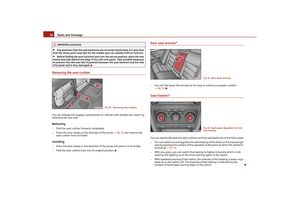 53
53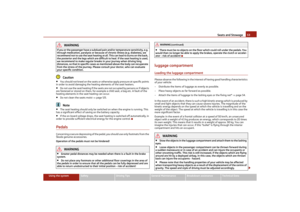 54
54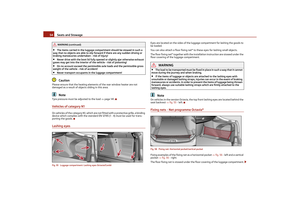 55
55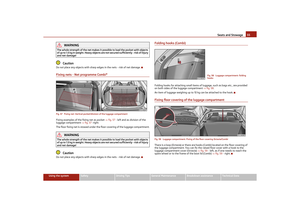 56
56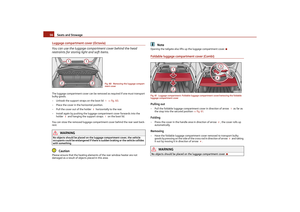 57
57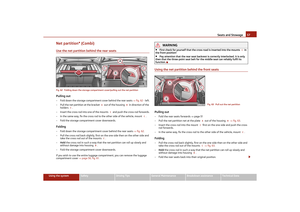 58
58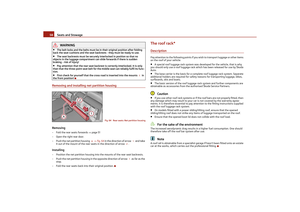 59
59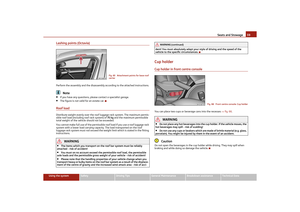 60
60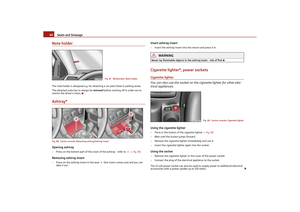 61
61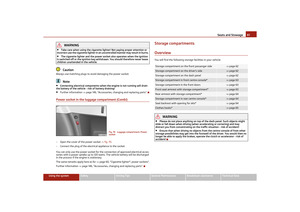 62
62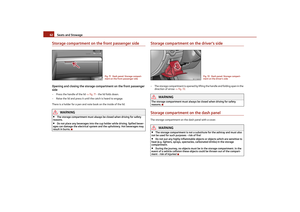 63
63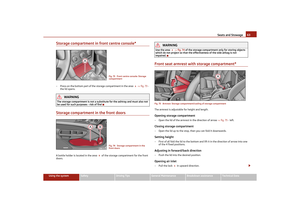 64
64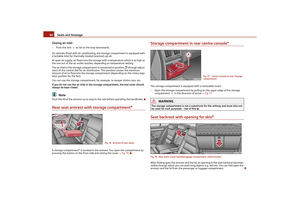 65
65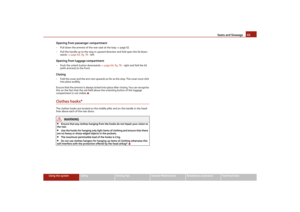 66
66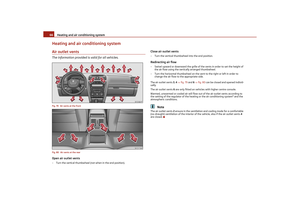 67
67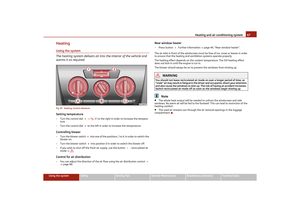 68
68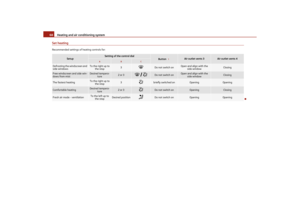 69
69 70
70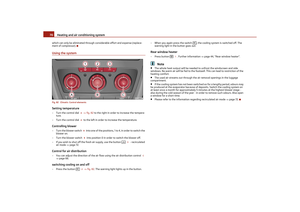 71
71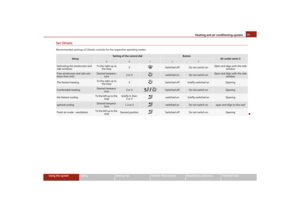 72
72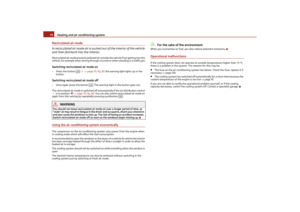 73
73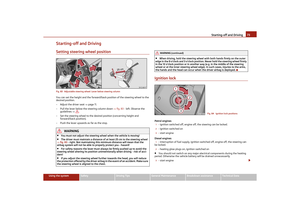 74
74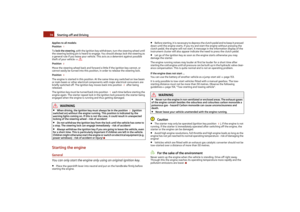 75
75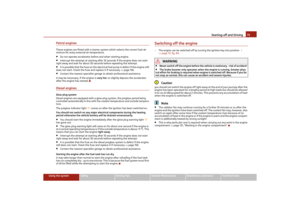 76
76 77
77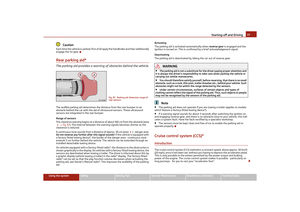 78
78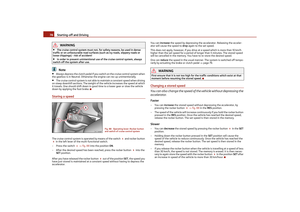 79
79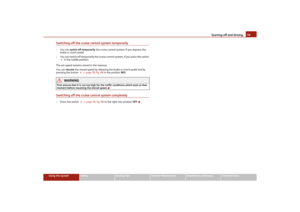 80
80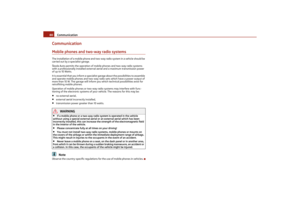 81
81 82
82 83
83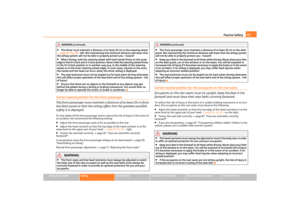 84
84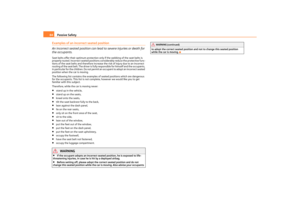 85
85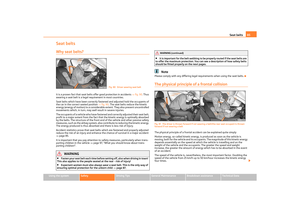 86
86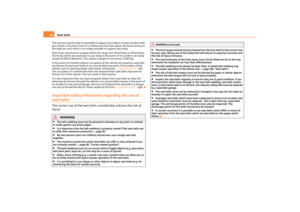 87
87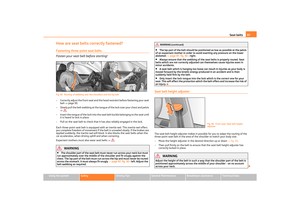 88
88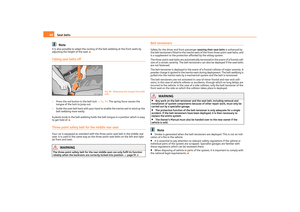 89
89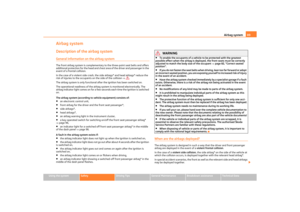 90
90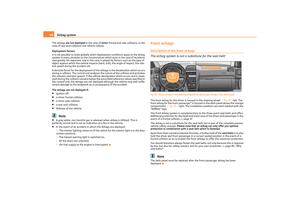 91
91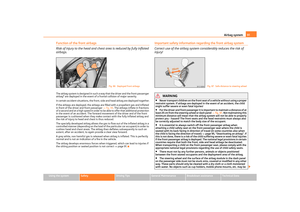 92
92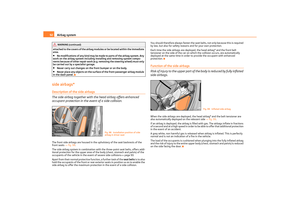 93
93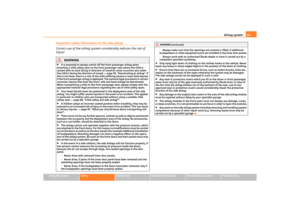 94
94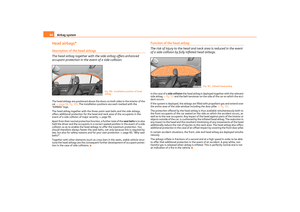 95
95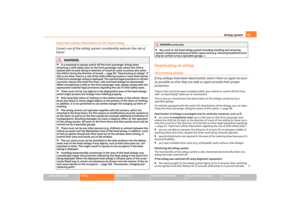 96
96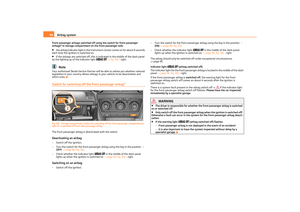 97
97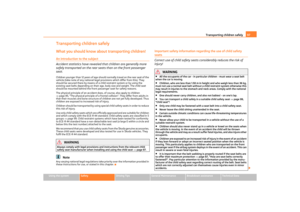 98
98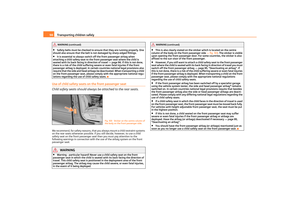 99
99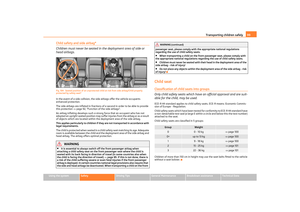 100
100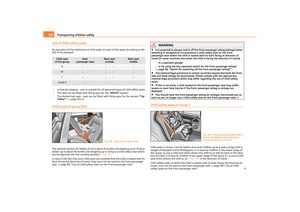 101
101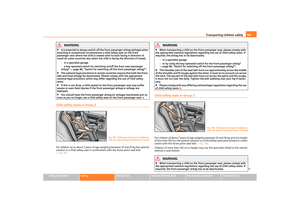 102
102 103
103 104
104 105
105 106
106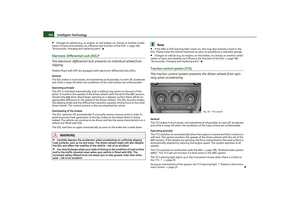 107
107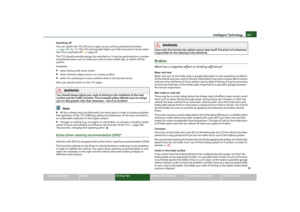 108
108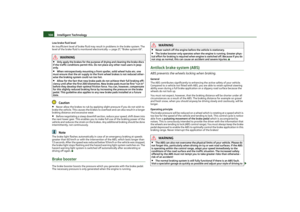 109
109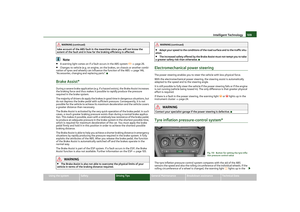 110
110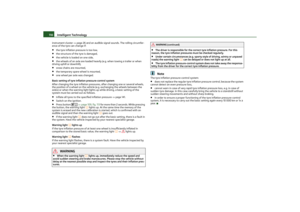 111
111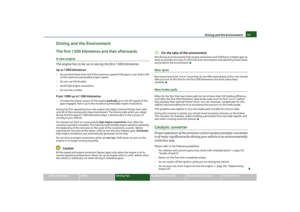 112
112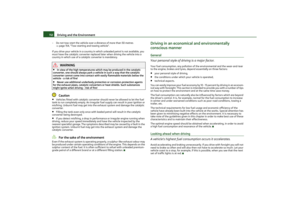 113
113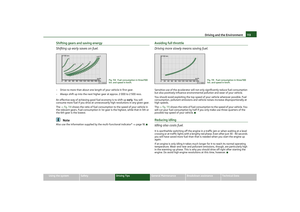 114
114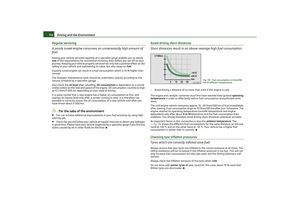 115
115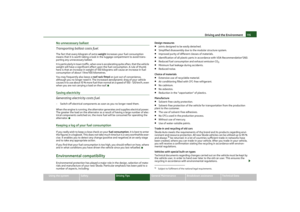 116
116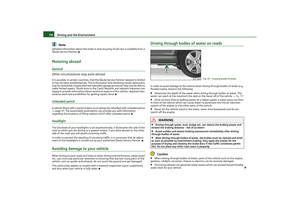 117
117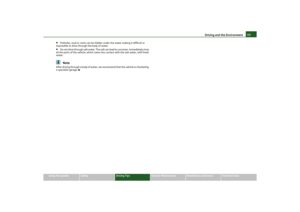 118
118 119
119 120
120 121
121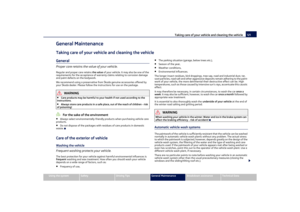 122
122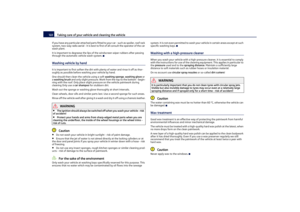 123
123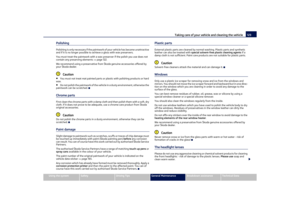 124
124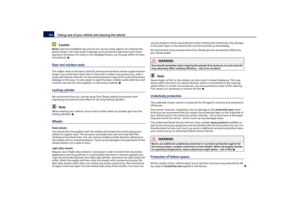 125
125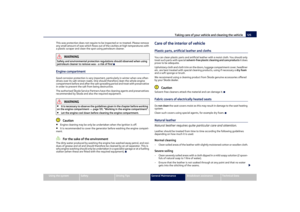 126
126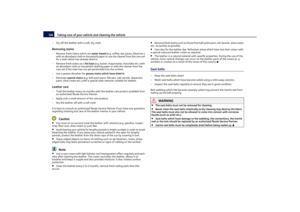 127
127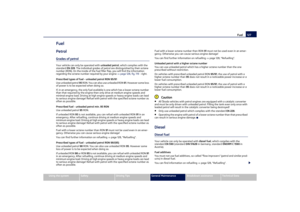 128
128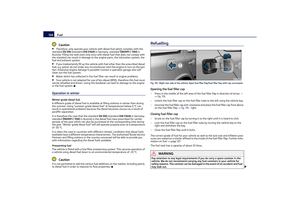 129
129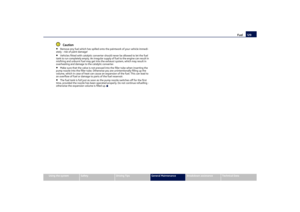 130
130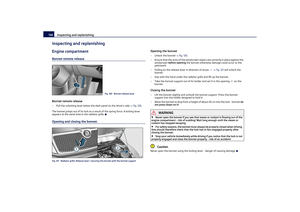 131
131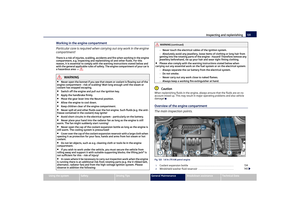 132
132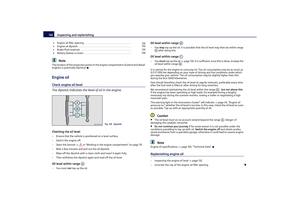 133
133 134
134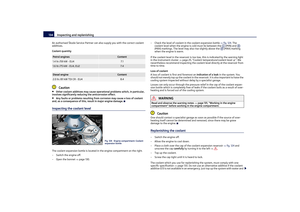 135
135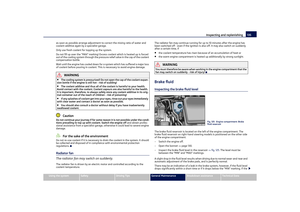 136
136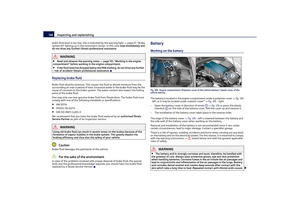 137
137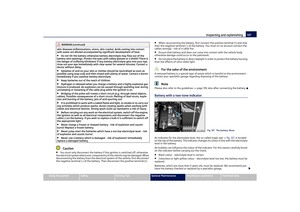 138
138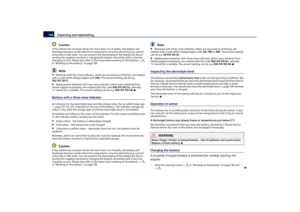 139
139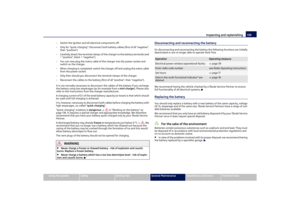 140
140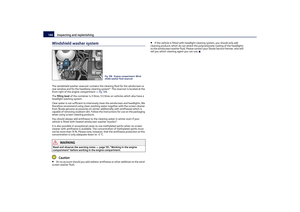 141
141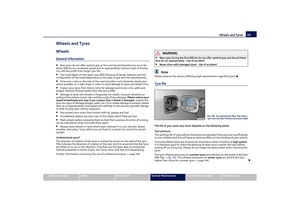 142
142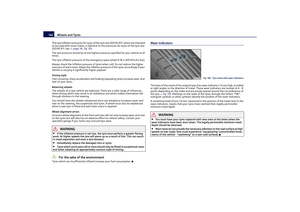 143
143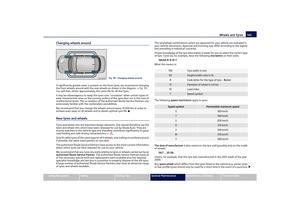 144
144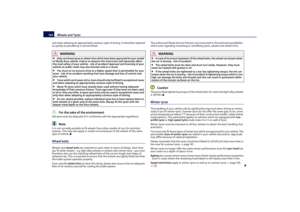 145
145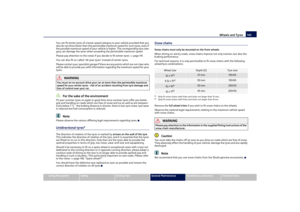 146
146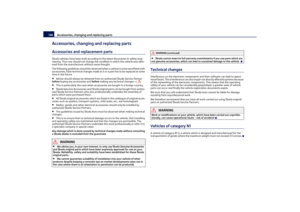 147
147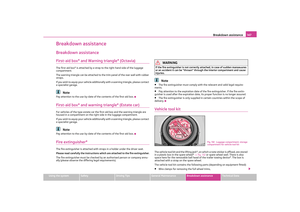 148
148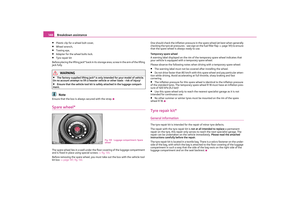 149
149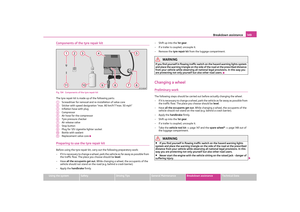 150
150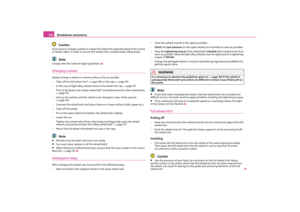 151
151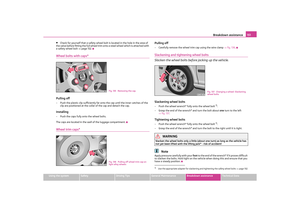 152
152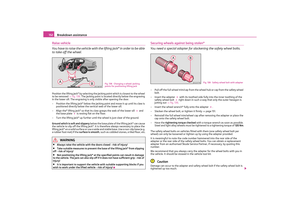 153
153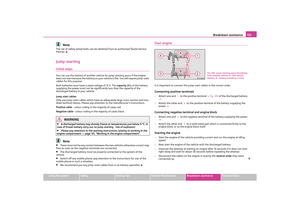 154
154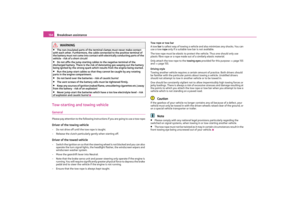 155
155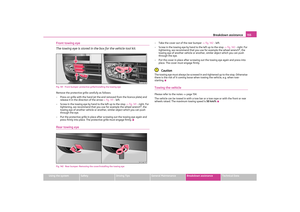 156
156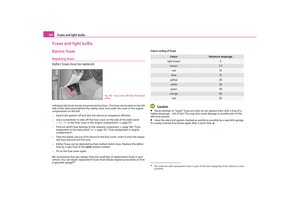 157
157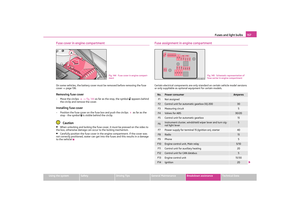 158
158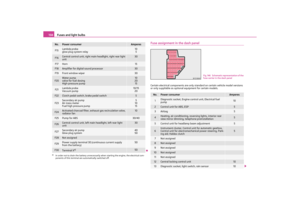 159
159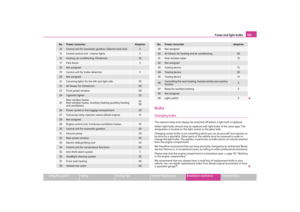 160
160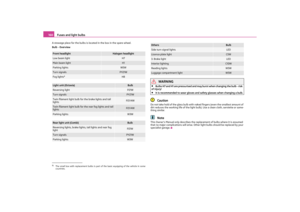 161
161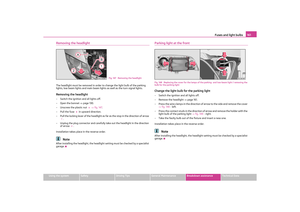 162
162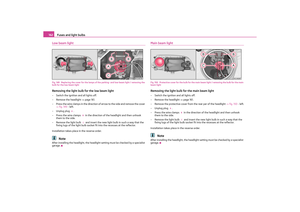 163
163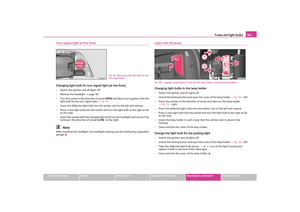 164
164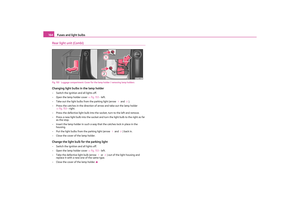 165
165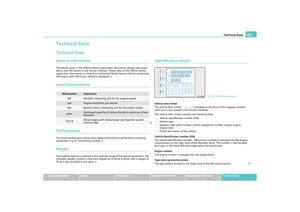 166
166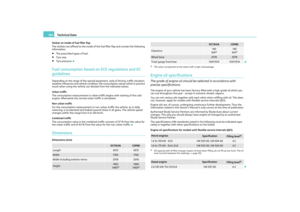 167
167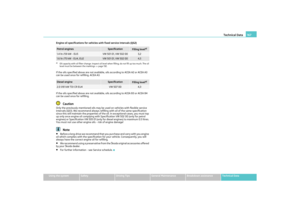 168
168 169
169 170
170 171
171 172
172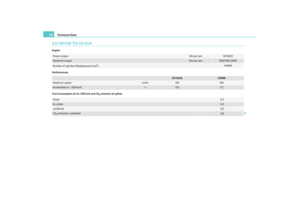 173
173 174
174 175
175 176
176 177
177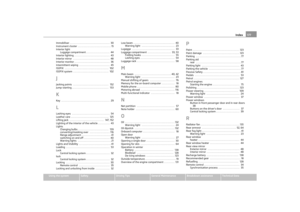 178
178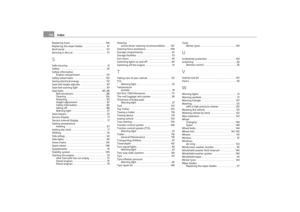 179
179 180
180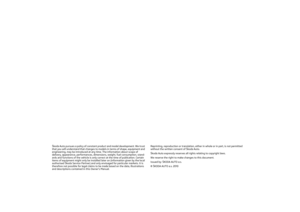 181
181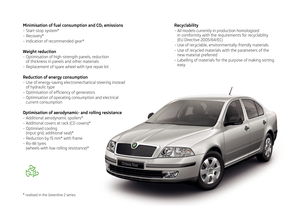 182
182