Page 201 of 256

Under the hoodMOBILITY
199
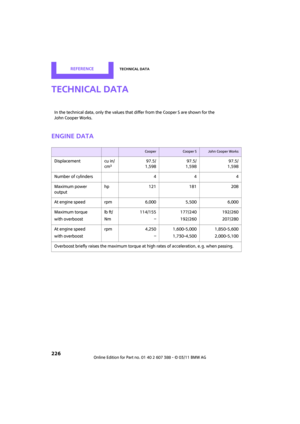
Important parts of the engine compartment
1Vehicle identification number*
2Battery, under the cover 219
3 Engine oil dipstick 199
4 Engine oil filler neck 200 5
Coolant expansion tank 200
6 Reservoir for washer fl uid for the headlamp
and window washer system 53
7 Engine compartment fuse box 218
Engine oil
The engine oil consumption is dependent on
driving style and driving conditions.
Check the engine oil level regularly, e.g. when
refueling.
Checking engine oil level
1.With the vehicle's engi ne at normal operat-
ing temperature, i.e. after uninterrupted
driving for at least 6 miles/10 km, park the
vehicle on a level surface.
2. Switch off the engine.
3. Pull the dipstick out after approx. 5 minutes
and wipe it off with a lint-free cloth, paper
towel or similar material. 4.
Carefully push the dipstick all the way into
the guide tube and pull it out again.
The oil level should be between the two
marks on the dipstick.
The oil quantity corresponding to the difference
between the two marks on the dipstick is
1 US quart/1 liter.
Page 202 of 256

MOBILITYUnder the hood
200
Do not fill beyond the upper mark on the
dipstick. Excess oil will damage the
engine. <
Adding engine oil
Do not add the maximum quantity of
1 US quart/1 liter of engine oil until the oil level
has dropped to just above the lower mark on the
dipstick, page 199.
Add oil within the next 30 miles/50 km;
otherwise, the engine could be dam-
aged. <
If too much motor oil is added, immedi-
ately have the vehicle checked; otherwise,
damage to the engine may result. <
Keep oils, grease, etc. out of the reach of
children and comply with the warnings on
the containers. Otherwise, health hazards may
result. <
Oil types for refilling
Notes
Do not use oil additives as this could result
in engine damage. <
When selecting a motor oil, ensure that it
belongs to one of the SAE viscosity classes
0W-40, 0W-30, 5W-40 an d 5W-30; otherwise,
malfunctions or damage to the engine may
result. <
The engine oil quality is critical for the life of the
engine.
Some types of oil may not be available in every
country.
Approved oil types
Additional information on approved types of oil
can be found at a dealer.
Alternative oil types
If the approved engine oils are not available, up
to 1 US quart/1 liter of another oil with the fol-
lowing specifications may be used:
Oil change
Only dealers are to perform oil changes.
Coolant
Coolant consists of half water and half additive.
Not all commercially available additives are suit-
able for your MINI. Your MINI dealer knows
which additives are suitable and will be glad to
advise you.
Only use suitable additives; otherwise,
engine damage may result. Because addi-
tives are harmful to your health, it is important
to follow the instructions on the containers. <
Comply with the appropriate environmen-
tal protection regulations when disposing
of coolant additives. <
Gasoline engines
BMW High Performance SAE 5W-30
BMW Longlife-01
BMW Longlife-01 FE
Gasoline engines
API SM or higher specifications
Page 203 of 256
Under the hoodMOBILITY
201
Coolant temperature
If the coolant, and therefore the engine, should
overheat, then a warning light will go on.
A message appears on the Control Display.
Checking coolant level
Do not add coolant to the cooling system
when the engine is hot. Escaping coolant
can cause burns. <
Do not open the hood until the engine has
cooled down.
The coolant level is correct if it is between the
Min and Max markings.
Topping off
1. Turn the cap of the expansion tank a little
counterclockwise to allow any accumulated
pressure to escape, then continue turning to
open.
2. Slowly fill to the correct fluid level; do not
overfill.
3. Close by turning the cap.
Have the reason for the coolant loss eliminated
as soon as possible.
Page 204 of 256

MOBILITYMaintenance
202
Maintenance
MINI Maintenance System
The MINI Maintenance System supports the
preservation of the traffic and operating safety
of your MINI. The objective is to optimize efforts
with respect to minimal vehicle maintenance
costs.
If and when you come to sell your MINI, a com-
prehensive record of serv icing will prove a signif-
icant benefit.
Condition Based Service CBS
Sensors and special algorithms take the different
driving conditions of your MINI into account.
Condition Based Service uses this to determine
the current and future se rvice requirements. By
letting you define a service and maintenance
regimen that reflects your own individual
requirements, the system builds the basis for
trouble-free driving.
On the Control Display, you can have the
remaining times or distan ces for selected main-
tenance tasks and any le gally prescribed dates
displayed, page 60.
Service data in the remote control
Your vehicle continuously stores service-
requirement information in the remote control
while you are driving. Your MINI dealer can read
out this data from the remote control unit, and
propose an optimized maintenance approach.
Whenever you take your car in for servicing you should therefore hand your MINI dealer the
remote control unit that you last used.
Make sure that the date is always set cor-
rectly, page 63; otherwise, the effective-
ness of Condition Based Service CBS is not
assured. <
Service and Warranty Information
Booklet for US mode ls and Warranty and
Service Guide Booklet for Canadian
models
Please consult your Service and Warranty Infor-
mation Booklet for US models and Warranty and
Service Guide Booklet for Canadian models for
additional information on service requirements.
The manufacturer of the MINI recom-
mends that you have service and repair
operations performed at your MINI dealer.
Take the time to ensure that these service pro-
cedures are confirmed by entries in your vehi-
cle's Service and Warran ty Information Booklet
for US models and Warranty and Service Guide
Booklet for Canadian models. These entries ver-
ify that your vehicle has received the specified
regular maintenance. <
Page 205 of 256

MaintenanceMOBILITY
203
Socket for On-Board
Diagnosis OBD
The primary components that make up the
emissions can be checked by a device via the
OBD socket.
Emissions
The warning lamps come on. The vehicle
is producing higher emissions. You can
continue your journey, but moderate
your speed and exercise due caution.
Have the car checked as soon as possible.
Under certain circumstances, one of the lamps
will flash or light up continuously. This indicates
excessive misfiring or a malfunction in the
engine. If this happens, reduce your speed and
visit the nearest MINI dealer as soon as possible.
Severe misfiring can quickly lead to serious dam-
age of emissions-related components, espe-
cially the catalytic converter. In addition,
mechanical engine components can become
damaged.
If the fuel filler cap is not properly tight-
ened, the OBD system may conclude
that fuel vapors are escaping, causing an
indicator to light up. If the filler cap is then tight-
ened, the indicator should go out within a few
days.
Data memory
Your vehicle displays data about the operation,
malfunctions, and user settings. These data are
stored in the vehicle and can be partly stored in
the remote control; the da ta can be read b y su it-
able devices, in particular at your service center.
The data read out are used for supporting the
service processes and repair or for optimization
and development of vehicle functions.
Page 206 of 256

MOBILITYCare
204
Care
Car-care products
Regular cleaning and care helps to maintain the
value of your MINI.
The manufacturer of your MINI recommends
using manufacturer-approved products to clean
and care for your vehicle.
Your MINI dealer would be pleased to advise
you on cleaning and care products and services
for your MINI.The ingredients of original MINI Care Prod-
ucts have been tested, and the products
have been tested in the laboratory and in prac-
tice. They offer optimum care and protection for
your vehicle. <
Do not use any cleansers containing alco-
hol or solvents as these may cause dam-
age. <
Cleaning agents may contain hazardous
or health-damaging substances. Follow
the warning and hazard instructions on the
packaging. For interior cleaning, always open
the doors or windows of the vehicle.
Do not use any products that are not intended
for cleaning the vehicle. <
External care
Washing your vehicle
Especially during the winter months the
vehicle should be frequently washed. Dirt
and road salt can damage the vehicle. <
After washing the vehicle, apply the
brakes briefly to dry them; otherwise,
water can reduce braking efficiency over the
short term and the brake rotors can corrode. <
Car washes
Preference should be given to cloth car washes. Do not use automatic high-pressure car
washes; otherwise, water may drip into
the vehicle around the windows. <
Before driving in to the car wash, check if the sys-
tem is suitable for your MINI. Observe the fol-
lowing points:
> Vehicle dimensions, page 227
> If necessary: fold in the outside mirrors,
page 41
> Maximum permissible tire width
Avoid car washes with tracks higher than
4 in/10 cm; otherwise, the chassis could
be damaged. <
Preparations for driving into the car wash:
> Unscrew the rod antenna.
> Deactivate the rain sensor
* to prevent unin-
tentional wiping.
> Deactivate the rear window wiper
* and pro-
tect it from damage. Ask the car wash oper-
ator about measures that can be taken to
protect the wipers.
> Remove additional atta chments, e.g. spoil-
ers or telephone antennas, if there is a pos-
sibility that they could be damaged.
> Inserting the remote control into the ignition
lock.
Automatic transmission
Before driving into the car wash, make sure that
the vehicle can roll:
1.Place the remote control, even with Comfort
Access, in the ignition lock.
2. Move the selector le ver to position N.
3. Release the parking brake.
4. Switch off the engine.
5. Insert the remote control in the ignition lock
so that the vehicle can roll.
Page 207 of 256

CareMOBILITY
205
Steam jets/high-pressure washers
When using steam jets or high-pressure
washers, make sure that you maintain suf-
ficient distance from the vehicle and do not
exceed a maximum temperature of 140 7/
60 6 .
If the distance is too close, the pressure too high,
or the temperature too high, parts of the vehicle
can be damaged, or water can penetrate.
Observe the operating in structions for high-
pressure washers. <
Do not spray sensors such as the Park
Distance Control with high-pressure
washers for a long time or at a distance of less
than 1 ft/30 cm. <
Manual washing
Use a great deal of water and, if necessary, car
shampoo when washing your car by hand. Clean
the vehicle with a spon ge or a washing brush
applying a slight amount of pressure.
Before cleaning the windshield, deacti-
vate the rain sensor or turn off the ignition
to prevent unintentional wiping. <
Observe local regulati ons regarding wash-
ing vehicles by hand. <
Headlamps
Do not wipe dry and do not use abrasive or cor-
rosive cleaning agents. Remove dirt and con-
tamination, such as inse cts, by soaking with
shampoo and then washing with plenty of
water.
Do not remove accumula ted ice and snow with
an ice scraper; use window deicers instead.
Windows
Clean the outside and inside of the windows and
mirrors with a window cleaner.
Do not clean the mirrors with cleaners
containing quartz. <
Wiper blades
Clean with soapy water an d change regularly to
prevent the formation of streaks.
Wax, preservatives and dirt on the win-
dows cause streaks when the windshield
wipers are on, and can cause premature wear of
the wiper blades and interfere with the rain sen-
sor. <
Paintwork, care
Regular care helps your vehicle retain its value
and protects the pain t from the long-term
effects of aggressive substances.
In some regions, envi ronmental factors can
affect the vehicl e paintwork and damage it. It is
therefore important to adjust the frequency and
extent of vehicle ca re correspondingly.
Immediately remove aggr essive materials such
as spilled fuel, oil, grease, brake fluid, tree sap or
bird droppings to preven t damage to the paint-
work.
Removing paintwork damage
Depending on the severity of the damage,
immediately repair stone damage or
scratches to prevent rusting. <
The manufacturer of the MINI recommends
repairing paint damage pr ofessionally according
to factory specifications with original MINI
paints.
Preservation
Preservation is necessary when water no longer
beads on the clean paint surface. To preserve
the paint, only use pres ervatives that contain
carnauba or synthetic waxes.
Rubber seals
Only treat with water or rubber care products.
Do not use silicon spra ys or other silicon-
containing care products on rubber seals;
otherwise, noise and damage could occur. <
Page 208 of 256

MOBILITYCare
206
Chrome parts*
Carefully clean vehicle parts such as the radiator
grill and door handles with copious quantities of
water and, if necessary, a shampoo additive,
especially when contaminated with road salt.
For additional treatmen t, use chrome polish.
Light alloy wheels*
The system produces brake dust that collects on
the light alloy wheels. Clean them regularly with
acid-free wheel cleaner.
Do not use aggressive, acid-containing,
highly alkaline, or abrasive cleansers or
steam jets hotter than 140 7/60 6 a s t h e y m a y
cause damage. <
External sensors
Keep the outside sensors on the vehicle
such as the Park Di stance Control clean
and ice-free to ensure that they function prop-
erly. <
Careinternal
Upholstery/fabrics
Regularly use a vacuum cleaner to remove sur-
face dirt.
In case of serious spots su ch as liquid stains, use
a soft sponge or lint-free microfiber cloth and
suitable interior cleaners. Observe the instruc-
tions on the packaging.
Clean upholstery up to the seams. Do not
rub forcefully. <
Velcro fasteners on pa nts or other items of
clothing can damage seat covers. Make
sure that all Velcro fasteners are closed. <
Leather/leather coverings*
The leather processed by the manufac-
turer of your MINI is a high-quality natural
product. Light variations in the grain is one of
the typical properties of natural leather.
e pores and folds of the
leather have an abrasive effect, leading to
increased wear and causing the leather surface
to become brittle prematurely. Use a cloth or
vacuum cleaner to remo ve dust on a regular
basis.
Especially when the leather has a light color, it
should be cleaned regularl y since it tends to get
heavily soiled.
Treat the leather twice a year using a leather
lotion since dirt and grease will gradually attack
the leather's protective layer.
Carpets/floor mats*
Keep floor mats, carpet, and other objects
out of the movement range of the pedals;
otherwise, they may inhibit the function of the
pedals during driving.
Do not place additional floor mats onto an exist-
ing one or onto other objects.
Only use floor mats that have been approved for
the vehicle and can be appropriately fastened.
Make sure that the floo r mats are securely fas-
tened again after they ha ve been removed, e.g.
for cleaning. <
Floor mats can be removed to be cleaned.
If the carpets are very di rty, clean with a microfi-
ber cloth and water or an interior cleaner. When
doing so, rub forward and back in the driving
direction; otherwise, the carpet may become
matted.
Interior plastic parts
These include:
> Plastic surfaces
> Lamp glass
> Display panes
> Mat parts
Only clean with water and, if necessary, solvent-
free plastic cleaners. Do not use solvents such as alcohol, lac-
quer thinner, cold clea ners, fuel, or similar,
as these will damage the surfaces. <