Page 65 of 76
SETUP
357
(c) Changing the passcode
The passcode for registering your por-
table player on the system. You can
change this to 4 to 8 digit number of
your choice. The default is “0000”.
1. Touch “Edit” of “Passcode” on “BT
Audio Settings” screen.
2. Enter the new 4−8 digits passcode
and touch “OK”.
Each time you touch
, an input digit
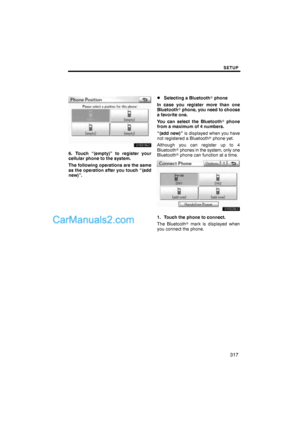
is deleted.(d) Changing the device name
You can change a device name. Even if
you change a device name, the name
registered your portable player is not
changed.
1. Touch “Edit” of “Device Name” on
“BT Audio Settings” screen.
2. Enter the new device name and
touch “OK”.
INFORMATION
The device names are common
Bluetooth� audio and Bluetooth�
phone.
If you change the device name of the
audio, the device name of the phone
will change at same time.
However, passcodes can be set
separately.
Page 66 of 76
SETUP
358
(e) Initializing the Bluetooth� audio
settings
You can initialize the settings.
1. Touch “Default” on “BT Audio Set-
tings” screen.
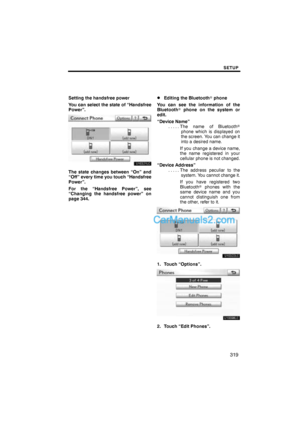
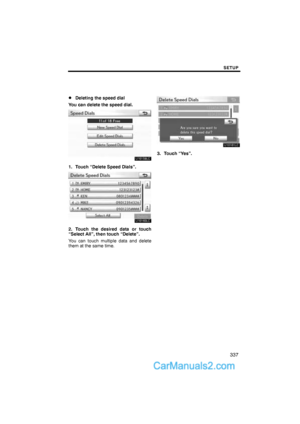
2. Touch “Yes”.When the navigation system is turned on,
the “Information” screen displays when it is
time to replace a part or certain compo-
nents. (See page 27.)
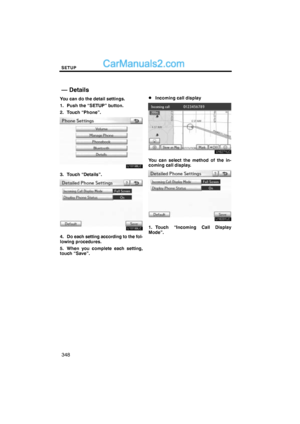
1. Push the “SETUP” button.
2. Touch “Vehicle”.
3. Touch “Maintenance”.
Vehicle settings —
— Maintenance
Page 67 of 76
SETUP
359
�Setting maintenance information (See
page 359.)
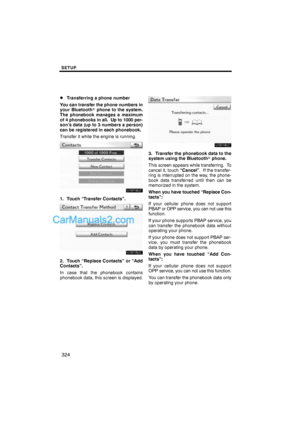
�Setting dealer (See page 361.)(a) Maintenance information setting
1. Push the “SETUP” button.
2. Touch “Vehicle” on the “Setup”
screen.
3. Touch “Maintenance” on the “Ve-
hicle Settings” screen.
4. Touch the desired button.
For details of each button, see “INFORMA-
TION ITEMS” on page 360.
“Delete All”: To cancel all conditions
which have been inputted.
“Reset All”: To reset the item which has
satisfied a condition.
“Set Dealer”: To register dealer informa-
tion. (See “ (b) Dealer setting” on page
361.)
“Dealer Info.”: To edit dealer information.
(See “ (b) Dealer setting” on page 361.)
“Reminder”: When this button is touched,
the indicator is illuminated. The system is
set to give maintenance information with
the “Information” screen. (See page 27.)
When the vehicle needs to be serviced, the
button color will change to orange.
Page 68 of 76

SETUP
360
INFORMATION ITEMS
“Engine oil”: Replace engine oil
“Oil filter”: Replace engine oil filter
“Rotation”: Rotate tires
“Tires”: Replace tires
“Battery”: Replace battery
“Brake pad”: Replace brake linings
“Wipers”: Replace wiper blades
“Coolant”: Replace engine coolant
“Brake oil”: Replace brake fluid
“Trans. fluid”: Replace transmission fluid
“Service”: Scheduled maintenance
“Air filter”: Replace air filter
“Personal”: New information items can
be created separately from provided ones.
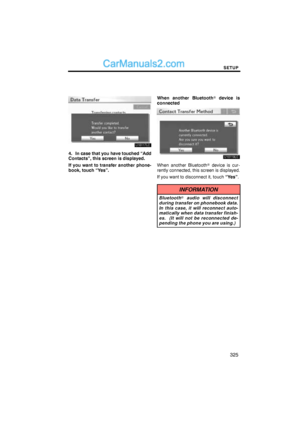
5. Input the conditions.
“Date”: The next maintenance date can be
input.
“Distance”: The driving distance until the
next maintenance check can be input.
“Delete”: To cancel the date and distance
conditions.
“Reset”: To reset the date and distance
conditions.
6. Touch “OK”.
The screen then returns to the “Mainte-
nance” screen.
INFORMATION
�For scheduled maintenance infor-
mation, please refer to the “War-
ranty and Services Guide/Owner’s
Manual Supplement/Scheduled
Maintenance”.
�Depending on driving or road con-
ditions, the actual date and dis-
tance may differ from the stored
date and distance in the system.
Page 69 of 76
 Dealer setting
It is possible to register a dealer in the sys-
tem. With dealer information registered,
route guidance to the dealer is available.
1. Push the “SETUP” button.
2. Touc")
SETUP
361
(b) Dealer setting
It is possible to register a dealer in the sys-
tem. With dealer information registered,
route guidance to the dealer is available.
1. Push the “SETUP” button.
2. Touch “Vehicle” on the “Setup”
screen.
3. Touch “Maintenance” on the “Ve-
hicle Settings” screen.
4. Touch “Set Dealer”.
5. If the dealer has not been registered,
enter the location of the dealer in the
same way as for a destination search.
(See “Destination search” on page 62.)
When “Set Dealer” registration is finished,
the “Dealer” screen will be displayed.
6. Touch “Edit” for the item you want
to change.
“Dealer”: To enter the name of a dealer.
(See page 362.)
“Contact”: To enter the name of a dealer
member. (See page 362.)
“Location”: To set a location. (See page
362.)
“Phone #”: To set a telephone number.
(See page 363.)
“Delete Dealer”: To delete the dealer in-
formation displayed on the screen.
“Enter
”: To set the displayed dealer as
a destination. (See “Starting route guid-
ance” on page 83.)
Page 70 of 76
SETUP
362 �
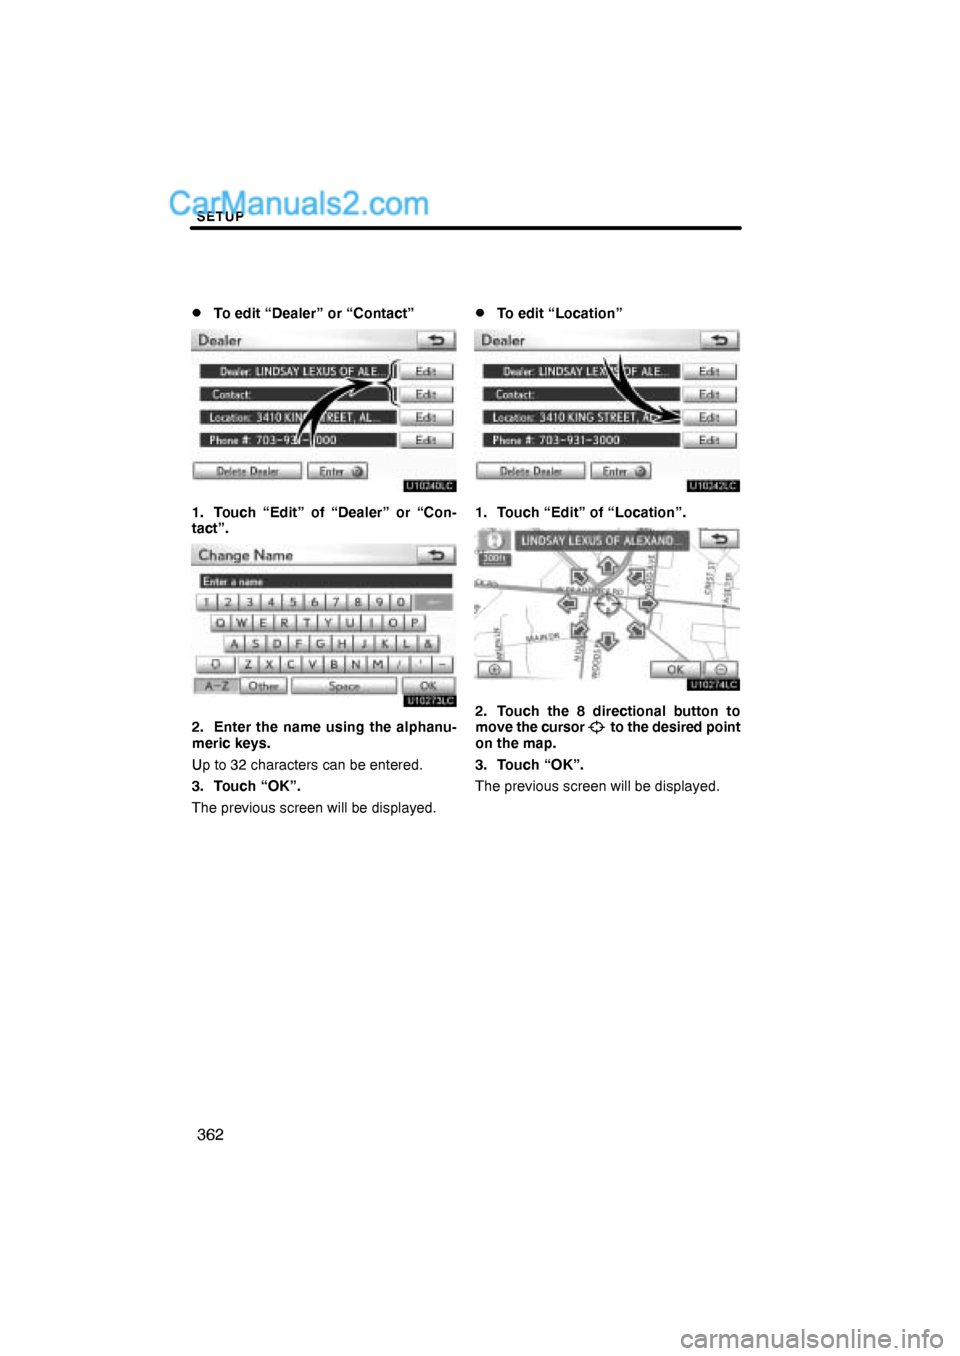
To edit “Dealer” or “Contact”
1. Touch “Edit” of “Dealer” or “Con-
tact”.
2. Enter the name using the alphanu-
meric keys.
Up to 32 characters can be entered.
3. Touch “OK”.
The previous screen will be displayed.
�To edit “Location”
1. Touch “Edit” of “Location”.
2. Touch the 8 directional button to
move the cursor to the desired point
on the map.
3. Touch “OK”.
The previous screen will be displayed.
Page 71 of 76
SETUP
363 �
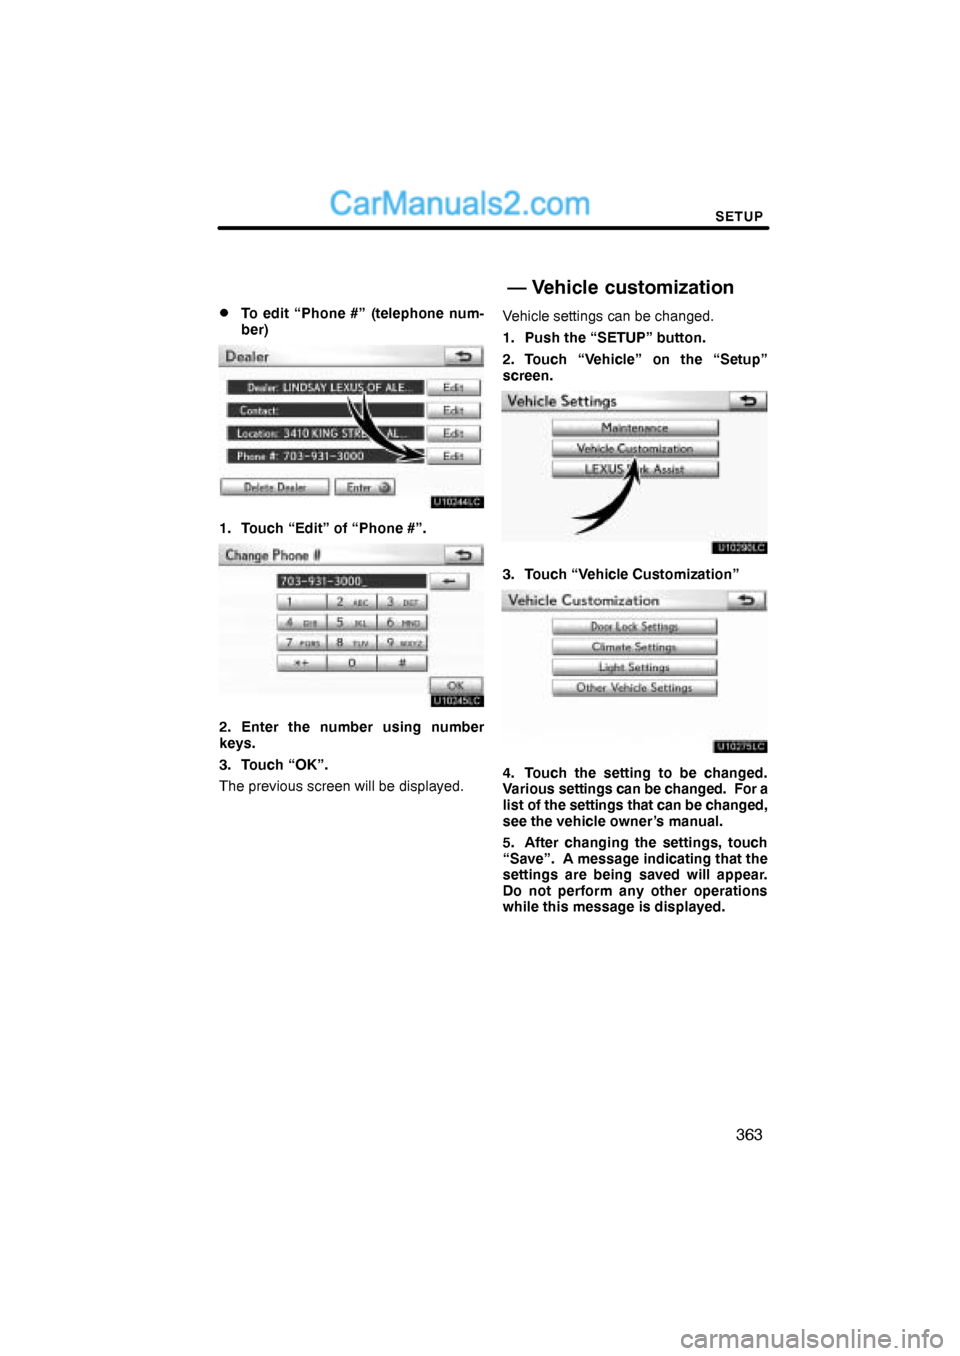
To edit “Phone #” (telephone num-
ber)
1. Touch “Edit” of “Phone #”.
2. Enter the number using number
keys.
3. Touch “OK”.
The previous screen will be displayed.Vehicle settings can be changed.
1. Push the “SETUP” button.
2. Touch “Vehicle” on the “Setup”
screen.
3. Touch “Vehicle Customization”
4. Touch the setting to be changed.
Various settings can be changed. For a
list of the settings that can be changed,
see the vehicle owner’s manual.
5. After changing the settings, touch
“Save”. A message indicating that the
settings are being saved will appear.
Do not perform any other operations
while this message is displayed.
— Vehicle customization
Page 72 of 76
SETUP
364
CAUTION
When performing the customization
procedure, ensure that there is suffi-
cient ventilation in the vehicle and
surrounding area. If there is insuffi-
cient ventilation, exhaust gases may
collect and enter the vehicle. Ex-
haust gases include harmful carbon
monoxide (CO) and inhaling them
may lead to death or a serious health
hazard.
INFORMATION
Stop the vehicle in a safe place, set
the parking brake and put the shift le-
ver in “P”. To avoid discharging the
battery, perform the customization
procedure with the engine running.
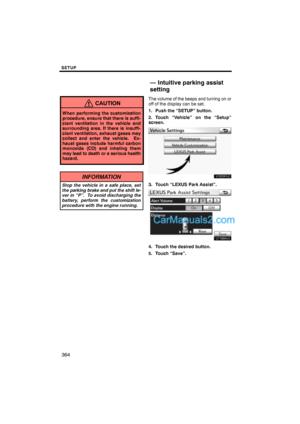
The volume of the beeps and turning on or
off of the display can be set.
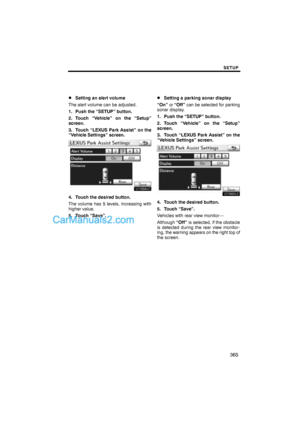
1. Push the “SETUP” button.
2. Touch “Vehicle” on the “Setup”
screen.
3. Touch “LEXUS Park Assist”.
4. Touch the desired button.
5. Touch “Save”.
— Intuitive parking assist
setting


 Changing the passcode
The passcode for registering your por-
table player on the system. You can
change this to 4 to 8 digit number of
your choice. The default is “0000”.
1. Touch �")