Page 9 of 76

2Voice guidance during route guid-
ance can be set to “On” or “Off”.")
SETUP
301
No.Function
1The voice guidance volume can
be adjusted or switched off. (See
“
�Voice volume” on page 301.)
2Voice guidance during route guid-
ance can be set to “On” or “Off”.
3“On” or “Off” can be selected for
voice guidance when the audio/air
conditioner is used.
4Voice recognition talkback can be
set to “On” or “Off”.
5
When “On” is selected, the voice
command system can be oper-
ated without pressing the talk
switch more than once.
6
When using the traffic information
function, voice guidance can be
s e t to “On” or “Off”. (See “
�Traf-
fic voice guidance” on page 302.)
7
When using the XM
NavWeather� function, the sev-
ere weather warning can be set to
“On” or “Off”.
8
Voice guidance projection can be
set to the “Center” position or the
“Driver” position. (See “
�Voice
guidance speaker” on page 302.)
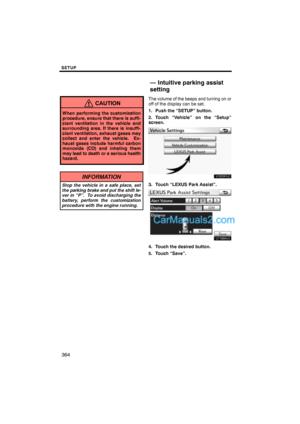
�Voice volume
The voice guidance volume can be ad-
justed or switched off.
1. Push the “SETUP” button.
2. Touch “Voice” on the “Setup”
screen.
3. Select the desired level by touching
the number.
If voice guidance is not needed, touch
“Off” to disable the feature.
When selected, the number or “Off” will
be highlighted.
4. Touch “Save”.
Page 10 of 76
SETUP
302 �
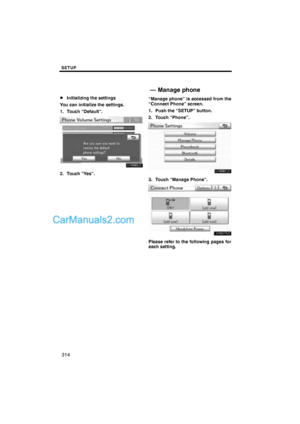
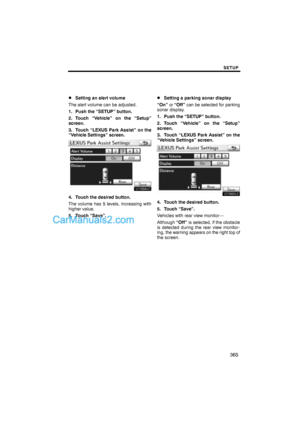
Traffic voice guidance
You can receive congestion information
through voice guidance while being guided
to your destination.
To turn the “Traffic Voice Guidance” on:
1. Push the “SETUP” button.
2. Touch “Voice” on the “Setup”
screen.
U10031LS
3. Touch “On” of the “Traffic Voice
Guidance”.
4. Touch “Save”.
INFORMATION
�This function is available only in
English. To select English, see “�Selecting a language” on page 295.
�When the “Traffic Information” in-
dicator is dimmed, “Auto Avoid
Traffic”, “Traffic Voice Guidance”
and “Show Free Flowing Traffic”
will not operate.
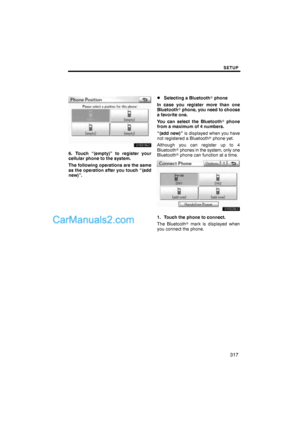
�Voice guidance speaker
The projection position of voice guidance
can be adjusted.
1. Push the “SETUP” button.
2. Touch “Voice” on the “Setup”
screen.
U10032LS
3. Touch “Voice Guidance Speaker”.
4. Touch “Center” or “Driver”.
5. Touch “Save”.
Page 11 of 76
SETUP
303
Points or areas on the map can be register-
ed.
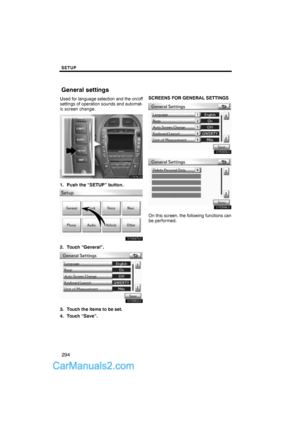
On this screen, the following operations
can be performed.
No.
Function
1Sets home
(See page 111.)
2Sets preset destinations
(See page 113.)
3Sets address book
(See page 116.)
4Sets area to avoid
(See page 122.)
5Deletes previous destinations
(See page 127.)
6Detailed navigation settings
(See page 303.)
Average cruising speed, displayed screen
contents, and POI icon categories can be
set.
1. Push the “SETUP” button.
2. Touch “Navi.”.
3. Touch “Detailed Navi. Settings”.
Navigation settings Detailed navigation settings
Page 12 of 76
SETUP
304
4. Touch the items to be set.
5. Touch “Save”.SCREENS FOR NAVIGATION SET-
TINGS
On this screen, the following functions can
be performed.
No.
Function
1Average cruising speed can be
set. (See “� Driving speeds” on
page 305.)
2The automatic input function can
be set to “On” or “Off”.
3During route guidance, voice guid-
ance for the next street name can
be set to “On” or “Off”.
4
“On” or “Off” can be selected to
display cautionary massages
when the route includes traffic re-
strictions or seasonally restricted
roads.
5When “On” is selected, freely
flowing traffic can be shown with
the arrow.
Page 13 of 76
” on
page 308.)
7
Buttons displayed on the map
screen when “��Off” is selected")
SETUP
305
No.Function
6
Displayed POI icon categories can
be set. (See “� POI category
change (Select POI icons)” on
page 308.)
7
Buttons displayed on the map
screen when “��Off” is selected
can be set. (See “
� Screen layout
function (“��Off” function)” on
page 309.)
8
The current vehicle position mark
can be adjusted manually. Miscal-
culation of the distance caused by
tire replacement can also be ad-
justed. (See “
� Current position/
tire change calibration” on page
309.)
9
Display of pop−up information can
be set to “On” or “Off”. (See “�Pop−up information” on the page
311.)
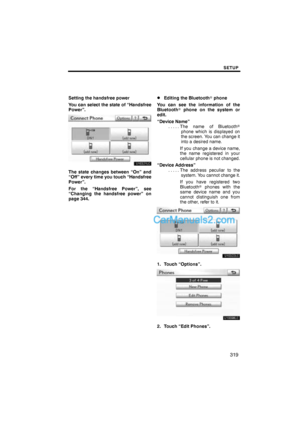
�Driving speeds
The speed that is used for the calculation
of the estimated travel time and the esti-
mated arrival time can be set.
1. Push the “SETUP” button.
2. Touch “Navi.” on the “Setup”
screen.
3. Touch “Detailed Navi. Settings” on
the “Navigation Settings” screen.
4. Touch “Driving Speeds”.
5. Touch or to set the average
vehicle speeds for “Residential”, “Main
Streets”, and “Freeways”.
To set the default speeds, touch “De-
fault”.
6. After setting of the desired speeds
is completed, touch “Save”.
Page 14 of 76

SETUP
306
INFORMATION
�The displayed time to the destina-
tion is the approximate driving
time that is calculated based on the
selected speeds and the actual
position along the guidance route.
�The time shown on the screen may
vary greatly depending on prog-
ress along the route, which may be
affected by conditions such as
traffic jams and construction work.
�It is possible to display up to 99
hours 59 minutes.
�Auto avoid traffic
The guidance route automatically
changes to another route to avoid heavy
congestion.
To turn the “Auto Avoid Traffic” on:
1. Push the “SETUP” button.
2. Touch “Navi.” on the “Setup”
screen.
3. Touch “Detailed Navi. Settings” on
the “Navigation Settings” screen.
4. Touch “On” of the “Auto Avoid Traf-
fic”.
5. Touch “Save”.
When congestion information about the
guidance route has been received, a
screen will appear to ask you whether to
reroute to avoid the congestion.
If you wish to reroute, touch “Yes”. Anoth-
er route to allow you to avoid the conges-
tion will appear.
If you do not wish to reroute, touch “No”.
Page 15 of 76
SETUP
307
INFORMATION
When the “Traffic Information” indi-
cator is dimmed, “Auto Avoid Traf-
fic”, “Traffic Voice Guidance” and
“Show Free Flowing Traffic” will not
operate.
�Show free flowing traffic
Freely flowing traffic is shown with the ar-
row.
To turn the “Show Free Flowing Traffic” on:
1. Push the “SETUP” button.
2. Touch “Navi.” on the “Setup”
screen.
3. Touch “Detailed Navi. Settings” on
the “Navigation Settings” screen.
4. Touch “On” of the “Show Free Flow-
ing Traffic”.
5. Touch “Save”.
INFORMATION
When the “Traffic Information” indi-
cator is dimmed, “Auto Avoid Traf-
fic”, “Traffic Voice Guidance” and
“Show Free Flowing Traffic” will not
operate.
Page 16 of 76
SETUP
308 �
POI category change
(Select POI icons)
Select from among the 6 icons displayed
on the “Customize POI Icons” screen, so
that setting of the icons to be displayed on
the map screen can be done easily.
1. Push the “SETUP” button.
2. Touch “Navi.” on the “Setup”
screen.
3. Touch “Detailed Navi. Settings” on
the “Navigation Settings” screen.
4. Touch “Customize POI Icons”.
5. Touch the category button to be
changed.
6. Touch the desired group.
If the desired POI category is not on the
screen, touch “List All Categories” to list
all POI categories.
7. Touch the desired category.
8. Touch “OK”.


2Sets preset destinations
(See page 113.)
3")


