Page 32 of 76

SETUP
324 �
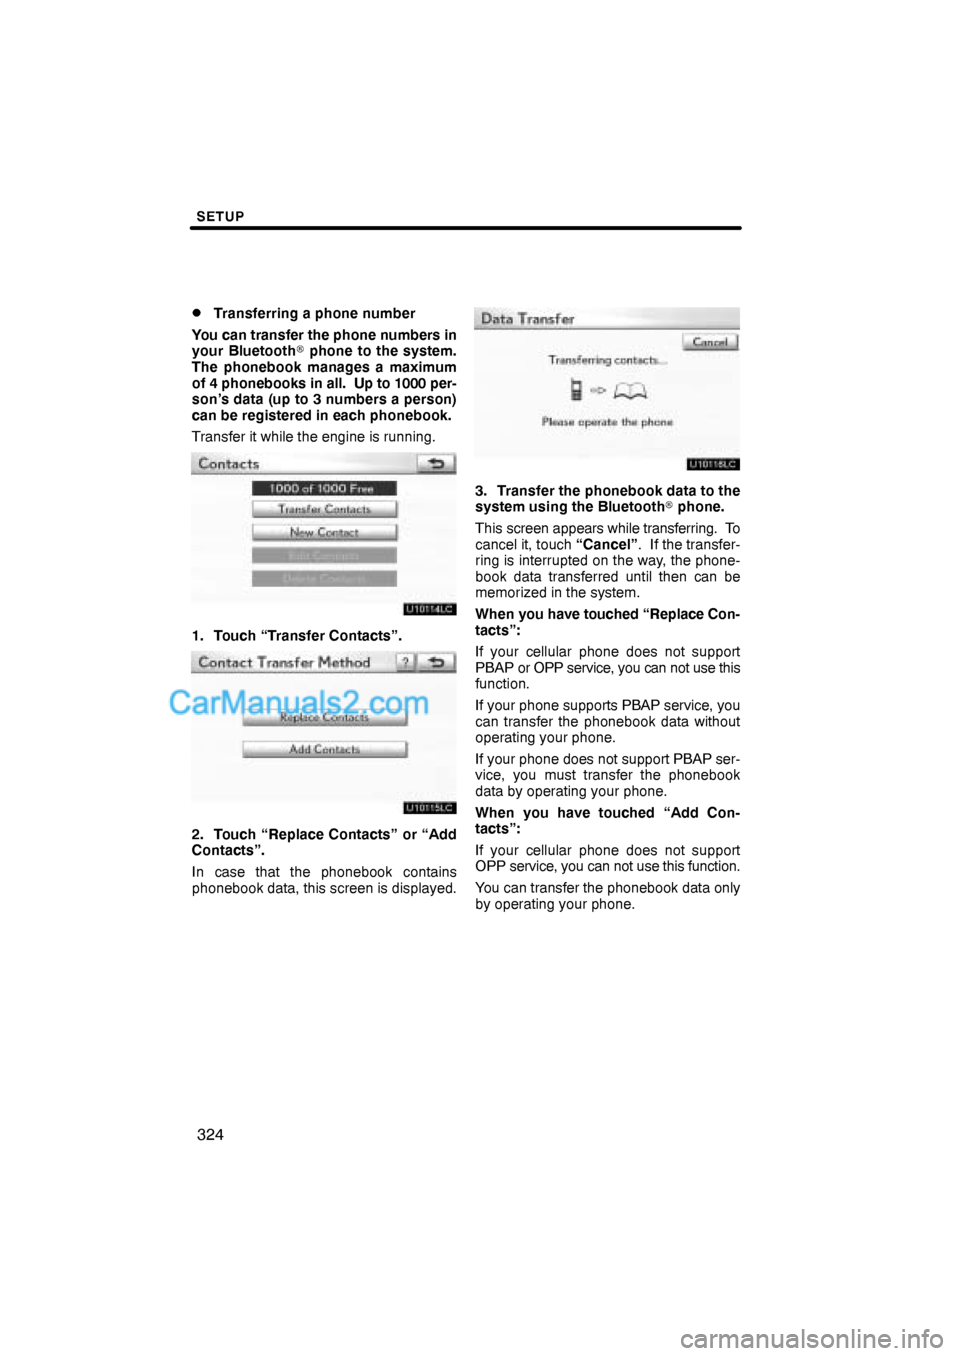
Transferring a phone number
You can transfer the phone numbers in
your Bluetooth� phone to the system.
The phonebook manages a maximum
of 4 phonebooks in all. Up to 1000 per-
son’s data (up to 3 numbers a person)
can be registered in each phonebook.
Transfer it while the engine is running.
1. Touch “Transfer Contacts”.
2. Touch “Replace Contacts” or “Add
Contacts”.
In case that the phonebook contains
phonebook data, this screen is displayed.
3. Transfer the phonebook data to the
system using the Bluetooth� phone.
This screen appears while transferring. To
cancel it, touch “Cancel”. If the transfer-
ring is interrupted on the way, the phone-
book data transferred until then can be
memorized in the system.
When you have touched “Replace Con-
tacts”:
If your cellular phone does not support
PBAP or OPP service, you can not use this
function.
If your phone supports PBAP service, you
can transfer the phonebook data without
operating your phone.
If your phone does not support PBAP ser-
vice, you must transfer the phonebook
data by operating your phone.
When you have touched “Add Con-
tacts”:
If your cellular phone does not support
OPP service, you can not use this function.
You can transfer the phonebook data only
by operating your phone.
Page 52 of 76

SETUP
344
The information displays the following
items.
“Device Name”
The name in the Bluetooth� . . . . .
network. You can change it.
“Passcode”
The password when you regis- . . . . .
ter your cellular phone in the
system. You can change it.
“Device Address”
The address peculiar to the . . . . .
system. You can not change it.
If the same device name is
displayed on the screen of
your phone, refer to it.
If you want to change the settings, refer
to the following pages.
When you change the settings, touch
“Save” after changing them.�Changing the Bluetooth� settings
You can change the Bluetooth� set-
tings according to the following proce-
dures.
Changing the handsfree power
The “Handsfree Power” display shows
the following state.
When “Handsfree Power” is “On”:
The Bluetooth� phone is automatically
connected when the “ENGINE START
STOP” switch is in ACCESSORY or IGNI-
TION ON mode.
When “Handsfree Power” is “Off”:
The Bluetooth� phone is disconnected,
and the system will not connect to it next
time.
You can select the state of “Handsfree
Power”.
On: The auto connection is turned on.
Off: The auto connection is turned off.
You can not change the state from “On”
into “Off” while driving.
Page 57 of 76
SETUP
349
2. Touch “Full Screen” or “Drop
Down”.
“Full Screen” mode
When a call is received, the . . . . .
Hands−free screen is dis-
played and you can operate it
on the screen.
“Drop Down” mode
The message is displayed on . . . . .
the upper side of the screen.
You can only operate the
steering switch.
�The Bluetooth� connection status
at start up
When the “ENGINE START STOP”
switch is in ACCESSORY or IGNITION
ON mode and the Bluetooth� is auto-
matically connected, the connection
check is displayed.
When “Display Phone Status” is “On”,
this status is displayed.
When “Display Phone Status” is “Off”,
this status is not displayed.
Page 64 of 76
SETUP
356
(b) Connecting Bluetooth� audio
AUTOMATICALLY
Touch “On” for “Auto Bluetooth∗ Connect”
to activate the automatic connection for
the Bluetooth�. Always set it to this mode
and leave the Bluetooth� portable player in
a condition where connection can be
established. The “Auto Bluetooth
∗
Connect” cannot be selected if the
connection method is set to “From
Portable Player”.
∗: Bluetooth is a registered trademark of
Bluetooth SIG.Inc.
When the “ENGINE START STOP” switch
is in ACCESSORY or IGNITION ON
mode, the selected portable player will be
automatically connected and the connec-
tion result is displayed.
MANUALLY
When the auto connection failed or turned
off, you have to connect Bluetooth� manu-
ally.
For the manual operation, see page 246.
Page 68 of 76

SETUP
360
INFORMATION ITEMS
“Engine oil”: Replace engine oil
“Oil filter”: Replace engine oil filter
“Rotation”: Rotate tires
“Tires”: Replace tires
“Battery”: Replace battery
“Brake pad”: Replace brake linings
“Wipers”: Replace wiper blades
“Coolant”: Replace engine coolant
“Brake oil”: Replace brake fluid
“Trans. fluid”: Replace transmission fluid
“Service”: Scheduled maintenance
“Air filter”: Replace air filter
“Personal”: New information items can
be created separately from provided ones.
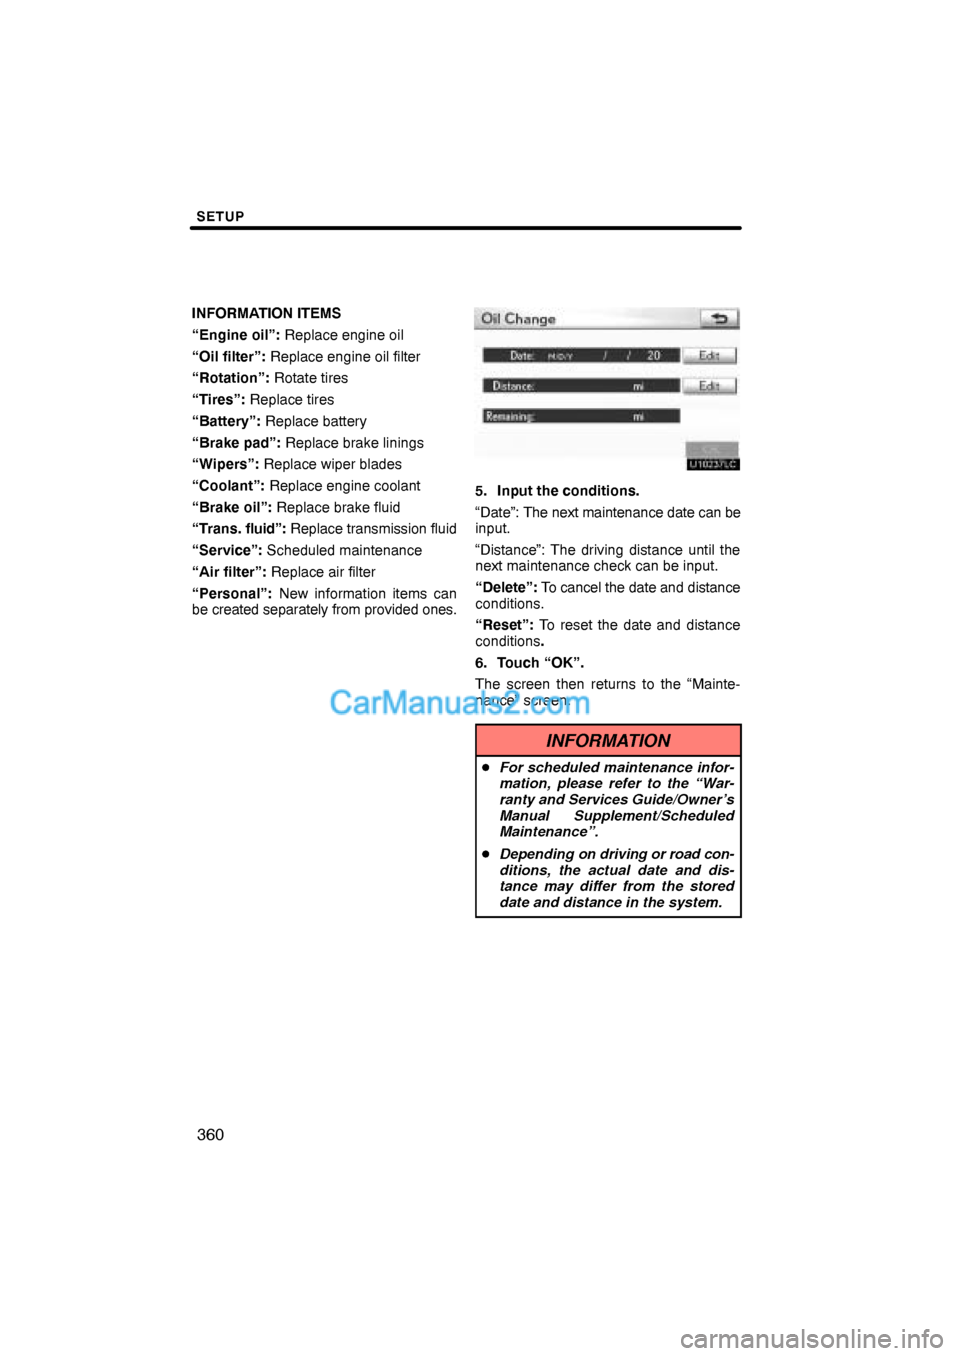
5. Input the conditions.
“Date”: The next maintenance date can be
input.
“Distance”: The driving distance until the
next maintenance check can be input.
“Delete”: To cancel the date and distance
conditions.
“Reset”: To reset the date and distance
conditions.
6. Touch “OK”.
The screen then returns to the “Mainte-
nance” screen.
INFORMATION
�For scheduled maintenance infor-
mation, please refer to the “War-
ranty and Services Guide/Owner’s
Manual Supplement/Scheduled
Maintenance”.
�Depending on driving or road con-
ditions, the actual date and dis-
tance may differ from the stored
date and distance in the system.
Page 72 of 76
SETUP
364
CAUTION
When performing the customization
procedure, ensure that there is suffi-
cient ventilation in the vehicle and
surrounding area. If there is insuffi-
cient ventilation, exhaust gases may
collect and enter the vehicle. Ex-
haust gases include harmful carbon
monoxide (CO) and inhaling them
may lead to death or a serious health
hazard.
INFORMATION
Stop the vehicle in a safe place, set
the parking brake and put the shift le-
ver in “P”. To avoid discharging the
battery, perform the customization
procedure with the engine running.
The volume of the beeps and turning on or
off of the display can be set.
1. Push the “SETUP” button.
2. Touch “Vehicle” on the “Setup”
screen.
3. Touch “LEXUS Park Assist”.
4. Touch the desired button.
5. Touch “Save”.
— Intuitive parking assist
setting