Page 5 of 76
SETUP
297 �
Unit of measurement
Distance unit can be changed.
1. Push the “SETUP” button.
2. Touch “General” on the “Setup”
screen.
3. Touch “Unit of Measurement”.
4. Touch “Kilometer” or “Mile”.
5. Touch “Save”.
INFORMATION
This function is available only in En-
glish or Spanish. To switch lan-
guage, see “� Selecting a language”
on page 295.
�Delete personal data
The following personal data can be de-
leted or returned to their default settings:
�Maintenance conditions
�Maintenance information “off” setting
�Address book
�Areas to avoid
�Previous points
�Route guidance
�Route trace
�Phonebook data
�Call history data
�Speed dial data
�Voice tag data
�Bluetooth� phone data
�Volume setting
�Details setting
This function is available only when the ve-
hicle is not moving.
Page 66 of 76
SETUP
358
(e) Initializing the Bluetooth� audio
settings
You can initialize the settings.
1. Touch “Default” on “BT Audio Set-
tings” screen.
2. Touch “Yes”.When the navigation system is turned on,
the “Information” screen displays when it is
time to replace a part or certain compo-
nents. (See page 27.)
1. Push the “SETUP” button.
2. Touch “Vehicle”.
3. Touch “Maintenance”.
Vehicle settings —
— Maintenance
Page 67 of 76
SETUP
359
�Setting maintenance information (See
page 359.)
�Setting dealer (See page 361.)(a) Maintenance information setting
1. Push the “SETUP” button.
2. Touch “Vehicle” on the “Setup”
screen.
3. Touch “Maintenance” on the “Ve-
hicle Settings” screen.
4. Touch the desired button.
For details of each button, see “INFORMA-
TION ITEMS” on page 360.
“Delete All”: To cancel all conditions
which have been inputted.
“Reset All”: To reset the item which has
satisfied a condition.
“Set Dealer”: To register dealer informa-
tion. (See “ (b) Dealer setting” on page
361.)
“Dealer Info.”: To edit dealer information.
(See “ (b) Dealer setting” on page 361.)
“Reminder”: When this button is touched,
the indicator is illuminated. The system is
set to give maintenance information with
the “Information” screen. (See page 27.)
When the vehicle needs to be serviced, the
button color will change to orange.
Page 68 of 76

SETUP
360
INFORMATION ITEMS
“Engine oil”: Replace engine oil
“Oil filter”: Replace engine oil filter
“Rotation”: Rotate tires
“Tires”: Replace tires
“Battery”: Replace battery
“Brake pad”: Replace brake linings
“Wipers”: Replace wiper blades
“Coolant”: Replace engine coolant
“Brake oil”: Replace brake fluid
“Trans. fluid”: Replace transmission fluid
“Service”: Scheduled maintenance
“Air filter”: Replace air filter
“Personal”: New information items can
be created separately from provided ones.
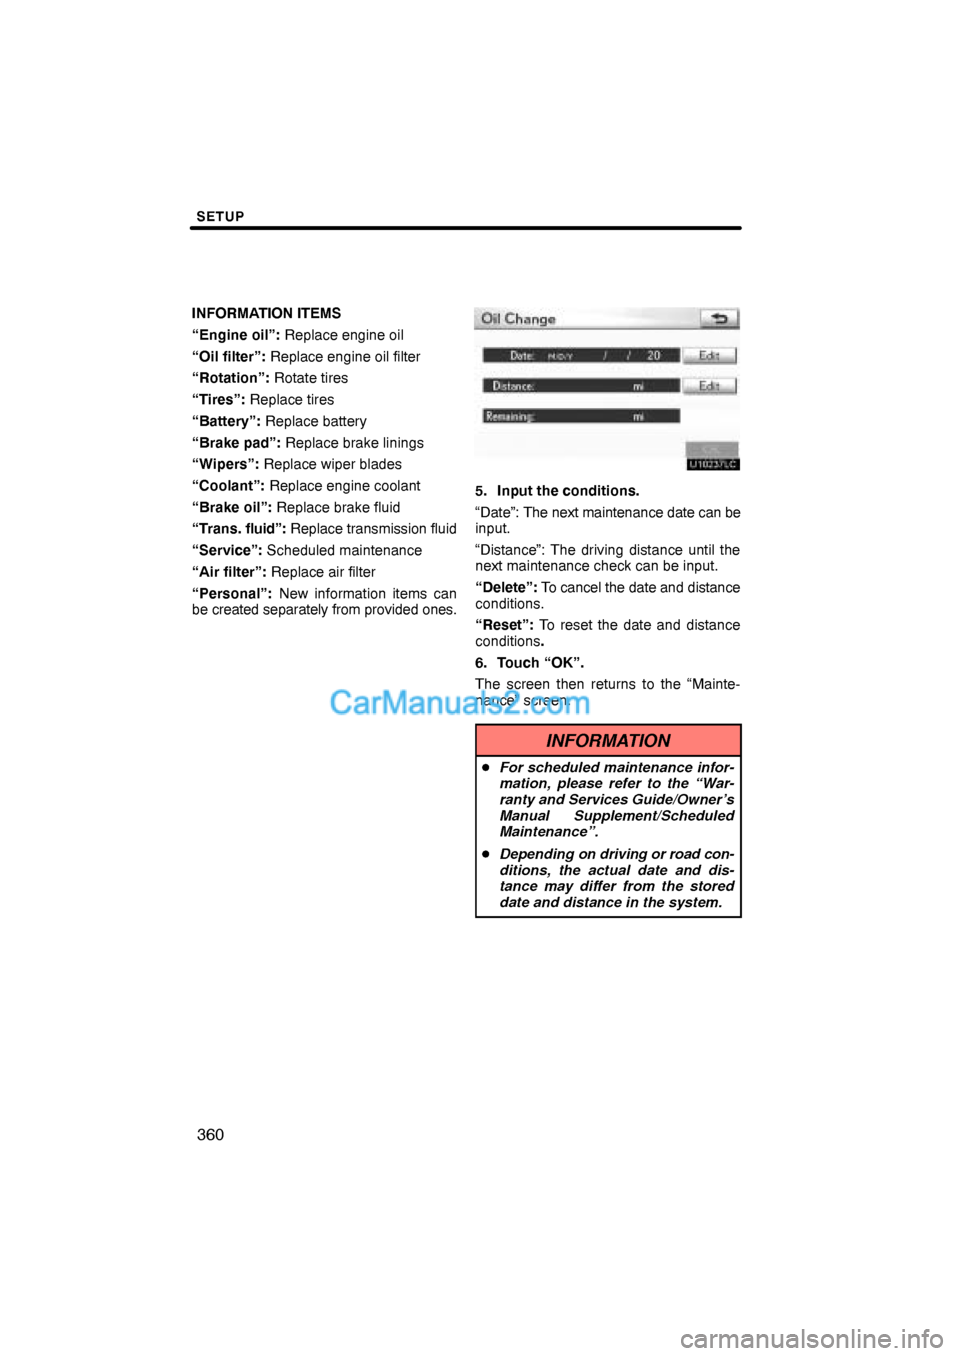
5. Input the conditions.
“Date”: The next maintenance date can be
input.
“Distance”: The driving distance until the
next maintenance check can be input.
“Delete”: To cancel the date and distance
conditions.
“Reset”: To reset the date and distance
conditions.
6. Touch “OK”.
The screen then returns to the “Mainte-
nance” screen.
INFORMATION
�For scheduled maintenance infor-
mation, please refer to the “War-
ranty and Services Guide/Owner’s
Manual Supplement/Scheduled
Maintenance”.
�Depending on driving or road con-
ditions, the actual date and dis-
tance may differ from the stored
date and distance in the system.
Page 69 of 76

SETUP
361
(b) Dealer setting
It is possible to register a dealer in the sys-
tem. With dealer information registered,
route guidance to the dealer is available.
1. Push the “SETUP” button.
2. Touch “Vehicle” on the “Setup”
screen.
3. Touch “Maintenance” on the “Ve-
hicle Settings” screen.
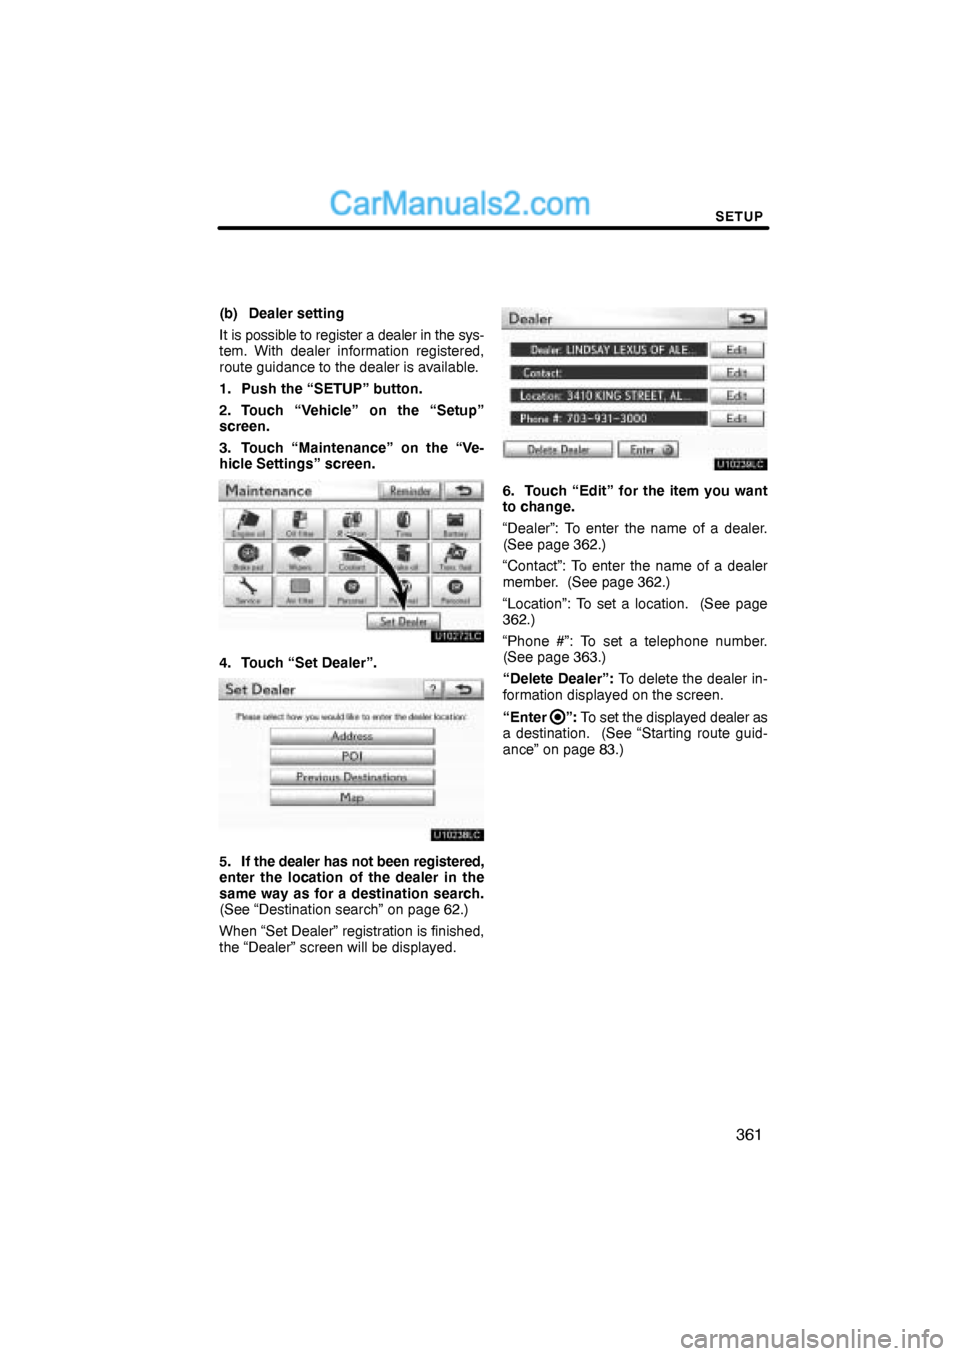
4. Touch “Set Dealer”.
5. If the dealer has not been registered,
enter the location of the dealer in the
same way as for a destination search.
(See “Destination search” on page 62.)
When “Set Dealer” registration is finished,
the “Dealer” screen will be displayed.
6. Touch “Edit” for the item you want
to change.
“Dealer”: To enter the name of a dealer.
(See page 362.)
“Contact”: To enter the name of a dealer
member. (See page 362.)
“Location”: To set a location. (See page
362.)
“Phone #”: To set a telephone number.
(See page 363.)
“Delete Dealer”: To delete the dealer in-
formation displayed on the screen.
“Enter
”: To set the displayed dealer as
a destination. (See “Starting route guid-
ance” on page 83.)