Page 2588 of 4210
CLUSTER LID CIP-15
< ON-VEHICLE REPAIR >
C
DE
F
G H
I
K L
M A
B
IP
N
O P
CLUSTER LID C
Exploded ViewINFOID:0000000005147365
Removal and InstallationINFOID:0000000005147366
REMOVAL
1. Disconnect battery negative terminal.
2. Release the clips and remove cluster lid C lower.
3. Remove the upper and lower cluster lid C screws.
4. Release the clips, then pull cluster lid C rearward to remove from instrument panel and pad assembly.
5. Disconnect electrical connectors.
INSTALLATION
1. A/C and AV switch assembly 2. Cluster lid C 3. Center ventilator assembly LH
4. Audio switch LH 5. 4WD switch (if equipped) 6. Cluster lid C lower/clock
7. Hazard switch 8. Audio switch RH9. Center ventilator assembly RH
Clip Pawl
AWJIA0237ZZ
ALJIA0078ZZ
Revision: April 20092010 QX56
Page 2591 of 4210
IP-18
< ON-VEHICLE REPAIR >
INSTRUMENT UPPER PANEL RH
INSTRUMENT UPPER PANEL RH
Exploded ViewINFOID:0000000005147369
Removal and InstallationINFOID:0000000005147370
REMOVAL
1. Remove instrument lower panel RH and glove box. Refer to IP-17, "Removal and Installation".
2. Remove instrument upper panel RH screws, then rel ease the clips and remove from instrument panel and
pad assembly.
INSTALLATION
Installation is in the reverse order of removal.
1. Instrument panel and pad assembly 2. Instrument upper panel RH 3. Side ventilator assembly RH
Clip Pawl ⇐Vehicle front
ALJIA0080ZZ
Revision: April 20092010 QX56
Page 2592 of 4210
A/T FINISHERIP-19
< ON-VEHICLE REPAIR >
C
DE
F
G H
I
K L
M A
B
IP
N
O P
A/T FINISHER
Removal and InstallationINFOID:0000000005147371
REMOVAL
1. Remove the shift knob (1). : Metal clip
2. Remove the storage compartment mask (3) and front console upper finisher (4).
3. Pull up on A/T finisher (2) to release clips, then tilt aside.
4. Disconnect A/T finisher electrical connectors and remove from front center console assembly.
INSTALLATION
Installation is in the reverse order of removal.
AWJIA0004ZZ
Revision: April 20092010 QX56
Page 2593 of 4210

IP-20
< ON-VEHICLE REPAIR >
FRONT CENTER CONSOLE
FRONT CENTER CONSOLE
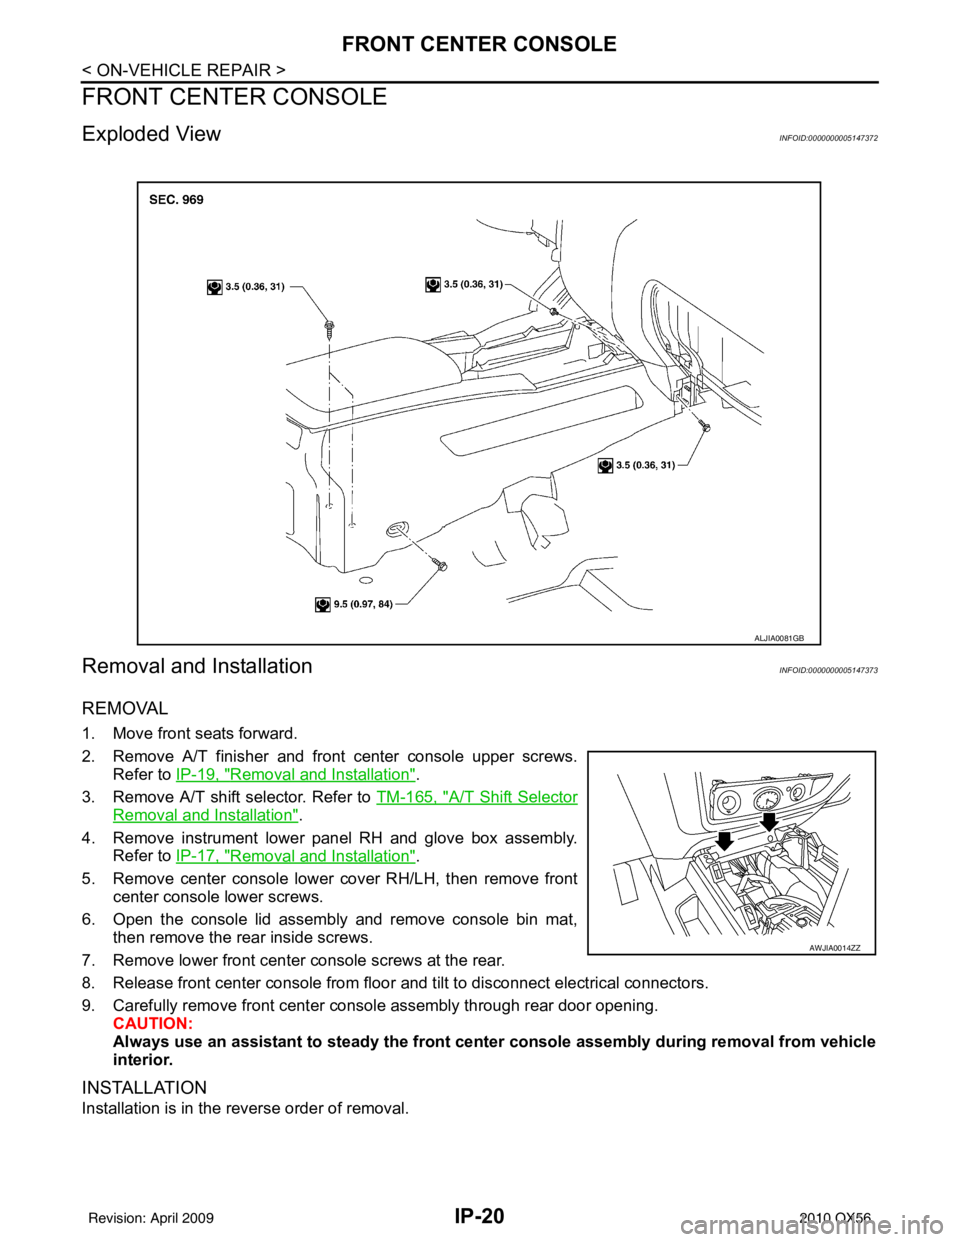
Exploded ViewINFOID:0000000005147372
Removal and InstallationINFOID:0000000005147373
REMOVAL
1. Move front seats forward.
2. Remove A/T finisher and front center console upper screws.Refer to IP-19, "
Removal and Installation".
3. Remove A/T shift selector. Refer to TM-165, "
A/T Shift Selector
Removal and Installation".
4. Remove instrument lower panel RH and glove box assembly. Refer to IP-17, "
Removal and Installation".
5. Remove center console lower cover RH/LH, then remove front center console lower screws.
6. Open the console lid assembly and remove console bin mat, then remove the rear inside screws.
7. Remove lower front center console screws at the rear.
8. Release front center console from floor and tilt to disconnect electrical connectors.
9. Carefully remove front center console assembly through rear door opening. CAUTION:
Always use an assistant to steady the front cen ter console assembly during removal from vehicle
interior.
INSTALLATION
Installation is in the reverse order of removal.
ALJIA0081GB
AWJIA0014ZZ
Revision: April 20092010 QX56
Page 2596 of 4210

FRONT CENTER CONSOLEIP-23
< DISASSEMBLY AND ASSEMBLY >
C
DE
F
G H
I
K L
M A
B
IP
N
O P
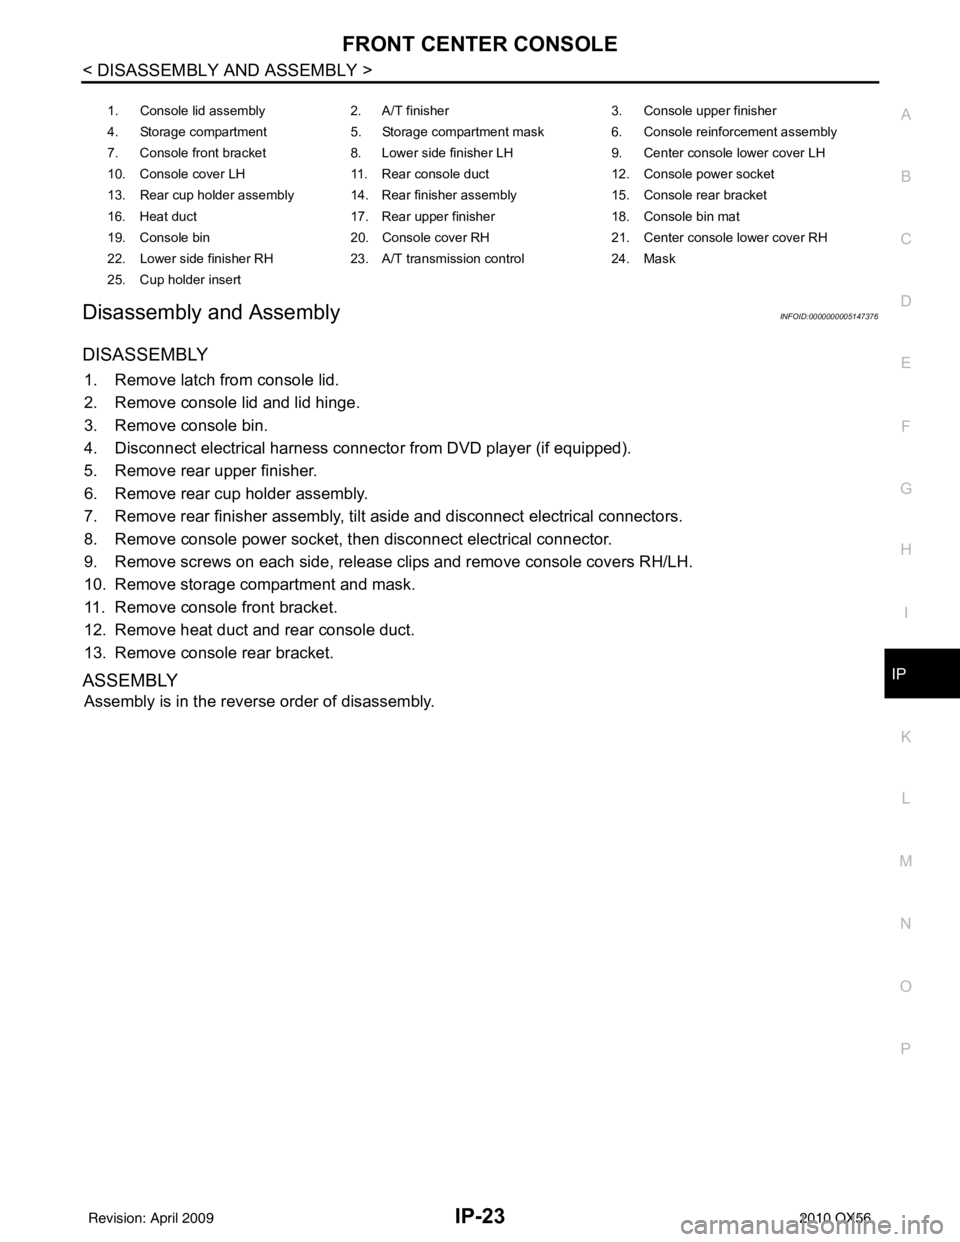
Disassembly and AssemblyINFOID:0000000005147376
DISASSEMBLY
1. Remove latch from console lid.
2. Remove console lid and lid hinge.
3. Remove console bin.
4. Disconnect electrical harness connec tor from DVD player (if equipped).
5. Remove rear upper finisher.
6. Remove rear cup holder assembly.
7. Remove rear finisher assembly, tilt aside and disconnect electrical connectors.
8. Remove console power socket, then disconnect electrical connector.
9. Remove screws on each side, release clips and remove console covers RH/LH.
10. Remove storage compartment and mask.
11. Remove console front bracket.
12. Remove heat duct and rear console duct.
13. Remove console rear bracket.
ASSEMBLY
Assembly is in the reverse order of disassembly.
1. Console lid assembly 2. A/T finisher 3. Console upper finisher
4. Storage compartment 5. Storage compartment mask 6. Console reinforcement assembly
7. Console front bracket 8. Lower side finisher LH 9. Center console lower cover LH
10. Console cover LH 11. Rear console duct 12. Console power socket
13. Rear cup holder assembly 14. Rear finisher assembly 15. Console rear bracket
16. Heat duct 17. Rear upper finisher 18. Console bin mat
19. Console bin 20. Console cover RH 21. Center console lower cover RH
22. Lower side finisher RH 23. A/T transmission control 24. Mask
25. Cup holder insert
Revision: April 20092010 QX56
Page 2597 of 4210
IP-24
< DISASSEMBLY AND ASSEMBLY >
REAR CENTER CONSOLE
REAR CENTER CONSOLE
Exploded ViewINFOID:0000000005147377
1. Lid assembly2. Lid latch3. Console bin
4. Cup holder insert 5. Rear upper console assembly 6. Rubber bumpers
7. Floor latch 8. Rear console floor bracket9. Rear console floor base
10. Hinge cover 11. Hinge12. Base hook
13. Rear lower console assembly 14. Console bin mat
AWJIA0340GB
Revision: April 20092010 QX56
Page 2598 of 4210
REAR CENTER CONSOLEIP-25
< DISASSEMBLY AND ASSEMBLY >
C
DE
F
G H
I
K L
M A
B
IP
N
O P
Disassembly and AssemblyINFOID:0000000005147378
DISASSEMBLY
1. Remove cup holder insert.
2. Remove hinge cover.
3. Remove screws and remove lid assembly.
4. Remove screw and remove latch from lid assembly.
5. Remove screws and remove hinge.
6. Remove screws and separate rear upper console assembly and rear lower console assembly.
7. Remove floor latch from rear upper console assembly.
8. Remove screws and remove console bin from rear upper console assembly.
9. Remove screws and remove rear console floor base.
10. Remove bolts and remove rear console floor bracket.
ASSEMBLY
Assembly is in the reverse order of disassembly.
Revision: April 20092010 QX56
Page 2724 of 4210

MA-20
< ON-VEHICLE MAINTENANCE >
ENGINE MAINTENANCE
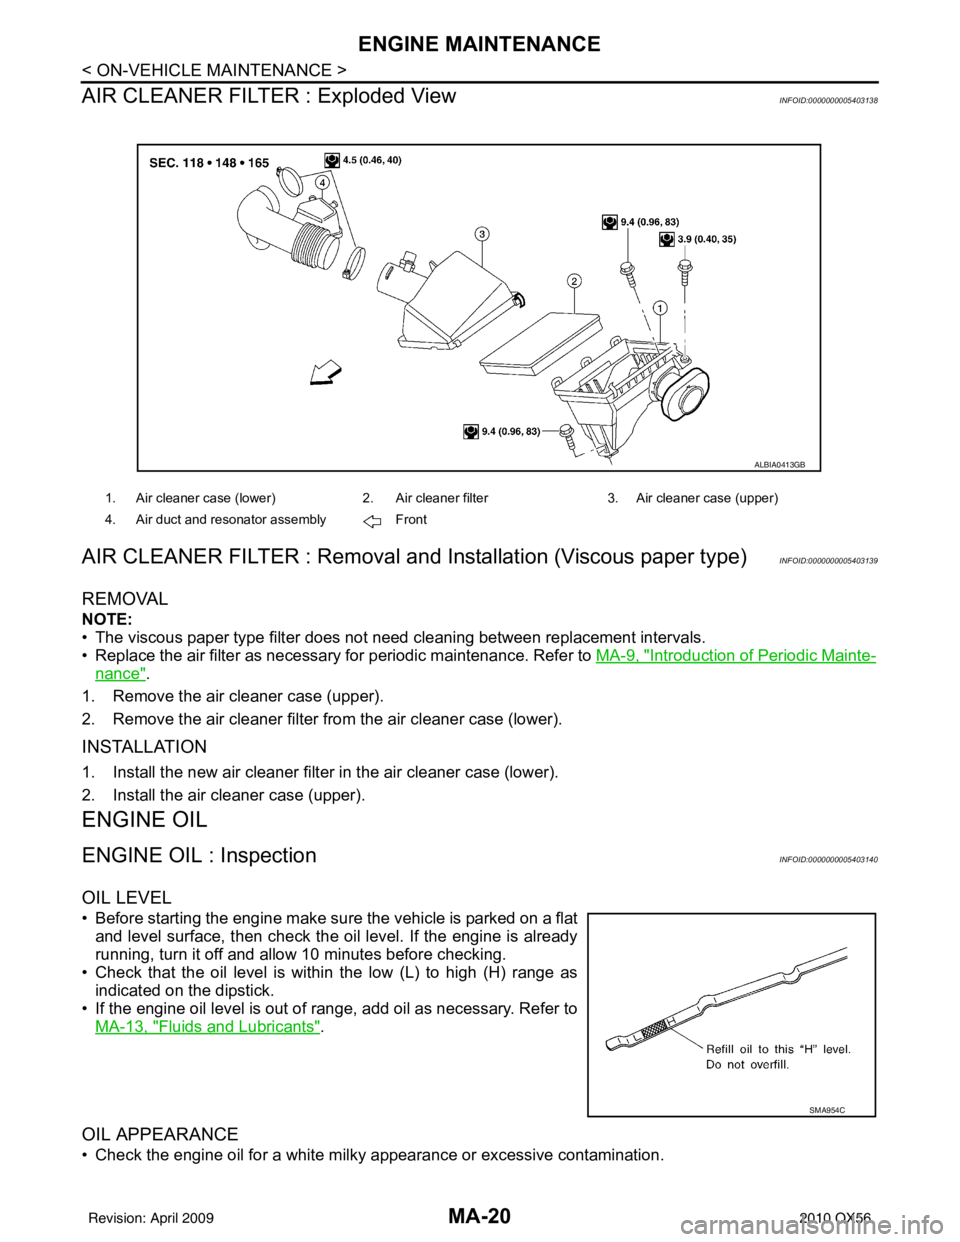
AIR CLEANER FILTER : Exploded View
INFOID:0000000005403138
AIR CLEANER FILTER : Removal and Installation (Viscous paper type)INFOID:0000000005403139
REMOVAL
NOTE:
• The viscous paper type filter does not need cleaning between replacement intervals.
• Replace the air filter as necessary for periodic maintenance. Refer to MA-9, "
Introduction of Periodic Mainte-
nance".
1. Remove the air cleaner case (upper).
2. Remove the air cleaner filter from the air cleaner case (lower).
INSTALLATION
1. Install the new air cleaner filter in the air cleaner case (lower).
2. Install the air cleaner case (upper).
ENGINE OIL
ENGINE OIL : InspectionINFOID:0000000005403140
OIL LEVEL
• Before starting the engine make sure the vehicle is parked on a flat and level surface, then check the oil level. If the engine is already
running, turn it off and allow 10 minutes before checking.
• Check that the oil level is within the low (L) to high (H) range as indicated on the dipstick.
• If the engine oil level is out of range, add oil as necessary. Refer to
MA-13, "
Fluids and Lubricants".
OIL APPEARANCE
• Check the engine oil for a white milky appearance or excessive contamination.
1. Air cleaner case (lower) 2. Air cleaner filter 3. Air cleaner case (upper)
4. Air duct and resonator assembly Front
ALBIA0413GB
SMA954C
Revision: April 20092010 QX56