2009 NISSAN LATIO ignition
[x] Cancel search: ignitionPage 1102 of 4331

OK >>
INSPECTION END
NG >> Replace the transaxle assembly. Refer to CVT-182, " Removal and Installation " .
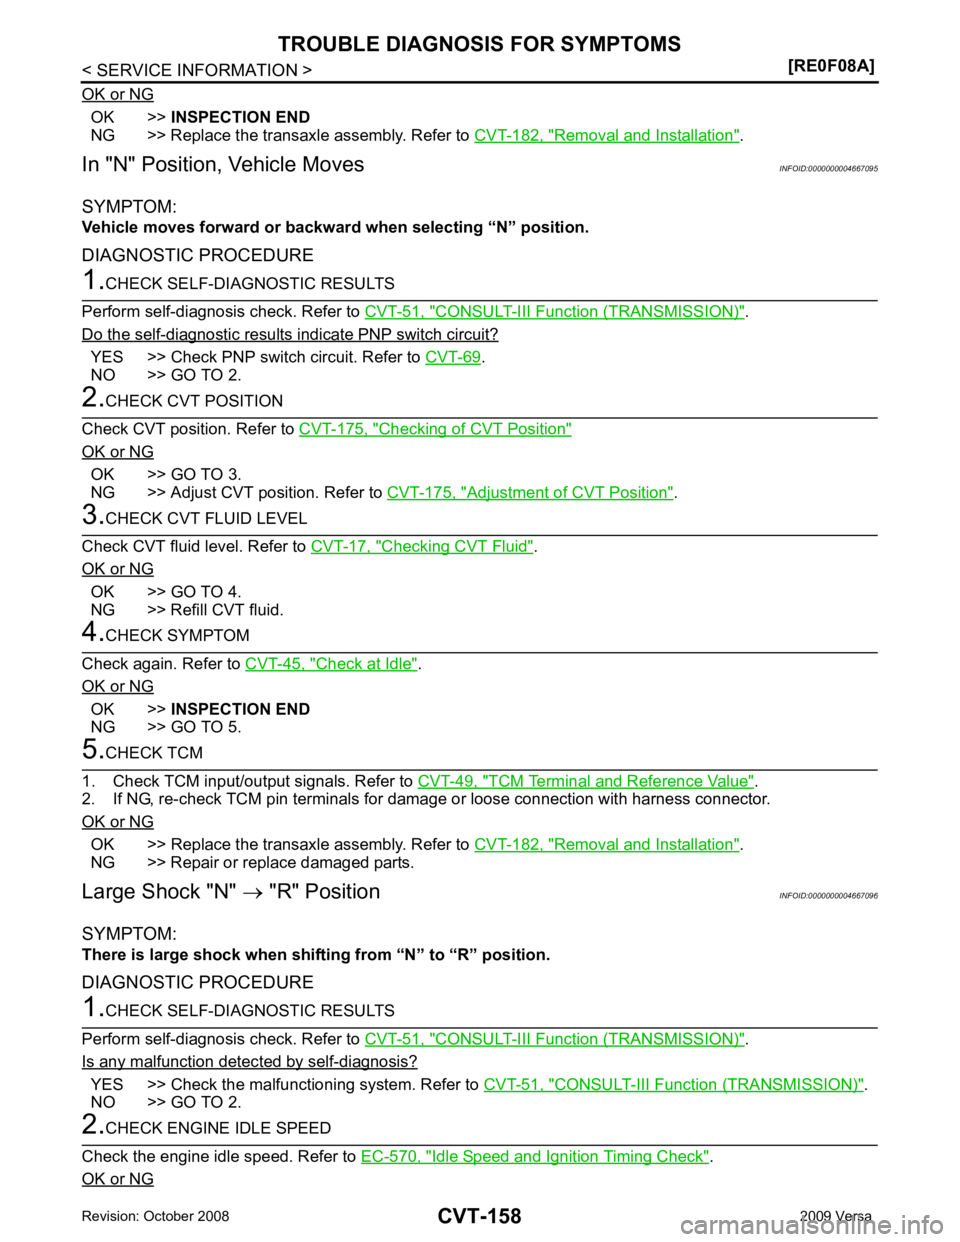
In "N" Position, Vehicle Moves INFOID:0000000004667095
SYMPTOM:
Vehicle moves forward or backwar d when selecting “N” position.
DIAGNOSTIC PROCEDURE CONSULT-III Function (TRANSMISSION) " .
Do the self-diagnostic results indicate PNP switch circuit? YES >> Check PNP switch circuit. Refer to
CVT-69 .
NO >> GO TO 2. Checking of CVT Position "
OK or NG
OK >> GO TO 3.
NG >> Adjust CVT position. Refer to CVT-175, " Adjustment of CVT Position " .
Checking CVT Fluid " .
OK or NG OK >> GO TO 4.
NG >> Refill CVT fluid. Check at Idle " .
OK or NG OK >>
INSPECTION END
NG >> GO TO 5. TCM Terminal and Reference Value " .
2. If NG, re-check TCM pin terminals for damage or loose connection with harness connector.
OK or NG OK >> Replace the transaxle assembly. Refer to
CVT-182, " Removal and Installation " .
NG >> Repair or replace damaged parts.
Large Shock "N" → "R" Position INFOID:0000000004667096
SYMPTOM:
There is large shock when shif ting from “N” to “R” position.
DIAGNOSTIC PROCEDURE CONSULT-III Function (TRANSMISSION) " .
Is any malfunction detec ted by self-diagnosis?YES >> Check the malfunctioning system. Refer to
CVT-51, " CONSULT-III Function (TRANSMISSION) " .
NO >> GO TO 2. Idle Speed and Ignition Timing Check " .
OK or NG
Page 1109 of 4331

CVT
N
O P
CVT SHIFT LOCK SYSTEM
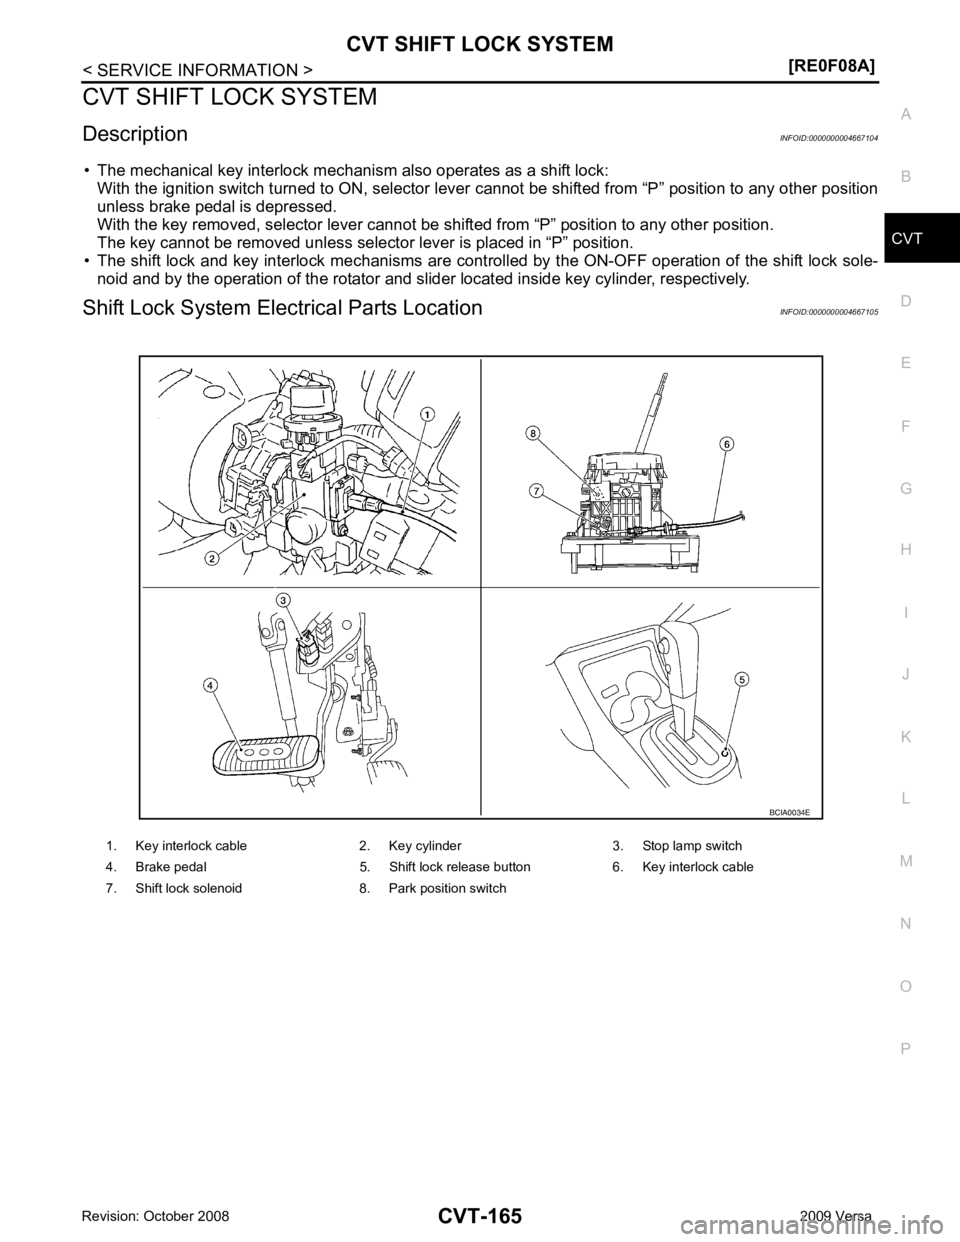
Description INFOID:0000000004667104
• The mechanical key interlock mechanism also operates as a shift lock: With the ignition switch turned to ON, selector lever cannot be shifted from “P” position to any other position
unless brake pedal is depressed.
With the key removed, selector lever cannot be shifted from “P” position to any other position.
The key cannot be removed unless selector lever is placed in “P” position.
• The shift lock and key interlock mechanisms are controlled by the ON-OFF operation of the shift lock sole-
noid and by the operation of the rotator and sli der located inside key cylinder, respectively.
Shift Lock System Electrical Parts Location INFOID:0000000004667105
1. Key interlock cable 2. Key cylinder 3. Stop lamp switch
4. Brake pedal 5. Shift lock release button 6. Key interlock cable
7. Shift lock solenoid 8. Park position switch
Page 1111 of 4331

CVT
N
O P
•
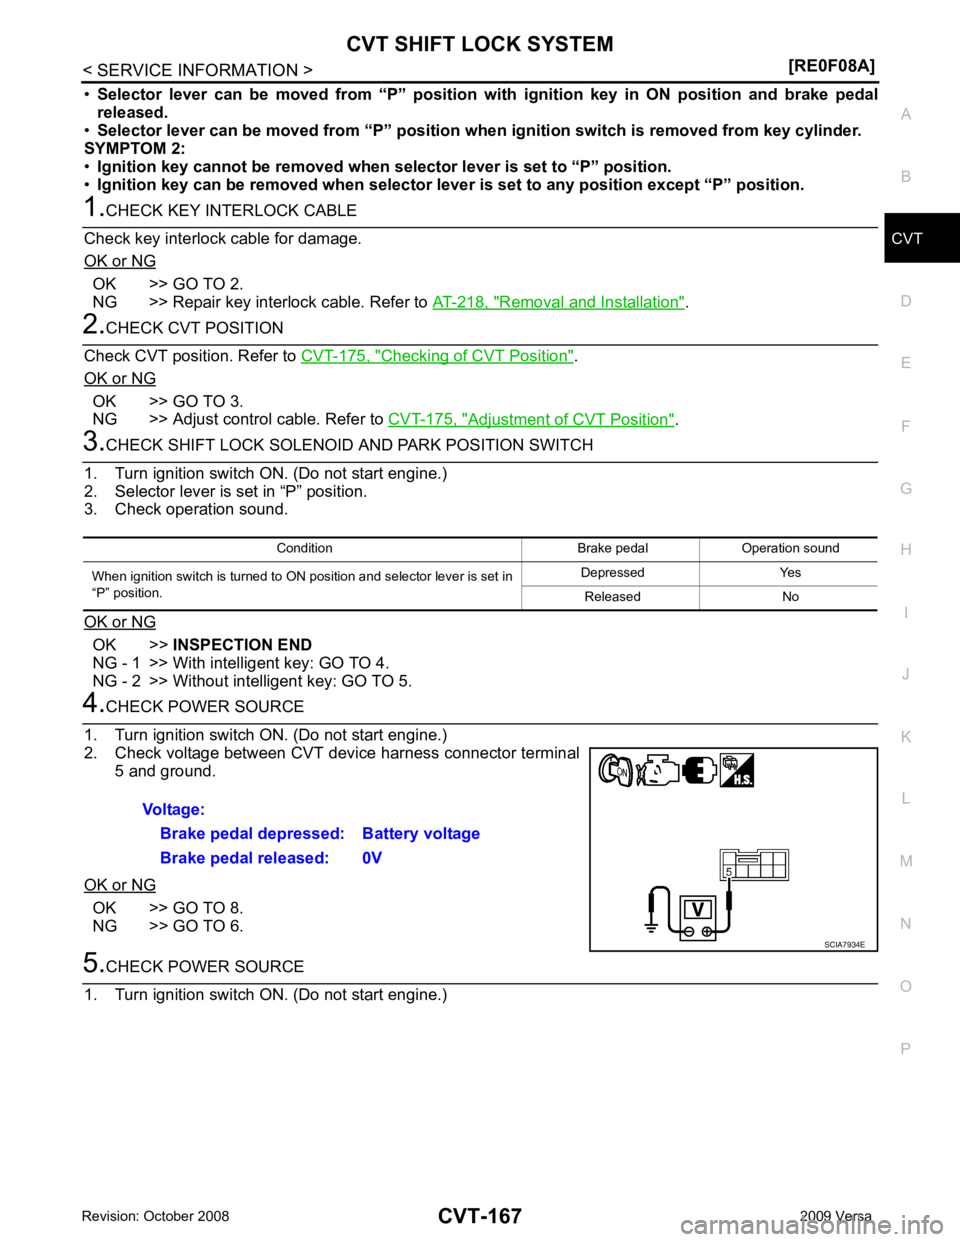
Selector lever can be moved fr om “P” position with ignition key in ON position and brake pedal
released.
• Selector lever can be moved from “P” position when ignition switch is removed from key cylinder.
SYMPTOM 2:
• Ignition key cannot be removed when sel ector lever is set to “P” position.
• Ignition key can be removed wh en selector lever is set to any position except “P” position.OK >> GO TO 2.
NG >> Repair key interlock cable. Refer to AT-218, " Removal and Installation " .
Checking of CVT Position " .
OK or NG OK >> GO TO 3.
NG >> Adjust control cable. Refer to CVT-175, " Adjustment of CVT Position " .
OK >>
INSPECTION END
NG - 1 >> With intelligent key: GO TO 4.
NG - 2 >> Without intelligent key: GO TO 5. OK >> GO TO 8.
NG >> GO TO 6.
Page 1112 of 4331
![NISSAN LATIO 2009 Service Repair Manual CVT-168< SERVICE INFORMATION >
[RE0F08A]
CVT SHIFT LOCK SYSTEM
2. Check voltage between CVT device harness connector terminal 5 and ground.
OK or NG OK >> GO TO 9.
NG >> GO TO 6. 6.
CHECK STOP LAMP SW NISSAN LATIO 2009 Service Repair Manual CVT-168< SERVICE INFORMATION >
[RE0F08A]
CVT SHIFT LOCK SYSTEM
2. Check voltage between CVT device harness connector terminal 5 and ground.
OK or NG OK >> GO TO 9.
NG >> GO TO 6. 6.
CHECK STOP LAMP SW](/manual-img/5/57359/w960_57359-1111.png)
CVT-168< SERVICE INFORMATION >
[RE0F08A]
CVT SHIFT LOCK SYSTEM
2. Check voltage between CVT device harness connector terminal 5 and ground.
OK or NG OK >> GO TO 9.
NG >> GO TO 6. 6.
CHECK STOP LAMP SWITCH
1. Turn ignition switch OFF.
2. Disconnect stop lamp switch harness connector.
3. Check continuity between stop lamp switch harness connector
terminals 3 and 4.
Check stop lamp switch after adjusting brake pedal. Refer to
BR-6 .
OK or NG OK >> GO TO 7.
NG >> Repair or replace damaged parts. 7.
DETECT MALFUNCTIONING ITEM
Check the following. If any items are damaged, repair or replace damaged parts.
• Harness for short or open between ignition switch and stop lamp switch harness connector
• Harness for short or open between stop lamp switch harness connector and CVT device harness connector
• 10A fuse [No.3, located in the fuse block (J/B)]
• Ignition switch, Refer to PG-3 .
OK or NG OK >>
INSPECTION END
NG >> Repair or replace damaged parts. 8.
CHECK GROUND CIRCUIT
1. Turn ignition switch OFF.
2. Disconnect CVT device harness connector.
3. Check continuity between CVT device harness connector termi- nal 6 and ground.
4. Connect CVT device harness connector.
OK or NG OK >> Replace shift lock solenoid and park position switch
assembly.
NG >> Repair open circuit or short to ground or short to power in harness or connectors. 9.
CHECK GROUND CIRCUIT
1. Turn ignition switch OFF.
2. Disconnect CVT device harness connector. Voltage:
Brake pedal depressed: Battery voltage
Brake pedal released: 0V SCIA7935E
Condition Continuity
When brake pedal is depressed Yes
When brake pedal is released No SCIA2126E
Continuity should exist.
SCIA7936E
Page 1119 of 4331
![NISSAN LATIO 2009 Service Repair Manual SHIFT CONTROL SYSTEM
CVT-175
< SERVICE INFORMATION >
[RE0F08A] D
E
F
G H
I
J
K L
M A
B CVT
N
O P
1. Set selector lever knob (1) in “N” position.
2. Slide knob cover (2) downward.
3. Pull out lock NISSAN LATIO 2009 Service Repair Manual SHIFT CONTROL SYSTEM
CVT-175
< SERVICE INFORMATION >
[RE0F08A] D
E
F
G H
I
J
K L
M A
B CVT
N
O P
1. Set selector lever knob (1) in “N” position.
2. Slide knob cover (2) downward.
3. Pull out lock](/manual-img/5/57359/w960_57359-1118.png)
SHIFT CONTROL SYSTEM
CVT-175
< SERVICE INFORMATION >
[RE0F08A] D
E
F
G H
I
J
K L
M A
B CVT
N
O P
1. Set selector lever knob (1) in “N” position.
2. Slide knob cover (2) downward.
3. Pull out lock pin (3) from selector lever knob (1).
4. Remove selector lever knob (1) and knob cover (2) as a set from selector lever.
CAUTION:
Do not push selector button.
INSTALLATION 1. Insert lock pin (1) to selector lever knob (2).
2. Install knob cover (3) to selector lever knob (2).
3. Set selector lever in “N” position.
4. Install selector lever knob onto selector lever until a click is felt. CAUTION:
• Do not tilt selector lever knob when installing. Install it
straight, and do not tap or ap ply any shock to install it.
• Do not push selector button.
Adjustment of CVT Position INFOID:0000000004667111
CAUTION:
Make sure that parking brake is applied before adjustment.
1. Loosen the control cable nut (A) and place the manual lever (1) in “P” position.
2. Place selector lever in “P” position.
3. Push the control cable (2) in with a load of 9.8 N (approximately 1 kg, 2.2 lb). Release the control cable and temporarily tighten
the control cable nut.
NOTE:
Do not move the manual lever. Make sure the manual lever
stays in the “P” position.
4. Tighten the control cable nut. CAUTION:
Secure the manual lever when tightening nut.
5. Check the operation of the CVT. Refer to CVT-175, " Checking of CVT Position " .
Checking of CVT Position INFOID:0000000004667112
1. Place selector lever in “P” position, and tu rn ignition switch ON. (Do not start engine.)
2. Make sure selector lever can be shifted to other than “P” position when brake pedal is depressed. Also
make sure selector lever can be shifted from “P” position only when brake pedal is depressed.
3. Move the selector lever and check for excessive effort, sticking, noise or rattle.
4. Confirm the selector lever stops at each position with the feel of engagement when it is moved through all
the positions. Check that t he actual position of the selector lever matches the position shown by the shift
position indicator and the manual lever on the transaxle. SCIA6971E
SCIA6972E
Control cable nut: Refer to
CVT-171, " Removal
and Installation " . WCIA0608E
Page 1122 of 4331
![NISSAN LATIO 2009 Service Repair Manual CVT-178< SERVICE INFORMATION >
[RE0F08A]
KEY INTERLOCK CABLE
4. Slide the slider (A) toward the casing cap (B) while pressing tabs (C) on the slider to separate the slider (A) from the adjust holder
( NISSAN LATIO 2009 Service Repair Manual CVT-178< SERVICE INFORMATION >
[RE0F08A]
KEY INTERLOCK CABLE
4. Slide the slider (A) toward the casing cap (B) while pressing tabs (C) on the slider to separate the slider (A) from the adjust holder
(](/manual-img/5/57359/w960_57359-1121.png)
CVT-178< SERVICE INFORMATION >
[RE0F08A]
KEY INTERLOCK CABLE
4. Slide the slider (A) toward the casing cap (B) while pressing tabs (C) on the slider to separate the slider (A) from the adjust holder
(D).
5. Remove the casing cap (B) from the cable bracket on the control
device assembly.
6. Remove the key interlock cable from the key interlock rod (E).
7. Remove steering column cover (upper and lower) and instru- ment lower finisher. Refer to IP-11 .
8. Pull out the lock plate (A) from the holder (B).
9. Remove the key interlock cable (1) from the key cylinder (2).
10. Remove the clip (A), and then remove the key interlock cable (1).
INSTALLATION
CAUTION:
• Install key interlock cable in such a way that it will not be damaged by sharp bends, twists or interfer-
ence with adjacent parts.
• After installing key interlock cable to contro l device assembly, make sure that casing cap and
bracket are firmly secured in their positions.
1. Place the selector lever in the “P” position.
2. Turn ignition switch to “ACC” or “ON” position.
3. Set the key interlock cable (1) to the key cylinder (2).
4. Install the lock plate (A) to the holder (B).
5. Turn ignition switch to “LOCK” position. SCIA6975E
SCIA6976E
SCIA6973E
SCIA6976E
Page 1133 of 4331

CVT
N
O P
PRECAUTIONS
Precaution for Supplemental Restraint System (SRS) "AIR BAG" and "SEAT BELT
PRE-TENSIONER" INFOID:0000000004800720
The Supplemental Restraint System such as “A IR BAG” and “SEAT BELT PRE-TENSIONER”, used along
with a front seat belt, helps to reduce the risk or severi ty of injury to the driver and front passenger for certain
types of collision. This system includes seat belt switch inputs and dual stage front air bag modules. The SRS
system uses the seat belt switches to determine the front air bag deployment, and may only deploy one front
air bag, depending on the severity of a collision and w hether the front occupants are belted or unbelted.
Information necessary to service the system safely is included in the SRS and SB section of this Service Man-
ual.
WARNING:
• To avoid rendering the SRS inoper ative, which could increase the risk of personal injury or death in
the event of a collision which would result in air bag inflation, all maintenance must be performed by
an authorized NISSAN/INFINITI dealer.
• Improper maintenance, including in correct removal and installation of the SRS can lead to personal
injury caused by unintentional act ivation of the system. For removal of Spiral Cable and Air Bag
Module, see the SRS section.
• Do not use electrical test equipm ent on any circuit related to the SRS unless instructed to in this
Service Manual. SRS wiring harnesses can be identi fied by yellow and/or orange harnesses or har-
ness connectors.
• When working near the Airbag Diagnosis Sensor Un it or other Airbag System sensors with the Igni-
tion ON or engine running, DO NOT use air or el ectric power tools or strike near the sensor(s) with a
hammer. Heavy vibration could activate the sensor( s) and deploy the air bag(s), possibly causing
serious injury.
• When using air or electric power tools or hammers , always switch the Ignition OFF, disconnect the
battery, and wait at least 3 minutes before performing any service.
Precaution Necessary for Steering Wh eel Rotation After Battery Disconnect
INFOID:0000000004305562
NOTE:
• This Procedure is applied only to models with Intell igent Key system and NVIS/IVIS (NISSAN/INFINITI
VEHICLE IMMOBILIZER SYSTEM - NATS).
• Remove and install all control units after disconnecti ng both battery cables with the ignition knob in the
″ LOCK ″ position.
• Always use CONSULT-III to perform self-diagnosis as a part of each function inspection after finishing work.
If DTC is detected, perform trouble diagnosis according to self-diagnostic results.
For models equipped with the Intelligent Key system and NVIS/IVIS, an electrically controlled steering lock
mechanism is adopted on the key cylinder.
For this reason, if the battery is disconnected or if the battery is discharged, the steering wheel will lock and
steering wheel rotation will become impossible.
If steering wheel rotation is required when battery pow er is interrupted, follow the procedure below before
starting the repair operation.
OPERATION PROCEDURE 1. Connect both battery cables. NOTE:
Supply power using jumper cables if battery is discharged.
2. Use the Intelligent Key or mechanical key to turn the ignition switch to the ″ACC ″ position. At this time, the
steering lock will be released.
3. Disconnect both battery cables. The steering lock will remain released and the steering wheel can be
rotated.
4. Perform the necessary repair operation.
5. When the repair work is completed, return the ignition switch to the ″LOCK ″ position before connecting
the battery cables. (At this time, the steering lock mechanism will engage.)
6. Perform a self-diagnosis check of al l control units using CONSULT-III.
Page 1135 of 4331

CVT
N
O P
CAUTION:
Never start engine.
7. Select “Self Diagnostic Results” in “TRANSMISSION”.
8. Shift the selector lever to “R” position.
9. Depress slightly the accelerator pedal (Pedal angle: 2/8) while depressing the brake pedal.
10. Select “Erase”.
11. Turn ignition switch OFF while keeping the selector lever in “R” position.
12. Wait approximately 10 seconds.
13. Turn ignition switch ON while keeping the selector lever in “R” position. CAUTION:
Never start engine.
14. Select “Special function” in “TRANSMISSION”.
15. Check that the value on “CALIBRATION DATA” in CONS ULT-III is the same as the data listed in the table
below.
• Restart the procedure from step 3 if the values are not the same.
CALIBRATION DATA
16. Shift the selector lever to “P” position.
17. Check that the shift position indicator in combinat ion meter turns ON. (It indicates approximately 1 or 2
seconds after shifting the selector lever to “P” position.)
• Check the following items if shift position indicator does not turn ON. Repair or replace accordingly as necessary.
- The harness between TCM and ROM ASSY in transaxle assembly is open or shorted.
- Terminals disconnected, loose, or bent from connector housing.
- Power supply and ground of TCM. Refer to CVT-295, " Description " .
PATTERN C 1. Replace transaxle assembly first, and then replace TCM.
2. Perform the service of “PATTERN A”. (Perform the service of “PATTERN B” if TCM is replaced first.)
Removal and Installation Proc edure for CVT Unit Connector INFOID:0000000004305565
REMOVAL Item name Display value Item name Display value
UNIT CLB ID 1 00 GAIN PL 256
UNIT CLB ID 2 00 OFFSET PL 40
UNIT CLB ID 3 00 OFFSET2 PL 0
UNIT CLB ID 4 00 MAP NO SEC 32
UNIT CLB ID 5 00 GAIN SEC 256
UNIT CLB ID 6 00 OFFSET SEC 40
MAP NO LU 33 OFFSET2 SEC 0
GAIN LU 256 MAP NO SL 32
OFFSET LU 40 GAIN SL 256
OFFSET2 LU 0 OFFSET SL 40
MAP NO PL 32 OFFSET2 SL 0