Page 137 of 426

Warm and cold -
-------------------'
concentrations of pollutants, the air conditioning system is
switched automatically to recirculation mode and the supply of
outside air is blocked. As soon as the concentration of pollutants in
the outside air drops , fresh air is supplied to the vehicle interior
again.
In the event that the windows fog up during automatic air recircula
tion, you must press the® button immediately.
Under certain operating conditions, automatic air recirculation is
switched off automatically . With outside temperatures below about
+10 °C, automatic air recirculation is limited to 30 seconds . With
outside temperatures below about -1 °C and in the ECON mode,
automatic air recirculation is limited to 15 seconds. •
Synchronization
One climate control setting for the driver and front
passenger seats.
With synchronization active, the driver's settings are adopted for
the passenger or vice versa. All the other settings that were made are transferred to the other seat. This includes all the clima te control
settings, except for the Seat heating *.
If a different setting is selected at a "synchronized seat", synchroni
z ation is cancelled. •
Applies to vehicles: with four-zone automatic comfort ai r cond itioning
Synchronization
One climate control setting for all seats.
With synchronization active, the driver's settings are adopted for
the front passenger and the rear left and right seats . All the other
settings that were made are transferred to the other seats. This
includes all the climate control settings, except for the Seat
heating*.
Con tro ls and eq uip
ment
If a different setting is selected at a "synchronized seat", synchroni
zation is cancelled. •
Applies to vehicles : wit h fo ur-zone autom atic comfort air co ndi tioning
Rear operation
Using the "Rear operation" function, settings can be made
in the center console control element for the rear left and
right sides of the vehicle.
Fig. 143 MMI Display:
Rear operation
Fig . 144 MMI Display:
Temperature setting
for rear left side
Press the [SETUP) button in the controls to access the
menu.
~
Vehicle care I I Technical data
Page 138 of 426

• .___w_ a_ rm __ a_ n_ d_ c_o _l_d ________________________________________________ _
-Selec t the R ear opera tion => page 135, fig. 143 fu nction
us ing the (driver or front passenger) cont ro l knob on the
air conditioning contro l eleme nt in the ce nter console
=> page 125 , fig. 135 to adjust the rear a ir condit ion ing .
Set ting the temperature
If you turn the contro l knob on the middle console driver side
control element ~
page 125, fig. 135 to the left, the temperature in
t he rear on the left side is decreased . If you turn the control knob to
the right, the temperature in the rear on the left side is increased
~ page 135, fig . 144.
If you turn the control knob on the midd le console front passenger
side control e lement to the left, the temperature in the rear on the
right side is decreased. If you turn the control knob to the right, the
temperature in the rear on the right s ide is inc reased.
Air di str ibu tion (!)
If you press the Dis tribution (fl control button and then turn the
control knob on the driver or front passenger side, you can set the
desired air distribution for the rear left or right side .
Blowe r [8e ]
If you press the Bl ow er [8e ] control button and then turn the control
knob on the driver or front passenger side, you can set the desired
fan speed for the rear left or right side .
Seat heating Q)
If you press the Seat heat. (i) control button and then turn the
control knob on the driver or front passenger side, you can set the
des ired temperature for the rear left or righ t side ~
page 137. •
Heated Seats
A pplies to veh icles : with e lect ric a lly heate d s eats
Heated front seats Q)
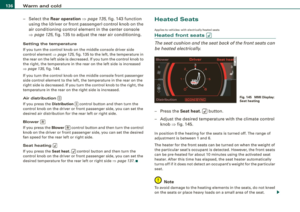
The seat cushion and the seat back of the front seats can
be heated electrically.
Fi g. 14 5 MMI Di spl ay:
Se at h eatin g
Press the Seat h eat . GD butto n.
Adjust t he desired temperature with the climate con trol
knob => fig . 145.
In pos ition O the heating for the seats is turned off . The range of
adjustment is between 1 and 6 .
The heater for the front seats can be turned on when the weight of the par ticular seat's occupant is detec ted. How eve r, the front s eats
can be pre -heated for about 10 minutes using the activated seat
hea ter . After this time has elapsed , the seat hea ter automatically
t urns off if i t does not detec t an occupant's weight for the particular
sea t.
0 Note
To avoid damage to the heating elements in the seats, do not kneel
on the seats or place heavy loads on a small area of the seat . _..
Page 139 of 426

_________________________________________________ W_ a_ r_ m __ a_n_ d_ c_ o_ld _ __._
[ i J Tip s
Please note that the weight of objects placed on the seat will a lso
be detected . This weight may be enough to cause the seat heater to
turn on. •
App lies to vehicles: with heate d rea r seats
Heated rear seats
The seat cushions and seat backs of the two outer rear
seats can be heated electrically.
Fig . 146 Ce nter
co nso le rear : H eated
seats
Rotate the thumb wheel © to turn on and adjust the
heating for the left rea r seat .
- Rotate the t humb wheel ® to turn on and adjust the
heating for the right rear seat .
With the thumb wheel in the O position , heating for the seats is
turned off . The range of adjustmen t is from 1 to 6.
The heater for the outer rear seats can be turned on when the
weight of the particu lar seat's occupant is detected. However, the
rear seats can be pre-hea ted for about 10 minutes using the acti
vated seat heater. After this time has elapsed, the seat heater auto
matical ly turns off if it does not detect an occupant's weight for the
particular seat .
Contro ls and eq uip
ment
0 Not e
To avoid damage to the heating elements in the seats, do not kneel
on the seats or place heavy loads on a small area of the seat .
[ i J Tip s
Please note that the weight of objects placed on the seat will a lso
be detected. This weight may be enough to cause the seat heater to
turn on. •
App lies to vehic les: with heated rear seats, four-.one automatic c omfo rt a ir co ndit ioning
Heated rear seats Gl)
The seat cushions and seat backs of the two outer rear
seats can be heated elec trically.
Vehicle care I I
F ig. 147 Ce nter
co nso le in rear : T urni ng
o n h eate d r ear seats
~
irechnical data
Page 140 of 426

• ..__w_ a_ r_m _ a_ n_d_ c_ o_ ld __________________________________________________ _
Fig. 14 8 Center
conso le in fron t:
T urni ng on hea te d rea r
sea ts
Adju sting h eat ed sea t settin gs on rear control
e le m ent
- Press the
Seat heat . Ii_] button on the rear control
element ~
page 137, fig. 147.
Adjust the desired temperature with the control knob .
Adjustin g he ated seat settings on center
console control element
Press the
I SETUP] button on the air conditioning control
element to access the menu.
- Select
Rear operation ~ page 135, fig. 143 to adjus t the
rear a ir condit io ning settings usi ng the center console
control element.
- Press the
Sea t he at. [i_] co ntrol button on the center
console control element~ fig.
148.
Adjust t he desired temperature with the control knob.
In position O the heating for the seats is turned off . The range of
adjustment is between 1 and 6 .
The heater for the outer rear seats can be turned on when the
weight of the particu lar seat's occupant is detected. However, the
rear seats can be pre-heated for about 10 minutes using the acti- vated seat heater. After this time has elapsed, the seat heater auto
matically turns off if it does not detect an occupant's weight for the
particular seat.
0 Note
T o avoid damage to the heating elements in the seats, do not kneel
on the seats or place heavy loads on a small area of the seat.
[ i ] Tips
Please note that the weight of objects placed on the seat will also
be detected. This weight may be enough to cause the seat heater to
turn on. •
Applies t o vehicles: with steering whee l heating
Steering wheel heating (j)
The s teering wheel can be heated electrically.
F ig . 149 Mult ifun ction
ste ering wheel : Bu tto n
for stee ring w hee l
h ea ting
- Press the[~] button to turn t he steering whee l heating on
and off~ fig .
149. The message
Steering wh eel h eating on ! or
Ste ering wheel hea ting off I appears in the instrument
cluster display.
~
Page 141 of 426
_________________________________________________ w_ a_ r_ m __ a_n_ d_ c_ o_ld __ lllll
When the steering wheel heating is switched on, the steering wheel
is heated to about 82 °F (28 °C) and held there.
The last setting se lected for the steering wheel heating (on or off) is
automatically saved when the vehicle is shut off and is assigned to
the remote key. •
Controls and equip
ment I • •
Page 142 of 426

• ..__O_ n_ t_h _e _ r_o _a _ d __________________________________________________ _
On the road
Steering
Applies to vehicles : w ith manua lly ad justab le steering whee l
Manually adjusted steering wheel
The height and reach of the steering wheel can be
adjusted.
First, adjust the driver's seat correctly.
Fig . 150 Lever under
the steering column
Pull the lever~ fig. 150 -Arrow -~&.
Move the steering wheel to the des ired position.
Push the lever against the steering column until it lock s.
There must be at leas t 10 inch es (25 cm) between your chest and the
center of the steering wheel. If you cannot sit more than 10 inches
(25 cm) from the steering wheel, see if adaptive equipment is avail
able to help you reach the pedals and increase the distance from the
steering wheel.
For detailed information on how to adjust the driver's seat, see
=> page 93.
The steering wheel can be adjusted even when the ignition is turned
Off. For vehicles with seat memory, the individual positions for the
steering wheel can be stored along with the seat position.
& WARNING
Improper use of steering wheel adjustment and improper seating
position can cause serious personal injury .
• Adjust the steering wheel column only when the vehicle is not
moving to prevent loss of vehicle control.
• Adjust the driver's seat or steering wheel so that there is a
minimum of 10 inches (25 cm) between your chest and the
steering wheel
=> page 222 , fig . 235 . If you cannot maintain this
minimum distance, the airbag system cannot protect you prop
erly .
• If physical limitations prevent you from sitting 10 inches (25
cm) or more from the steering wheel, check with your authorized
Audi dealer to see if adaptive equipment is available .
• If the steering wheel is aligned with your face , the supple
mental driver's airbag cannot provide as much protection in an
accident . Always make sure that the steering wheel is aligned with
your chest .
• Always hold the steering wheel with your hands at the 9 o'clock
and 3 o'clock positions to reduce the risk of personal injury if the
driver's airbag deploys .
• Never hold the steering wheel at the 12 o'clock position or with
your hands inside the steering wheel rim or on the steering wheel
hub. Holding the steering wheel the wrong way can cause serious
injuries to the hands, arms and head if the driver's airbag
deploys. •
Page 143 of 426

___________________________________________________ O_ n_ t_h _e_ r_o _a_ d _ ___._
Ap plies to v ehi cles : wi th ele ctr ic ally a djuste d steer in g wh eel
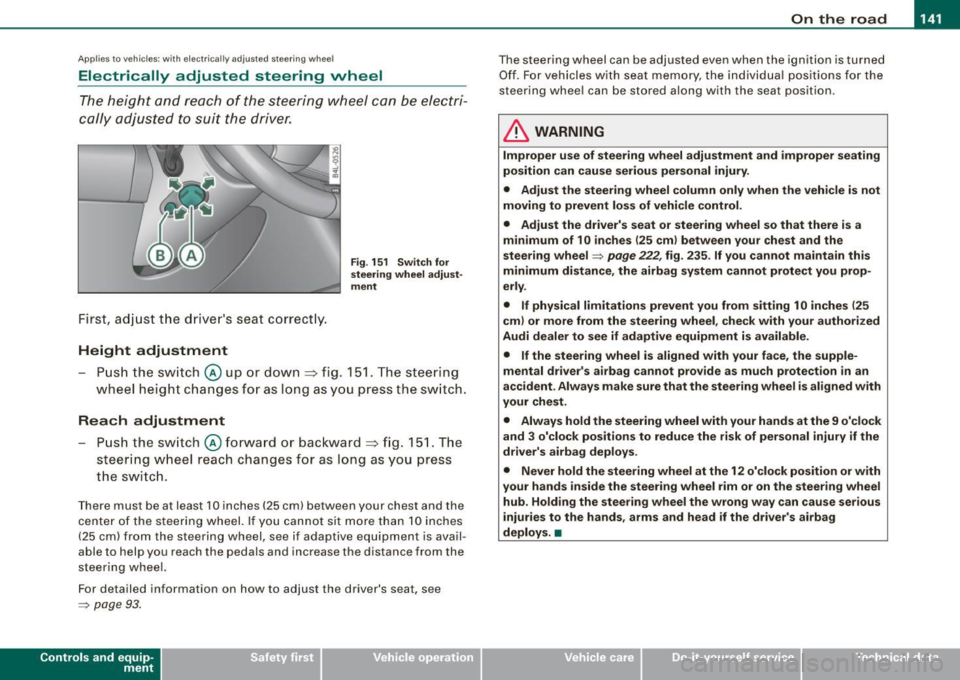
Electrically adjusted steering vvheel
The he ight and re ach of the stee ring whe el can b e electr i
cally adj uste d to s uit t he d river .
First, adjust the d river's seat co rrect ly.
Height adjustment
Fig . 151 Switch for
steering wheel adjust ·
ment
- Push the switch@ up or dow n=> fig. 1 51. T he steer ing
w heel he ight cha nges for a s long as you pre ss th e swi tc h.
Reach adjustment
- Push the s witch @ forw ard o r backwar d => fig . 151. Th e
s teer ing whe el reach ch an ges for as lon g as you pr ess
t h e s wit c h.
Ther e must b e at least 1 O in ches ( 25 cml betw een your chest and the
cen te r of th e st eer ing w hee l. If you cannot sit mo re than 1 0 in che s
(2 5 cm) from the stee rin g wh eel, se e if adaptive equ ipm ent is ava il
able to help you reach the pedals and increase the distance from the
st eeri ng whe el.
F or detailed info rmation on how to ad just the drive r's seat, see
~ pa ge 93 .
Con tro ls and eq uip
ment
T he steering whe el can be adj ust ed even when the ignition is turn ed
O ff . F or vehi cle s with seat memory , the i ndividu al p osi tions fo r the
st eer in g w he el can be sto red a lon g w ith th e seat position.
& WARNING
Improper use of steering wheel adjustment and improper seating
position can cause serious personal injury.
• Adjust the steering wheel column only when the vehicle is not
moving to prevent loss of vehicle control .
• Adjust the driver's seat or steering wheel so that there is a
minimum of 10 inches (25 cm ) between your chest and the
steering wheel
~ page 222, fig . 235 . If you cannot maintain this
minimum distance , the airbag system cannot protect you prop
erly .
• If physical limitations prevent you from sitting 1 O inches (25
cml or more from the steering wheel , check with your authorized
Audi dealer to see if adaptive equipment is available.
• If the steering wheel is aligned with your face, the supple
mental driver's airbag cannot provide as much protection in an
accident . Always make sure that the steering wheel is aligned with
your chest .
• Always hold the steering wheel with your hands at the 9 o'clock
and 3 o'clock positions to reduce the risk of personal injury if the
driver's airbag deploys .
• Never hold the steering wheel at the 12 o'clock position or with
your hands inside the steering wheel rim or on the steer ing wheel
hub . Holding the steering wheel the wrong way can cause serious
injuries to the hands, arms and head if the driver's airbag
deploys. •
Vehicle care I I Technical data
Page 144 of 426

• ..__O_ n_ t_ h _e _ ro_ a_d __________________________________________________ _
Easy entry feature
The easy entry feature makes it easier to enter and exit the
vehicle by automatically adjusting the steering wheel.
Press the button @~ page 141, fig. 151 to turn the easy
entry feature on or off.
When the easy entry feature is turned on (button depressed), the
steering wheel moves up to the parked position when the ignition is
turned off. After you enter the vehicle, the steering wheel moves to
the stored position as soon as you turn on the ignition .
Easy entry feature on vehicles with memory seat*
For the stored steering wheel position to be recalled, the driver's
seat memory must be switched on
(I ON OFF I switch in depressed
position).
If the easy entry feature is switched off, the steering wheel moves to
the stored position as soon as you press the seat memory button. •
Ignition lock and ignition switch
Ignition key positions
The engine can be started or turned off with the ignition
key.
Position @
Fig. 152 Ignition
switch positions
The ignition key can be inserted into the ignition switch in this posi
tion. This automatically unlocks the steering column lock. When the
ignition key is removed, the steering column lock is automatically
locked
~ & .
Ignition on 0
Turn the ignition key to this position and release it .
Starting the engine 0
The engine starts with the key in this position. Major electrical loads
are temporarily turned off.
Ignition off @
Turn the ignition key to this position and release it.