Page 73 of 426

& WARNING !continued)
• Never leave children or persons requiring assistance alone in
the vehicle, especially when they could access the vehicle keys.
Unsupervised use of the keys can result in the engine being
started or use of vehicle systems such as the power windows, etc.
which could result in serious injury. The doors could be locked
with the remote key, delaying help in an emergency.
• The Panoramic sliding sunroof will continue to operate until the
ignition key has been removed and one of the front doors has been
opened .•
Appl ies to vehicles: with Panoramic sli ding sunroof
Mechanical emergency closing for front roof
segment (Step 1 )
The Panoramic sliding sunroof can be closed manually in
an emergency.
Con tro ls and eq uip
ment
Fig . 56 Sect ion of front
headliner: Removing
cover
Opening and closing
Fig . 57 Section of front
headliner : Removing
the cover for the light unit
Removal of the light unit requires some dexterity.
Open the compartment. Pull the chrome strip down carefully, along with th e
center cover=> fig. 56 -Arrow -.
Pu ll the cover for the lig ht un it down carefully=> fig. 57
-A rro ws- .•
App lies to veh icles: with Panoramic sliding sunroof
Mechanical emergency closing for front roof
segment (Step 2)
a;. I
Vehicle care I I
Fig . 58 Section of front
headliner: Removing
light unit .,,_
irechnical data
Page 74 of 426

Opening and closing
Fig. 59 Section of front
headliner: Crank for
emergency operation
- Take the screwdriver from the vehicle tool kit
=>
page 371.
- Remove the two screws=> page 71, fig. 58 -Arrows- from
the light unit.
- Carefully remove the light unit.
- Remove the crank from the bracket on the fuse cover on
the left front of the instrument panel=>
page 381, fig. 308
®·
- Push the crank into the hexagonal hole as far as it can go
=> fig.
59.
- Hold the crank down and turn it to close the roof.
- Re-install the l ight unit. For installation, reverse the
removal sequence.
- Return the crank to its location in the fuse box cover
=>
page 381, fig. 308 and install the cover.
Have the problem corrected.
[ i ] Tips
To turn the crank for emergency closing more easily, you should use
the screwdr iver handle as an aid=> fig. 59 . First,
remove the screw
driver from the handle, then push the handle onto the crank .•
A pplies to vehicle s: with Panoram ic sli ding su nroof
Mechanical emergency closing for rear roof
segment
- Carefully remove the cover for the rear roof segment
drive in the rear area of the headliner.
- Remove the crank from the bracket on the fuse cover on
the left front of the instrument panel=>
page 381 , fig. 308
®·
- Press the crank into the hexagonal hole in the drive as far
as it will go (basically, as shown in=> fig.
59).
- Hold the crank down and turn it to close the roof.
- Re-install the cover.
- Return the crank to its location in the fuse box cover
=>
page 381, fig. 308 and install the cover.
- Have the problem corrected.
[ i ] Tips
To turn the crank for emergency closing more easily, you should use
the screwdriver handle from the tool kit=>
page 371 as an aid. First,
remove the screwdriver from the handle, then push the handle onto
the crank. •
Page 75 of 426

Clear vision
Lights
Switching the headlights on and off ·'t!-·
In the "AUTO" position, a light sensor* automatically
switches the head- and taillights on and off in response to
light conditions.
Fig. 60 Instrument
panel : light switch
The light switch must not be overturned past the stops in
either direction.
Switching on automatic headlight control
-Turn the light switch to AUTO=> fig. 60.
Switching on the side marker lights
-Turn the light switch to ~oo:.
Switching on the headlights and high beam
-Turn the light switch to ~D.
- Push the high beam lever forward towards the instru-
ment panel=>
page 77.
Contro ls and eq uip
ment
Switching off the lights
- Turn the light switch to 0. Clear vision
The headlights only work when the
ignition is switched on . While
starting the engine or when switching off the ignition, the head
lights will go off and only the side marker lights will be on.
After starting the engine, the headlights are automatically adjusted* to the load and angle of the vehicle (for example, during
acceleration, braking). This prevents oncoming traffic from experi
encing unnecessary headlight glare from your headlights.
If the system is not operating properly, a warning symbol in the
Auto -Check Control is displayed
=> page 37.
With the side marker lights or headlights switched on, the symbol
next to the light switch illuminates
coo:.
Daytime running lights
• USA models:
On vehicles with xenon lights the daytime running
lights will come on automatically when the ignition is turned on and
the light switch=> fig. 60 is in the
O position or the AUTO position
(only in daylight conditions). The
Daytime running lights function
can be turned on and off in the MMI menu
Exterior lighting
=> page 74. On vehicles with halogen fights, daytime running lights
can be activated by your authorized Audi dealer=>
f.1.
• Canada models: The daytime running lights will come on auto
matically when the ignition is turned on and the light switch
=> fig. 60 is in the O position or the AUTO position (only in daylight
conditions)
=> /.1 .
Automatic headlight control*
In the switch position AUTO the automatic headlight control is
turned on . The low beams and tail lights are turned on automatically
through a light sensor as soon as ambient brightness (e.g . when
driving into a tunnel) falls below a value preset at the factory. When ..,_
Vehicle care I I irechnical data
Page 76 of 426

Clear vision
ambient brightness increases again, the low beams are turned off
again automatica lly => & .
In the
AUTO pos ition the low beams are switched off automatically
when the ignition is turned off .
L ight S ensor M alfu nction *
In the event of a ligh t sensor mal func tion, the drive r is notified in the
ins trument cluster display :
e. Automatic headlights /autom ati c w ipers defe ctive
For safety reasons the low beams are turned on permanently with
the switch in
AUTO . However , you can continue to turn the lights on
and off using the light switch . Have the light sensor checked as soon
as possible at an authorized Audi dealer or qualified workshop.
& WARNING
• Never use d ayt ime running lights to see where you are going.
The y are no t bright enough and will not let you see far enough
ahead for safety , espe cially at du sk or when it is d ark . Al way s
switch on the low beams at du sk or when it is dark .
• Automati c he adlights* are onl y intended to assist the driver .
They do not relieve the driver of his re sponsibility to check the
headlight s and to turn them on manually a ccording t o th e cur rent
light and visibility condit ion s. For example , fog and ra in cannot be
dete cted by the l ight sen sor s. S o alwa ys sw itch on the headlight s
under th ese weather condition s and wh en driv ing in the dark
t D .
• Cras hes c an happen when y ou cannot see th e road ahead and
when you cannot be seen by other motori sts.
- Alway s turn on the headlights s o that you can see ahead a nd
s o that others can see your c ar from the ba ck.
[ i ] Tips
• With the switch in AUTO front fog lights and rear f og lights
cannot be turned on in addition . • T
he light sensor * for headlight control is located in the rear view
mirror mount . Do no t apply any stickers to the windshie ld in this
area to prevent malfunctions or failures .
• I f you remove the ign itio n from the ign ition lock while the head
lights are still on, a bu zzer will sound as long as the driver's door is
open to remind you to turn off the lig hts.
• Always observe the specific local regulations for your ar ea as to
when to use you r lights .•
Adjusting exterior lighting
The functions are set in the MM/ .
Fig . 61 MM I display :
E x te rior lighting
- Press the [ CAR ] fu nct io n butto n.
- Selec t
Exterior lighting . The menu Exterior lighting
appears=> fig. 61.
C oming h om e*
T he
Com ing home function ensures that after turn ing off the igni
tion and op ening the driver's doo r
the vehicle periphery is il lumi
nated in the dark. In addition , the front fog lights, the tail lights and
the license plate light are turned on . On- time can be set fo r a period
from
O (off) to 60 seconds. .,,_
Page 77 of 426

Le avi ng hom e*
The Leaving home function ensures that when unlocking the vehicle
periphery is illuminated in the dark. In addit ion, the front fog lights,
t he tail lights and the licen se plate light are tu rned on . This func tion
can be turned on and off.
Daytime running light s
USA models :
On vehicles with xenon lights the daytime running
lights can be turned on or off using this function . On vehicles with
halogen lights , daytime running lights can be activated by your
authorized Audi dea ler .
Canada model s: The function cannot be turned off. It is activate d
automatically each time the ignition is turned on. This menu item is
shown "greyed out". •
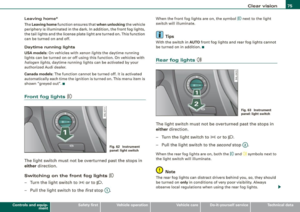
Front fog lights }0
Fig. 6 2 Instru ment
pane l: light switch
The light switch must not be overturned past the stops in
either direction.
Switching on the front fog lights tD
- Tur n t he light switch to ;oo~ o r to io .
- P ull the light switch to t he first sto p G).
Con tro ls and eq uip
ment
Clear vision
When the front fog lights are on, the symbo l }0 next to the light
switch will illuminate .
[ i ] Tips
Wi th the switch i n AUTO front fog lights and rear fog lights cannot
be turned on in addition .•
Rear fog lights 0$
Fig . 6 3 Instrument
p anel : light switch
The ligh t switch must no t be overt urned pas t th e stops in
either direct ion.
- Tu rn t he ligh t sw itch to
;oo~ or to io .
- Pull the ligh t switch to t he second sto p (v.
When the rear fog lights are on, both the }O and symbols next to
the light switch wi ll i lluminate .
0 Note
The rear fog lights can distract dr ive rs beh ind you, so, they should
be turned on
only in cond itions of very poor visibility. Always
obse rve local regulations when u sing the rea r fog lights . ...
Vehicle care I I irechnical data
Page 78 of 426

Clear vision
[ i J Tips
With the switch in AUTO front fog lights and rear fog lights cannot
be turned on in addition.•
App lies to veh icles: with Adaptive Ligh t
Adaptive Light
When driving around bends, the relevant area of the road
is better illuminated.
Fig. 64 Adaptive light
when driving
The benefit of Adaptive Light is that the curve and the edge of the
road are better illuminated~ fig. 64. The Adaptive Light is
controlled automatically, depending on vehicle speed and steering
wheel angle.
When driving around bends, the headlights are controlled
according to steering wheel angle. So that there is no black area
ahead of the vehicle, the two main beams pivot at different angles.
[ i J Tip s
The system works above a speed of about 6 mph (10 km/h) .•
Appl ies to vehicles: with light package
Perimeter lighting in the mirror housing
LEDs in the exterior mirror housing illuminate the ground
during entry.
This function ensures that when unlocking, the vehicle periphery is
illuminated in the dark. LEDs in the exterior mirror housing are
switched on. The function cannot be turned off separate ly .•
Emergency flasher J1.
The emergency flasher makes other motorists aware that
you or your vehicle are in an emergency situation.
Fig. 65 Center
console: emergency
flasher switch
-Press the switch J1. => fig. 65 to turn the emergency
flashers on or off.
When the emergency flasher is on, all four turn signals blink at the
same time. The turn signal indicator lights¢ Q in the instrument
cluster, as well as the light in the emergency flasher switch&:, blink
likewise.
The emergency flashers will turn on automatically if you are in an
accident where the airbag has deployed.
~
Page 79 of 426

[ i J Ti ps
You should turn on the emergency flashers when:
• you are the last vehicle standing in a traffic jam so that any other
vehicles coming can see you, or when
• your vehicle has broken down or you are in an emergency s itua
tion, or when
• your vehicle is being towed by a tow truck or if you are towing
another vehicle behind you .•
Turn signal ¢ ¢ and high beam ~D lever
The lever on the left side of the steering column is used to
operate the turn signals and the high beam as well as the
headlight flasher .
-"' M
-w ... m
Fig. 66 Tu rn sign al and
hig h bea m lever
The turn signal and high beam lever has the following func
tions:
Turn sign als ¢ ¢
- Lift the lever up all the way=> fig. 66 (D to use the right
turn s ignals, or push the lever down all the way@ to use
the left turn signals.
Con tro ls and eq uip
ment
C lea r v is ion
Au to-blink
- Move the lever (up or down) just to the point of resis
tance to use the turn signals for as long as you need
them, for example when changing lanes .
- Move the lever (up or down) just to the point of resis
tance and then release it right away to make the turn signals blink
three times . You can use this feature for
example when changing lanes on highways.
High b eam ~D
- P ush the lever forward ® to switc h on the high beam.
- P ull the lever back towards you to switch off the high
beam.
H ea dlight fl asher ~D
Pull the lever toward the steering wheel © to use the
headlight flasher.
N otes o n these fea tures
• The turn signals only work with the ignition turned on . The indi
cator lights ¢ or¢ in the instrument cluster=> page 17 also blink.
• After you have turned a corner , the turn signal sw itches off auto
matically .
• The high beam works only when the head lights are on . The indi
cator light [D in the instru ment cluster i llum inates when the high
beams are on.
• The headligh t flash er works only as long as you hold the lever -
even if there are no lights turned on. The indicator light [0 in the
instrument cluster illuminates when you use the headlight flasher . .,,_
Vehicle care I I Technical data
Page 80 of 426

Clear vision
0 Note
Do not use the h igh beam or headlight flasher if you know that these
could blind oncoming traffic. •
Interior lights
Front interior lights
The interior lights inclu de rea ding lights for both the
driver and the front passenger.
I;
S? ..!I ... m
r
~-
~
Fig . 6 7 H eadlin er:
F ron t int erior light s
18 S? ..:.,
~
(
"--8
Fig. 68 H eadlin er:
Front r eadin g li ghts :
T he rocker sw itch ©:::::, fig. 67 for operating the int erior
li gh ting has the following funct ions: Door
conta ct swit ch
- Place the sw itch © in the midd le position.
Interior l ight switched on
- Place the sw itch © in posi tion
I.
Int erior light switch ed off
- Place the switch © in position 0.
Reading lights
«~
- Press one of the switches ® to tu rn the r ig ht or left
reading light on or off:::::, fig. 68.
In the door contact switch position (switch @ in the middle po si
tion) , the interior lights turn on as soon as you unlock the vehicle or
open the doors. The interior lights are a lso turned on when the igni
tion key is removed. The light goes out about 30 seconds after the
doors are closed. When th e vehic le is locked or when the igni tion is
turned on, the interior lights are turned o ff.
When a door is open, the interio r ligh ts are turned off after about 10
minutes to prevent d raining the battery.
The brightness of the l ights is controlled automatically by a dimmer
when they are switched on and off. •