2008 MERCEDES-BENZ SL ROADSTER lights
[x] Cancel search: lightsPage 146 of 317
Driving sys
tems 143
Front sensors Centre Approximatel
y100 cm Corners Approximatel
y60cm Rea
rsenso rs Centre Approximatel
y120 cm Corners Approximatel
y80cm !
Payp articula rattentio ntoobjects above
or belo wthe sensors when parking, such
as flower pots or trailer towbars. Parktronic
does not detect such objects when the yare
in the immediate vicinity of the vehicle. You
could damage the vehicl eorthe objects.
Ultrasonic sources such as an automatic
ca rw ash, alorry's compressed-air brakes
or ap neumati cdrill could caus eParktronic
to malfunction.
Minimum distance Centre Approximatel
y20cm Corners Approximatel
y15cm If there is an obstacle withi
nthisr ange,all
warning displays ligh tupa nd atone sounds.
If the distance fall sbelow the minimum clear-
ance, it ma ynolongerbes hown.
Warnin gdisplays Th
ew arning displays sho wthe distance
between the sensors and the obstacle .The
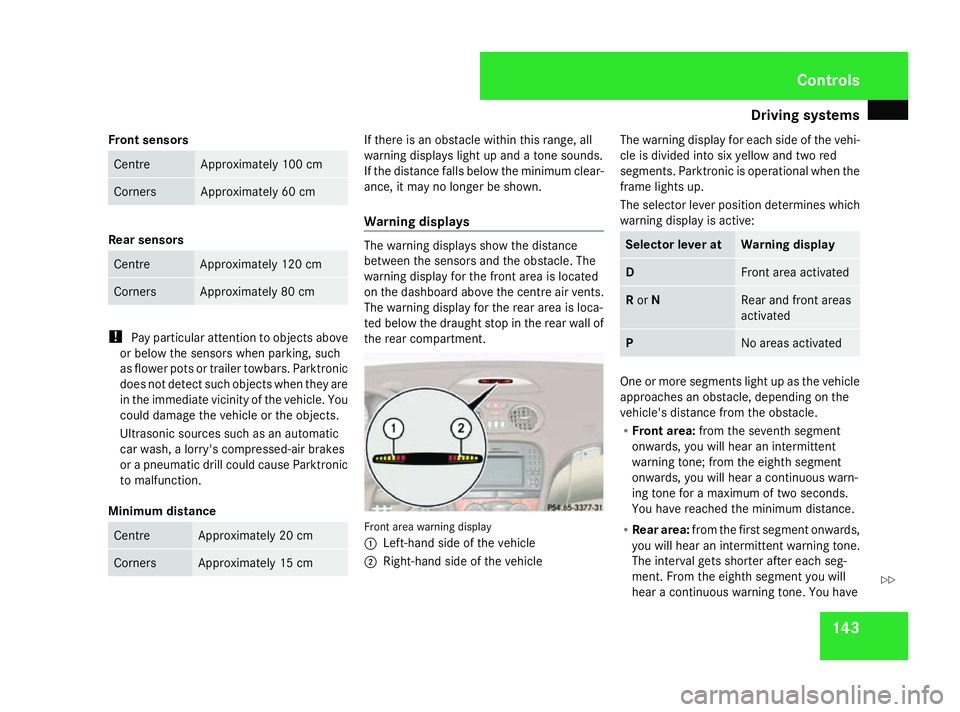
warning displa yfor the front area is located
on the dashboard above the centr eairvents.
Th ew arning displa yfor the rea rareaisl oca-
ted belo wthe draught sto pinthe rea rwallof
the rea rcompartment. Front area warning display
1
Left-hand side of the vehicle
2 Right-hand side of the vehicle Th
ew arning displa yfor each side of the vehi-
cle is divide dinto si xyello wand two red
segments. Parktronic is operational when the
frame lights up.
Th es elect or lever positio ndetermine swhich
warning displa yisactive: Selecto
rlever at Warnin
gdisplay D Front area activated
R
or N Rear and front areas
activated
P No area
sactivated One or mor
esegments ligh tupast he vehicle
approache sanobstacle ,depen ding on the
vehicle' sdistance fro mthe obstacle.
R Front area: fromt he seventh segment
onwards ,you will hear an intermittent
warning tone ;fro mt he eighth segment
onwards ,you will hear acontinuous warn-
ing tone for amaximum of two seconds.
Yo uh aver eache dthe minimum distance.
R Rea rarea: fromt he first segment onwards,
yo uw illh earani ntermittent warning tone.
Th einterva lgetss horter after each seg-
ment. Fro mthe eighth segment yo uwill
hear acontinuous warning tone .You have Controls
230_AKB; 5; 4, en-GB
bjanott,
Version: 2.9.6 2008-04-08T15:09:54+02:00-Seite 143 ZDateiname: 6515_3089_02_buchblock.pdf; preflight
Page 149 of 317
Air conditioning
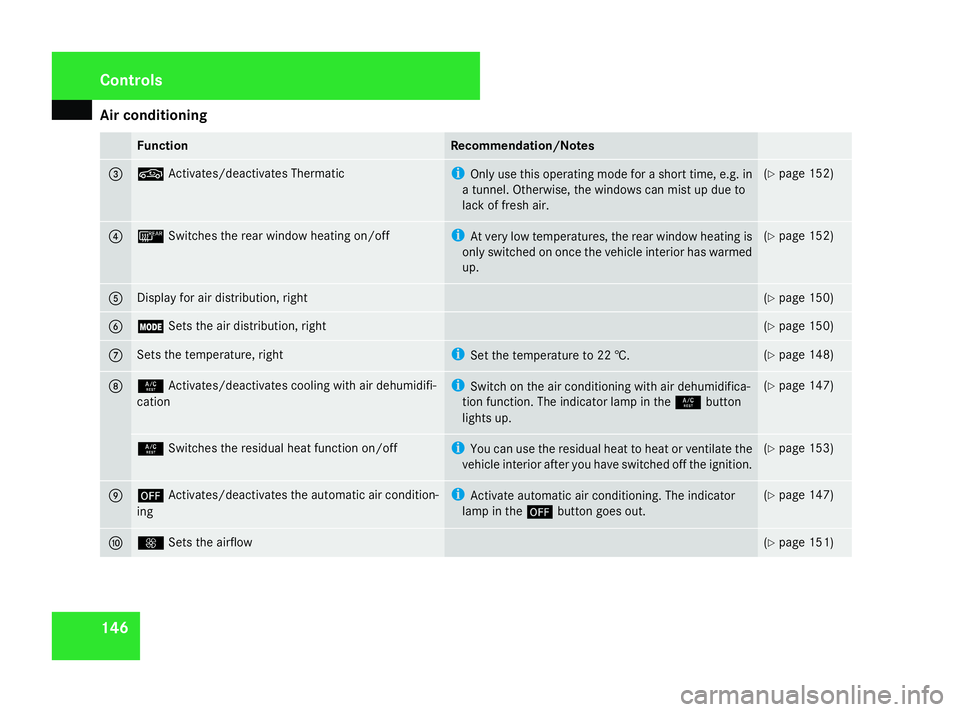
146 Function Recommendation/Notes
3 ,
Activates/deactivates Thermatic i
Only use this operatin gmodefor as hort time, e.g. in
at unnel. Otherwise ,the windows can mis tupdue to
lac koff resh air. (Y
page 152) 4 ¯
Switches th erearw indow heatin gon/off i
At ver ylow temperatures, th erearw indow heatin gis
only switched on once th evehicl einterior has warmed
up. (Y
page 152) 5 Displa
yfor air distribution ,right (Y
page 150) 6 Ñ
Sets th eair distribution ,right (Y
page 150) 7 Sets th
etem perature ,right i
Setthe temperature to 22 †. (Y
page 148) 8 9
Activates/deactivates coolin gwitha ir dehumidifi-
cation i
Switc hont heair conditionin gwitha ir dehumidifica-
tion function .The indicator lamp in the 9button
lights up. (Y
page 147) 9
Switches th eresidual heat function on/off i
You can use th eresidual heat to heat or ventilat ethe
vehicl einterior after you hav eswitched of fthe ignition. (Y
page 153) 9 ´
Activates/deactivates th eautomatic air condition-
ing i
Activat eautomatic air conditioning. The indicator
lamp in the ´buttongoeso ut. (Y
page 147) a Q
Sets th eairflow (Y
page 151) Cont
rols
230_AKB; 5; 4, en-GB
bjanott,
Version: 2.9.6 2008-04-08T15:09:54+02:00-Seite 146 Dateiname: 6515_3089_02_buchblock.pdf; preflight
Page 151 of 317
Air conditioning
148 H
Environmental note
The coolin gsystem uses th erefrigerant
R134A .Thisr efrigerant doe snotdamage
th ee arth's ozon elayer.
i Condensation may dri pfromt heunder-
side of th evehicl ewhen Thermatic is in
coolin gmode.
X To activate: press the9button.
The indicator lamp in the 9buttonlights
up.
X To deactivate: press the9button.
The indicator lamp in the 9buttongoes
out .The coolin gwitha ir dehumidification
function has adelaye dswitch-off feature. Controllin
gthe air conditionin gauto-
matically
In automatic mode, th eset temperature is
maintained at aconstan tlevel full yautomat-
ically. To do so, th esystem automatically
regulates th etem perature of th edispensed
air, th eairflow and th eair distribution.
The automatic air conditionin gwill achieve
optimal operation if "coolin gwitha ir dehu-
midification "isalso activated. If necessary,
coolin gwitha ir dehumidification can be deac-
tivated.
X Mak esuret hatthe keyisi nposition 2in
th ei gnition lock.
X Se tthe desire dtem perature.
X To activate: press theUbutton.
The indicator lamp in the Ubutton
comes on .Automatic air distribution and
airflow are activated.
X To deactivate: press theUbutton.
The indicator lamp in the Ubuttongoes
out .The airflow is set to level 3.The airflow
is directe dthrou gh th ecentre and side air
vents.
or X
Press on eoftheÑ buttons.
The indicator lamp in the Ubuttongoes
out .The air conditionin giscontrol led man-
ually fo rthe correspondin gside of th evehi-
cle.
or
X Tur nthe Q thumbwhee lclockwis eor
anti-clockwise.
The indicator lamp in the Ubuttongoes
out .Automatic airflow is deactivated and
th ea irflow is controlled accordin gtothe
level set .Automatic air distribution
remain sactivated. Setting th
etemperature
Different temperature scan be set fo rthe
driver's and front-passenger sides.
X Mak esuret hatthe keyisi nposition 2in
th ei gnition lock.
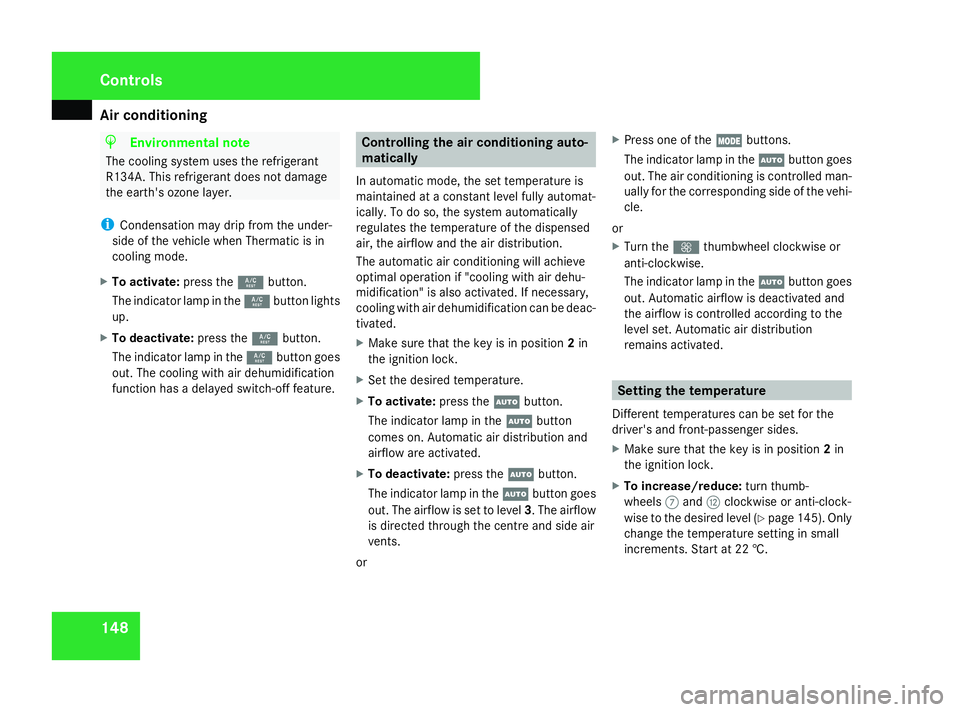
X To increase/reduce: turnthumb-
wheels 7and cclockwise or anti-clock-
wise to th edesire dlevel (Y page 145). Only
chang ethe temperature setting in small
increments. Start at 22 †. Cont
rols
230_AKB; 5; 4, en-GB
bjanott,
Version: 2.9.6 2008-04-08T15:09:54+02:00-Seite 148 Dateiname: 6515_3089_02_buchblock.pdf; preflight
Page 155 of 317
Air conditioning
152 Switchin
gthe rear window heating
on/off G
Risk of accident
Clear all windows of ice or snow befor eset-
ting off. Impaired visibility could otherwise
endanger you and others.
i At ver ylow temperatures, th erearw in-
dow heatin gisonlys witched on once the
vehicl einterior has warmed up.
i The rea rwindow heatin ghasah ighc ur-
ren tdraw. You should therefore switch it
of fass oonast hewindow is clear, as it only
switches of fautomatically after approxi-
mately 30 minutes.
i If th ebattery voltage is to olow, th erear
window heatin gmay switch off.
X Mak esuret hatthe keyisi nposition 2in
th ei gnition lock.
X Press the ¯button.
The indicator lamp in the ¯buttonlights
up or goe sout. Activating/deactivating air-recircula-
tion mode
You can deactivat ethe flowoff resh air if
unpleasant odours are enterin gthe vehicle
from outside .The air already inside th evehi-
cle will then be recirculated. G
Risk of accident
Only switch over to air-recirculation mode
briefl yatlow outside temperatures. Other-
wise ,the windows could mis tup, thus
impairing visibility and endangerin gyour-
sel fand others. Thi smay preven tyou from
observin gthe traffic conditions, thereby
causin ganaccident.
X Mak esuret hatthe keyisi nposition 2in
th ei gnition lock.
X To activate: press the,button.
The indicator lamp in the ,button
comes on.
i Air-recirculation mode is activated auto-
matically at hig houtside temperatures.
Whe nair-recirculation mode is activated
automatically, th eind icator lamp in
the , buttonisn otlit.
Outside air is adde dafter about
30 minutes. X
To deactivate: press the,button.
The indicator lamp in the ,buttongoes
out.
i Air-recirculation mode switches of fauto-
matically:
R after approximately fiv eminute sato ut-
side temperature sbelo wa pproximately
5†
R after approximately fiv eminute siftheair
dehumidification is deactivated
R after approximately 30 minute satout-
side temperature sabov eapproximately
5†
Air-recirculation mode wit hthe conve-
nience opening/closing feature G
Risk of injury
Mak esuret hatn obody can becom etrap-
ped between th eside window and th edoor
frame as th eside windows are opene dand
closed .Donotplac eobjects or lean against
th es ide window when it is bein gopene dor
closed .You or th eobjects could be drawn
in or becom etrappe dbetween th eside
window and th edoorframe as th ewindow Cont
rols
230_AKB; 5; 4, en-GB
bjanott,
Version: 2.9.6 2008-04-08T15:09:54+02:00-Seite 152 Dateiname: 6515_3089_02_buchblock.pdf; preflight
Page 156 of 317
Air conditioning
153moves
.Ifthere is ariskofe ntrapment,
press the ,buttonagain .Ifn eces sary,
press th eswitch that stops ,opens or closes
th es ide window in th eopposit edirection.
X Convenience closing: press and hold
the , buttonuntil th eside windows
hav eclosed.
The indicator lamp in the ,button
comes on .Air-recircul ation mode is activa-
ted.
X Convenience opening: press and hold
the , buttonuntil th eside windows
hav ereturned to their original position.
The indicator lamp in the ,buttongoes
out .Air-recircul ation mode is deactivated.
i If you ope nthe side windows manually
after closin gusingthe convenience closing
feature, it will remain in this position when
opene dusingthe convenience opening fea-
ture. Switchin
gthe residua lhea tona ndoff
It is possibl etom akeu se of th eresidual heat
of th eenginetoc ontinu eheatin gthe station-
ary vehicl efor up to 30 minute safter the
engin ehas been switched off. The heating
time depend sontheset interio rtem perature.
i The blower will run at alow speed regard-
les soft heairflow setting.
i If you activat ethe "residual heat "function
at hig htem peratures, only th eventilation
will be activated. The blower run sat
medium speed.
X Mak esuret hatthe keyisi nposition 0in
th ei gnition loc korthatith as been
removed.
X To switch on: press the9button.
The indicator lamp in the 9buttonlights
up.
X To deactivate: press the9button.
The indicator lamp in the 9buttongoes
out. i
The residual heat automatically switches
of fa fter around 30 minute sorif:
R thei gnition is switched on
R theb attery voltage drops Cont
rols
230_AKB; 5; 4, en-GB
bjanott,
Version: 2.9.6
2008-04-08T15:09:54+02:00
-Seite 153 ZDateiname: 6515_3089_02_buchblock.pdf; preflight
Page 167 of 317
Loading and stowing
164
X
To fasten th eluggage tensioning
strap: pull luggage tensioning strap 1out
of retainer 2.
X Secure th eluggage usin gluggage tension-
ing strap 1so that it canno tslip.
X Inser tluggage tensioning strap 1intofas-
tener 3.
X To release th eluggage tensioning
strap: pressrelease button 4and retract
luggage tensioning strap 1.
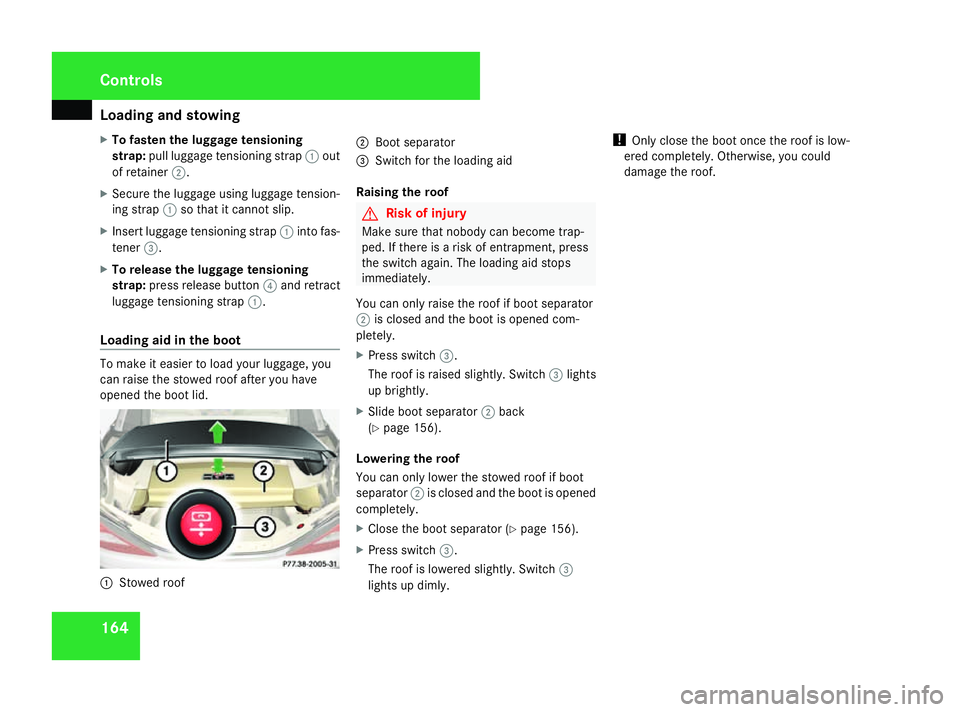
Loading aid in th eboot To mak
eiteasier to load your luggage ,you
can rais ethe stowed roo fafter you have
opened th eboot lid. 1
Stowed roof 2
Boo tseparator
3 Switch for th eloadin gaid
Raising th eroof G
Ris
kofi njury
Mak esure that nobody can become trap-
ped. If there is ariskofe ntrapment, press
th es witch again .The loadin gaid stops
immediately.
You can only rais ethe roo fifb oot separator
2 is closed and th eboot is opened com-
pletely.
X Press switch 3.
The roo fisraised slightly. Switch 3lights
up brightly.
X Slid eboot separator 2back
(Y page 156).
Lowering th eroof
You can only lower th estowed roo fifboot
separator 2is closed and th eboot is opened
completely.
X Close th eboot separato r(Ypage 156).
X Press switch 3.
The roo fislowered slightly. Switch 3
light supd imly. !
Only close th eboot once th eroofisl ow-
ered completely. Otherwise, you could
damag ethe roof. Controls
230_AKB
;5;4,en-GB
bjanott ,V ersion: 2.9.6
2008-04-08T15:09:54+02:00
-Seite 164 Dateiname: 6515_3089_02_buchblock.pdf; preflight
Page 168 of 317
Features
165Features
Su
nv isors G
Risk of accident
Kee pthe mirror sinthesun visors covered
while driving. You could otherwise be daz-
zled by bright lights ,impairing your vie wof
traffic conditions. You could caus eanacci-
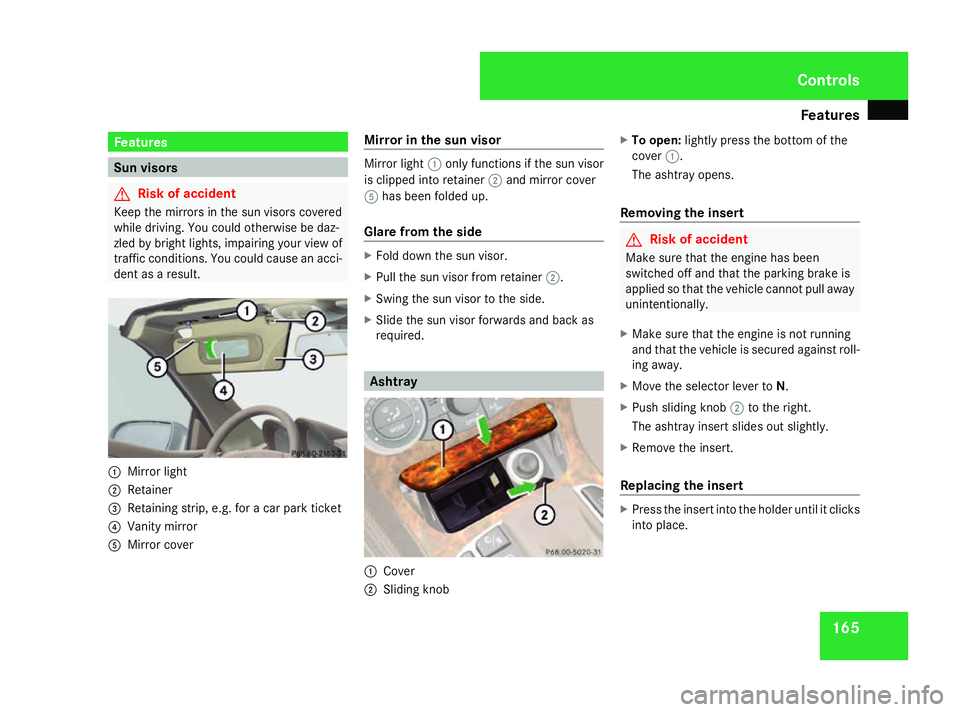
den tasa result. 1
Mirror light
2 Retainer
3 Retaining strip, e.g .for ac ar park ticket
4 Vanity mirror
5 Mirror cover Mirror in th
esun visor Mirror light
1onlyfunction sifthesun visor
is clipped int oretainer 2and mirror cover
5 has been folded up.
Glare from th eside X
Fold down th esun visor.
X Pull th esun viso rfromr etainer 2.
X Swin gthe sun viso rtotheside.
X Slid ethe sun viso rforwards and back as
required. Ashtray
1
Cover
2 Sliding knob X
To open: lightly pres sthe botto moft he
cover 1.
The ashtray opens.
Removing th einsert G
Risk of accident
Make sure that th eengine has been
switche doff and that th eparking brak eis
applied so that th evehicle cannot pull away
unintentionally.
X Make sure that th eengine is not running
and that th evehicle is secured agains troll-
ing away.
X Move th eselecto rlever to N.
X Push slidin gknob 2to th eright.
The ashtray insert slides out slightly.
X Remov ethe insert.
Replacing th einsert X
Pres sthe insert int othe holder until it clicks
int op lace. Controls
230_AKB
;5;4,en-GB
bjanott, Version:2.9.6
2008-04-08T15:09:54+02:00
-Seite 165 ZDateiname: 6515_3089_02_buchblock.pdf; preflight
Page 173 of 317
Features
170
X
Erase th ememory of th eintegrated remote
control (Y page 171) before programming
it fo rthe first time.
X Tur nthe keyt op osition 2in th eignition
lock.
X Press and hold on eoftransmitte rbuttons
2 to4 on th eintegrated remotecontrol.
Indicato rlamp 1start stof lasha fter a
short while .Itflashes about once asecond.
i Indicato rlamp 1flashes immediately
th ef irst time th etransmitte rbutto nisp ro-
grammed. If this transmitte rbutto nhas
already been programmed, indicator
lamp 1will only start flashin gatarateof
once asecon dafter 20 seconds have
elapsed.
X Kee pthe transmitte rbuttons depressed.
X Poin tthe garage door' sremot econtro lwith
th et ransmitte rtow ard sthe left-han dside
of th erear-view mirror from adistanc eof5
to 20 cm.
i The distanc ebetween th egarage door's
remot econtro land th eintegrated garage
doo ropener depend sonthesystem of the
garage doo rdrive. You might require sev-
eral attempts .You should test every posi- tion fo
ratleast20s econds before trying
another position.
X Kee pthe transmitte rbutto nont hegarage
door' sremot econtro ldepressed until indi-
cator lamp 1start stof lashrapidly.
The programmin gwas successful if indica-
to rlamp 1flashes rapidly.
X Releas ethe transmitte rbuttons on the
garage door' sremot econtro land th einte-
grate dremot econtrol.
If indicato rlamp 1goe sout after approxi-
mately 20 seconds and did no tflas hrapidly
before this:
X Releas ethe transmitte rbuttons on the
integrate dand portable remot econtrols.
X Repeat th eprogrammin gprocedure .Atthe
sam etimec hang et he distanc ebetween
th eg arage door' sremot econtro land the
transmitte rbuttons in th erear-view mirror.
i If th egarage doo rsystem works wit ha
rollin gcode, after programmin gyou must
synchronise th eremot econtro lintegrated
in th erear-view mirror wit hthe garage door
system receiver.
You will fin dfurther information in the
garage doo ropenin gsystem' soperating instructions, e.g. th
esection son"Synchro-
nisin gthe transmitter" or "Registerin ga
ne wt ransmitter". You can also cal lthe hot-
lin em entioned above.
Opening or closin gthe garage door Once programmed, th
eintegrated remote
control will assume th efunction of th egarage
doo rsystem' sremot econtrol. Pleaseread
th eo perating instruction sfor theg arage door
system.
X Tur nthe keyt op osition 2in th eignition
lock.
X Press th etransmitte rbutto nont herear-
vie wm irror that you hav eprogrammed to
operate th egarage door.
Garag edoors ystem wit hfixed code: indi-
cator lamp 1lights up continuously.
Garag edoorsystem wit hrollin gcode: indi-
cator lamp 1flashes briefl yand then lights
up fo rapproximately tw oseconds. This is
repeated fo rupto20s econds.
i The transmitte rwill transmit asignal for
as lon gasthetransmitte rbutto nisb eing
pressed. The transmissio nwill be halted
after amaximum of 20 seconds and indi- Cont
rols
230_AKB; 5; 4, en-GB
bjanott,
Version: 2.9.6 2008-04-08T15:09:54+02:00-Seite 170 Dateiname: 6515_3089_02_buchblock.pdf; preflight