2008 MERCEDES-BENZ SL ROADSTER wiper blades
[x] Cancel search: wiper bladesPage 14 of 317
11
Rear window heating
............152
Malfunction indicator lamp ......231
Refuelling ...................... 175
Remote control Garage door opene r............ 169
Programming (garage door
opener) ...................... 169
Replacing the wiper blades .......264
Reserve Display message .............. 227
Reserve fuel .................... 300
Display message .............. 227
Fuel tank .................... 300
Warning lamp ................. 239
Rese tbutton ................... 194
Restrain tsystem
see SRS (Supplemental Restraint
System)
Restrain tSystem
see SRS
Restrain tsystems
For children ................... 47
Rev counter .................... 106
Reverse gear Engaging (automatic transmission) .99
Reversin glamp
Displa ymessag e.............. 224
Roller sunblind ................. 159Roll-ove
rbar..................... 46
Display message .............. 228
Warning lamp ................. 237
Roof ........................... 154
Closing (key )................ .155
Closing (switch) ............... 155
Display message .............. 228
Malfunction .................. 249
Opening (key )................. 155
Opening (switch) .............. 155
Relocking .................... 156
Roof rack ...................... 160
Roof switch .................... 154
Run-on time (mobile phone) .......168 S
SBC Hold ....................... 137
Display message .............. 212
SBC TM
brake system .............. 57
Activation/Deactivatio n.......... 58
Malfunctio n.................. 242
Notes on driving ................ 58
Seat
Adjusting ..................... 74
Correct driver's seat position ......86
Storing settings ................ 82
Seat belt
Fastening ..................... 83
Warning lamp .............. 85, 238Seat heating
..................... 77
Seat ventilation .................. 77
Malfunctio nindicator lamp ......230
Selector lever
Display message .............. 209
Positions ..................... 99
Sensotronic Brake Control
see SBC TM
brak esystem
Service indicator
see Service indicator
Service products ................ 300
Brake fluid ................... 306
Coolant ..................... 304
Windscreen washer fluid ........306
Settings
Calling up astored setting ........83
Factory (key ).............. .64, 65
Factory (KEYLESS GO) ...........66
Factory (on-board computer) .....116
Settin gthe clock
see COMAND operating instructions
Settin gthe date
see COMAND operating instructions
Settin gthe time
see COMAND operating instructions
Settin gthe unit (on-board computer)
Speedometer ................. 117
SETUP (on-board computer) .......111 Index
230_AKB; 5; 4, en-GB
bjanott,
Version: 2.9.6
2008-04-08T15:09:54+02:00
-Seite 11 Dateiname: 6515_3089_02_buchblock.pdf; preflight
Page 17 of 317
14ESP
®
Spor t...................2 34
LIM (Cruise control) ............125
LIM (Distronic) ................ 128
LIM (variable Speedtronic) .......134
Warning signal
Audible ...................... 240
Warning triangle ................ 200
Washer fluid Display message .............. 229
Wearin gseat belts ................ 83
Wheel bolts Tightening torque .............. 274
Wheels
General notes ................. 182
Interchanging ................. 188
Technical data ............ 293, 295
Windows
Cleaning ..................... 196
Cleaning the windscreen ........196
Side windows .................. 93
Windscreen
Cleaning ..................... 196
Windscree nwashe rfluid ......... 306
Topping up ................... 181
Windscree nwashe rfluid reservoir
.......................... 181, 306
Windscree nwashe rreservoir
Capacity ..................... 306
Windscree nwashe rsystem ....... 306Windscreen wipers
...............92
Cleaning ..................... 196
Malfunction .................. 248
Replacing the wiper blades ......264
Winte rdriving .............. 189, 190
Winte rtyres .................... 189
Limiting the spee d(on-board com-
puter) ....................... 136Index
230_AKB; 5; 4, en-GB
bjanott,
Version: 2.9.6 2008-04-08T15:09:54+02:00-Seite 14 Dateiname: 6515_3089_02_buchblock.pdf; preflight
Page 96 of 317
Side windows
93
may be activated inadvertently. This could
then damage the windscreen wiper blades
or scratcht
he windscreen.
For this reason, you should always switch
off the windscreen wipers in dry weather.
X Make sure that the key is in position 1or
2 in the ignition lock.
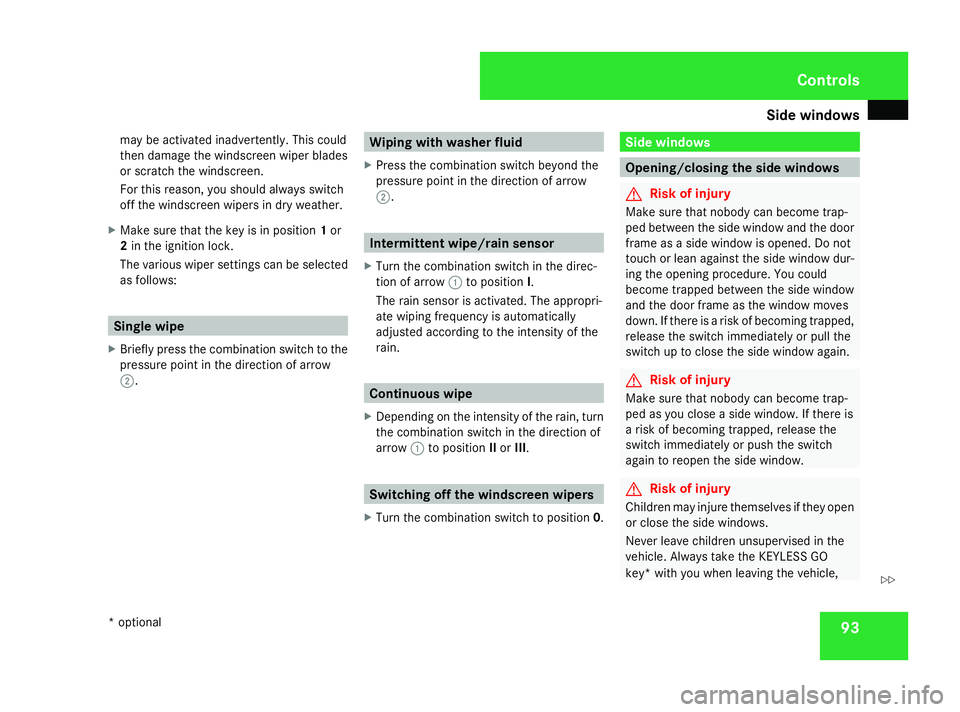
The various wiper settings can be selected
as follows: Single wipe
X Briefly press the combination switch to the
pressure point in the direction of arrow
2. Wiping with washer fluid
X Press the combination switch beyond the
pressure point in the direction of arrow
2. Intermittent wipe/rain sensor
X Turn the combination switch in the direc-
tion of arrow 1to position I.
The rain sensor is activated. The appropri-
ate wiping frequency is automatically
adjusted according to the intensity of the
rain. Continuous wipe
X Depending on the intensity of the rain, turn
the combination switch in the direction of
arrow 1to position IIor III. Switching off the windscreen wipers
X Turn the combination switch to position 0. Side windows
Opening/closing the side windows
G
Risk of injury
Make sure that nobody can become trap-
ped between the side window and the door
frame as aside window is opened. Do not
touch or lean against the side window dur-
ing the opening procedure. You could
become trapped between the side window
and the door frame as the window moves
down. If there is arisk of becoming trapped,
release the switch immediately or pull the
switch up to close the side window again. G
Risk of injury
Make sure that nobody can become trap-
ped as you close aside window. If there is
ar isk of becoming trapped, release the
switch immediately or push the switch
again to reopen the side window. G
Risk of injury
Children may injure themselves if they open
or close the side windows.
Never leave children unsupervised in the
vehicle. Always take the KEYLESS GO
key* with you when leaving the vehicle, Controls
*o ptional
230_AKB; 5; 4, en-GB
bjanott
,V ersion: 2.9.6
2008-04-08T15:09:54+02:00
-Seite 93 ZDateiname: 6515_3089_02_buchblock.pdf; preflight
Page 198 of 317
Care
195H
Environmental note
Dispose of empty packaging ,cleaning
cloth sand polishin gwads in an environ-
mentally responsible manner.
! Do no taffix:
R stickers
R films
R magnetic plates or similar items
to painte dsurfaces, otherwise you could
damag ethe paintwork. Vehicle care
! Do no tpark th evehicl efor alon gp eriod
of time directly after cleaning ,especially if
th ew heels have jus tbeen cleane dwitha
whee lcleaner. Whee lcleaners could cause
rapi dcorro sionoft hebrak ediscsa nd
brak epads/linings. Afte rcleaning ,park
th ev ehicl ewhen it is at normal operating
temperature. Automati
ccar wash G
Ris
kofa ccident
The vehicl eisbraked when SBC ®
Hold is
activated. Therefore, deactivat eSBC®
Hold
before th evehicl eisw ashedinana uto-
matic car wash.
You can wash th evehicl einana utomatic car
wash from th everys tart.
! It is preferable to use car washe swhich
do no tuse high-pressur ecleaners. In car
washe sthatu se high water pressures,
there is adanger that water may leak into
th ev ehicle.
! Do no tuse atouch-free automatic car
wash that uses chemical agents to wash
th ev ehicle.
If th evehicl eisv eryd irty, prewash it before
cleaning it in an automatic car wash.
! Mak esuret hatthe automatic car wash is
suitable for th esizeoft hevehicle. Fold in
th ee xter iorm irror sbefore th evehicl eis
washed. Ther eisotherwise ariskofd am-
age to th eexter iorm irrors.
! Mak esuret ha tthe side windows are com-
pletely closed, that th eventilation/heater blowe
risfully turne doff and that th ewind-
scree nwiper switch is set to 0.Otherwise,
th er ain sensor may be activated, inadver-
tently triggerin gwiper operation .This could
caus edamag etothevehicle.
Afte rusin gana utomatic car wash, wipe off
wax from th ewindscree nand th ewiper
blades .This will preven tsmears and reduce
wipin gnoises caused by residue on th ewind-
screen.
High-pressur ecleaners G
Ris
kofa ccident
Do no tuse high-pressure cleaners wit hcir-
cular-jet nozzles (dir tgrinders )toc lean
your vehicl eor-especially -the tyres. You
could otherwise damag ethe tyres and
caus eana ccident.
! Observ ethe instruction sissue dbyt he
equipmen tmanufacturer concerning the
distanc etobem aintainedbetween the
nozzle of th ehigh-pressure cleane rand the
vehicl e(at least 30 cm).
Mov ethe high-pressure cleane rnozzle
aroun dwhen cleaning your vehicle.
Do no taim directly at any of th efollowing: Operation
230_AKB; 5; 4, en-GB
bjanott
,V ersion: 2.9.6
2008-04-08T15:09:54+02:00
-Seite 195 ZDateiname: 6515_3089_02_buchblock.pdf; preflight
Page 199 of 317
Care
196R
tyres
R door joint
R electrical components
R battery
R connectors
R lights
R seals
Damaged seals or electrical components
can lead to failures or leaks.
Cleaning th ewiper blades and th eout-
sid eoft hewindscreen G
Ris
kofi njury
Turn th ekeyto position 0in th eignition
loc kb efore cleaning th ewindscree northe
wiper blades .Ther eiso therwise ariskof
th ew indscree nwiper sbein gset in motion
and causing injury.
X Turn th ekeyto position 1in th eignition
loc k(Ypage 73).
X Se tthe windscree nwiper stop osition Ion
th ec om bination switch (Y page 92).
X Turn th ekeyto position 0or remove it when
th ew iper arm sare vertical (Y page 73). !
Only fol dthe wiper arm saway from the
windscree nwhen they are in avertical posi-
tion ,otherwise you will damag ethe bonnet.
X Fold th ewiper arm saway from th ewind-
scree nuntil you fee lthe me ngage.
X Clean th ewindscree nand th ewiper blades.
X Fold th ewindscree nwiper sbacka gain
before th eignition is switched on.
! Do no tclean th ewiper blades to ooften
as this will result in th erubber becoming
porous, leadin gtowiper noise.
Cleaning th ewindows !
Do no tuse dry cloths, abrasive products,
solvents or cleaning agents containing sol-
vents to clean th einside of th ewindows.
Clean th einsides of th ewindows wit ha
damp cloth or commercially-available glass
cleaner. Avoid touching th einside of the
rear windscree nand th eside windows with
hard objects ,e.g.ice scrapers or rings. You
could otherwise caus edamag etothewin-
dows ,rear window heating or aerial on the
rear window. i
Anti-glare film retrofitte dtotheinsides of
th ew indows could interfere wit hradio or
mobile phon ereception ,especially if it is
conductive or metal-coate dfilm .Inf orma-
tion about anti-glare film can be obtained
from any Mercedes-Benz Service Centre.
Cleaning th eheadlamps X
Clean th eplastic lenses of th eheadlamps
wit had amp sponge.
! Only use washe rfluid whic hissuitable
for plastic lenses .Unsuitable washe rfluid
could damag ethe plastic lenses of the
headlamps.
Do no tuse th efollowing:
R dry cloths
R abrasive cleaning agents
R solvents
R cleaning agents containing solvent
You could otherwise scratch or damag ethe
surfac eofthelenses. Operation
230_AKB; 5; 4, en-GB
bjanott
,V ersion: 2.9.6
2008-04-08T15:09:54+02:00
-Seite 196 Dateiname: 6515_3089_02_buchblock.pdf; preflight
Page 202 of 317
199
Wher
ewillIfind...? ........................... 200
Display messages ............................. 202
Troubleshooting ................................ 230
Locking/unlocking in an emer-
gency ................................................. 255
Changin gthe batteries ..................... 258
Changin gthe bulbs ........................... 259
Replacing th ewiper blades ..............264
Flat tyre ............................................. 266
Battery ............................................... 276
Towing an dtow-starting .................. 280
Fuses .................................................. 283 Practical advice
230_AKB
;5;4,en-GB
bjanott ,V ersion:2.9.6
2008-04-08T15:09:54+02:00
-Seite 199 Dateiname: 6515_3089_02_buchblock.pdf; preflight
Page 267 of 317
Replacing the wiper blades
264
X
Turn the corresponding bulb holde ranti-
clockwise and remove it.
X Pull the corresponding bulb ou tofthe bulb
holder.
X Insert the appropriate new bulb into the
bulb holder.
X Insert the corresponding bulb holde rand
turn it clockwise.
X Close the side trim panel (Y page 263).
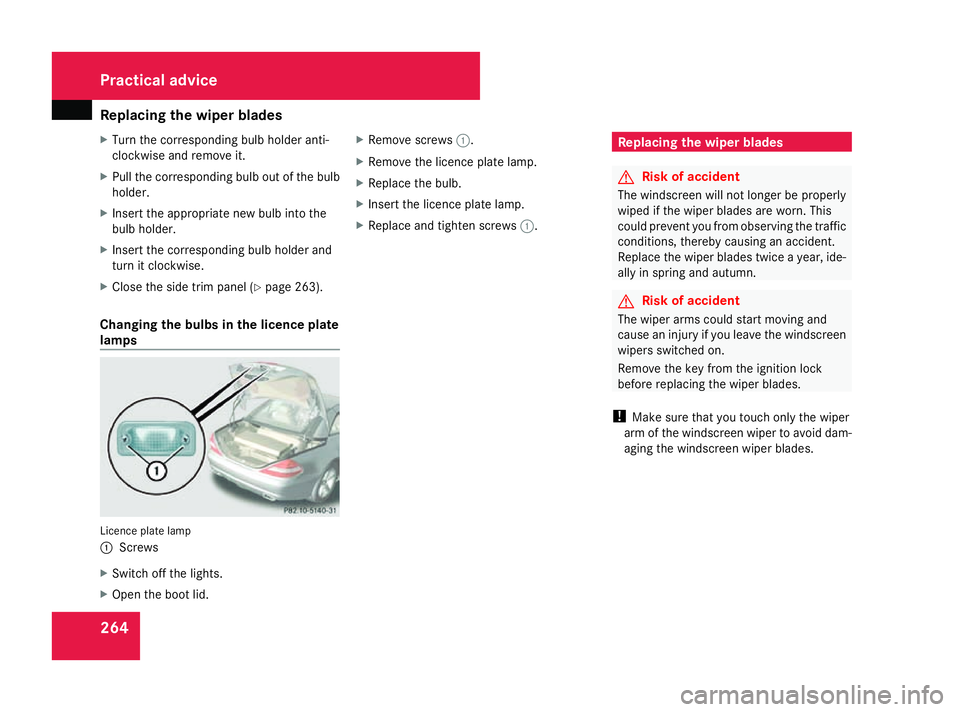
Changin gthe bulbs in the licenc eplate
lamps Licence plate lamp
1
Screws
X Switch off the lights.
X Ope nthe boo tlid. X
Remove screws 1.
X Remove the licence plate lamp.
X Replace the bulb.
X Insert the licence plate lamp.
X Replace and tighten screws 1. Replacing the wiper blades
G
Ris
kofa ccident
The windscree nwilln ot longer be properly
wipe difthe wipe rblade sare worn. This
could prevent yo ufrom observing the traffic
conditions, thereb ycausing an accident.
Replace the wipe rblade stwice ayear, ide-
ally in spring and autumn. G
Ris
kofa ccident
The wipe rarm sc ould start moving and
cause an injury if yo ulea ve the windscreen
wipers switched on.
Remove the key from the ignition lock
before replacing the wipe rblade s.
! Make sure tha tyou touch onl ythe wiper
arm of the windscree nwiper to avoid dam-
aging the windscree nwiper blades. Practical advice
230_AKB; 5; 4, en-GB
bjanott,
Version: 2.9.6 2008-04-08T15:09:54+02:00-Seite 264 Dateiname: 6515_3089_02_buchblock.pdf; preflight
Page 268 of 317
Replacing the wiper blades
265Removing
Movin gthe wiper blades to avertical
position Vehicles withou
tKEYLESS GO*
X Make sure tha tthe key is in position 1or
2 in the ignition lock.
X Set the windscree nwiper stop osition II
(Y page 93) on the combinatio nswitch.
X Whe nthe wipe rarm sh aver eached aver-
tica lposition, turn the key to position 0and
remove it from the ignition lock.
X Fol dthe wipe rarm away from the wind-
screen unti litengages.
X Set the wipe rblade at right angle stothe
wipe rarm.
Vehicles with KEYLES SGO*
X Switch off the engine.
X Take your foo toff the brake pedal.
X Set the windscree nwiper stop osition II
(Y page 93) on the combinatio nswitch.
X Press the KEYLESS GO button repeatedly
unti lthe windscree nwiper sstart. X
Whe nthe wipe rarm sh aver eached aver-
tica lposition, press the KEYLESS GO but-
ton again.
X Fol dthe wipe rarm away from the wind-
screen unti litengages.
X Set the wipe rblade at right angle stothe
wipe rarm.
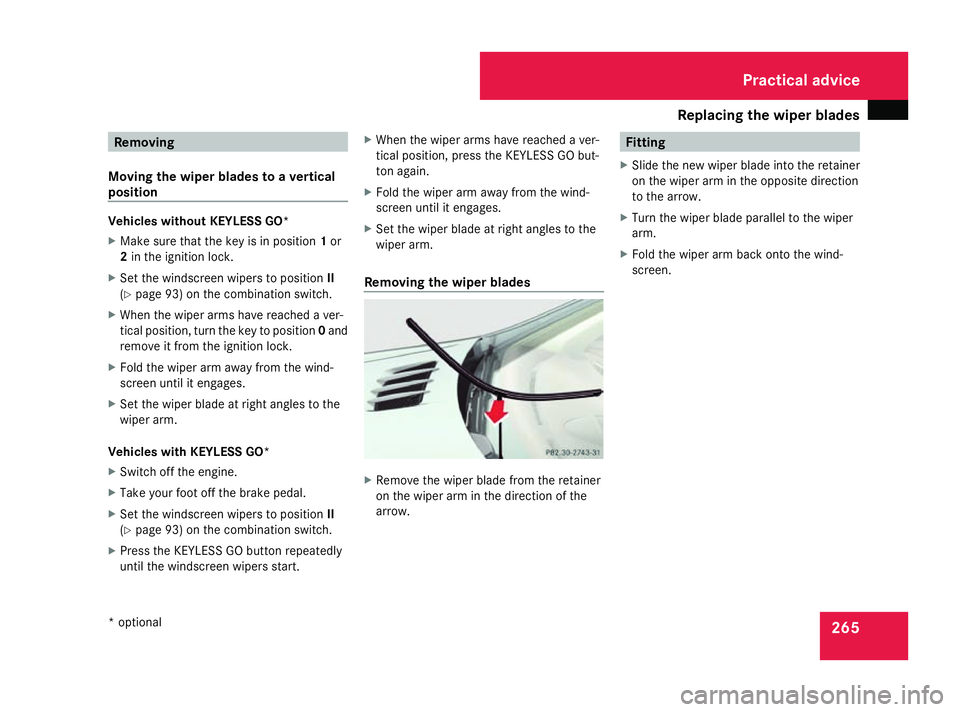
Removing the wiper blades X
Remove the wipe rblade from the retainer
on the wipe rarm in the direction of the
arrow. Fitting
X Slide the new wipe rblade into the retainer
on the wipe rarm in the opposite direction
to the arrow.
X Turn the wipe rblade paralle ltothe wiper
arm.
X Fol dthe wipe rarm back onto the wind-
screen. Practical advice
*o ptional
230_AKB; 5; 4, en-GB
bjanott,
Version: 2.9.6 2008-04-08T15:09:54+02:00-Seite 265 ZDateiname: 6515_3089_02_buchblock.pdf; preflight