Page 62 of 317

Anti-thef
tsyste ms 59G
Ris
kofa ccident
Make sure tha tyou do not endanger
other roa dusers when applying the
brakes.
R Yo us hould applythe brakes firml yfrom
tim etot imeatah ighv ehicle speedifthe
vehicle' sbrake syste mhasnot been sub-
jected to high load sfor alon gp erio dof
time. This improve sthe gri pofthe brake
pads/linings.
R Yo us hould brakefirml ya fter driving on a
we tors now-covere droads urface before
stopping the engine .The brak ediscs dr yas
the yarewarme dup,thu spreve nting cor-
rosion.
R For safety reasons ,Mercedes-Benz recom-
mends tha tyou onlyusecomponents ,e.g.
brak epads/li nings,which have been spe-
cially approve dbyMercedes-Benz for your
vehicle. Brake pads/linings whic hhaven ot
been approve dfor Mercedes-Benz could
affect your vehicle' sopera ting safety. Anti-theft systems
Immobiliser
Th eimm obiliser prevents your vehicl efrom
being starte dwithout the correct key.
Activating the immobiliser X
With the key: removethe key fro mthe
ignition lock.
X With KEYLES SGO*: pres sthe KEYLESS
GO button on the selector lever.
Th ee ngine switche soff.
Deactivating th eimmob iliser X
Wit hthe key: turn th ekeyto position 2in
th ei gnition lock.
X Wit hKEYLESS GO*: press theKEYLESS
GO butto nontheselecto rlever twic ewith-
out depressin gthe brake.
i The immobilise risalways deactivated
when you start th eengine. ATA (anti-thef
talarm system)
Av isual and audible alar mistriggere difthe
alar msystem is primed and you open:
R ad oor
R ad ooru sin gthe emergency ke yelement
R theb ootlid
R theb onnet
R theg love compartment
R thes towag espac eunder th earmrest
R as towag ecom partmen tintherear
The alar misnotswitched of fevenify ou close
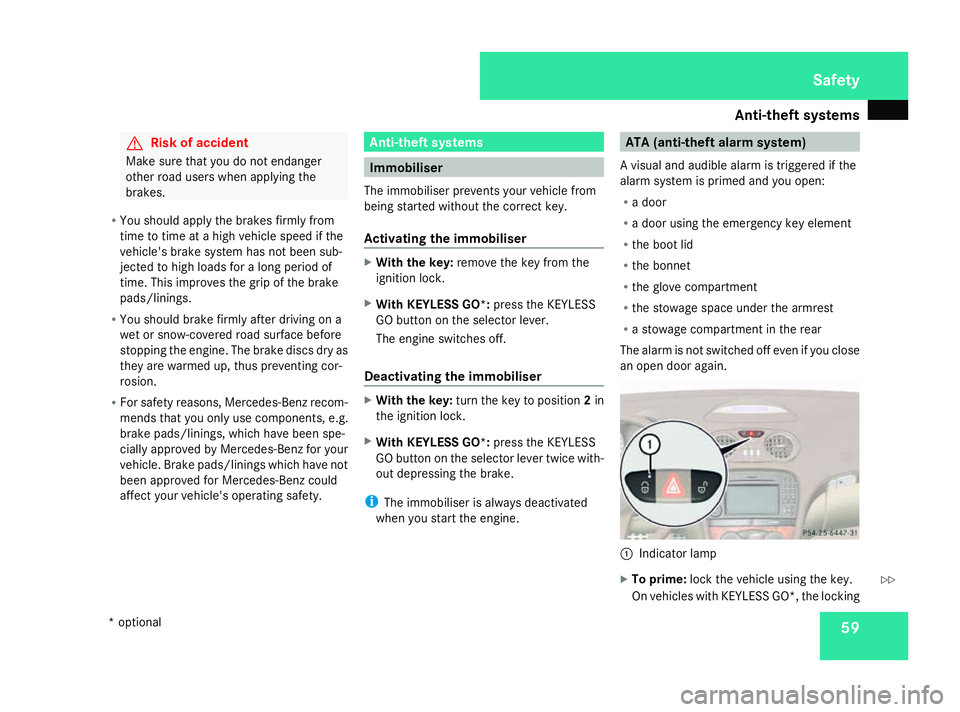
an ope ndoora gain. 1
Indicator lamp
X To prime: lockthe vehicle usin gthe key.
On vehicles wit hKEYLESS GO* ,the locking Safety
*o ptional
230_AKB; 5; 4, en-GB
bjanott
,V ersion: 2.9.6
2008-04-08T15:09:54+02:00
-Seite 59 ZDateiname: 6515_3089_02_buchblock.pdf; preflight
Page 115 of 317

On-boar
dcomputer 112
RACETIMER The RACETIMER allows time measurements
to be saved.
While you have the RACETIMER displayed,
you will not be able to adjust the volume using
the æ andç buttons.
X Press the èor· buttontoselect the
AMG menu.
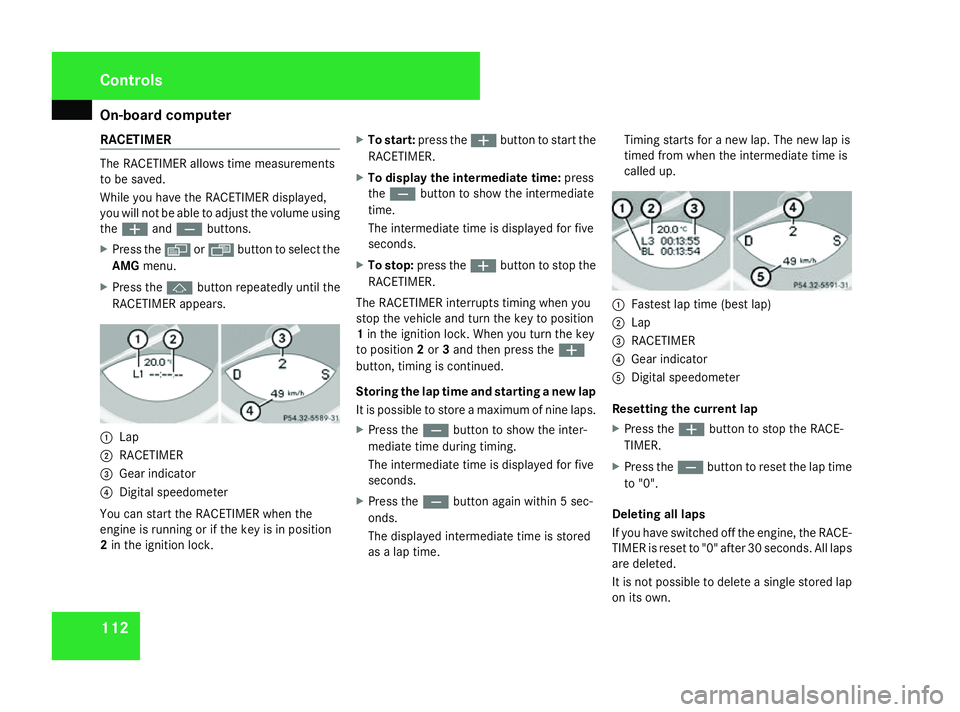
X Press the jbuttonrepeatedly until the
RACETIMER appears. 1
Lap
2 RACETIMER
3 Gear indicator
4 Digital speedometer
You can start the RACETIMER when the
engin eisrunning or if the key is in position
2 in the ignition lock. X
To start: press the æbuttontostart the
RACETIMER.
X To displa ythe intermediat etime: press
the ç buttontos how the intermediate
time.
The intermediate time is displayed for five
seconds.
X To stop: press the æbuttontos top the
RACETIMER.
The RACETIMER interrupts timin gwhen you
stop the vehicle and turn the key to position
1 in the ignition lock .When you turn the key
to position 2or 3and then press the æ
button, timin giscontinued.
Storing the lap tim eand starting anew lap
It is possible to stor eamaximum of nin elaps.
X Press the çbuttontos how the inter-
mediate time during timing.
The intermediate time is displayed for five
seconds.
X Press the çbuttonagain within 5sec-
onds.
The displayed intermediate time is stored
as alap time. Timing start
sfor an ew lap. The new lap is
timed from when the intermediate time is
called up. 1
Fastest lap time (best lap)
2 Lap
3 RACETIMER
4 Gear indicator
5 Digital speedometer
Resetting the current lap
X Press the æbuttontos top the RACE-
TIMER.
X Press the çbuttontoreset the lap time
to "0".
Deleting all laps
If you have switched off the engine, the RACE-
TIME Risreset to "0" after 30 seconds. All laps
are deleted.
It is not possible to delete asingle stored lap
on its own. Controls
230_AKB
;5;4,en-GB
bjanott, Version:2.9.6
2008-04-08T15:09:54+02:0
0-Seite 112 Dateiname: 6515_3089_02_buchblock.pdf; preflight
Page 182 of 317

Engine compartment
179
You will see th
efollowin gmessage if you did
no to bserv ethe required waiting time:
Observ ewaitin gperiod
X Repeat th emeasuremen tafter about five
minute siftheengin eisatn ormaloperating
temperature.
X Repeat th emeasuremen tafter about
30 minute siftheengin eisnotat normal
operating temperature (if th eenginew as
only started briefly).
The followin gmessage appear siftheengine
is running:
Engine oil level Not whe nengine on
X Switch off th eenginea nd wait for five
minute siftheengin eisatn ormaloperating
temperature, or for about 30 minute sifthe
engin eisnotat normal operating temper-
atur e(if th eenginew as only started
briefly), before measuring.
i If you wish to cancel th emeasurement,
press the korj buttonont hemulti-
function steering wheel. Using th
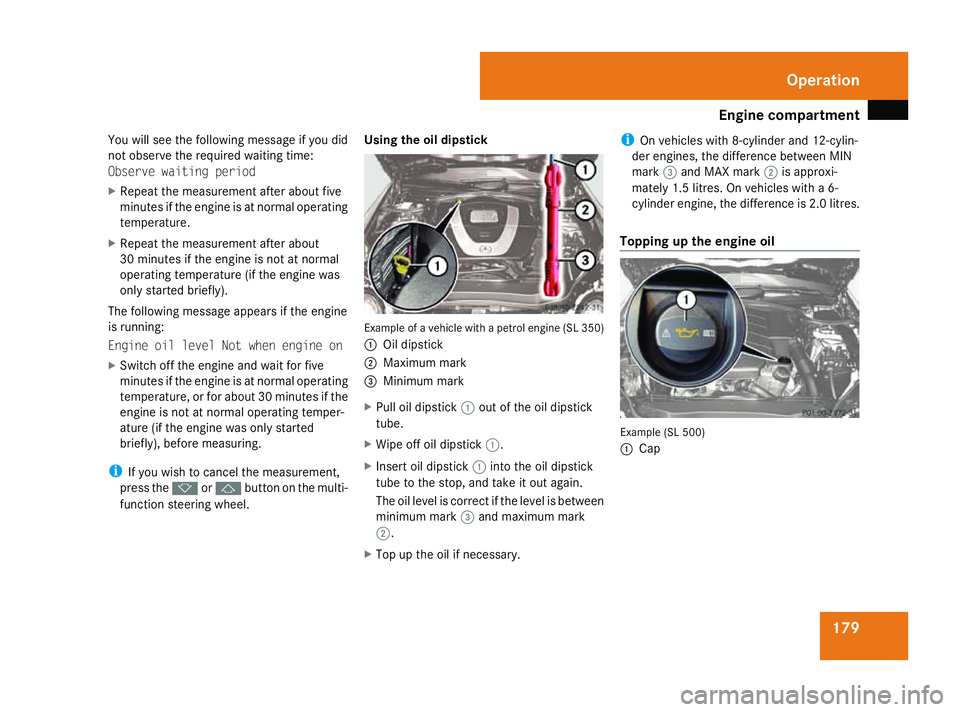
eoil dipstick Example of
avehicle with apetrol engine (SL 350)
1 Oil dipstick
2 Maximum mark
3 Minimum mark
X Pull oil dipstick 1out of th eoil dipstick
tube.
X Wipe off oil dipstick 1.
X Insert oil dipstick 1intot he oil dipstick
tube to th estop, and tak eitout again.
The oil level is correc tifthelevel is between
minimum mark 3and maximum mark
2.
X Top up th eoil if necessary. i
On vehicles with 8-cylinder and 12-cylin-
der engines ,the difference between MIN
mark 3and MAX mark 2is approxi-
mately 1. 5litres. On vehicles with a6-
cylinder engine, th edifference is 2. 0litres.
Topping up th eengine oil Example (SL 500)
1
Cap Operation
230_AKB; 5; 4, en-GB
bjanott
,V ersion: 2.9.6
2008-04-08T15:09:54+02:00
-Seite 179 ZDateiname: 6515_3089_02_buchblock.pdf; preflight
Page 268 of 317

Replacing the wiper blades
265Removing
Movin gthe wiper blades to avertical
position Vehicles withou
tKEYLESS GO*
X Make sure tha tthe key is in position 1or
2 in the ignition lock.
X Set the windscree nwiper stop osition II
(Y page 93) on the combinatio nswitch.
X Whe nthe wipe rarm sh aver eached aver-
tica lposition, turn the key to position 0and
remove it from the ignition lock.
X Fol dthe wipe rarm away from the wind-
screen unti litengages.
X Set the wipe rblade at right angle stothe
wipe rarm.
Vehicles with KEYLES SGO*
X Switch off the engine.
X Take your foo toff the brake pedal.
X Set the windscree nwiper stop osition II
(Y page 93) on the combinatio nswitch.
X Press the KEYLESS GO button repeatedly
unti lthe windscree nwiper sstart. X
Whe nthe wipe rarm sh aver eached aver-
tica lposition, press the KEYLESS GO but-
ton again.
X Fol dthe wipe rarm away from the wind-
screen unti litengages.
X Set the wipe rblade at right angle stothe
wipe rarm.
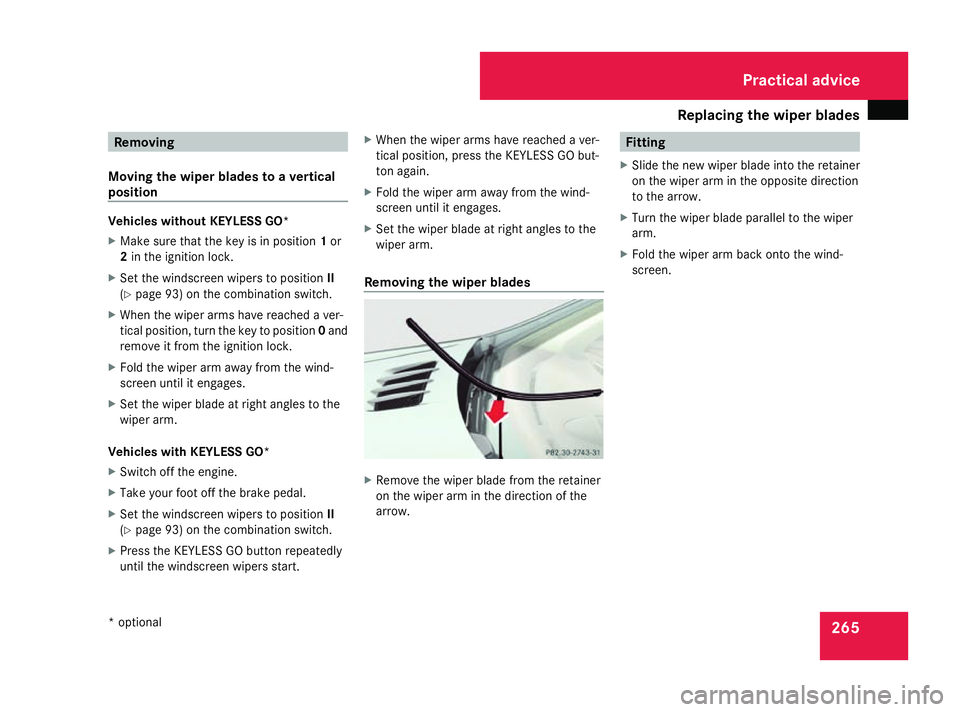
Removing the wiper blades X
Remove the wipe rblade from the retainer
on the wipe rarm in the direction of the
arrow. Fitting
X Slide the new wipe rblade into the retainer
on the wipe rarm in the opposite direction
to the arrow.
X Turn the wipe rblade paralle ltothe wiper
arm.
X Fol dthe wipe rarm back onto the wind-
screen. Practical advice
*o ptional
230_AKB; 5; 4, en-GB
bjanott,
Version: 2.9.6 2008-04-08T15:09:54+02:00-Seite 265 ZDateiname: 6515_3089_02_buchblock.pdf; preflight