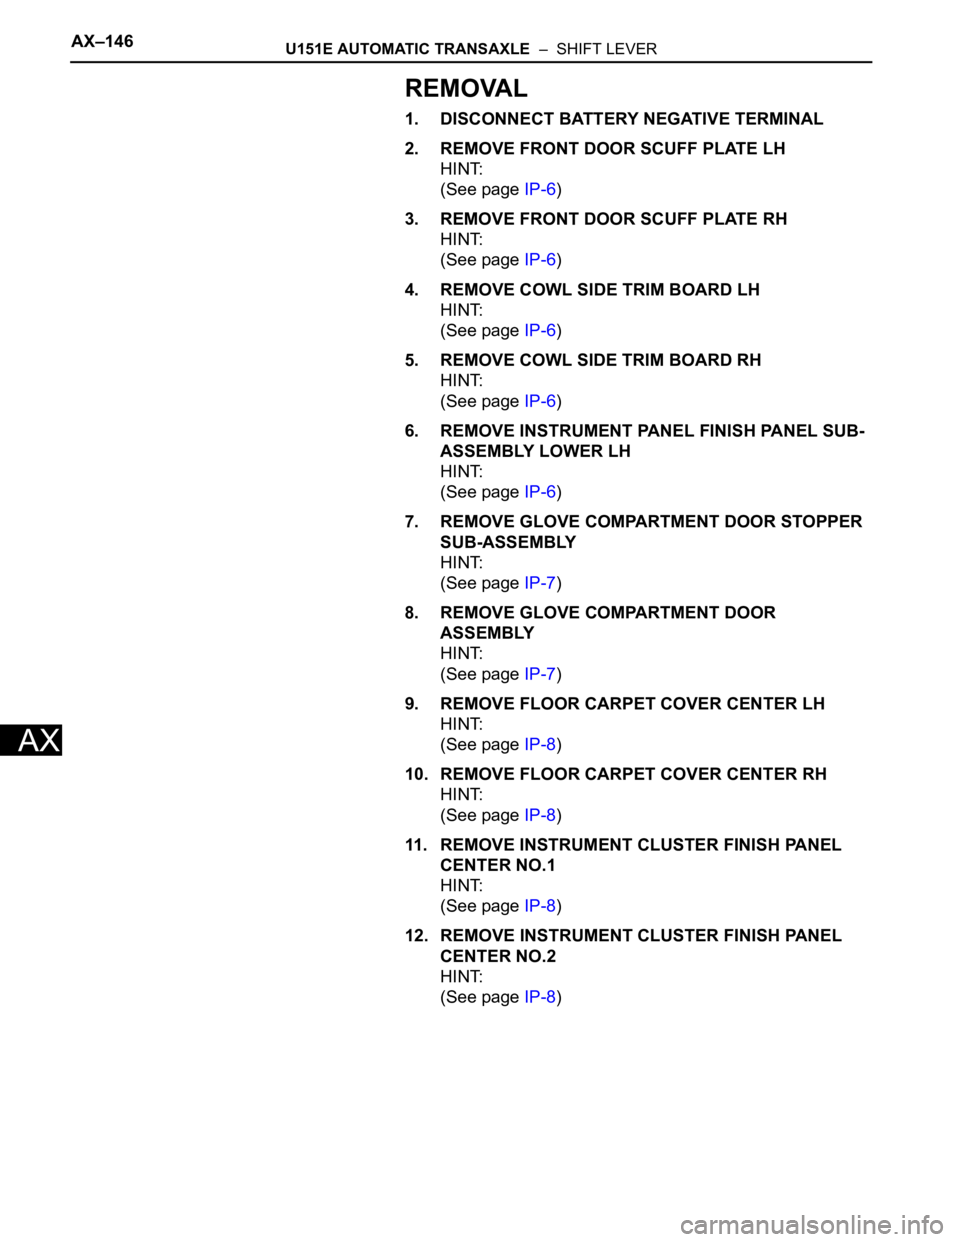
Page 279 of 3000
OTHER SYSTEM – CIGARETTE LIGHTEROT–5
OT
REMOVAL
1. REMOVE INSTRUMENT CLUSTER CENTER NO. 1
FINISH PANEL (See page IP-8)
2. REMOVE INSTRUMENT CLUSTER CENTER NO. 2
FINISH PANEL
3. REMOVE SHIFT LEVER KNOB SUB-ASSEMBLY (See
page IP-8)
4. REMOVE POSITION INDICATOR HOUSING
ASSEMBLY (See page IP-9)
5. REMOVE INSTRUMENT CLUSTER CENTER LOWER
FINISH PANEL SUB-ASSEMBLY (See page IP-9)
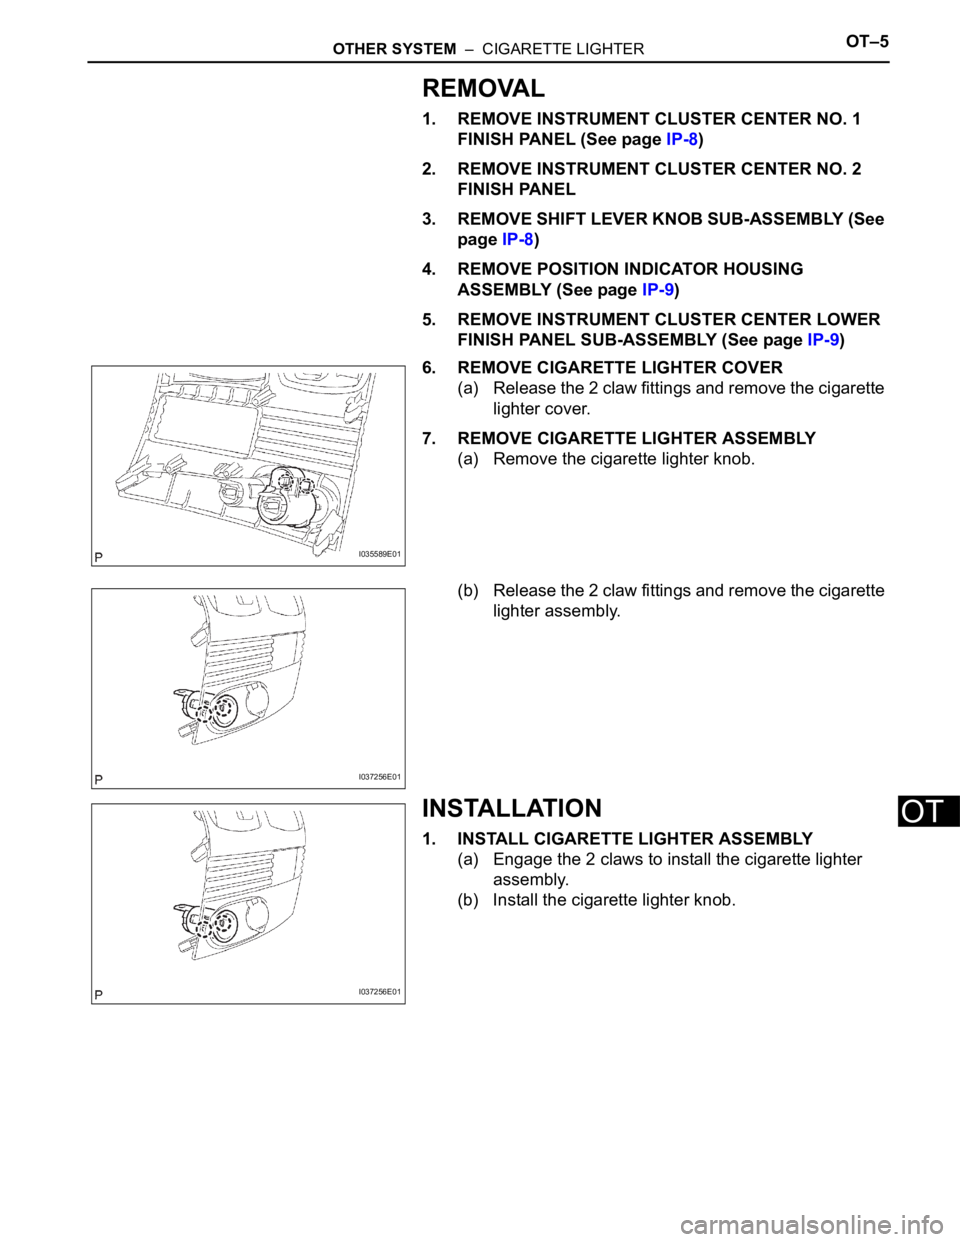
6. REMOVE CIGARETTE LIGHTER COVER
(a) Release the 2 claw fittings and remove the cigarette
lighter cover.
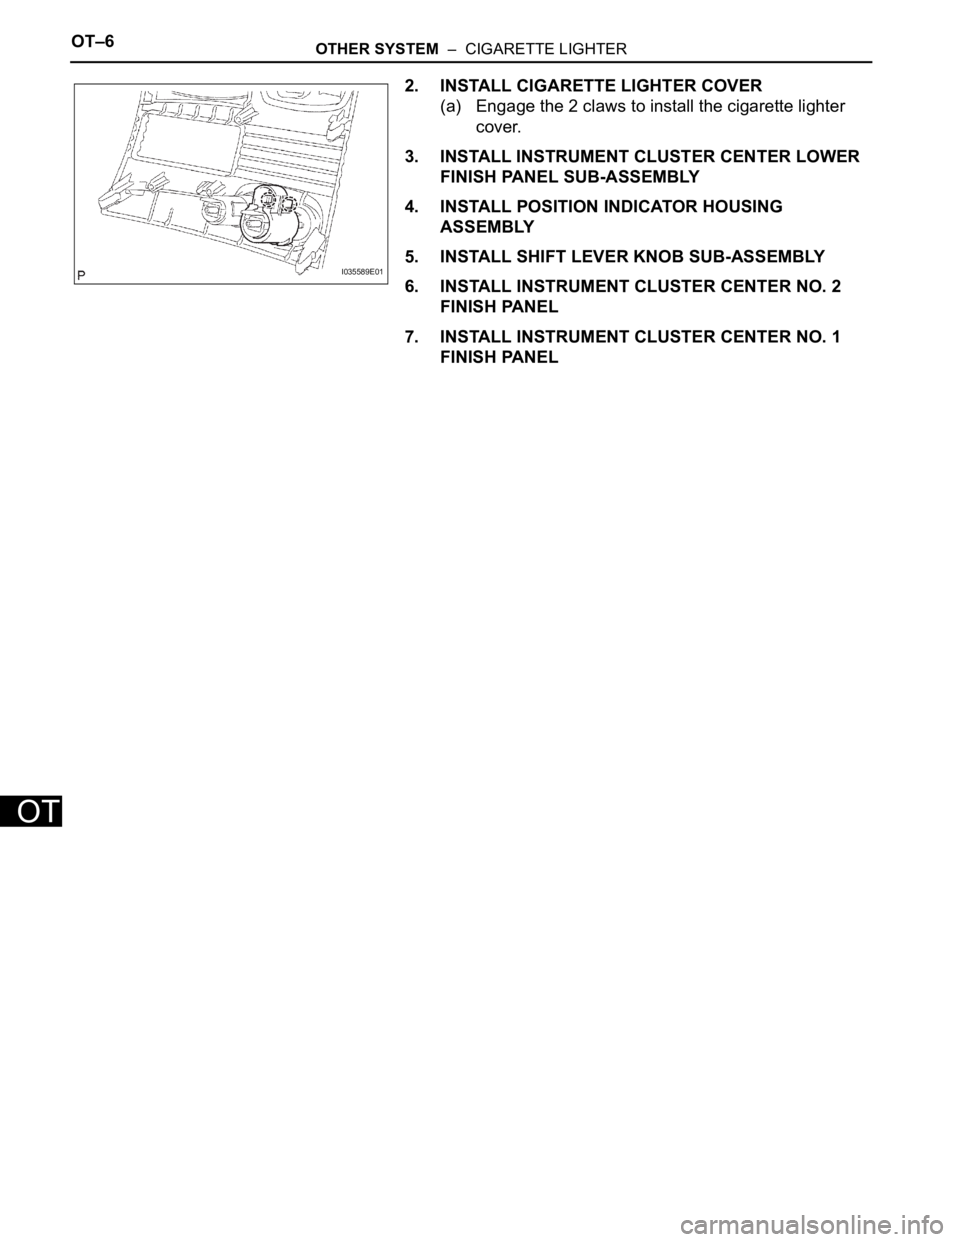
7. REMOVE CIGARETTE LIGHTER ASSEMBLY
(a) Remove the cigarette lighter knob.
(b) Release the 2 claw fittings and remove the cigarette
lighter assembly.
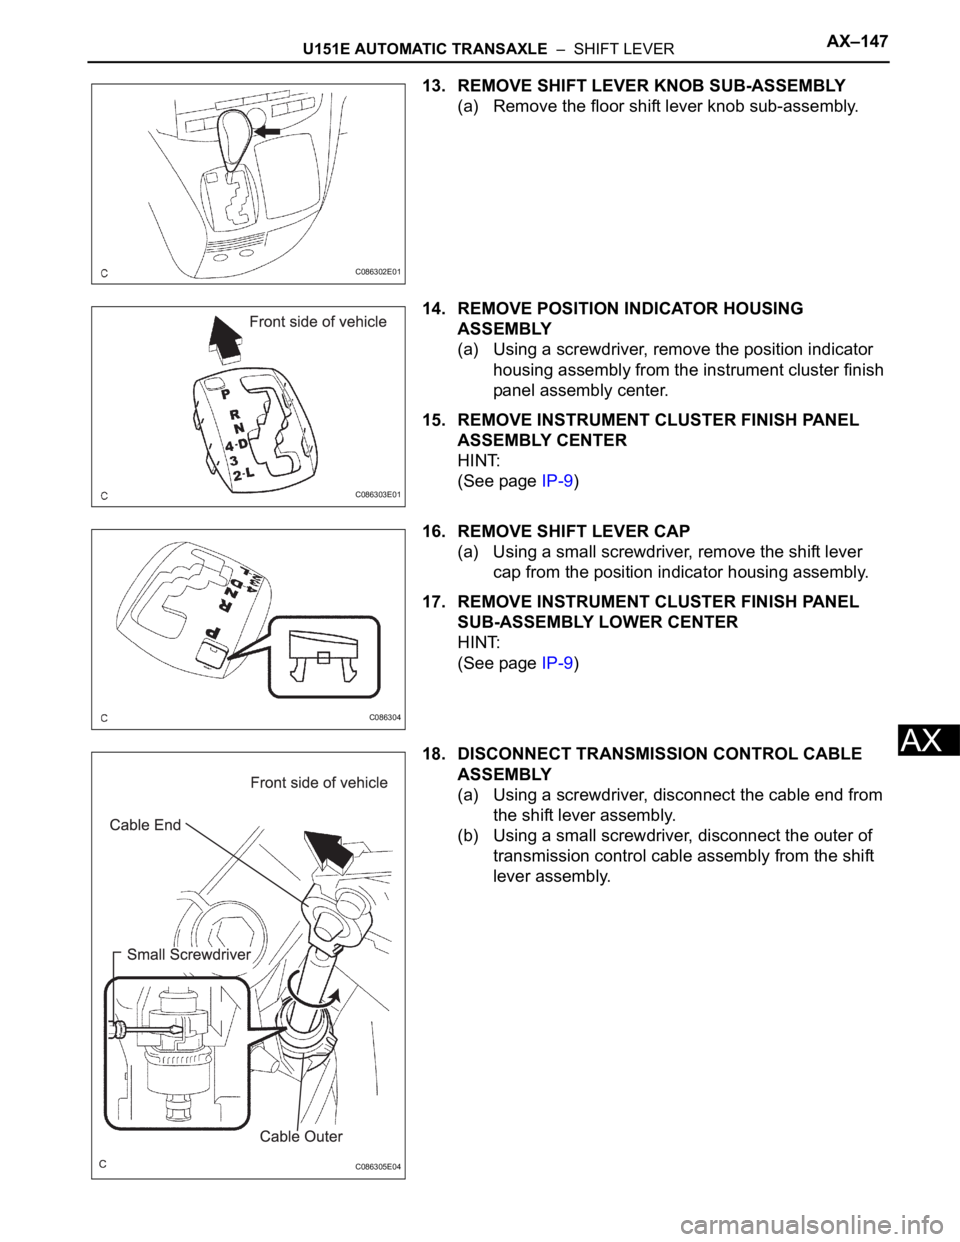
INSTALLATION
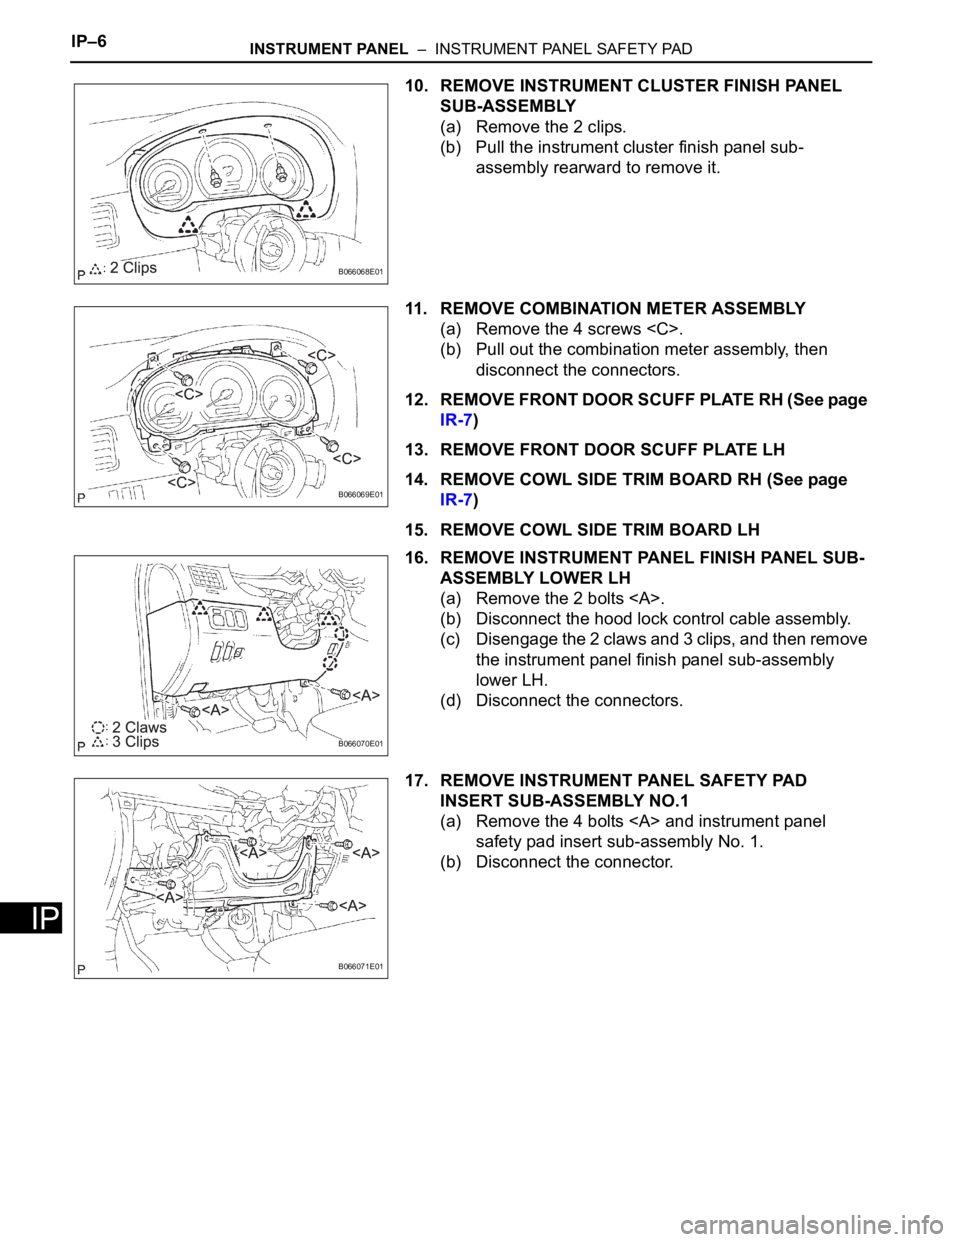
1. INSTALL CIGARETTE LIGHTER ASSEMBLY
(a) Engage the 2 claws to install the cigarette lighter
assembly.
(b) Install the cigarette lighter knob.
I035589E01
I037256E01
I037256E01
Page 280 of 3000
OT–6OTHER SYSTEM – CIGARETTE LIGHTER
OT
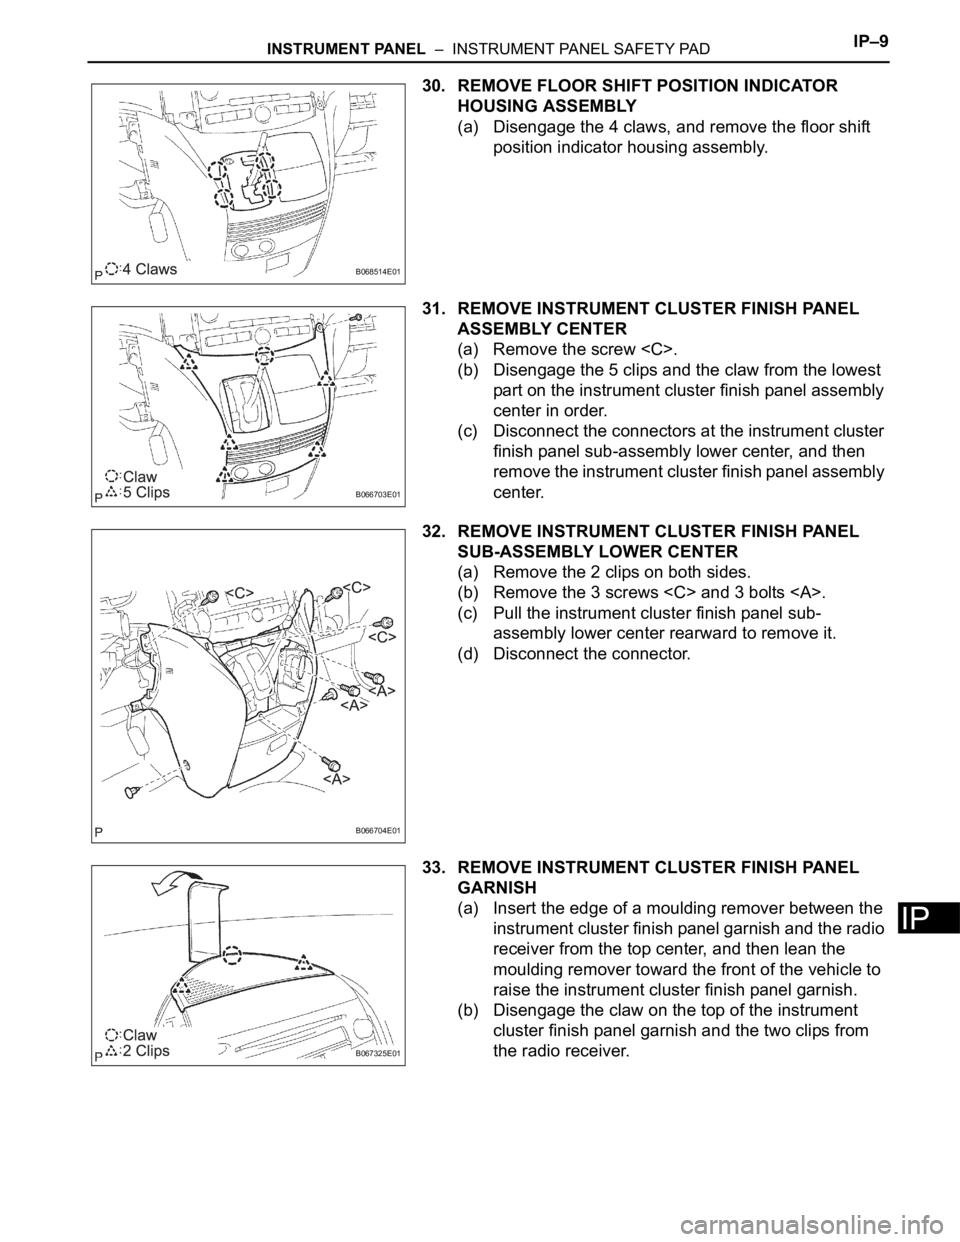
2. INSTALL CIGARETTE LIGHTER COVER
(a) Engage the 2 claws to install the cigarette lighter
cover.
3. INSTALL INSTRUMENT CLUSTER CENTER LOWER
FINISH PANEL SUB-ASSEMBLY
4. INSTALL POSITION INDICATOR HOUSING
ASSEMBLY
5. INSTALL SHIFT LEVER KNOB SUB-ASSEMBLY
6. INSTALL INSTRUMENT CLUSTER CENTER NO. 2
FINISH PANEL
7. INSTALL INSTRUMENT CLUSTER CENTER NO. 1
FINISH PANEL
I035589E01
Page 290 of 3000
Page 292 of 3000
IP–8INSTRUMENT PANEL – INSTRUMENT PANEL SAFETY PAD
IP
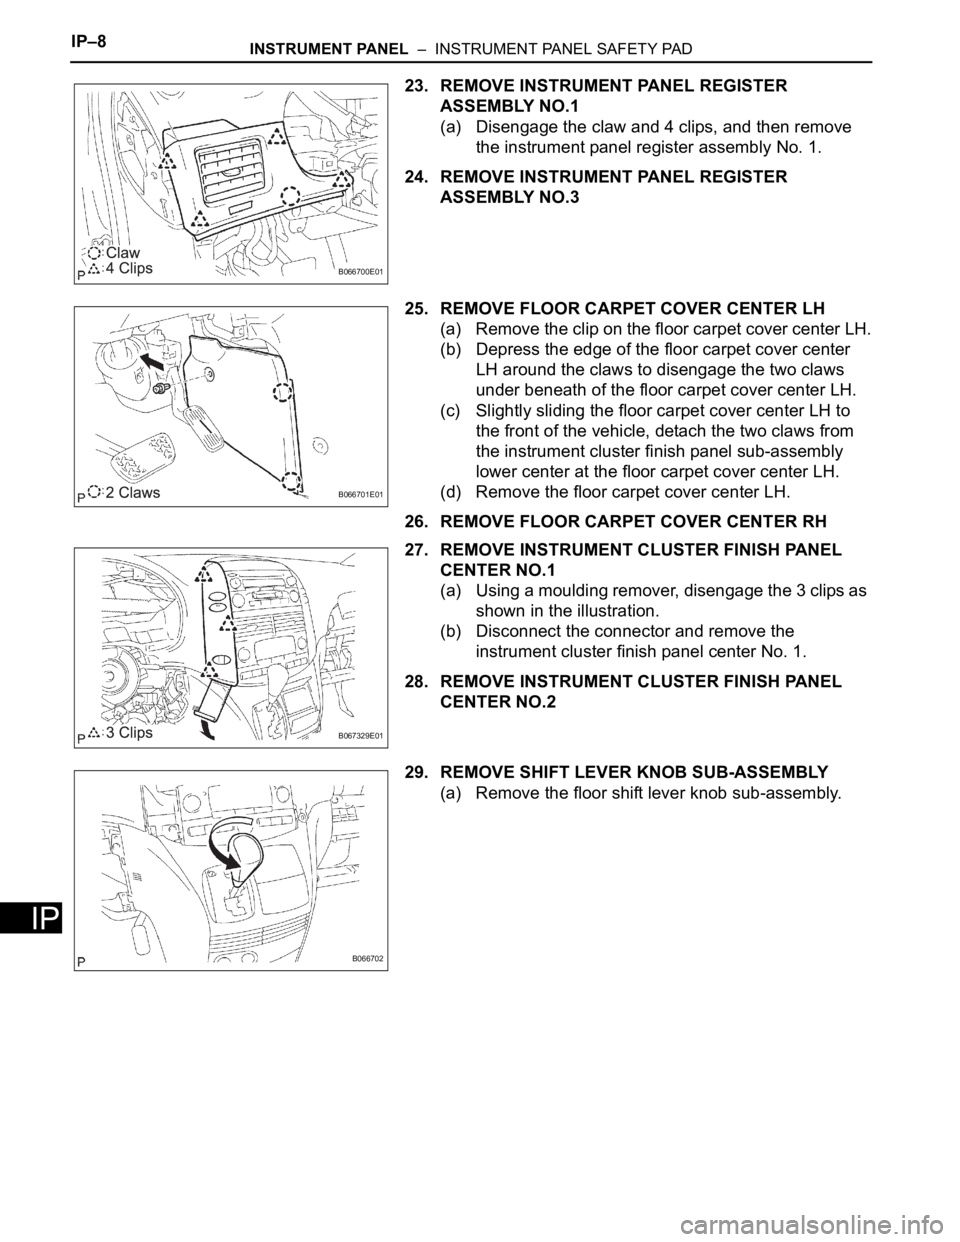
23. REMOVE INSTRUMENT PANEL REGISTER
ASSEMBLY NO.1
(a) Disengage the claw and 4 clips, and then remove
the instrument panel register assembly No. 1.
24. REMOVE INSTRUMENT PANEL REGISTER
ASSEMBLY NO.3
25. REMOVE FLOOR CARPET COVER CENTER LH
(a) Remove the clip on the floor carpet cover center LH.
(b) Depress the edge of the floor carpet cover center
LH around the claws to disengage the two claws
under beneath of the floor carpet cover center LH.
(c) Slightly sliding the floor carpet cover center LH to
the front of the vehicle, detach the two claws from
the instrument cluster finish panel sub-assembly
lower center at the floor carpet cover center LH.
(d) Remove the floor carpet cover center LH.
26. REMOVE FLOOR CARPET COVER CENTER RH
27. REMOVE INSTRUMENT CLUSTER FINISH PANEL
CENTER NO.1
(a) Using a moulding remover, disengage the 3 clips as
shown in the illustration.
(b) Disconnect the connector and remove the
instrument cluster finish panel center No. 1.
28. REMOVE INSTRUMENT CLUSTER FINISH PANEL
CENTER NO.2
29. REMOVE SHIFT LEVER KNOB SUB-ASSEMBLY
(a) Remove the floor shift lever knob sub-assembly.
B066700E01
B066701E01
B067329E01
B066702
Page 293 of 3000
Page 294 of 3000
IP–10INSTRUMENT PANEL – INSTRUMENT PANEL SAFETY PAD
IP
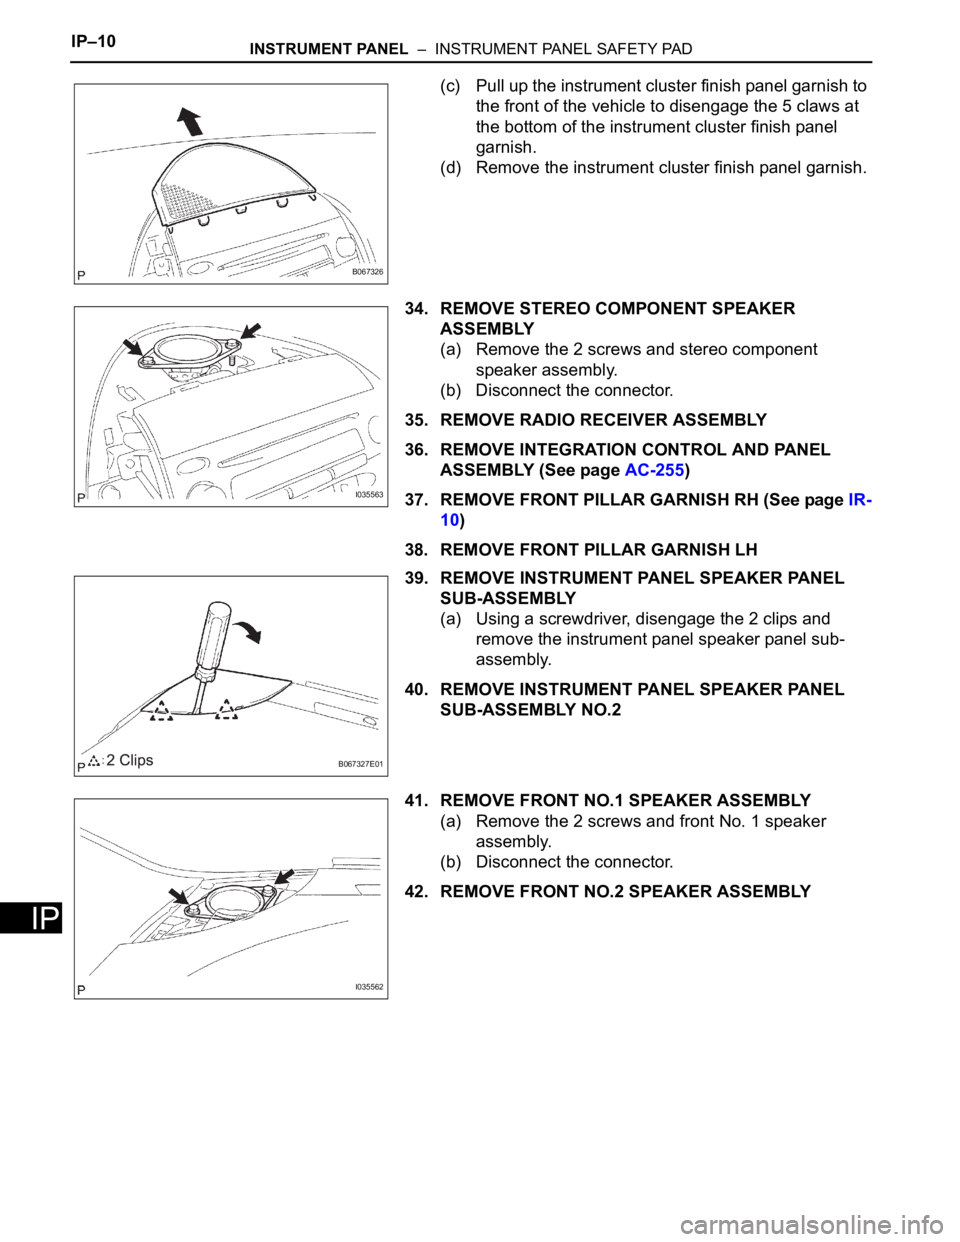
(c) Pull up the instrument cluster finish panel garnish to
the front of the vehicle to disengage the 5 claws at
the bottom of the instrument cluster finish panel
garnish.
(d) Remove the instrument cluster finish panel garnish.
34. REMOVE STEREO COMPONENT SPEAKER
ASSEMBLY
(a) Remove the 2 screws and stereo component
speaker assembly.
(b) Disconnect the connector.
35. REMOVE RADIO RECEIVER ASSEMBLY
36. REMOVE INTEGRATION CONTROL AND PANEL
ASSEMBLY (See page AC-255)
37. REMOVE FRONT PILLAR GARNISH RH (See page IR-
10)
38. REMOVE FRONT PILLAR GARNISH LH
39. REMOVE INSTRUMENT PANEL SPEAKER PANEL
SUB-ASSEMBLY
(a) Using a screwdriver, disengage the 2 clips and
remove the instrument panel speaker panel sub-
assembly.
40. REMOVE INSTRUMENT PANEL SPEAKER PANEL
SUB-ASSEMBLY NO.2
41. REMOVE FRONT NO.1 SPEAKER ASSEMBLY
(a) Remove the 2 screws and front No. 1 speaker
assembly.
(b) Disconnect the connector.
42. REMOVE FRONT NO.2 SPEAKER ASSEMBLY
B067326
I035563
B067327E01
I035562
Page 1534 of 3000
AX–146U151E AUTOMATIC TRANSAXLE – SHIFT LEVER
AX
REMOVAL
1. DISCONNECT BATTERY NEGATIVE TERMINAL
2. REMOVE FRONT DOOR SCUFF PLATE LH
HINT:
(See page IP-6)
3. REMOVE FRONT DOOR SCUFF PLATE RH
HINT:
(See page IP-6)
4. REMOVE COWL SIDE TRIM BOARD LH
HINT:
(See page IP-6)
5. REMOVE COWL SIDE TRIM BOARD RH
HINT:
(See page IP-6)
6. REMOVE INSTRUMENT PANEL FINISH PANEL SUB-
ASSEMBLY LOWER LH
HINT:
(See page IP-6)
7. REMOVE GLOVE COMPARTMENT DOOR STOPPER
SUB-ASSEMBLY
HINT:
(See page IP-7)
8. REMOVE GLOVE COMPARTMENT DOOR
ASSEMBLY
HINT:
(See page IP-7)
9. REMOVE FLOOR CARPET COVER CENTER LH
HINT:
(See page IP-8)
10. REMOVE FLOOR CARPET COVER CENTER RH
HINT:
(See page IP-8)
11. REMOVE INSTRUMENT CLUSTER FINISH PANEL
CENTER NO.1
HINT:
(See page IP-8)
12. REMOVE INSTRUMENT CLUSTER FINISH PANEL
CENTER NO.2
HINT:
(See page IP-8)
Page 1535 of 3000
U151E AUTOMATIC TRANSAXLE – SHIFT LEVERAX–147
AX
13. REMOVE SHIFT LEVER KNOB SUB-ASSEMBLY
(a) Remove the floor shift lever knob sub-assembly.
14. REMOVE POSITION INDICATOR HOUSING
ASSEMBLY
(a) Using a screwdriver, remove the position indicator
housing assembly from the instrument cluster finish
panel assembly center.
15. REMOVE INSTRUMENT CLUSTER FINISH PANEL
ASSEMBLY CENTER
HINT:
(See page IP-9)
16. REMOVE SHIFT LEVER CAP
(a) Using a small screwdriver, remove the shift lever
cap from the position indicator housing assembly.
17. REMOVE INSTRUMENT CLUSTER FINISH PANEL
SUB-ASSEMBLY LOWER CENTER
HINT:
(See page IP-9)
18. DISCONNECT TRANSMISSION CONTROL CABLE
ASSEMBLY
(a) Using a screwdriver, disconnect the cable end from
the shift lever assembly.
(b) Using a small screwdriver, disconnect the outer of
transmission control cable assembly from the shift
lever assembly.
C086302E01
C086303E01
C086304
C086305E04