Page 2715 of 3000

POWER STEERING – POWER STEERING SYSTEMPS–5
PS
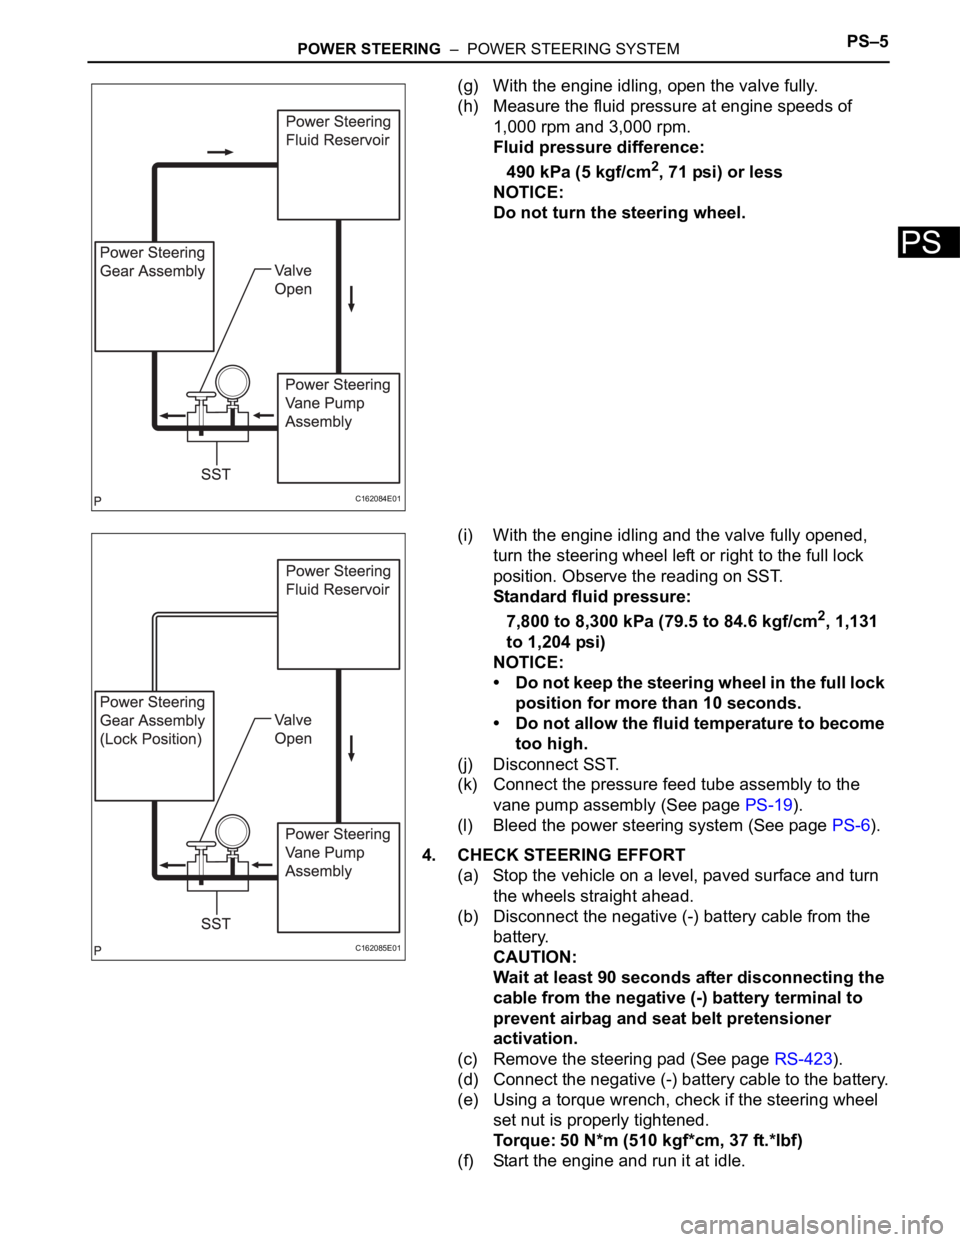
(g) With the engine idling, open the valve fully.
(h) Measure the fluid pressure at engine speeds of
1,000 rpm and 3,000 rpm.
Fluid pressure difference:
490 kPa (5 kgf/cm
2, 71 psi) or less
NOTICE:
Do not turn the steering wheel.
(i) With the engine idling and the valve fully opened,
turn the steering wheel left or right to the full lock
position. Observe the reading on SST.
Standard fluid pressure:
7,800 to 8,300 kPa (79.5 to 84.6 kgf/cm
2, 1,131
to 1,204 psi)
NOTICE:
• Do not keep the steering wheel in the full lock
position for more than 10 seconds.
• Do not allow the fluid temperature to become
too high.
(j) Disconnect SST.
(k) Connect the pressure feed tube assembly to the
vane pump assembly (See page PS-19).
(l) Bleed the power steering system (See page PS-6).
4. CHECK STEERING EFFORT
(a) Stop the vehicle on a level, paved surface and turn
the wheels straight ahead.
(b) Disconnect the negative (-) battery cable from the
battery.
CAUTION:
Wait at least 90 seconds after disconnecting the
cable from the negative (-) battery terminal to
prevent airbag and seat belt pretensioner
activation.
(c) Remove the steering pad (See page RS-423).
(d) Connect the negative (-) battery cable to the battery.
(e) Using a torque wrench, check if the steering wheel
set nut is properly tightened.
Torque: 50 N*m (510 kgf*cm, 37 ft.*lbf)
(f) Start the engine and run it at idle.
C162084E01
C162085E01
Page 2718 of 3000
POWER STEERING – VANE PUMPPS–7
PS
STEERING
POWER STEERING
VANE PUMP
COMPONENTS
C161545E01
Page 2719 of 3000
PS–8POWER STEERING – VANE PUMP
PS
C159003E01
Page 2720 of 3000
POWER STEERING – VANE PUMPPS–9
PS
REMOVAL
1. DRAIN POWER STEERING FLUID
2. REMOVE FRONT WHEEL RH
3. REMOVE FRONT FENDER APRON SEAL RH (See
page EM-26)
4. REMOVE FAN AND GENERATOR V BELT (See page
EM-6)
5. DISCONNECT NO. 1 FLUID RESERVOIR TO PUMP
HOSE
(a) Slide the clip and disconnect the No. 1 fluid
reservoir to pump hose from the vane pump
assembly.
6. DISCONNECT PRESSURE FEED TUBE ASSEMBLY
(a) Remove the union bolt and disconnect the pressure
feed tube assembly from the vane pump assembly.
(b) Remove the gasket from the pressure feed tube
assembly.
7. DISCONNECT POWER STEERING FLUID PRESSURE
SWITCH CONNECTOR
(a) Disconnect the power steering fluid pressure switch
connector.
C133174E02
C161546
C161547
Page 2721 of 3000
PS–10POWER STEERING – VANE PUMP
PS
8. REMOVE VANE PUMP ASSEMBLY
(a) Using SST, loosen bolt (A) and remove bolt (B), and
then remove the vane pump assembly.
SST 09249-63010
(b) Remove the bolt from the vane pump assembly.
DISASSEMBLY
1. HOLD VANE PUMP ASSEMBLY
(a) Using SST, hold the vane pump assembly in a vise.
SST 09630-00014 (09631-00132)
2. REMOVE POWER STEERING SUCTION PORT UNION
(a) Remove the bolt and the power steering suction port
union from the vane pump front housing.
(b) Using a screwdriver, remove the O-ring from the
power steering suction port union.
3. REMOVE POWER STEERING FLUID PRESSURE
SWITCH
NOTICE:
Perform this procedure only when the power
steering fluid pressure switch is replaced.
C158999E01
C135238
C141305E01
C133179
Page 2722 of 3000
POWER STEERING – VANE PUMPPS–11
PS
(a) Remove the power steering fluid pressure switch
from the vane pump front housing.
4. REMOVE FLOW CONTROL VALVE ASSEMBLY
(a) Remove the pressure port union from the vane
pump front housing.
(b) Remove the O-ring from the pressure port union.
(c) Remove the flow control valve assembly and the
flow control valve compression spring from the vane
pump front housing.
5. REMOVE VANE PUMP REAR HOUSING
(a) Remove the 4 bolts and vane pump rear housing
from the vane pump front housing.
(b) Using a screwdriver, remove the O-ring from the
vane pump rear housing.
HINT:
Tape the screwdriver tip before use.
6. REMOVE VANE PUMP SHAFT WITH PULLEY
(a) Using 2 screwdrivers, remove the vane pump shaft
snap ring from the vane pump shaft with pulley.
(b) Remove the vane pump shaft with pulley.
C133180
C158998
C107024
C107025E02
C057767
Page 2723 of 3000
PS–12POWER STEERING – VANE PUMP
PS
7. REMOVE VANE PUMP ROTOR
(a) Remove the 10 vane pump plates.
(b) Remove the vane pump rotor.
8. REMOVE VANE PUMP CAM RING
(a) Remove the vane pump cam ring from the vane
pump front housing.
9. REMOVE VANE PUMP FRONT SIDE PLATE
(a) Remove the vane pump front side plate from the
vane pump front housing.
(b) Using a screwdriver, remove the O-ring from the
vane pump front side plate.
HINT:
Tape the screwdriver tip before use.
(c) Remove the O-ring from the vane pump front
housing.
C114697
C114698
C114699
C107029E02
C114700
Page 2724 of 3000

POWER STEERING – VANE PUMPPS–13
PS
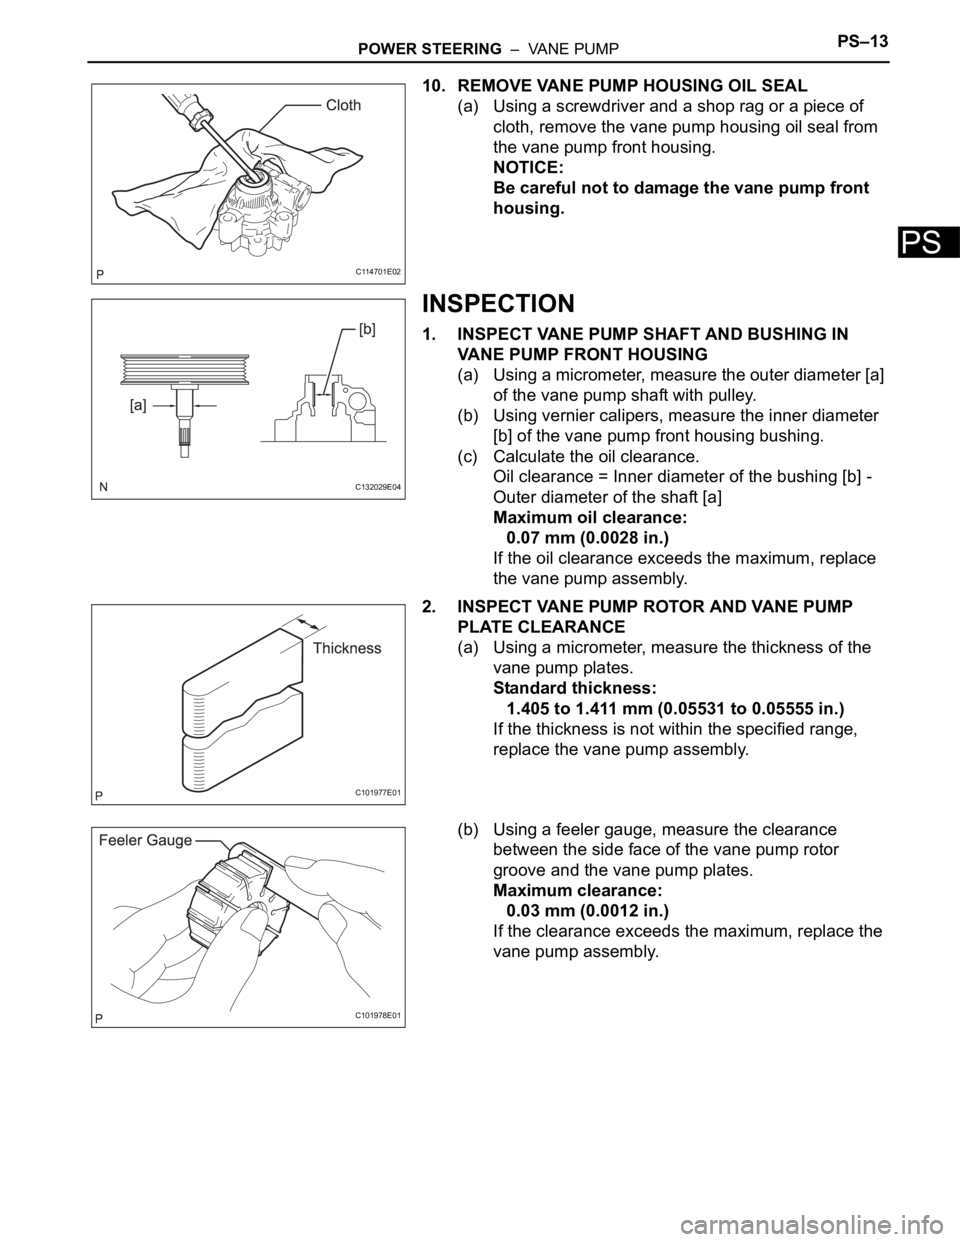
10. REMOVE VANE PUMP HOUSING OIL SEAL
(a) Using a screwdriver and a shop rag or a piece of
cloth, remove the vane pump housing oil seal from
the vane pump front housing.
NOTICE:
Be careful not to damage the vane pump front
housing.
INSPECTION
1. INSPECT VANE PUMP SHAFT AND BUSHING IN
VANE PUMP FRONT HOUSING
(a) Using a micrometer, measure the outer diameter [a]
of the vane pump shaft with pulley.
(b) Using vernier calipers, measure the inner diameter
[b] of the vane pump front housing bushing.
(c) Calculate the oil clearance.
Oil clearance = Inner diameter of the bushing [b] -
Outer diameter of the shaft [a]
Maximum oil clearance:
0.07 mm (0.0028 in.)
If the oil clearance exceeds the maximum, replace
the vane pump assembly.
2. INSPECT VANE PUMP ROTOR AND VANE PUMP
PLATE CLEARANCE
(a) Using a micrometer, measure the thickness of the
vane pump plates.
Standard thickness:
1.405 to 1.411 mm (0.05531 to 0.05555 in.)
If the thickness is not within the specified range,
replace the vane pump assembly.
(b) Using a feeler gauge, measure the clearance
between the side face of the vane pump rotor
groove and the vane pump plates.
Maximum clearance:
0.03 mm (0.0012 in.)
If the clearance exceeds the maximum, replace the
vane pump assembly.
C114701E02
C132029E04
C101977E01
C101978E01