2007 TOYOTA SIENNA low beam
[x] Cancel search: low beamPage 1 of 3000

INTRODUCTION – REPAIR INSTRUCTIONIN–25
IN
VEHICLE LIFT AND SUPPORT
LOCATIONS
1. NOTICE ABOUT VEHICLE CONDITION WHEN
JACKING UP VEHICLE
(a) The vehicle must be unloaded before jacking up/
lifting up the vehicle. Never jack up/lift up a heavily
loaded vehicle.
(b) When removing heavy parts such as the engine and
transmission, the center of gravity of the vehicle
may shift. To stabilize the vehicle, place a balance
weight in a location where it will not roll or shift, or
use a transmission jack to hold the jacking support.
2. NOTICE FOR USING 4 POST LIFT
(a) Follow the safety procedures outlined in the lift
instruction manual.
(b) Use precautionary measures to prevent the free
wheel beam from damaging tires or wheels.
(c) Use wheel chocks to secure the vehicle.
3. NOTICE FOR USING JACK AND SAFETY STAND
(a) Work on a level surface. Use wheel chocks at all
times.
(b) Set the jack and rigid racks to the specified
locations of the vehicle accurately.
(c) When jacking up the vehicle, first release the
parking brake and move the shift lever to N.
(d) When jacking up the entire vehicle:
(1) When jacking up the front wheels first, make
sure wheel chocks are behind the rear wheels.
(2) When jacking up the rear wheels first, make sure
wheel chocks are in front of the front wheels.
(e) When jacking up only the front or rear wheels of the
vehicle:
(1) Before jacking up the front wheels, place wheel
chocks on both sides of the rear wheels.
(2) Before jacking up the rear wheels, place wheel
chocks on both sides of the front wheels.
(f) When lowering a vehicle that only has its front or
rear wheels jacked up:
(1) Before lowering the front wheels, make sure
wheel chocks are in front of the rear wheels.
(2) Before lowering the rear wheels, make sure
wheel chocks are behind the front wheels.
Page 256 of 3000
AV – 4AUDIO / VISUAL – AUDIO AND VISUAL SYSTEM
AV
SYSTEM DESCRIPTION
1. DISC PLAYER OUTLINE
(a) A CD player uses a laser pickup to read digital
signals recorded on CDs. By converting the digital
signals to analog, music and other content can be
played.
CAUTION:
Do not look directly at the laser pickup because
the CD player uses an invisible laser beam. Be
sure to operate the player only as instructed.
NOTICE:
• Do not disassemble any part of the CD player.
• Do not apply oil to the CD player.
• Do not insert anything but a CD into the CD
player.
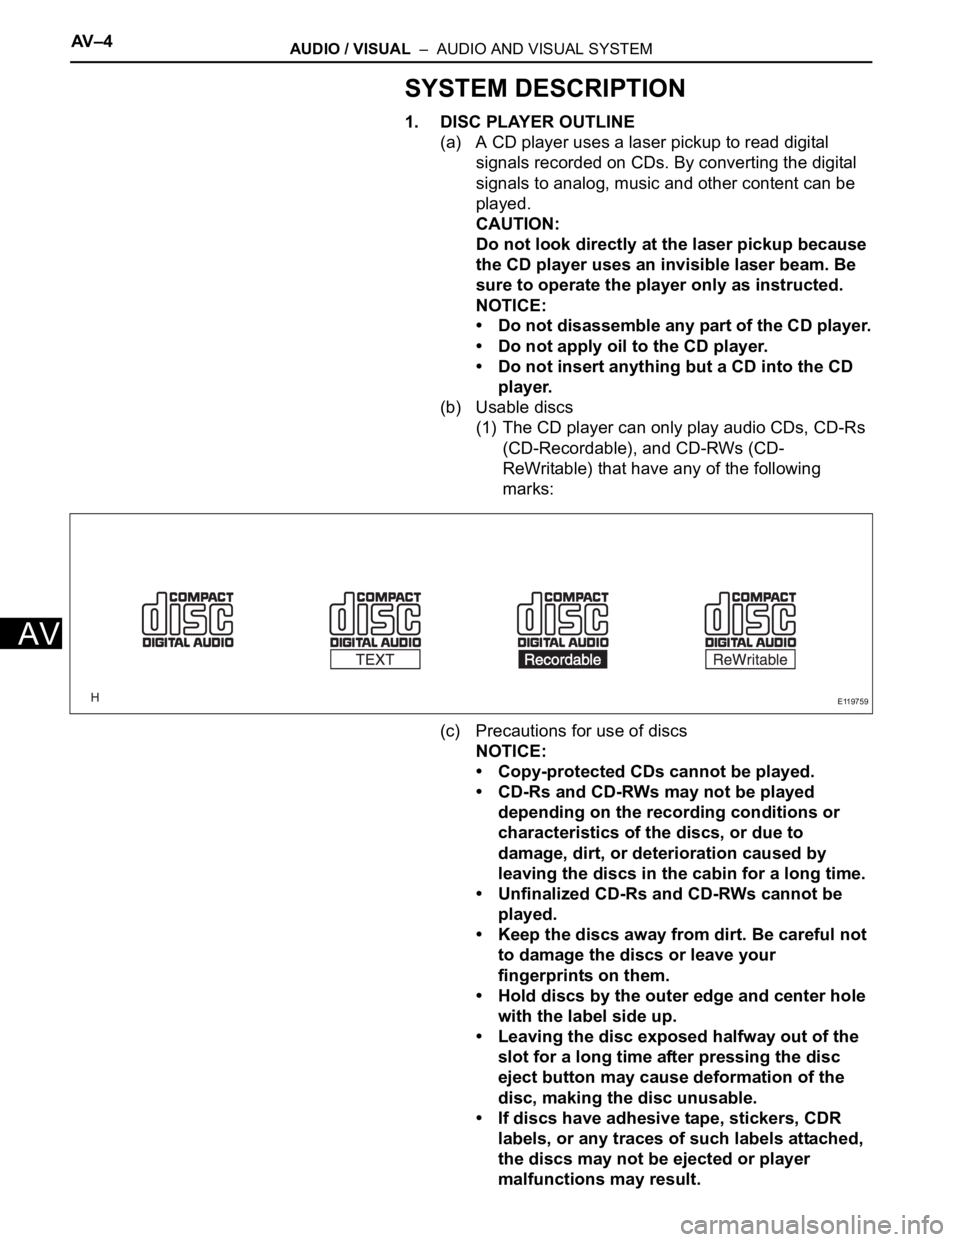
(b) Usable discs
(1) The CD player can only play audio CDs, CD-Rs
(CD-Recordable), and CD-RWs (CD-
ReWritable) that have any of the following
marks:
(c) Precautions for use of discs
NOTICE:
• Copy-protected CDs cannot be played.
• CD-Rs and CD-RWs may not be played
depending on the recording conditions or
characteristics of the discs, or due to
damage, dirt, or deterioration caused by
leaving the discs in the cabin for a long time.
• Unfinalized CD-Rs and CD-RWs cannot be
played.
• Keep the discs away from dirt. Be careful not
to damage the discs or leave your
fingerprints on them.
• Hold discs by the outer edge and center hole
with the label side up.
• Leaving the disc exposed halfway out of the
slot for a long time after pressing the disc
eject button may cause deformation of the
disc, making the disc unusable.
• If discs have adhesive tape, stickers, CDR
labels, or any traces of such labels attached,
the discs may not be ejected or player
malfunctions may result.
E119759
Page 271 of 3000
NS–10NAVIGATION – NAVIGATION SYSTEM
NS
CAUTION:
Do not look directly at the laser pickup because
the radio and navigation assembly (built-in
navigation ECU) uses an invisible laser beam.
Be sure to only operate the navigation system
as instructed.
4. CD (Compact Disc) player outline
(a) A compact disc player uses a laser pickup to read
digital signals recorded on a compact disc (CD). By
converting the digital signals to analog, it can play
music and other things.
NOTICE:
• Do not disassemble any part of the CD player.
• Do not apply oil to the CD player.
• Do not insert anything but a CD into the CD
player.
CAUTION:
Do not look directly at the laser pickup because
the CD player uses an invisible laser beam. Be
sure to only operate the player as instructed.
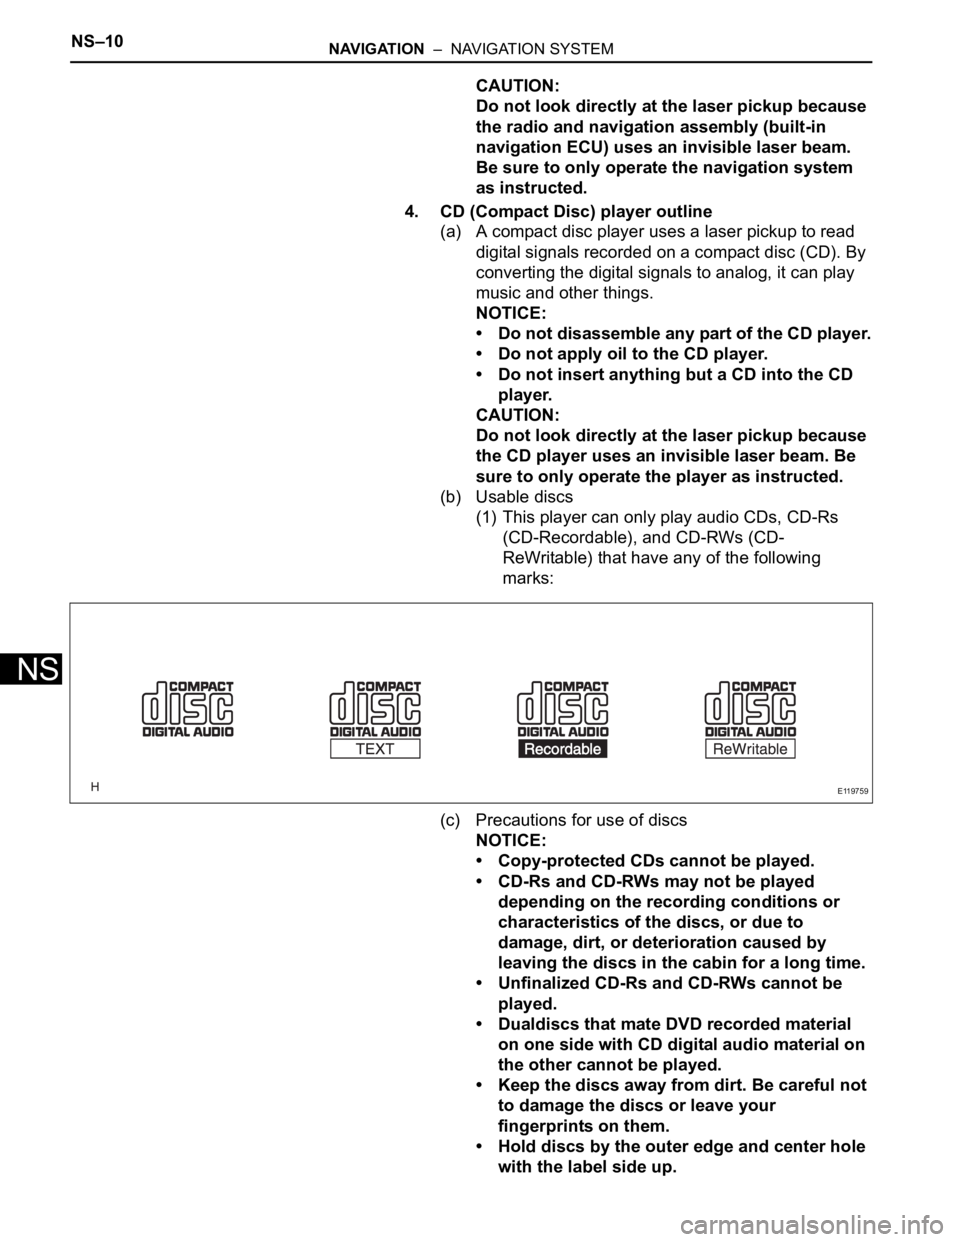
(b) Usable discs
(1) This player can only play audio CDs, CD-Rs
(CD-Recordable), and CD-RWs (CD-
ReWritable) that have any of the following
marks:
(c) Precautions for use of discs
NOTICE:
• Copy-protected CDs cannot be played.
• CD-Rs and CD-RWs may not be played
depending on the recording conditions or
characteristics of the discs, or due to
damage, dirt, or deterioration caused by
leaving the discs in the cabin for a long time.
• Unfinalized CD-Rs and CD-RWs cannot be
played.
• Dualdiscs that mate DVD recorded material
on one side with CD digital audio material on
the other cannot be played.
• Keep the discs away from dirt. Be careful not
to damage the discs or leave your
fingerprints on them.
• Hold discs by the outer edge and center hole
with the label side up.
E119759
Page 278 of 3000
PM–4PARK ASSIST / MONITORING – REAR VIEW MONITOR SYSTEM
PM
(b) Images are difficult to discern even in normal
conditions if:
(1) Camera screen is frosted over (the image
immediately after turning the ignition switch to
the on position may be blurred or darker than
normal).
(2) A strong beam of light, such as a sunbeam or
headlight, hits the camera.
(3) It is too dark around the camera (at night, etc.).
(4) The ambient temperature around the camera is
either too high or too low.
HINT:
When a strong light, such as a sunbeam
reflected off the vehicle's body, hits the camera,
the image may be blurred. This is called the
"SMEAR" phenomenon, peculiar to the CCD
camera.
Page 1342 of 3000
2GR-FE CHARGING – CHARGING SYSTEMCH–7
CH
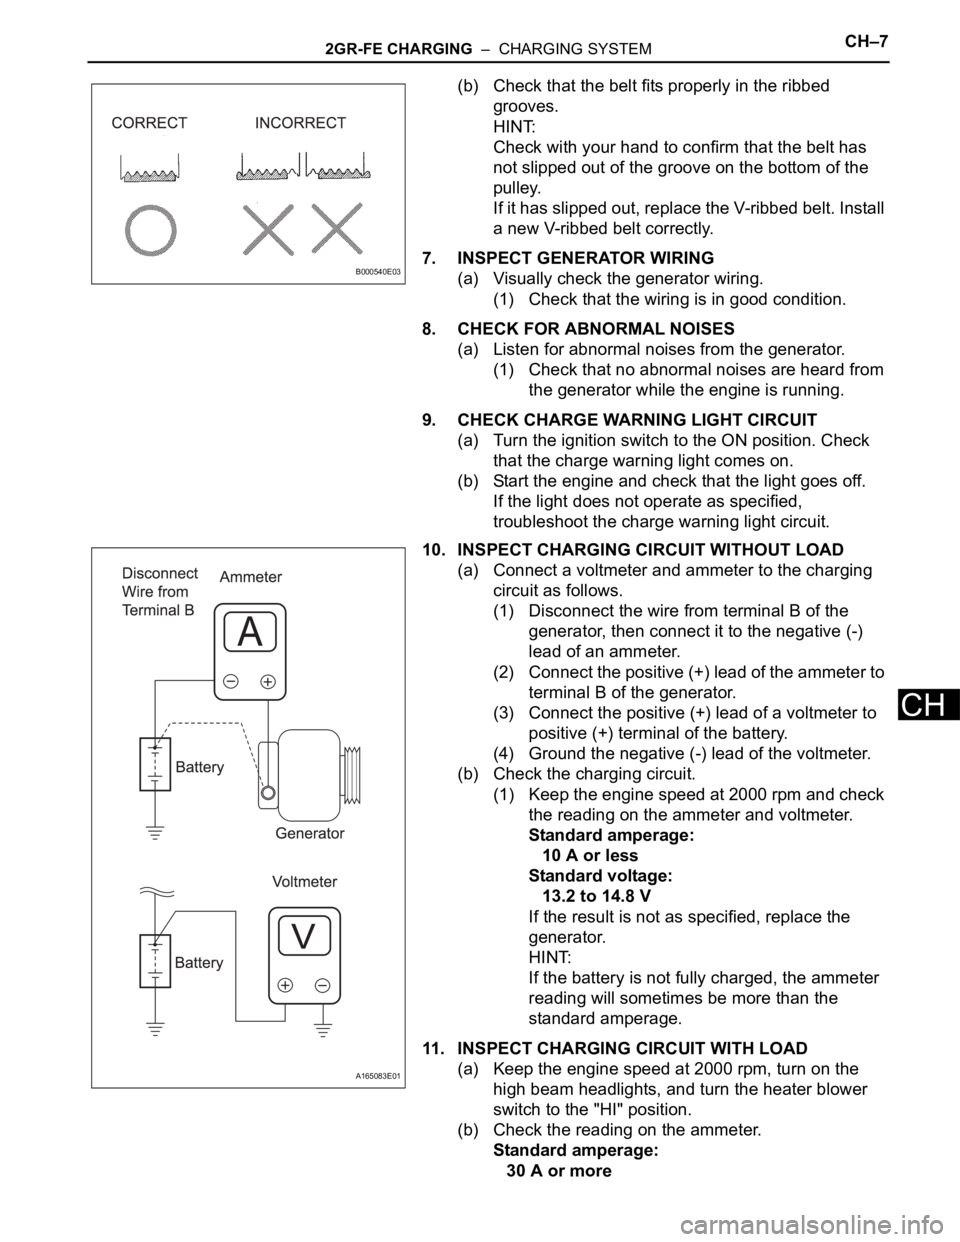
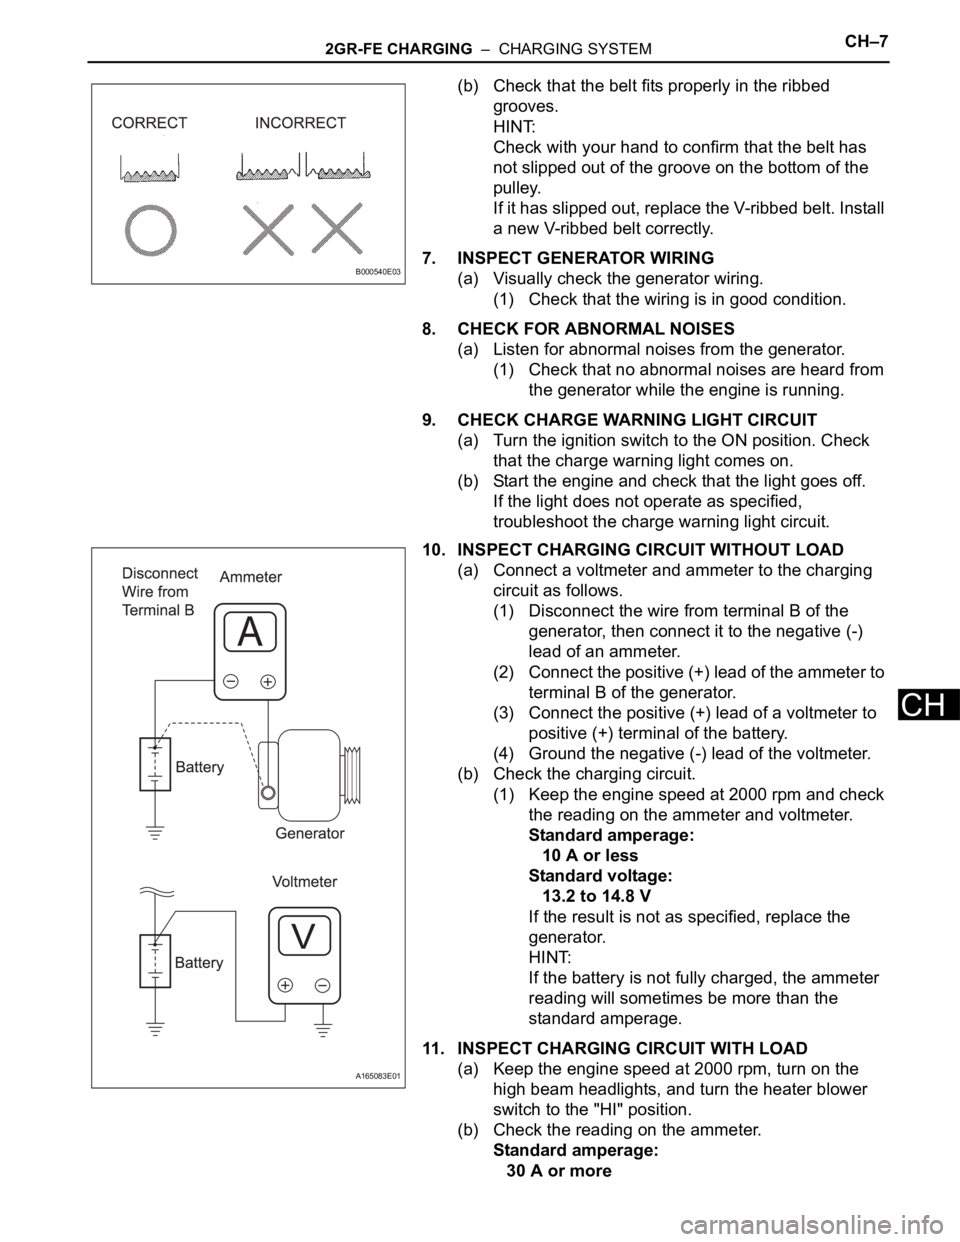
(b) Check that the belt fits properly in the ribbed
grooves.
HINT:
Check with your hand to confirm that the belt has
not slipped out of the groove on the bottom of the
pulley.
If it has slipped out, replace the V-ribbed belt. Install
a new V-ribbed belt correctly.
7. INSPECT GENERATOR WIRING
(a) Visually check the generator wiring.
(1) Check that the wiring is in good condition.
8. CHECK FOR ABNORMAL NOISES
(a) Listen for abnormal noises from the generator.
(1) Check that no abnormal noises are heard from
the generator while the engine is running.
9. CHECK CHARGE WARNING LIGHT CIRCUIT
(a) Turn the ignition switch to the ON position. Check
that the charge warning light comes on.
(b) Start the engine and check that the light goes off.
If the light does not operate as specified,
troubleshoot the charge warning light circuit.
10. INSPECT CHARGING CIRCUIT WITHOUT LOAD
(a) Connect a voltmeter and ammeter to the charging
circuit as follows.
(1) Disconnect the wire from terminal B of the
generator, then connect it to the negative (-)
lead of an ammeter.
(2) Connect the positive (+) lead of the ammeter to
terminal B of the generator.
(3) Connect the positive (+) lead of a voltmeter to
positive (+) terminal of the battery.
(4) Ground the negative (-) lead of the voltmeter.
(b) Check the charging circuit.
(1) Keep the engine speed at 2000 rpm and check
the reading on the ammeter and voltmeter.
Standard amperage:
10 A or less
Standard voltage:
13.2 to 14.8 V
If the result is not as specified, replace the
generator.
HINT:
If the battery is not fully charged, the ammeter
reading will sometimes be more than the
standard amperage.
11. INSPECT CHARGING CIRCUIT WITH LOAD
(a) Keep the engine speed at 2000 rpm, turn on the
high beam headlights, and turn the heater blower
switch to the "HI" position.
(b) Check the reading on the ammeter.
Standard amperage:
30 A or more
B000540E03
A165083E01
Page 1347 of 3000
2GR-FE CHARGING – CHARGING SYSTEMCH–7
CH
(b) Check that the belt fits properly in the ribbed
grooves.
HINT:
Check with your hand to confirm that the belt has
not slipped out of the groove on the bottom of the
pulley.
If it has slipped out, replace the V-ribbed belt. Install
a new V-ribbed belt correctly.
7. INSPECT GENERATOR WIRING
(a) Visually check the generator wiring.
(1) Check that the wiring is in good condition.
8. CHECK FOR ABNORMAL NOISES
(a) Listen for abnormal noises from the generator.
(1) Check that no abnormal noises are heard from
the generator while the engine is running.
9. CHECK CHARGE WARNING LIGHT CIRCUIT
(a) Turn the ignition switch to the ON position. Check
that the charge warning light comes on.
(b) Start the engine and check that the light goes off.
If the light does not operate as specified,
troubleshoot the charge warning light circuit.
10. INSPECT CHARGING CIRCUIT WITHOUT LOAD
(a) Connect a voltmeter and ammeter to the charging
circuit as follows.
(1) Disconnect the wire from terminal B of the
generator, then connect it to the negative (-)
lead of an ammeter.
(2) Connect the positive (+) lead of the ammeter to
terminal B of the generator.
(3) Connect the positive (+) lead of a voltmeter to
positive (+) terminal of the battery.
(4) Ground the negative (-) lead of the voltmeter.
(b) Check the charging circuit.
(1) Keep the engine speed at 2000 rpm and check
the reading on the ammeter and voltmeter.
Standard amperage:
10 A or less
Standard voltage:
13.2 to 14.8 V
If the result is not as specified, replace the
generator.
HINT:
If the battery is not fully charged, the ammeter
reading will sometimes be more than the
standard amperage.
11. INSPECT CHARGING CIRCUIT WITH LOAD
(a) Keep the engine speed at 2000 rpm, turn on the
high beam headlights, and turn the heater blower
switch to the "HI" position.
(b) Check the reading on the ammeter.
Standard amperage:
30 A or more
B000540E03
A165083E01
Page 2226 of 3000
SUSPENSION – REAR COIL SPRINGSP–43
SP
(b) Remove the 3 bolts and fuel tank filler hose cover.
15. REMOVE REAR FLOOR NO.2 CROSSMEMBER
BRACE LH
(a) Remove the 2 bolts and floor No.2 crossmember
brace.
16. REMOVE REAR FLOOR NO.2 CROSSMEMBER
BRACE RH
HINT:
Remove the RH side by the same procedures as the LH
side.
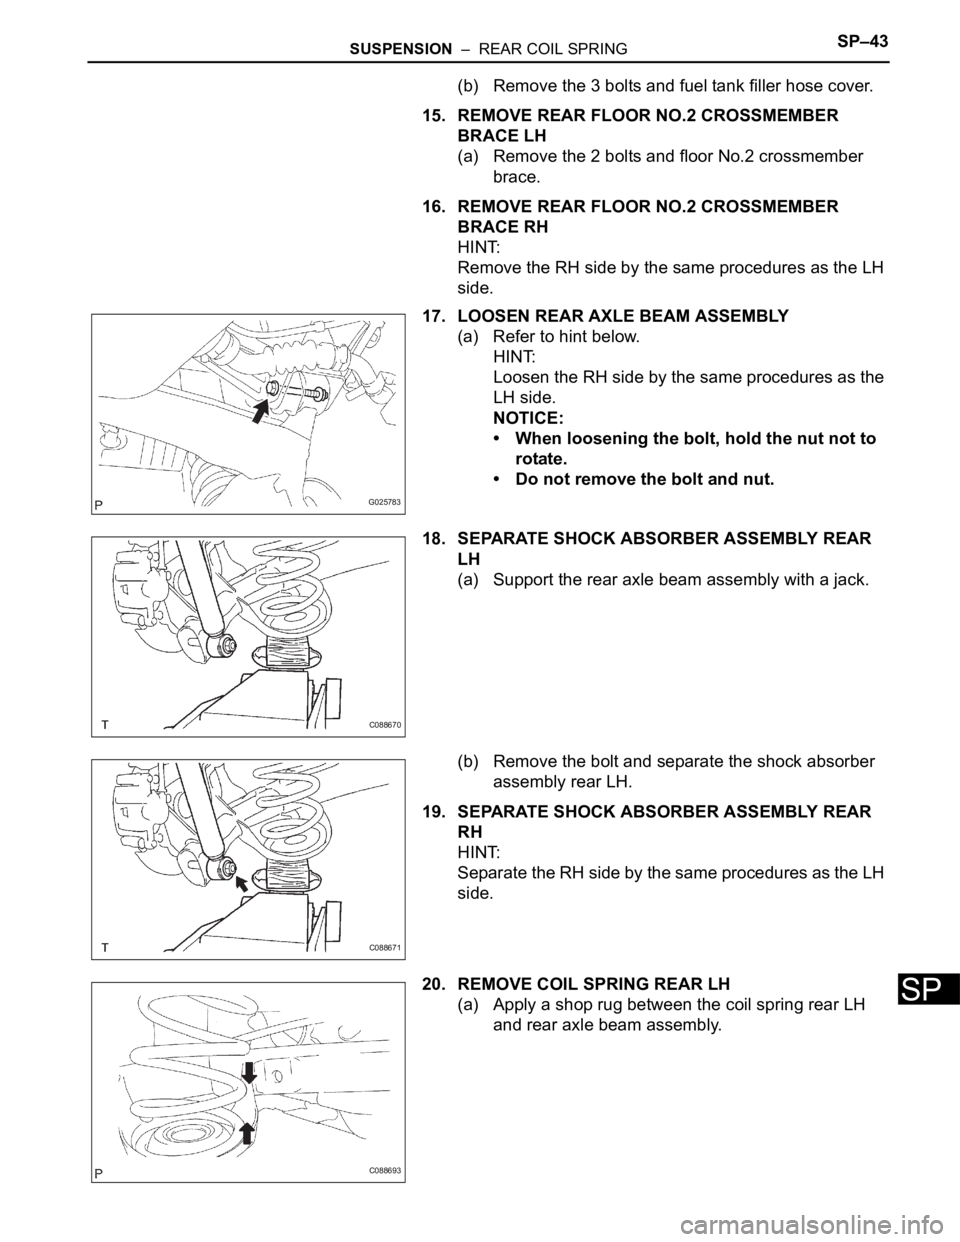
17. LOOSEN REAR AXLE BEAM ASSEMBLY
(a) Refer to hint below.
HINT:
Loosen the RH side by the same procedures as the
LH side.
NOTICE:
• When loosening the bolt, hold the nut not to
rotate.
• Do not remove the bolt and nut.
18. SEPARATE SHOCK ABSORBER ASSEMBLY REAR
LH
(a) Support the rear axle beam assembly with a jack.
(b) Remove the bolt and separate the shock absorber
assembly rear LH.
19. SEPARATE SHOCK ABSORBER ASSEMBLY REAR
RH
HINT:
Separate the RH side by the same procedures as the LH
side.
20. REMOVE COIL SPRING REAR LH
(a) Apply a shop rug between the coil spring rear LH
and rear axle beam assembly.
G025783
C088670
C088671
C088693
Page 2227 of 3000
SP–44SUSPENSION – REAR COIL SPRING
SP
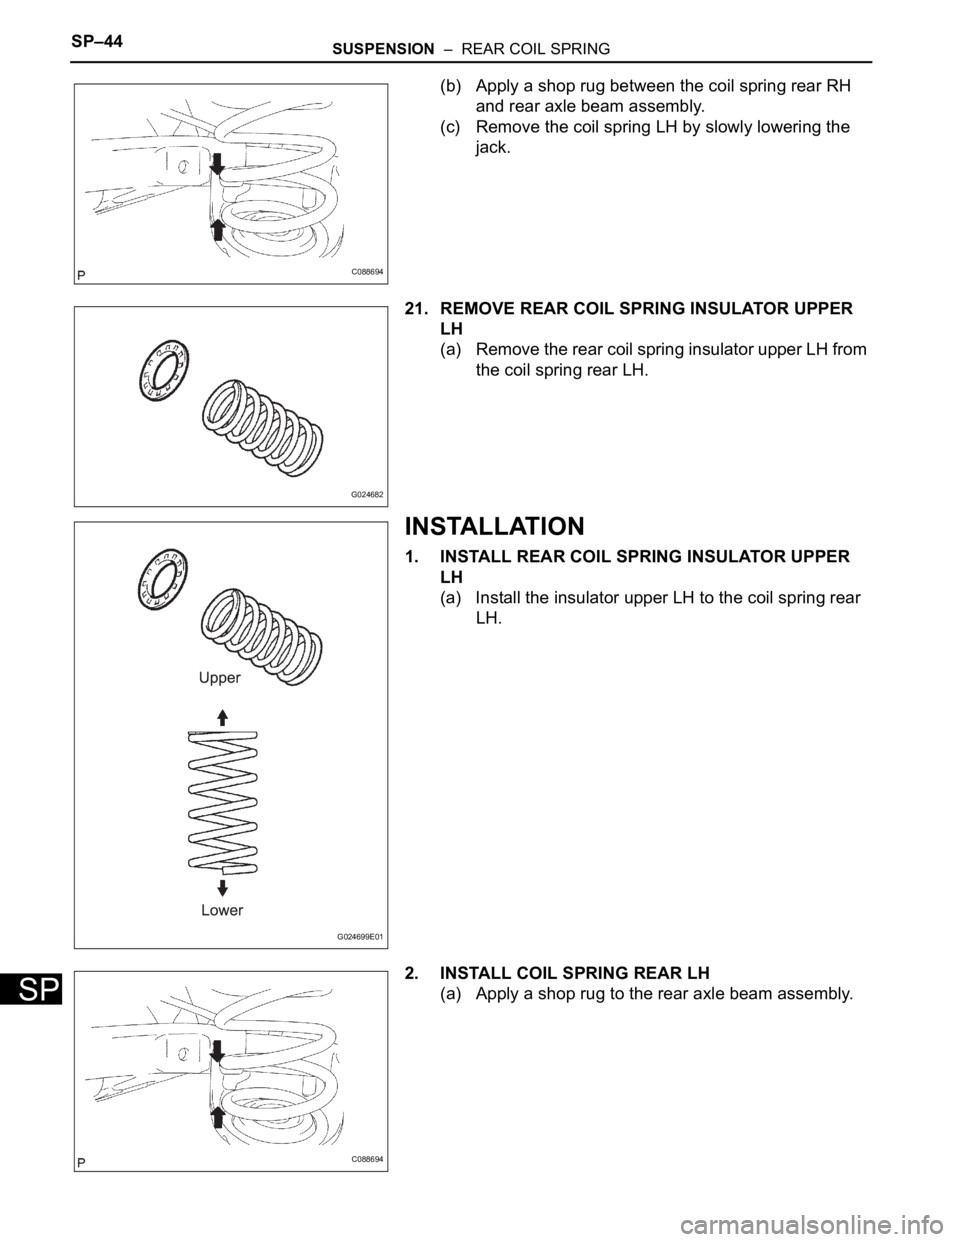
(b) Apply a shop rug between the coil spring rear RH
and rear axle beam assembly.
(c) Remove the coil spring LH by slowly lowering the
jack.
21. REMOVE REAR COIL SPRING INSULATOR UPPER
LH
(a) Remove the rear coil spring insulator upper LH from
the coil spring rear LH.
INSTALLATION
1. INSTALL REAR COIL SPRING INSULATOR UPPER
LH
(a) Install the insulator upper LH to the coil spring rear
LH.
2. INSTALL COIL SPRING REAR LH
(a) Apply a shop rug to the rear axle beam assembly.
C088694
G024682
G024699E01
C088694