2007 INFINITI QX56 check engine
[x] Cancel search: check enginePage 1520 of 3061
DTC P0550 PSP SENSOR
EC-437
< SERVICE INFORMATION >
C
D
E
F
G
H
I
J
K
L
MA
EC
N
P O
Diagnosis ProcedureINFOID:0000000003531949
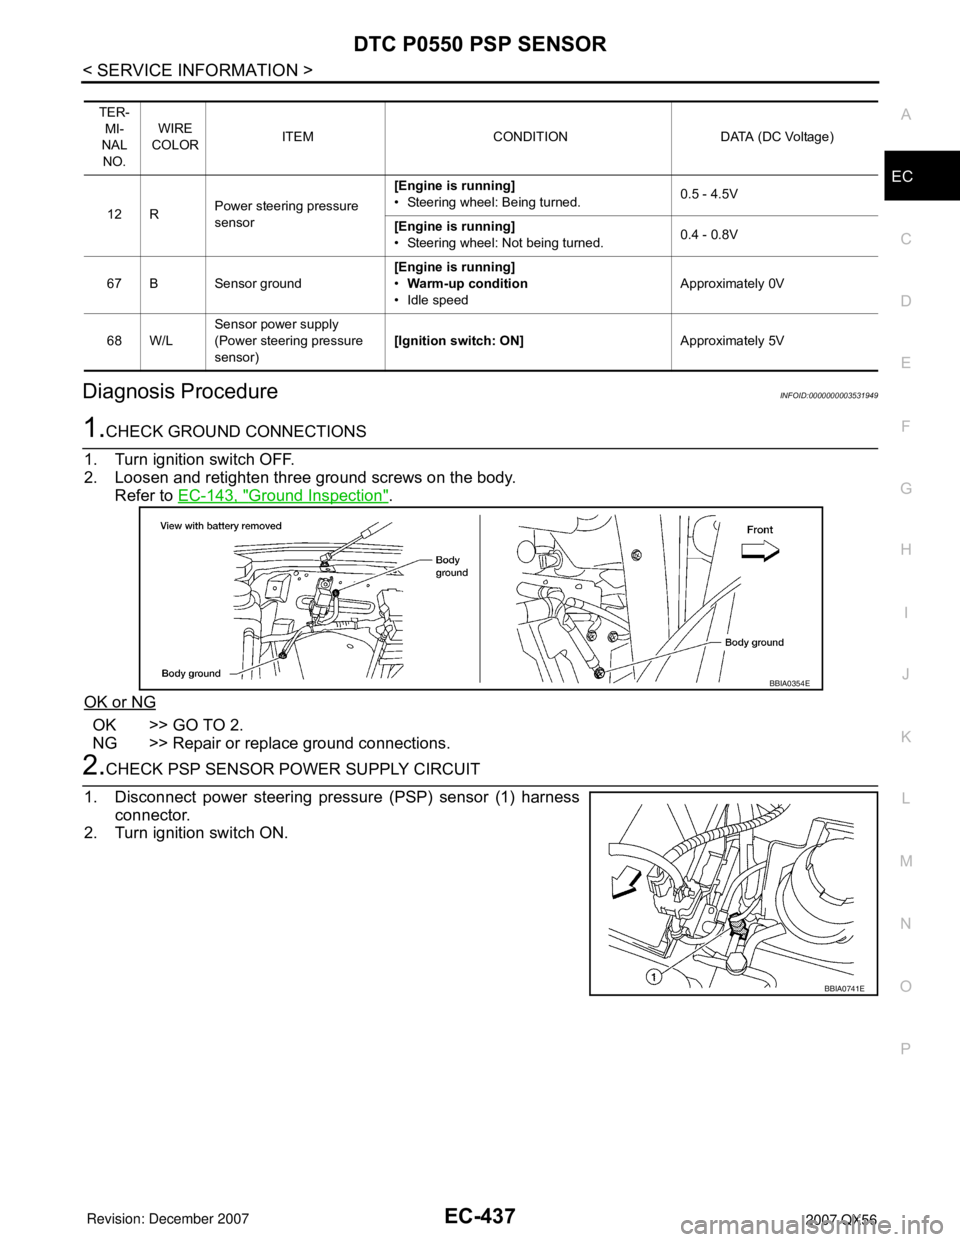
1.CHECK GROUND CONNECTIONS
1. Turn ignition switch OFF.
2. Loosen and retighten three ground screws on the body.
Refer to EC-143, "
Ground Inspection".
OK or NG
OK >> GO TO 2.
NG >> Repair or replace ground connections.
2.CHECK PSP SENSOR POWER SUPPLY CIRCUIT
1. Disconnect power steering pressure (PSP) sensor (1) harness
connector.
2. Turn ignition switch ON.
TER-
MI-
NAL
NO.WIRE
COLORITEM CONDITION DATA (DC Voltage)
12 RPower steering pressure
sensor[Engine is running]
• Steering wheel: Being turned.0.5 - 4.5V
[Engine is running]
• Steering wheel: Not being turned.0.4 - 0.8V
67 B Sensor ground[Engine is running]
•Warm-up condition
• Idle speedApproximately 0V
68 W/LSensor power supply
(Power steering pressure
sensor)[Ignition switch: ON]Approximately 5V
BBIA0354E
BBIA0741E
Page 1521 of 3061
EC-438
< SERVICE INFORMATION >
DTC P0550 PSP SENSOR
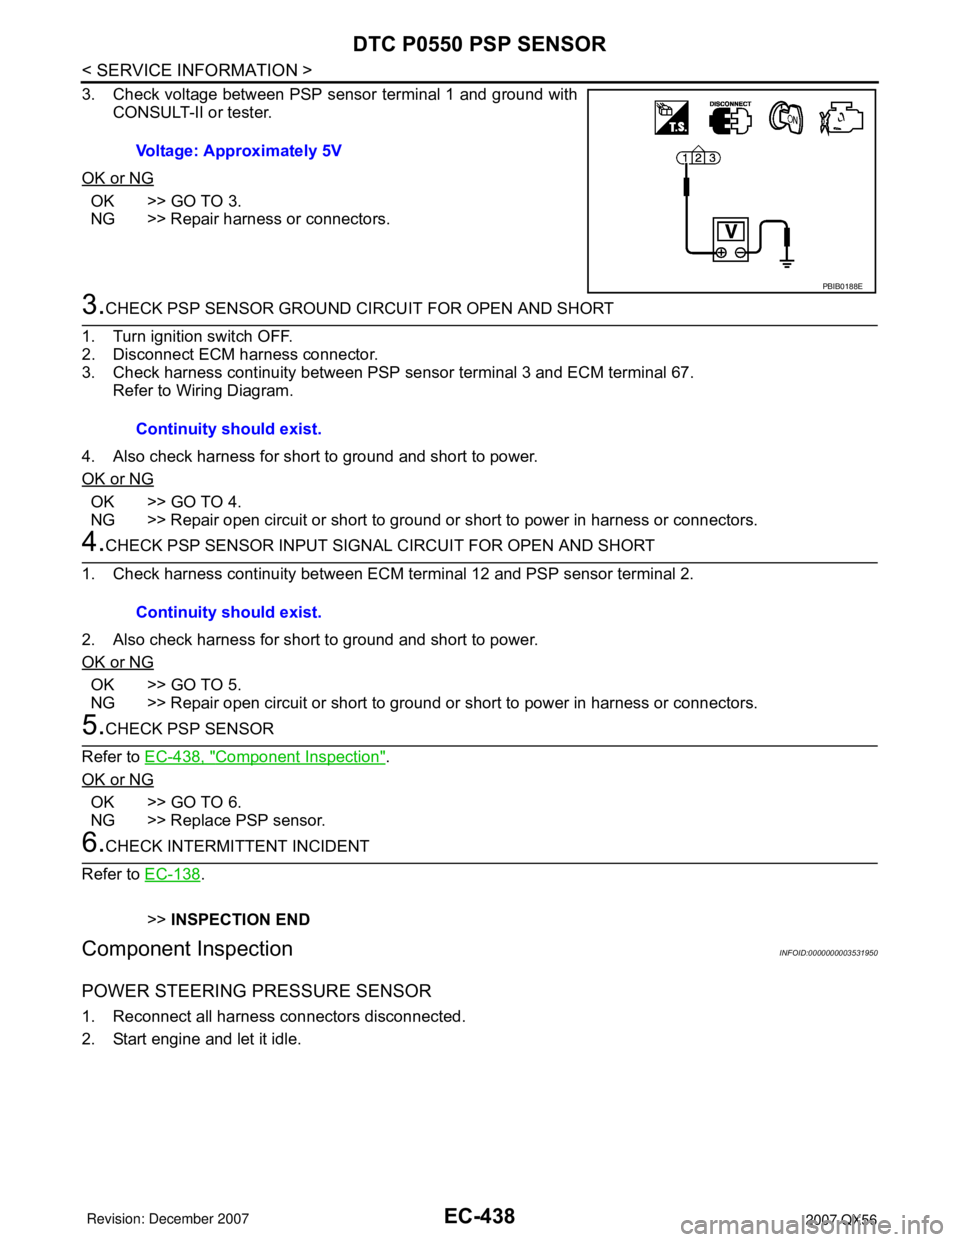
3. Check voltage between PSP sensor terminal 1 and ground with
CONSULT-II or tester.
OK or NG
OK >> GO TO 3.
NG >> Repair harness or connectors.
3.CHECK PSP SENSOR GROUND CIRCUIT FOR OPEN AND SHORT
1. Turn ignition switch OFF.
2. Disconnect ECM harness connector.
3. Check harness continuity between PSP sensor terminal 3 and ECM terminal 67.
Refer to Wiring Diagram.
4. Also check harness for short to ground and short to power.
OK or NG
OK >> GO TO 4.
NG >> Repair open circuit or short to ground or short to power in harness or connectors.
4.CHECK PSP SENSOR INPUT SIGNAL CIRCUIT FOR OPEN AND SHORT
1. Check harness continuity between ECM terminal 12 and PSP sensor terminal 2.
2. Also check harness for short to ground and short to power.
OK or NG
OK >> GO TO 5.
NG >> Repair open circuit or short to ground or short to power in harness or connectors.
5.CHECK PSP SENSOR
Refer to EC-438, "
Component Inspection".
OK or NG
OK >> GO TO 6.
NG >> Replace PSP sensor.
6.CHECK INTERMITTENT INCIDENT
Refer to EC-138
.
>>INSPECTION END
Component InspectionINFOID:0000000003531950
POWER STEERING PRESSURE SENSOR
1. Reconnect all harness connectors disconnected.
2. Start engine and let it idle.Voltage: Approximately 5V
PBIB0188E
Continuity should exist.
Continuity should exist.
Page 1532 of 3061
DTC P0643 SENSOR POWER SUPPLY
EC-449
< SERVICE INFORMATION >
C
D
E
F
G
H
I
J
K
L
MA
EC
N
P O
Diagnosis ProcedureINFOID:0000000003531964
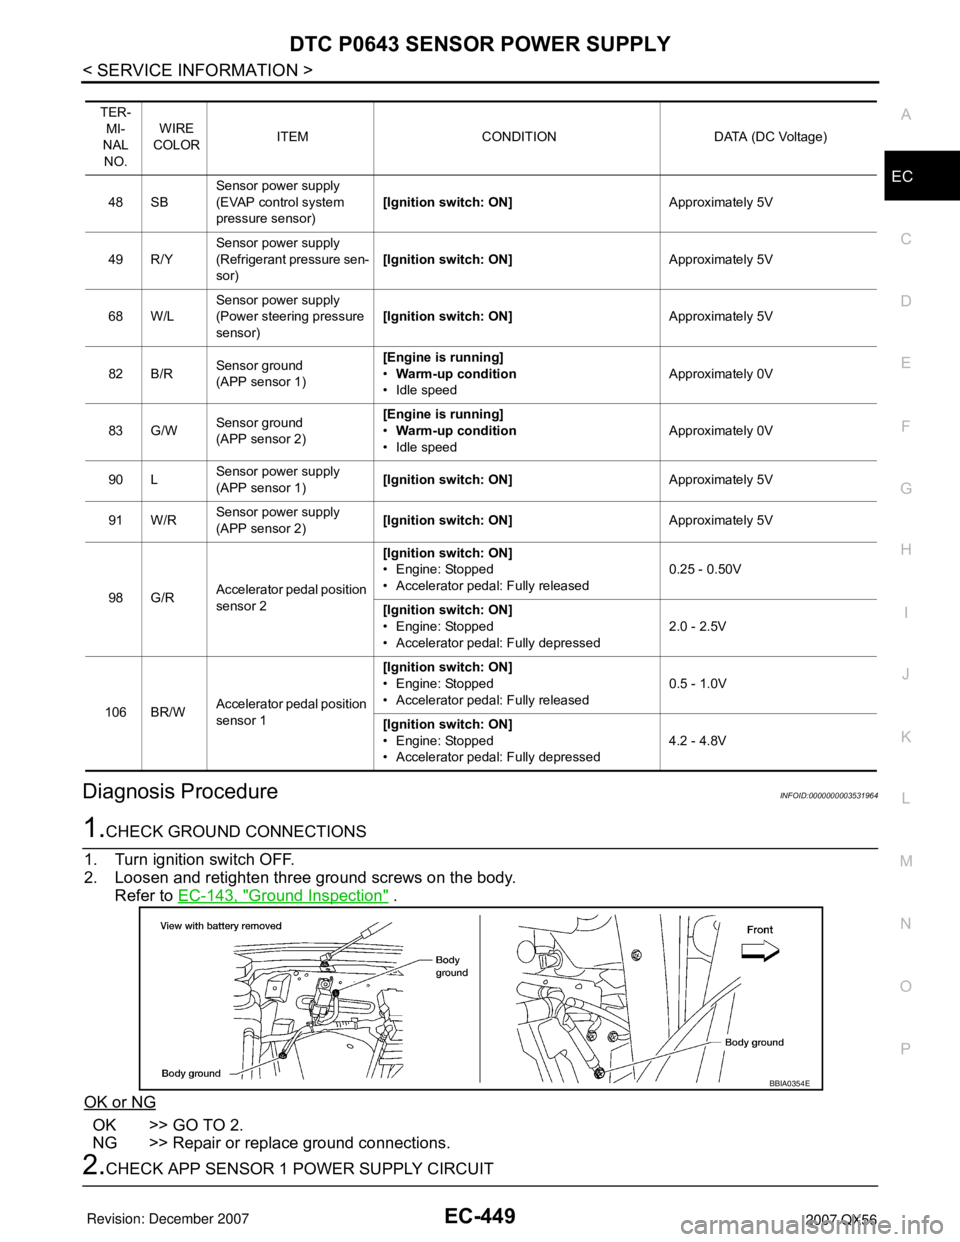
1.CHECK GROUND CONNECTIONS
1. Turn ignition switch OFF.
2. Loosen and retighten three ground screws on the body.
Refer to EC-143, "
Ground Inspection" .
OK or NG
OK >> GO TO 2.
NG >> Repair or replace ground connections.
2.CHECK APP SENSOR 1 POWER SUPPLY CIRCUIT
TER-
MI-
NAL
NO.WIRE
COLORITEM CONDITION DATA (DC Voltage)
48 SBSensor power supply
(EVAP control system
pressure sensor)[Ignition switch: ON]Approximately 5V
49 R/YSensor power supply
(Refrigerant pressure sen-
sor)[Ignition switch: ON]Approximately 5V
68 W/LSensor power supply
(Power steering pressure
sensor)[Ignition switch: ON]Approximately 5V
82 B/RSensor ground
(APP sensor 1)[Engine is running]
•Warm-up condition
• Idle speedApproximately 0V
83 G/WSensor ground
(APP sensor 2)[Engine is running]
•Warm-up condition
• Idle speedApproximately 0V
90 LSensor power supply
(APP sensor 1)[Ignition switch: ON]Approximately 5V
91 W/RSensor power supply
(APP sensor 2)[Ignition switch: ON]Approximately 5V
98 G/RAccelerator pedal position
sensor 2[Ignition switch: ON]
• Engine: Stopped
• Accelerator pedal: Fully released0.25 - 0.50V
[Ignition switch: ON]
• Engine: Stopped
• Accelerator pedal: Fully depressed2.0 - 2.5V
106 BR/WAccelerator pedal position
sensor 1[Ignition switch: ON]
• Engine: Stopped
• Accelerator pedal: Fully released0.5 - 1.0V
[Ignition switch: ON]
• Engine: Stopped
• Accelerator pedal: Fully depressed4.2 - 4.8V
BBIA0354E
Page 1535 of 3061
EC-452
< SERVICE INFORMATION >
DTC P0850 PNP SWITCH
DTC P0850 PNP SWITCH
Component DescriptionINFOID:0000000003531965
When the gear position is P or N, park/neutral position (PNP) switch is ON.
TCM detects the position because the continuity of the line (the ON signal) exists.
Then the TCM sends the PNP switch signal to the ECM via combination meter.
CONSULT-II Reference Value in Data Monitor ModeINFOID:0000000003531966
Specification data are reference values.
On Board Diagnosis LogicINFOID:0000000003531967
DTC Confirmation ProcedureINFOID:0000000003531968
CAUTION:
Always drive vehicle at a safe speed.
NOTE:
If DTC Confirmation Procedure has been previously conducted, always turn ignition switch OFF and wait at
least 10 seconds before conducting the next test.
WITH CONSULT-II
1. Turn ignition switch ON.
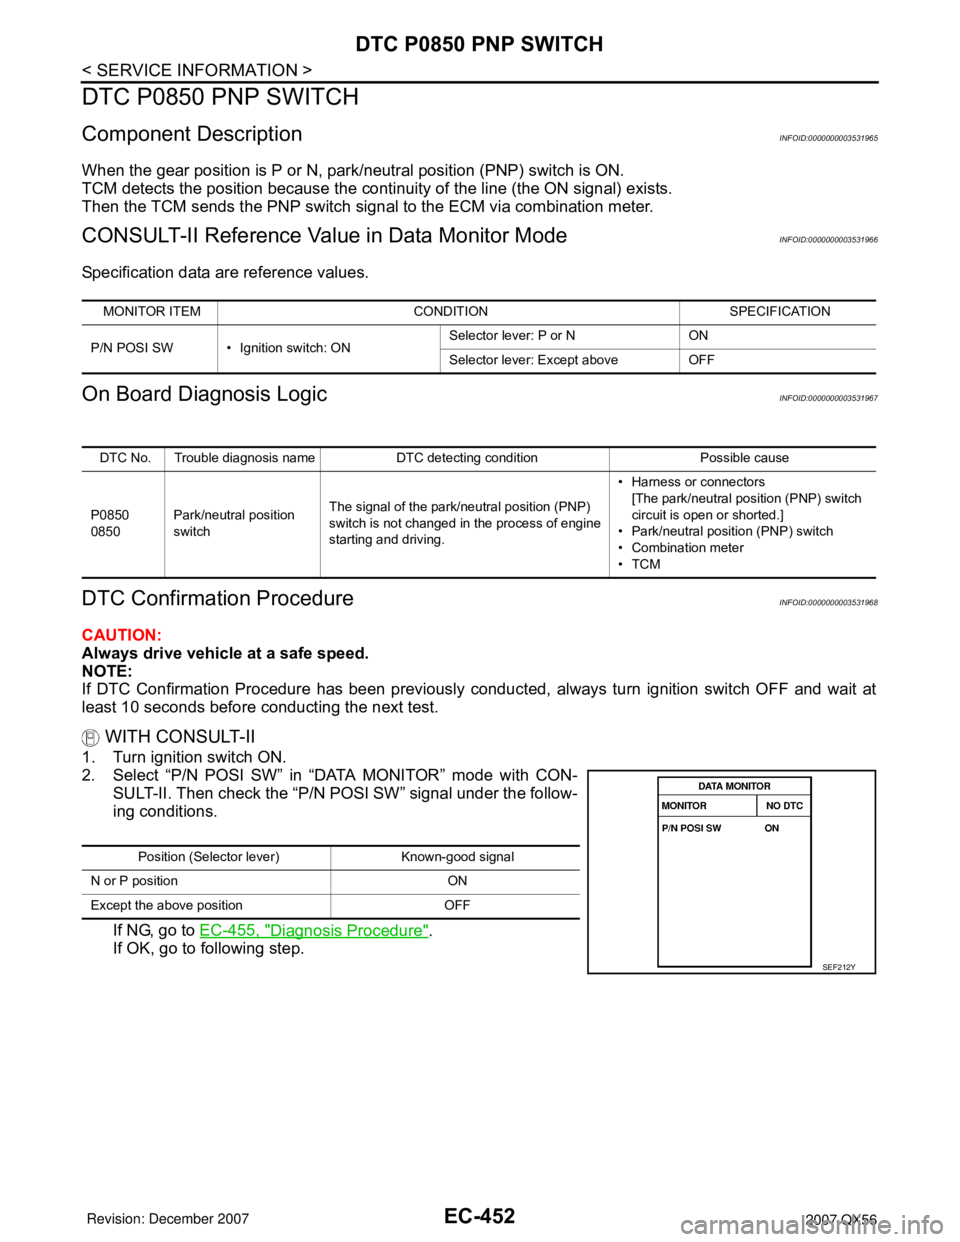
2. Select “P/N POSI SW” in “DATA MONITOR” mode with CON-
SULT-II. Then check the “P/N POSI SW” signal under the follow-
ing conditions.
If NG, go to EC-455, "
Diagnosis Procedure".
If OK, go to following step.
MONITOR ITEM CONDITION SPECIFICATION
P/N POSI SW • Ignition switch: ONSelector lever: P or N ON
Selector lever: Except above OFF
DTC No. Trouble diagnosis name DTC detecting condition Possible cause
P0850
0850Park/neutral position
switchThe signal of the park/neutral position (PNP)
switch is not changed in the process of engine
starting and driving.• Harness or connectors
[The park/neutral position (PNP) switch
circuit is open or shorted.]
• Park/neutral position (PNP) switch
• Combination meter
•TCM
Position (Selector lever) Known-good signal
N or P position ON
Except the above position OFF
SEF212Y
Page 1536 of 3061
DTC P0850 PNP SWITCH
EC-453
< SERVICE INFORMATION >
C
D
E
F
G
H
I
J
K
L
MA
EC
N
P O
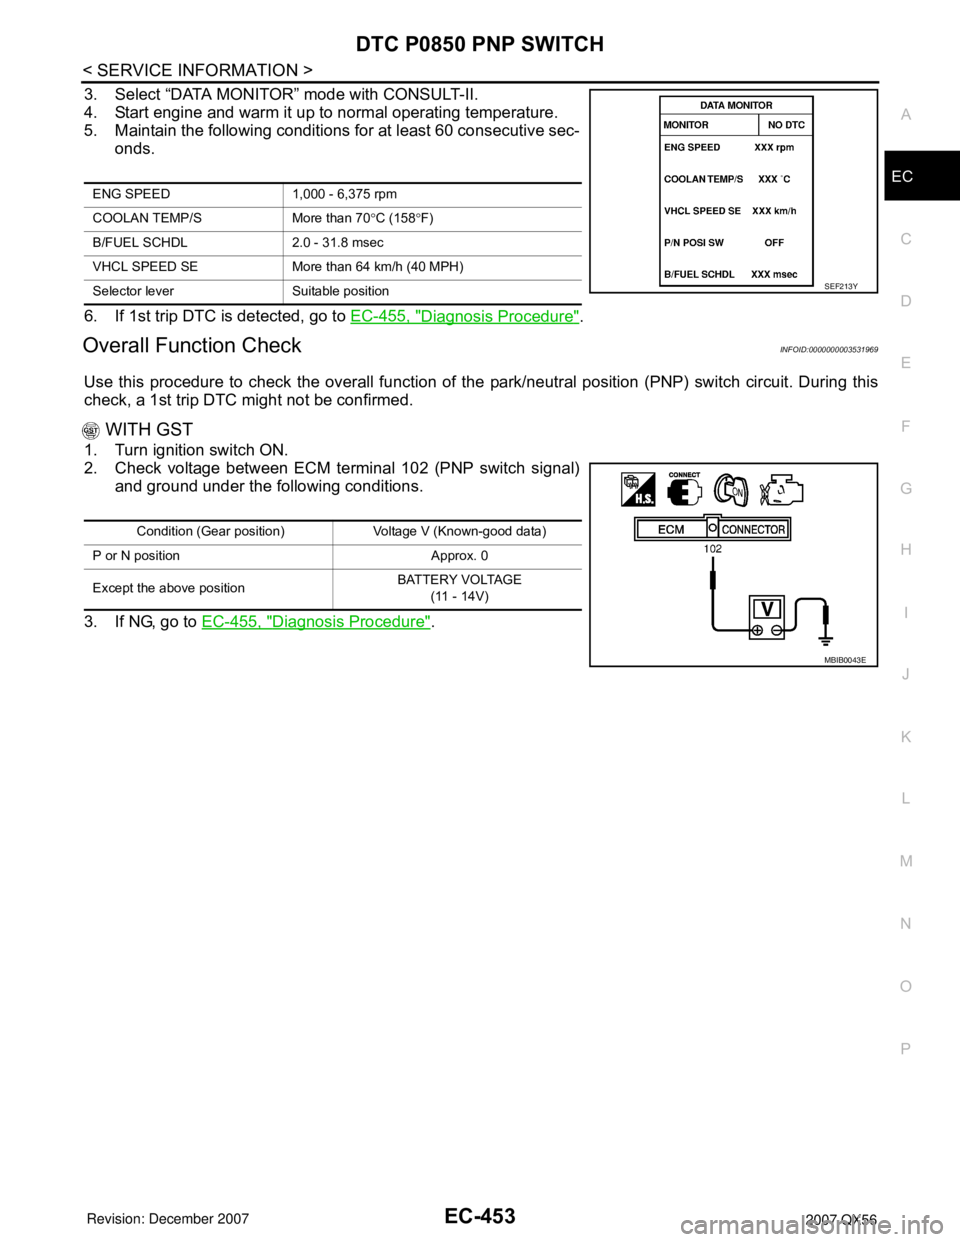
3. Select “DATA MONITOR” mode with CONSULT-II.
4. Start engine and warm it up to normal operating temperature.
5. Maintain the following conditions for at least 60 consecutive sec-
onds.
6. If 1st trip DTC is detected, go to EC-455, "
Diagnosis Procedure".
Overall Function CheckINFOID:0000000003531969
Use this procedure to check the overall function of the park/neutral position (PNP) switch circuit. During this
check, a 1st trip DTC might not be confirmed.
WITH GST
1. Turn ignition switch ON.
2. Check voltage between ECM terminal 102 (PNP switch signal)
and ground under the following conditions.
3. If NG, go to EC-455, "
Diagnosis Procedure".
ENG SPEED 1,000 - 6,375 rpm
COOLAN TEMP/S More than 70°C (158°F)
B/FUEL SCHDL 2.0 - 31.8 msec
VHCL SPEED SE More than 64 km/h (40 MPH)
Selector lever Suitable position
SEF213Y
Condition (Gear position) Voltage V (Known-good data)
P or N position Approx. 0
Except the above positionBATTERY VOLTAGE
(11 - 14V)
MBIB0043E
Page 1544 of 3061
DTC P1140, P1145 IVT CONTROL POSITION SENSOR
EC-461
< SERVICE INFORMATION >
C
D
E
F
G
H
I
J
K
L
MA
EC
N
P O
: Average voltage for pulse signal (Actual pulse signal can be confirmed by oscilloscope.)
Diagnosis ProcedureINFOID:0000000003531977
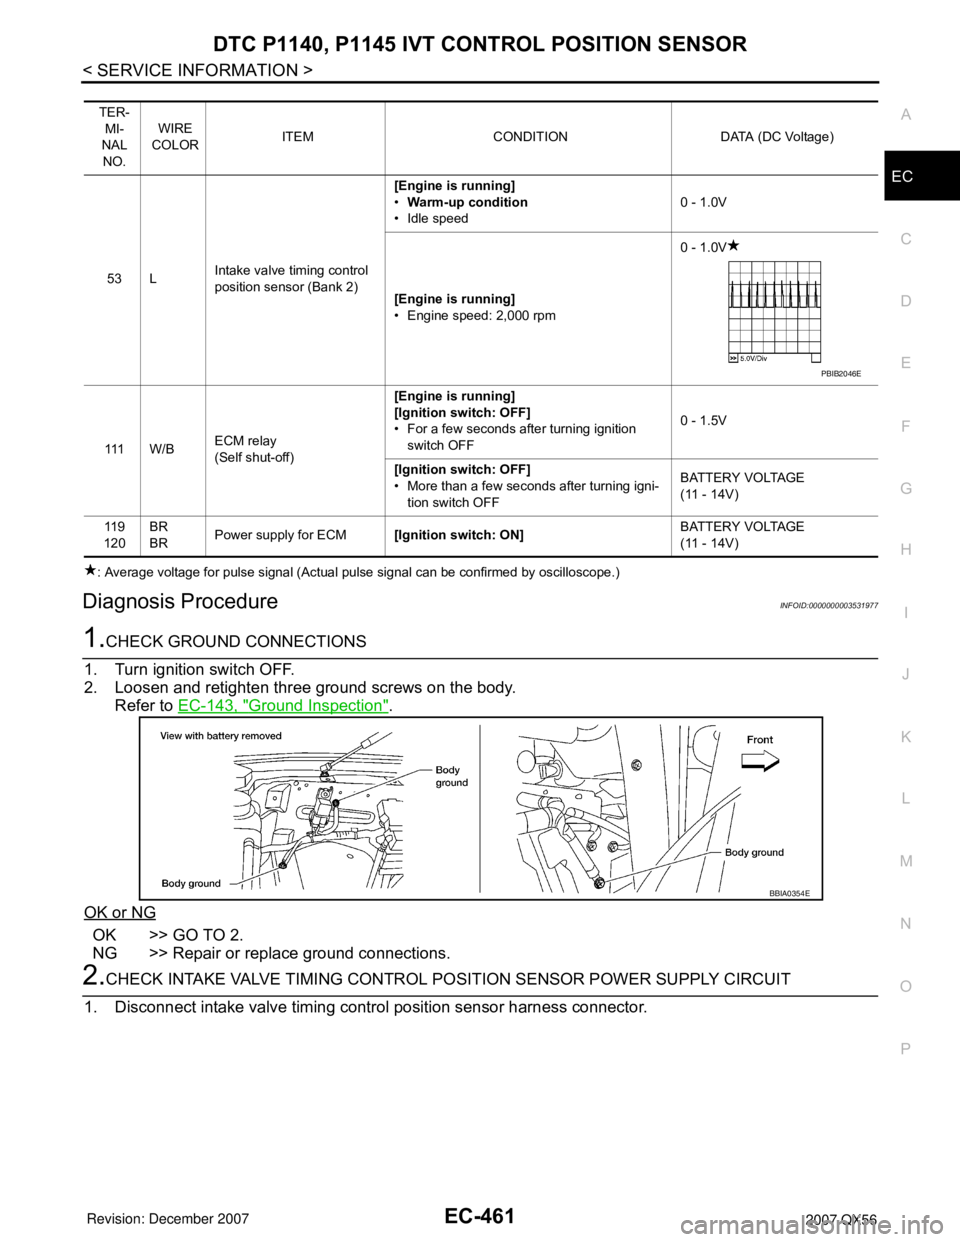
1.CHECK GROUND CONNECTIONS
1. Turn ignition switch OFF.
2. Loosen and retighten three ground screws on the body.
Refer to EC-143, "
Ground Inspection".
OK or NG
OK >> GO TO 2.
NG >> Repair or replace ground connections.
2.CHECK INTAKE VALVE TIMING CONTROL POSITION SENSOR POWER SUPPLY CIRCUIT
1. Disconnect intake valve timing control position sensor harness connector.
TER-
MI-
NAL
NO.WIRE
COLORITEM CONDITION DATA (DC Voltage)
53 LIntake valve timing control
position sensor (Bank 2)[Engine is running]
•Warm-up condition
• Idle speed0 - 1.0V
[Engine is running]
• Engine speed: 2,000 rpm0 - 1.0V
111 W / BECM relay
(Self shut-off)[Engine is running]
[Ignition switch: OFF]
• For a few seconds after turning ignition
switch OFF0 - 1.5V
[Ignition switch: OFF]
• More than a few seconds after turning igni-
tion switch OFFBATTERY VOLTAGE
(11 - 14V)
11 9
120BR
BRPower supply for ECM[Ignition switch: ON]BATTERY VOLTAGE
(11 - 14V)
PBIB2046E
BBIA0354E
Page 1547 of 3061
EC-464
< SERVICE INFORMATION >
DTC P1140, P1145 IVT CONTROL POSITION SENSOR
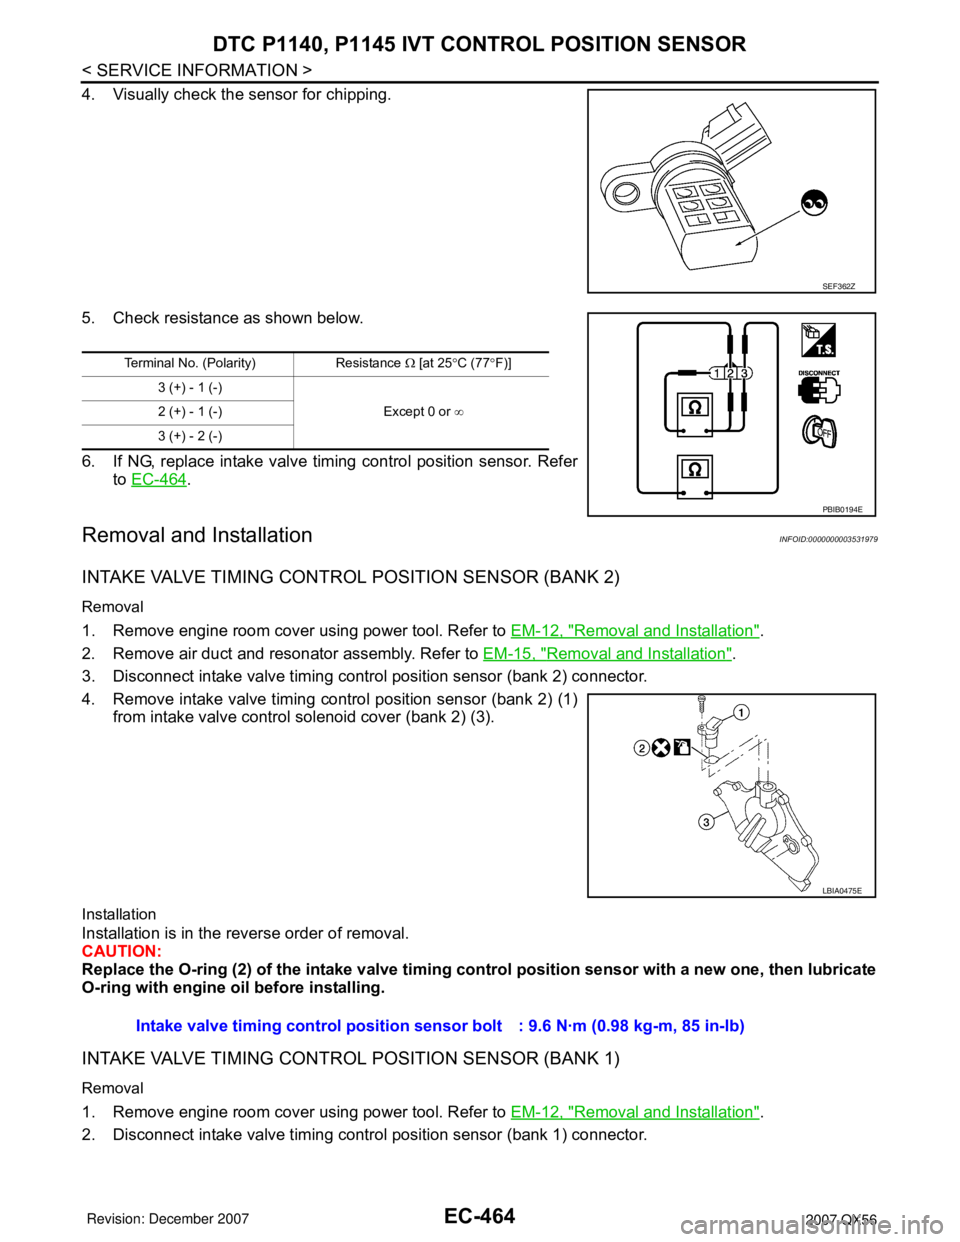
4. Visually check the sensor for chipping.
5. Check resistance as shown below.
6. If NG, replace intake valve timing control position sensor. Refer
to EC-464
.
Removal and InstallationINFOID:0000000003531979
INTAKE VALVE TIMING CONTROL POSITION SENSOR (BANK 2)
Removal
1. Remove engine room cover using power tool. Refer to EM-12, "Removal and Installation".
2. Remove air duct and resonator assembly. Refer to EM-15, "
Removal and Installation".
3. Disconnect intake valve timing control position sensor (bank 2) connector.
4. Remove intake valve timing control position sensor (bank 2) (1)
from intake valve control solenoid cover (bank 2) (3).
Installation
Installation is in the reverse order of removal.
CAUTION:
Replace the O-ring (2) of the intake valve timing control position sensor with a new one, then lubricate
O-ring with engine oil before installing.
INTAKE VALVE TIMING CONTROL POSITION SENSOR (BANK 1)
Removal
1. Remove engine room cover using power tool. Refer to EM-12, "Removal and Installation".
2. Disconnect intake valve timing control position sensor (bank 1) connector.
SEF362Z
Terminal No. (Polarity) Resistance Ω [at 25°C (77°F)]
3 (+) - 1 (-)
Except 0 or ∞ 2 (+) - 1 (-)
3 (+) - 2 (-)
PBIB0194E
LBIA0475E
Intake valve timing control position sensor bolt : 9.6 N·m (0.98 kg-m, 85 in-lb)
Page 1553 of 3061
EC-470
< SERVICE INFORMATION >
DTC P1217 ENGINE OVER TEMPERATURE
On Board Diagnosis Logic
INFOID:0000000003531991
If the cooling fan or another component in the cooling system malfunctions, engine coolant temperature will
rise.
When the engine coolant temperature reaches an abnormally high temperature condition, a malfunction is
indicated.
This self-diagnosis has the one trip detection logic.
CAUTION:
When a malfunction is indicated, be sure to replace the coolant. Refer to CO-9, "
Changing Engine
Coolant". Also, replace the engine oil. Refer to LU-9, "Changing Engine Oil".
1. Fill radiator with coolant up to specified level with a filling speed of 2 liters per minute. Be sure to
use coolant with the proper mixture ratio. Refer to MA-10, "
SAE Viscosity Number".
2. After refilling coolant, run engine to ensure that no water-flow noise is emitted.
Overall Function CheckINFOID:0000000003531992
Use this procedure to check the overall function of the cooling fan. During this check, a DTC might not be con-
firmed.
WARNING:
Never remove the radiator cap and/or reservoir tank cap when the engine is hot. Serious burns could
be caused by high pressure fluid escaping from the radiator and/or reservoir tank.
Wrap a thick cloth around cap. Carefully remove the cap by turning it a quarter turn to allow built-up
pressure to escape. Then turn the cap all the way off.
WITH CONSULT-II
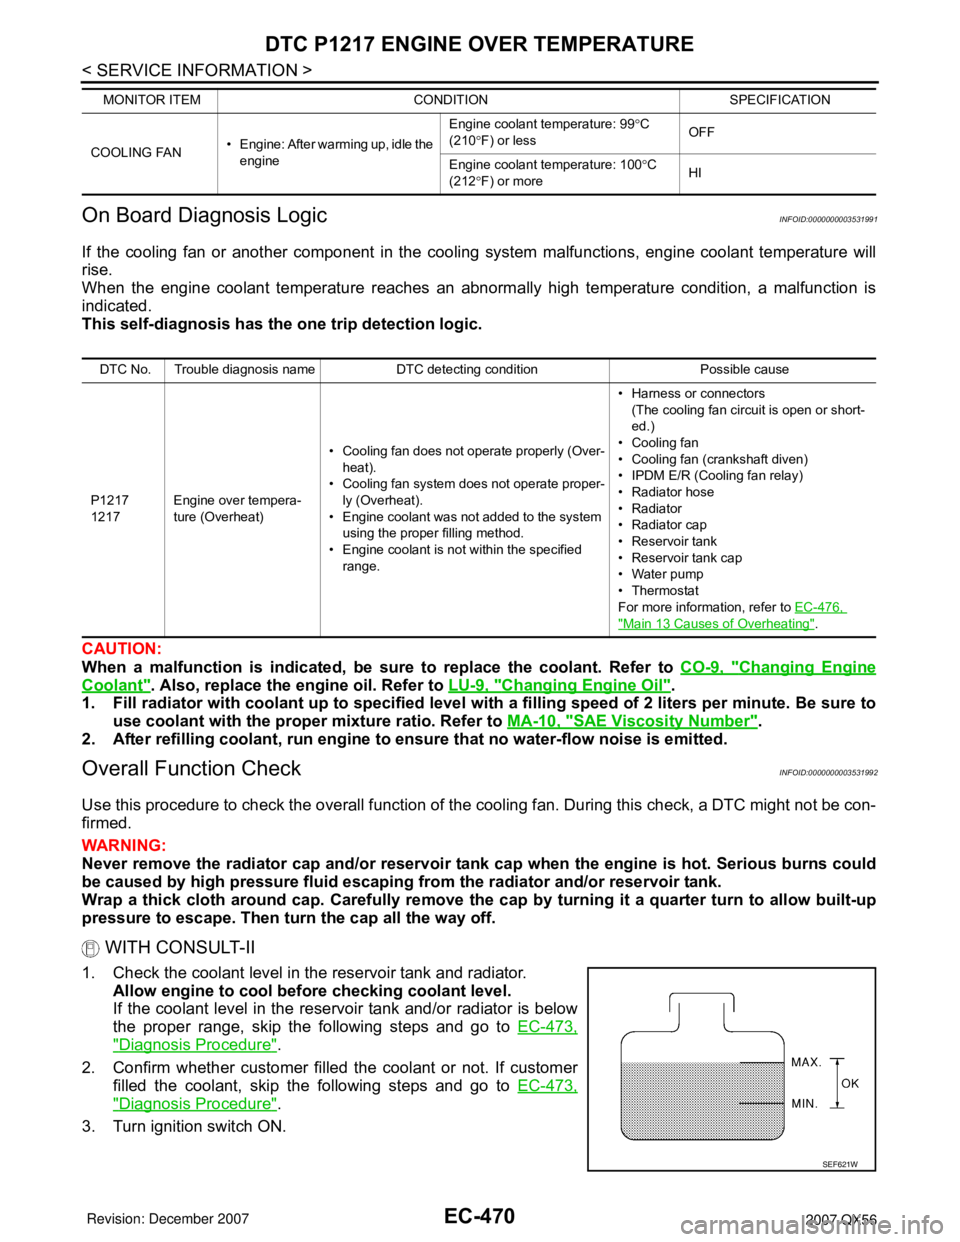
1. Check the coolant level in the reservoir tank and radiator.
Allow engine to cool before checking coolant level.
If the coolant level in the reservoir tank and/or radiator is below
the proper range, skip the following steps and go to EC-473,
"Diagnosis Procedure".
2. Confirm whether customer filled the coolant or not. If customer
filled the coolant, skip the following steps and go to EC-473,
"Diagnosis Procedure".
3. Turn ignition switch ON.
COOLING FAN• Engine: After warming up, idle the
engineEngine coolant temperature: 99°C
(210°F) or lessOFF
Engine coolant temperature: 100°C
(212°F) or moreHI MONITOR ITEM CONDITION SPECIFICATION
DTC No. Trouble diagnosis name DTC detecting condition Possible cause
P1217
1217Engine over tempera-
ture (Overheat)• Cooling fan does not operate properly (Over-
heat).
• Cooling fan system does not operate proper-
ly (Overheat).
• Engine coolant was not added to the system
using the proper filling method.
• Engine coolant is not within the specified
range.• Harness or connectors
(The cooling fan circuit is open or short-
ed.)
• Cooling fan
• Cooling fan (crankshaft diven)
• IPDM E/R (Cooling fan relay)
•Radiator hose
•Radiator
•Radiator cap
• Reservoir tank
• Reservoir tank cap
• Water pump
•Thermostat
For more information, refer to EC-476,
"Main 13 Causes of Overheating".
SEF621W