2007 INFINITI QX56 battery
[x] Cancel search: batteryPage 1082 of 3061
REAR VIEW MONITOR
DI-71
< SERVICE INFORMATION >
C
D
E
F
G
H
I
J
L
MA
B
DI
N
O
P
1. Turn ignition switch OFF.
2. Disconnect rear view camera control unit connector and display
unit connector.
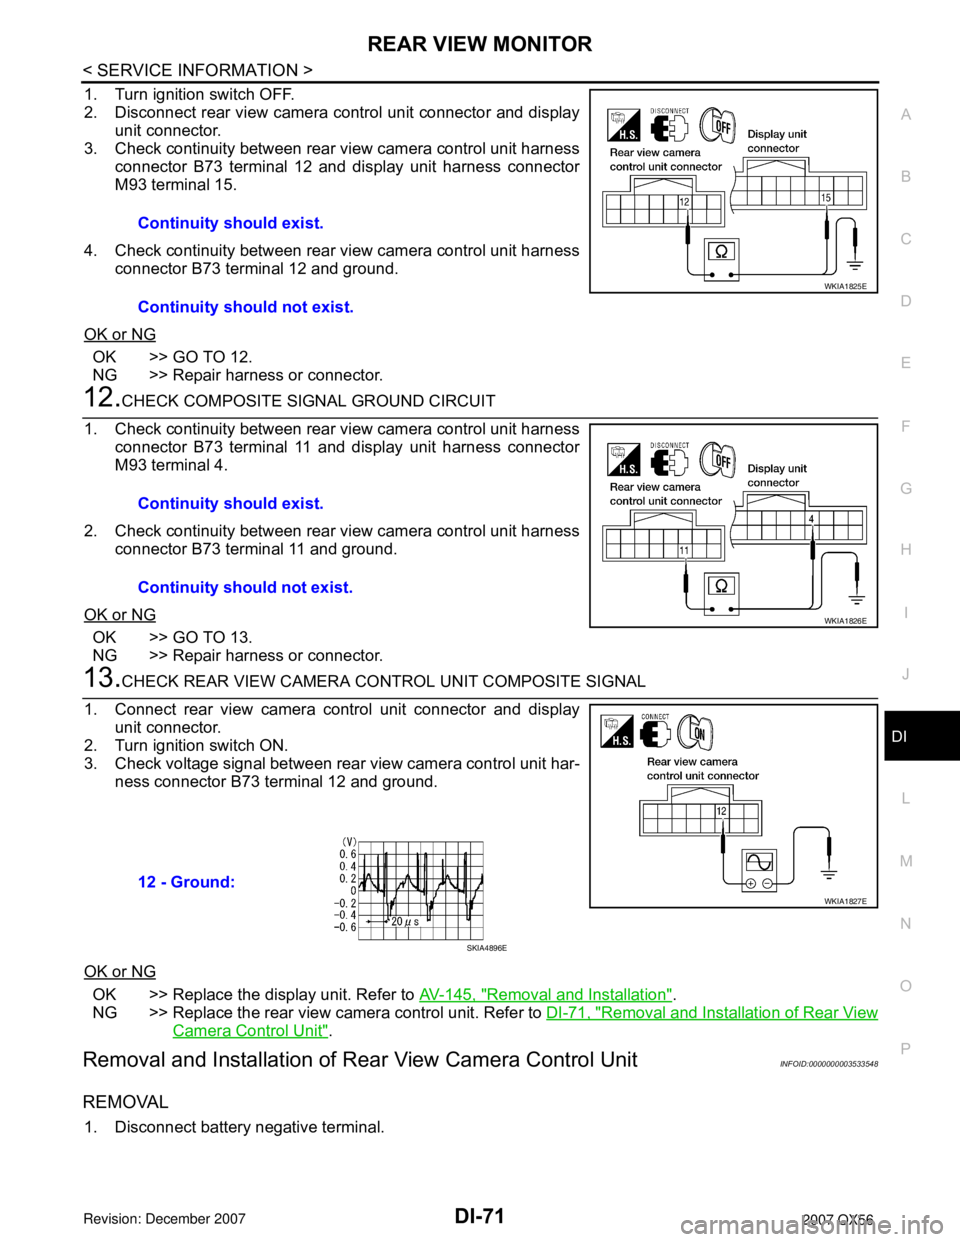
3. Check continuity between rear view camera control unit harness
connector B73 terminal 12 and display unit harness connector
M93 terminal 15.
4. Check continuity between rear view camera control unit harness
connector B73 terminal 12 and ground.
OK or NG
OK >> GO TO 12.
NG >> Repair harness or connector.
12.CHECK COMPOSITE SIGNAL GROUND CIRCUIT
1. Check continuity between rear view camera control unit harness
connector B73 terminal 11 and display unit harness connector
M93 terminal 4.
2. Check continuity between rear view camera control unit harness
connector B73 terminal 11 and ground.
OK or NG
OK >> GO TO 13.
NG >> Repair harness or connector.
13.CHECK REAR VIEW CAMERA CONTROL UNIT COMPOSITE SIGNAL
1. Connect rear view camera control unit connector and display
unit connector.
2. Turn ignition switch ON.
3. Check voltage signal between rear view camera control unit har-
ness connector B73 terminal 12 and ground.
OK or NG
OK >> Replace the display unit. Refer to AV-145, "Removal and Installation".
NG >> Replace the rear view camera control unit. Refer to DI-71, "
Removal and Installation of Rear View
Camera Control Unit".
Removal and Installation of Rear View Camera Control UnitINFOID:0000000003533548
REMOVAL
1. Disconnect battery negative terminal.Continuity should exist.
Continuity should not exist.
WKIA1825E
Continuity should exist.
Continuity should not exist.
WKIA1826E
12 - Ground:
WKIA1827E
SKIA4896E
Page 1089 of 3061

EC-6
DTC P0605 ECM ..............................................444
Component Description .........................................444
On Board Diagnosis Logic .....................................444
DTC Confirmation Procedure ................................444
Diagnosis Procedure .............................................445
DTC P0643 SENSOR POWER SUPPLY ........447
On Board Diagnosis Logic .....................................447
DTC Confirmation Procedure ................................447
Wiring Diagram ......................................................448
Diagnosis Procedure .............................................449
DTC P0850 PNP SWITCH ...............................452
Component Description .........................................452
CONSULT-II Reference Value in Data Monitor
Mode ......................................................................
452
On Board Diagnosis Logic .....................................452
DTC Confirmation Procedure ................................452
Overall Function Check .........................................453
Wiring Diagram ......................................................454
Diagnosis Procedure .............................................455
DTC P1140, P1145 IVT CONTROL POSITION
SENSOR ..........................................................
457
Component Description .........................................457
CONSULT-II Reference Value in Data Monitor
Mode ......................................................................
457
On Board Diagnosis Logic .....................................457
DTC Confirmation Procedure ................................457
Wiring Diagram ......................................................458
Diagnosis Procedure .............................................461
Component Inspection ...........................................463
Removal and Installation .......................................464
DTC P1148, P1168 CLOSED LOOP CON-
TROL ................................................................
466
On Board Diagnosis Logic .....................................466
DTC P1211 TCS CONTROL UNIT ..................467
Description .............................................................467
On Board Diagnosis Logic .....................................467
DTC Confirmation Procedure ................................467
Diagnosis Procedure .............................................467
DTC P1212 TCS COMMUNICATION LINE .....468
Description .............................................................468
On Board Diagnosis Logic .....................................468
DTC Confirmation Procedure ................................468
Diagnosis Procedure .............................................468
DTC P1217 ENGINE OVER TEMPERATURE .469
Description .............................................................469
CONSULT-II Reference Value in Data Monitor
Mode ......................................................................
469
On Board Diagnosis Logic .....................................470
Overall Function Check .........................................470
Wiring Diagram ......................................................472
Diagnosis Procedure .............................................473
Main 13 Causes of Overheating ............................476
Component Inspection ...........................................476
DTC P1225 TP SENSOR ..................................477
Component Description ........................................477
On Board Diagnosis Logic ....................................477
DTC Confirmation Procedure ................................477
Diagnosis Procedure .............................................477
Removal and Installation .......................................478
DTC P1226 TP SENSOR ..................................479
Component Description ........................................479
On Board Diagnosis Logic ....................................479
DTC Confirmation Procedure ................................479
Diagnosis Procedure .............................................479
Removal and Installation .......................................480
DTC P1421 COLD START CONTROL ............481
Description ............................................................481
On Board Diagnosis Logic ....................................481
DTC Confirmation Procedure ................................481
Diagnosis Procedure .............................................481
DTC P1550 BATTERY CURRENT SENSOR ...483
Component Description ........................................483
CONSULT-II Reference Value in Data Monitor
Mode .....................................................................
483
On Board Diagnosis Logic ....................................483
DTC Confirmation Procedure ................................483
Wiring Diagram .....................................................485
Diagnosis Procedure .............................................486
Component Inspection ..........................................488
DTC P1551, P1552 BATTERY CURRENT
SENSOR ...........................................................
489
Component Description ........................................489
CONSULT-II Reference Value in Data Monitor
Mode .....................................................................
489
On Board Diagnosis Logic ....................................489
DTC Confirmation Procedure ................................489
Wiring Diagram .....................................................491
Diagnosis Procedure .............................................492
Component Inspection ..........................................494
DTC P1553 BATTERY CURRENT SENSOR ...495
Component Description ........................................495
CONSULT-II Reference Value in Data Monitor
Mode .....................................................................
495
On Board Diagnosis Logic ....................................495
DTC Confirmation Procedure ................................495
Wiring Diagram .....................................................497
Diagnosis Procedure .............................................498
Component Inspection ..........................................500
DTC P1554 BATTERY CURRENT SENSOR ...501
Component Description ........................................501
CONSULT-II Reference Value in Data Monitor
Mode .....................................................................
501
On Board Diagnosis Logic ....................................501
Overall Function Check .........................................501
Wiring Diagram .....................................................503
Diagnosis Procedure .............................................504
Component Inspection ..........................................506
Page 1100 of 3061
PRECAUTIONS
EC-17
< SERVICE INFORMATION >
C
D
E
F
G
H
I
J
K
L
MA
EC
N
P O
PRECAUTIONS
Precaution for Supplemental Restraint System (SRS) "AIR BAG" and "SEAT BELT
PRE-TENSIONER"
INFOID:0000000003531580
The Supplemental Restraint System such as “AIR BAG” and “SEAT BELT PRE-TENSIONER”, used along
with a front seat belt, helps to reduce the risk or severity of injury to the driver and front passenger for certain
types of collision. This system includes seat belt switch inputs and dual stage front air bag modules. The SRS
system uses the seat belt switches to determine the front air bag deployment, and may only deploy one front
air bag, depending on the severity of a collision and whether the front occupants are belted or unbelted.
Information necessary to service the system safely is included in the SRS and SB section of this Service Man-
ual.
WARNING:
• To avoid rendering the SRS inoperative, which could increase the risk of personal injury or death in
the event of a collision which would result in air bag inflation, all maintenance must be performed by
an authorized NISSAN/INFINITI dealer.
• Improper maintenance, including incorrect removal and installation of the SRS, can lead to personal
injury caused by unintentional activation of the system. For removal of Spiral Cable and Air Bag
Module, see the SRS section.
• Do not use electrical test equipment on any circuit related to the SRS unless instructed to in this
Service Manual. SRS wiring harnesses can be identified by yellow and/or orange harnesses or har-
ness connectors.
On Board Diagnosis (OBD) System of Engine and A/TINFOID:0000000003531581
The ECM has an on board diagnostic system. It will light up the malfunction indicator lamp (MIL) to warn the
driver of a malfunction causing emission deterioration.
CAUTION:
• Be sure to turn the ignition switch OFF and disconnect the negative battery cable before any repair
or inspection work. The open/short circuit of related switches, sensors, solenoid valves, etc. will
cause the MIL to light up.
• Be sure to connect and lock the connectors securely after work. A loose (unlocked) connector will
cause the MIL to light up due to the open circuit. (Be sure the connector is free from water, grease,
dirt, bent terminals, etc.)
• Certain systems and components, especially those related to OBD, may use a new style slide-lock-
ing type harness connector. For description and how to disconnect, refer to PG-66
.
• Be sure to route and secure the harnesses properly after work. The interference of the harness with
a bracket, etc. may cause the MIL to light up due to the short circuit.
• Be sure to connect rubber tubes properly after work. A misconnected or disconnected rubber tube
may cause the MIL to light up due to the malfunction of the EVAP system or fuel injection system,
etc.
• Be sure to erase the unnecessary malfunction information (repairs completed) from the ECM and
TCM (Transmission control module) before returning the vehicle to the customer.
PrecautionINFOID:0000000003531582
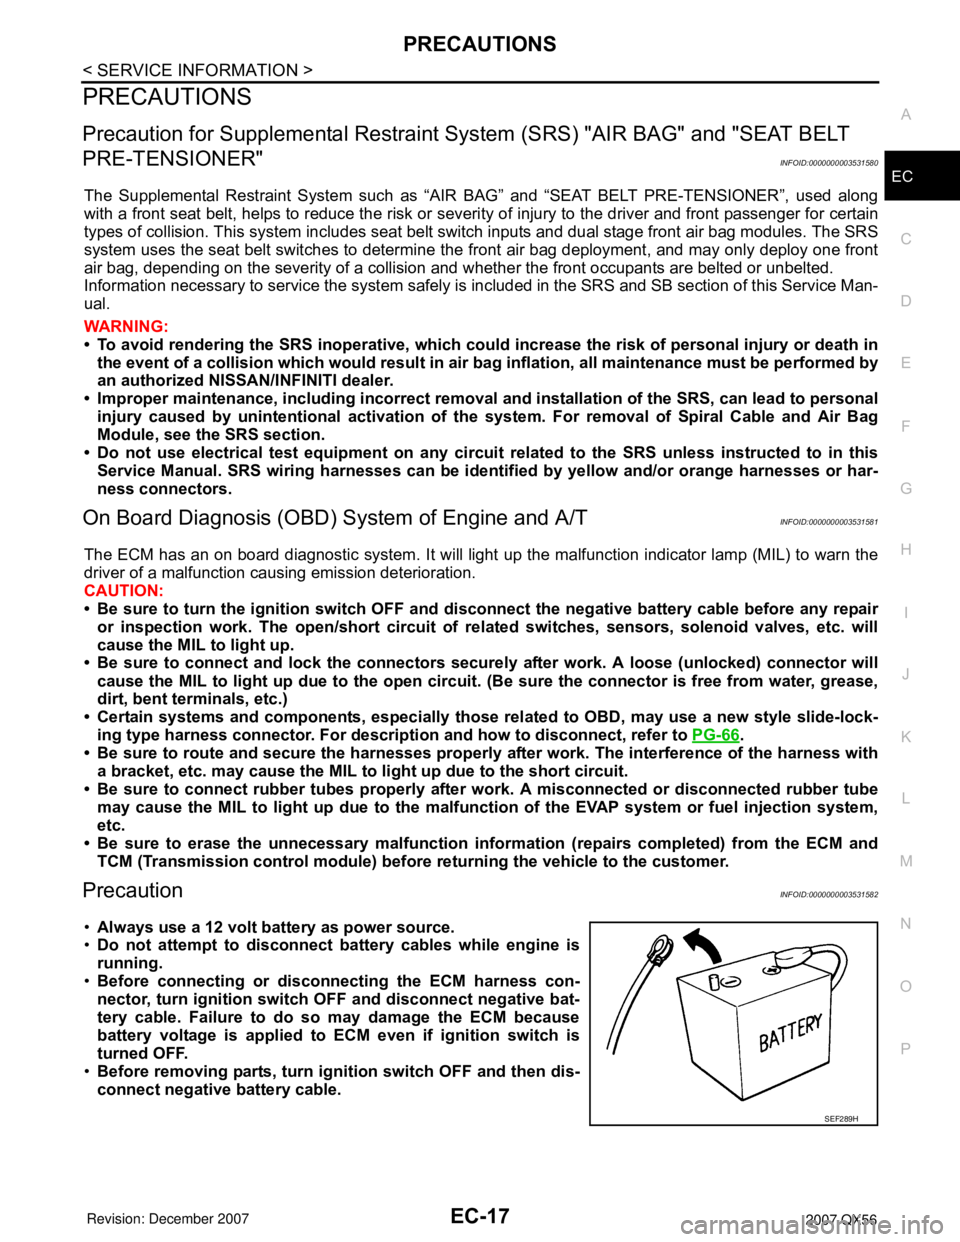
•Always use a 12 volt battery as power source.
•Do not attempt to disconnect battery cables while engine is
running.
•Before connecting or disconnecting the ECM harness con-
nector, turn ignition switch OFF and disconnect negative bat-
tery cable. Failure to do so may damage the ECM because
battery voltage is applied to ECM even if ignition switch is
turned OFF.
•Before removing parts, turn ignition switch OFF and then dis-
connect negative battery cable.
SEF289H
Page 1101 of 3061
EC-18
< SERVICE INFORMATION >
PRECAUTIONS
•Do not disassemble ECM.
•If a battery cable is disconnected, the memory will return to
the ECM value.
The ECM will now start to self-control at its initial value.
Engine operation can vary slightly when the terminal is dis-
connected. However, this is not an indication of a malfunc-
tion. Do not replace parts because of a slight variation.
•If the battery is disconnected, the following emission-related
diagnostic information will be lost within 24 hours.
-Diagnostic trouble codes
-1st trip diagnostic trouble codes
-Freeze frame data
-1st trip freeze frame data
-System readiness test (SRT) codes
-Test values
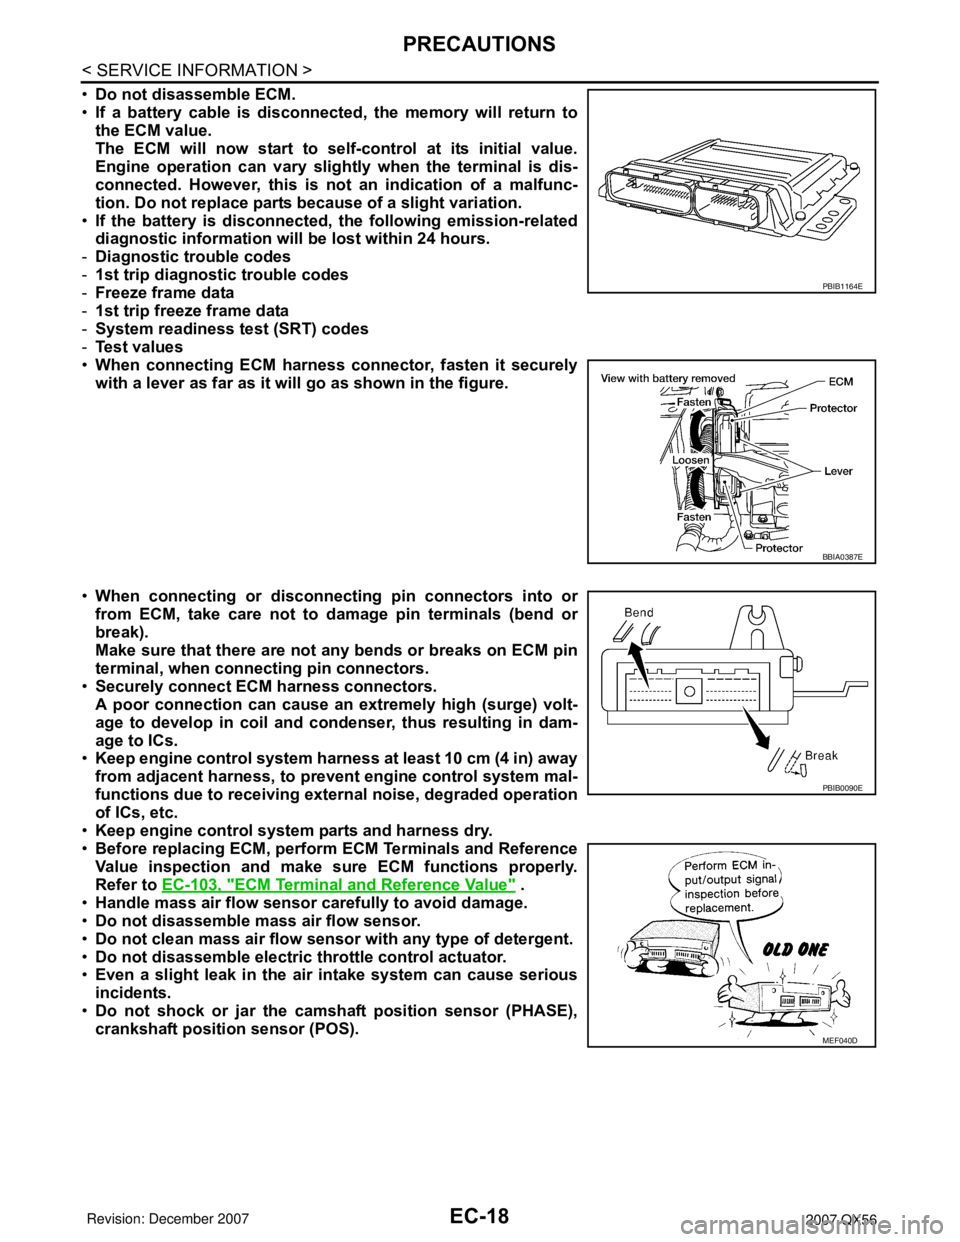
•When connecting ECM harness connector, fasten it securely
with a lever as far as it will go as shown in the figure.
•When connecting or disconnecting pin connectors into or
from ECM, take care not to damage pin terminals (bend or
break).
Make sure that there are not any bends or breaks on ECM pin
terminal, when connecting pin connectors.
•Securely connect ECM harness connectors.
A poor connection can cause an extremely high (surge) volt-
age to develop in coil and condenser, thus resulting in dam-
age to ICs.
•Keep engine control system harness at least 10 cm (4 in) away
from adjacent harness, to prevent engine control system mal-
functions due to receiving external noise, degraded operation
of ICs, etc.
•Keep engine control system parts and harness dry.
•Before replacing ECM, perform ECM Terminals and Reference
Value inspection and make sure ECM functions properly.
Refer to EC-103, "
ECM Terminal and Reference Value" .
•Handle mass air flow sensor carefully to avoid damage.
•Do not disassemble mass air flow sensor.
•Do not clean mass air flow sensor with any type of detergent.
•Do not disassemble electric throttle control actuator.
•Even a slight leak in the air intake system can cause serious
incidents.
•Do not shock or jar the camshaft position sensor (PHASE),
crankshaft position sensor (POS).
PBIB1164E
BBIA0387E
PBIB0090E
MEF040D
Page 1108 of 3061
ENGINE CONTROL SYSTEM
EC-25
< SERVICE INFORMATION >
C
D
E
F
G
H
I
J
K
L
MA
EC
N
P O
*1: This sensor is not used to control the engine system. This is used only for the on board diagnosis.
*2: This signal is sent to the ECM through CAN communication line.
*3: ECM determines the start signal status by the signals of engine speed and battery voltage.
SYSTEM DESCRIPTION
The amount of fuel injected from the fuel injector is determined by the ECM. The ECM controls the length of
time the valve remains open (injection pulse duration). The amount of fuel injected is a program value in the
ECM memory. The program value is preset by engine operating conditions. These conditions are determined
by input signals (for engine speed and intake air) from both the crankshaft position sensor and the mass air
flow sensor.
VARIOUS FUEL INJECTION INCREASE/DECREASE COMPENSATION
In addition, the amount of fuel injected is compensated to improve engine performance under various operat-
ing conditions as listed below.
• When starting the engine
• During acceleration
• Hot-engine operation
• When selector lever is changed from N to D
• High-load, high-speed operation
• During deceleration
• During high engine speed operation
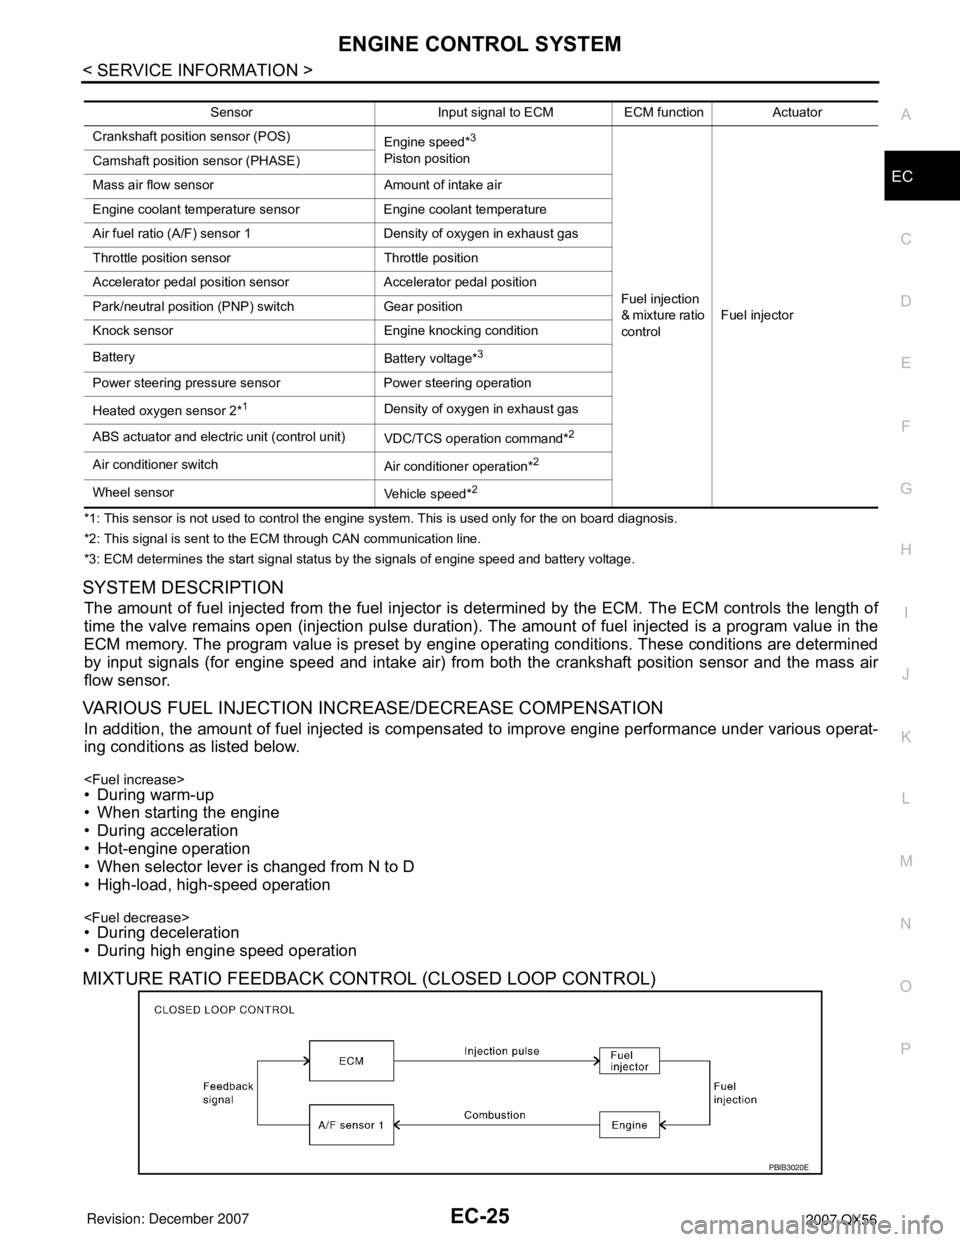
MIXTURE RATIO FEEDBACK CONTROL (CLOSED LOOP CONTROL)
Sensor Input signal to ECM ECM function Actuator
Crankshaft position sensor (POS)
Engine speed*
3
Piston position
Fuel injection
& mixture ratio
controlFuel injector Camshaft position sensor (PHASE)
Mass air flow sensor Amount of intake air
Engine coolant temperature sensor Engine coolant temperature
Air fuel ratio (A/F) sensor 1 Density of oxygen in exhaust gas
Throttle position sensor Throttle position
Accelerator pedal position sensor Accelerator pedal position
Park/neutral position (PNP) switch Gear position
Knock sensor Engine knocking condition
Battery
Battery voltage*
3
Power steering pressure sensor Power steering operation
Heated oxygen sensor 2*
1Density of oxygen in exhaust gas
ABS actuator and electric unit (control unit)
VDC/TCS operation command*
2
Air conditioner switch
Air conditioner operation*2
Wheel sensor
Vehicle speed*2
PBIB3020E
Page 1110 of 3061

ENGINE CONTROL SYSTEM
EC-27
< SERVICE INFORMATION >
C
D
E
F
G
H
I
J
K
L
MA
EC
N
P O
This system is used when the engine is being started and/or if the fail-safe system (CPU) is operating.
FUEL SHUT-OFF
Fuel to each cylinder is cut off during deceleration, operation of the engine at excessively high speeds or oper-
ation of the vehicle at excessively high speed.
Electronic Ignition (EI) SystemINFOID:0000000003531587
INPUT/OUTPUT SIGNAL CHART
*1: This signal is sent to the ECM through CAN communication line.
*2: ECM determines the start signal status by the signals of engine speed and battery voltage.
SYSTEM DESCRIPTION
Firing order: 1 - 8 - 7 - 3 - 6 - 5 - 4 -2
The ignition timing is controlled by the ECM to maintain the best air-fuel ratio for every running condition of the
engine. The ignition timing data is stored in the ECM.
The ECM receives information such as the injection pulse width and camshaft position sensor signal. Comput-
ing this information, ignition signals are transmitted to the power transistor.
During the following conditions, the ignition timing is revised by the ECM according to the other data stored in
the ECM.
• At starting
• During warm-up
•At idle
• At low battery voltage
• During acceleration
The knock sensor retard system is designed only for emergencies. The basic ignition timing is programmed
within the anti-knocking zone, if recommended fuel is used under dry conditions. The retard system does not
operate under normal driving conditions. If engine knocking occurs, the knock sensor monitors the condition.
The signal is transmitted to the ECM. The ECM retards the ignition timing to eliminate the knocking condition.
Fuel Cut Control (at No Load and High Engine Speed)INFOID:0000000003531588
INPUT/OUTPUT SIGNAL CHART
*: This signal is sent to the ECM through CAN communication line.Sensor Input signal to ECM ECM function Actuator
Crankshaft position sensor (POS)
Engine speed*
2
Piston position
Ignition timing
controlPower transistor Camshaft position sensor (PHASE)
Mass air flow sensor Amount of intake air
Engine coolant temperature sensor Engine coolant temperature
Throttle position sensor Throttle position
Accelerator pedal position sensor Accelerator pedal position
Knock sensor Engine knocking
Park/neutral position (PNP) switch Gear position
Battery
Battery voltage*
2
Wheel sensor
Vehicle speed*1
Sensor Input signal to ECM ECM function Actuator
Park/neutral position (PNP) switch Neutral position
Fuel cut control Fuel injector Accelerator pedal position sensor Accelerator pedal position
Engine coolant temperature sensor Engine coolant temperature
Crankshaft position sensor (POS)
Camshaft position sensor (PHASE)Engine speed
Wheel sensor Vehicle speed*
Page 1112 of 3061

AIR CONDITIONING CUT CONTROL
EC-29
< SERVICE INFORMATION >
C
D
E
F
G
H
I
J
K
L
MA
EC
N
P O
AIR CONDITIONING CUT CONTROL
Input/Output Signal ChartINFOID:0000000003531589
*1: This signal is sent to the ECM through CAN communication line.
*2: ECM determines the start signal status by the signals of engine speed and battery voltage.
System DescriptionINFOID:0000000003531590
This system improves engine operation when the air conditioner is used.
Under the following conditions, the air conditioner is turned OFF.
• When the accelerator pedal is fully depressed.
• When cranking the engine.
• At high engine speeds.
• When the engine coolant temperature becomes excessively high.
• When operating power steering during low engine speed or low vehicle speed.
• When engine speed is excessively low.
• When refrigerant pressure is excessively low or high.
Sensor Input Signal to ECM ECM function Actuator
Air conditioner switch
Air conditioner ON signal*
1
Air conditioner
cut controlAir conditioner relay Accelerator pedal position sensor Accelerator pedal position
Crankshaft position sensor (POS)
Camshaft position sensor (PHASE)Engine speed*
2
Engine coolant temperature sensor Engine coolant temperature
Battery
Battery voltage*
2
Refrigerant pressure sensor Refrigerant pressure
Power steering pressure sensor Power steering operation
Wheel sensor
Vehicle speed*
1
Page 1122 of 3061
EVAPORATIVE EMISSION SYSTEM
EC-39
< SERVICE INFORMATION >
C
D
E
F
G
H
I
J
K
L
MA
EC
N
P O
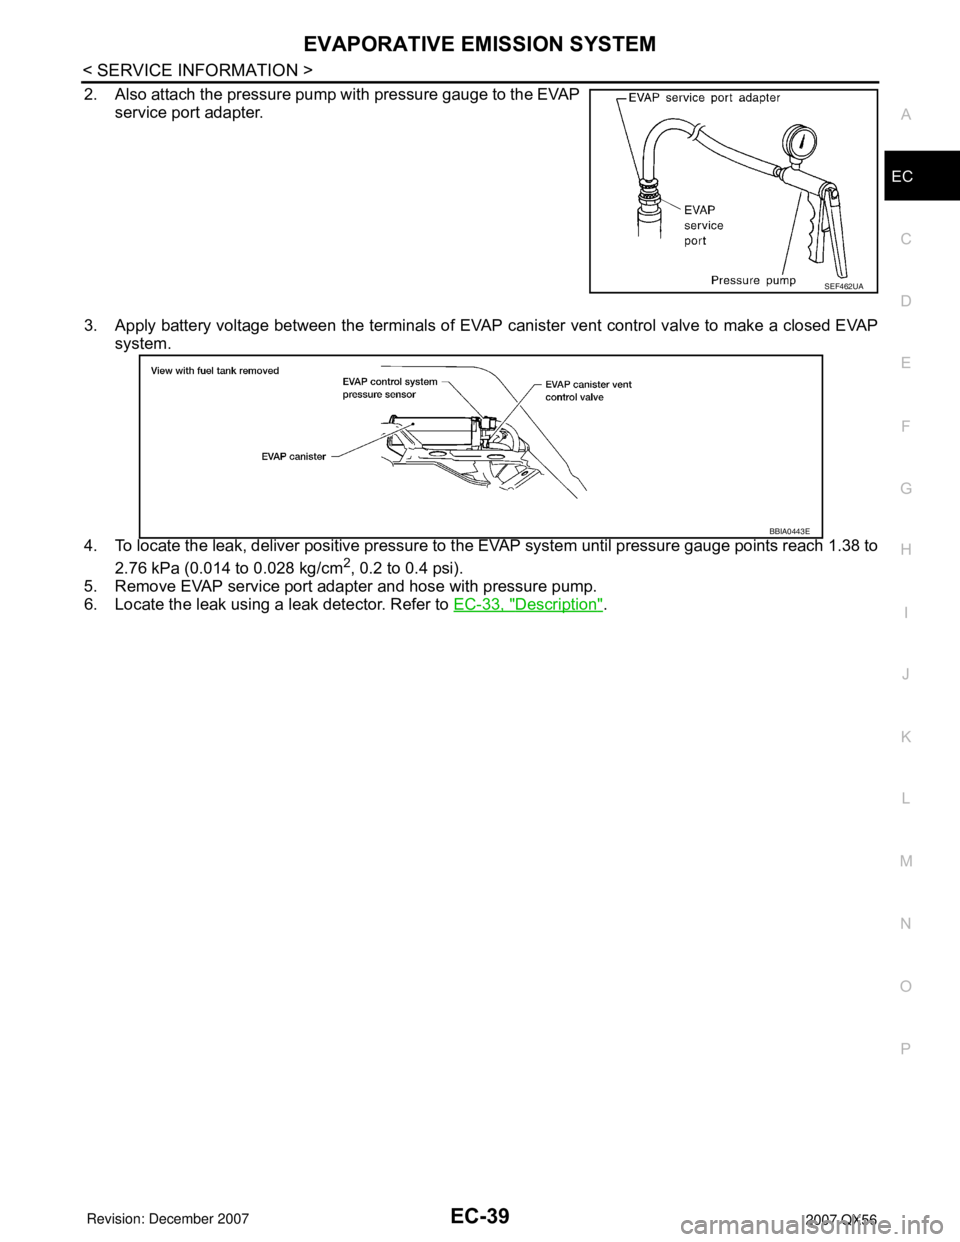
2. Also attach the pressure pump with pressure gauge to the EVAP
service port adapter.
3. Apply battery voltage between the terminals of EVAP canister vent control valve to make a closed EVAP
system.
4. To locate the leak, deliver positive pressure to the EVAP system until pressure gauge points reach 1.38 to
2.76 kPa (0.014 to 0.028 kg/cm
2, 0.2 to 0.4 psi).
5. Remove EVAP service port adapter and hose with pressure pump.
6. Locate the leak using a leak detector. Refer to EC-33, "
Description".
SEF462UA
BBIA0443E