2006 DODGE RAM SRT-10 relay
[x] Cancel search: relayPage 1045 of 5267
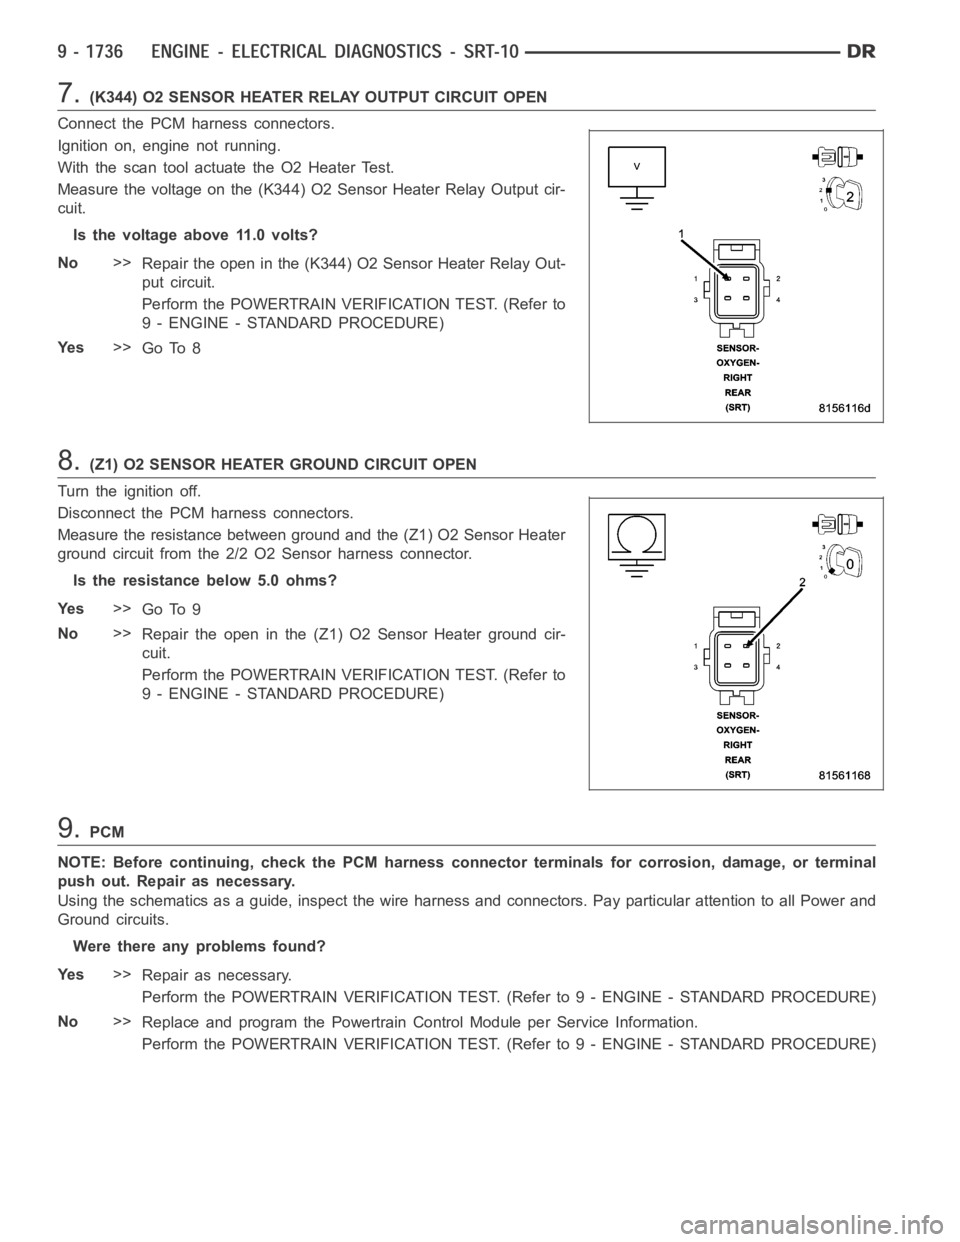
7.(K344) O2 SENSOR HEATER RELAY OUTPUT CIRCUIT OPEN
Connect the PCM harness connectors.
Ignition on, engine not running.
With the scan tool actuate the O2 Heater Test.
Measure the voltage on the (K344) O2 Sensor Heater Relay Output cir-
cuit.
Is the voltage above 11.0 volts?
No>>
Repair the open in the (K344) O2 Sensor Heater Relay Out-
put circuit.
Perform the POWERTRAIN VERIFICATION TEST. (Refer to
9 - ENGINE - STANDARD PROCEDURE)
Ye s>>
Go To 8
8.(Z1) O2 SENSOR HEATER GROUND CIRCUIT OPEN
Turn the ignition off.
Disconnect the PCM harness connectors.
Measure the resistance between ground and the (Z1) O2 Sensor Heater
ground circuit from the 2/2 O2 Sensor harness connector.
Is the resistance below 5.0 ohms?
Ye s>>
Go To 9
No>>
Repair the open in the (Z1) O2 Sensor Heater ground cir-
cuit.
Perform the POWERTRAIN VERIFICATION TEST. (Refer to
9 - ENGINE - STANDARD PROCEDURE)
9.PCM
NOTE: Before continuing, check the PCM harness connector terminals for corrosion, damage, or terminal
push out. Repair as necessary.
Using the schematics as a guide, inspect the wire harness and connectors. Pay particular attention to all Power and
Ground circuits.
Were there any problems found?
Ye s>>
Repair as necessary.
Perform the POWERTRAIN VERIFICATION TEST. (Refer to 9 - ENGINE - STANDARD PROCEDURE)
No>>
Replace and program the Powertrain Control Module per Service Information.
Perform the POWERTRAIN VERIFICATION TEST. (Refer to 9 - ENGINE - STANDARD PROCEDURE)
Page 1050 of 5267
When Monitored:
With battery voltage greater than 9 volts, at a cold start, ECT less than 147°F, battery temperature sensor
equal to or less than 27°F, and engine at idle for at least 12 seconds.
Set Condition:
O2 sensor voltage greater than 3 volts for 60 to 240 seconds.
Possible Causes
(K344) O2 SENSOR HEATER RELAY OUTPUT CIRCUIT OPEN
(K344) O2 SENSOR HEATER RELAY OUTPUT CIRCUIT SHORTED TO GROUND
(K127) O2 HEATER RELAY CONTROL CIRCUIT OPEN
(K127) O2 HEATER RELAY CONTROL CIRCUIT SHORTED TO GROUND
(Z1) HEATER GROUND CIRCUIT OPEN
O2 SENSOR
PCM
Always perform the Pre-Diagnostic Troubleshooting procedure before proceeding. (Refer to 9 - ENGINE -
DIAGNOSIS AND TESTING).
Diagnostic Test
1.O2 SENSOR HEATER OPERATION
Turn the ignition off.
NOTE: Wait a minimum of 8 minutes to allow the O2 Sensor to cool down before continuing the test.
Ignition on, engine not running.
With the scan tool, actuate the O2 Heater Test.
With the scan tool, monitor O2 Sensor voltage for at least 2 minutes.
Does the voltage stabilize between 0.1 and 0.3 of a volt during the Heater test?
Ye s>>
Refer to the INTERMITTENT CONDITIONSymptom (Diagnostic Procedure).
Perform the POWERTRAIN VERIFICATION TEST. (Refer to 9 - ENGINE - STANDARD PROCEDURE)
No>>
Go To 2
2.O2 SENSOR HEATER ELEMENT
Turn the ignition off.
NOTE: Allow the O2 Sensor to cool to room temperature.
Disconnect the O2 Sensor harness connector.
Measure the resistance across the O2 Sensor Heater element component side.
NOTE: The resistance value will increase with warmer temperatures.
Is the resistance between 4.0 and 5.0 ohms at 70° F (21.1°C)?
Ye s>>
Go To 3
No>>
Replace the O2 Sensor.
Perform the POWERTRAIN VERIFICATION TEST. (Refer to 9 - ENGINE - STANDARD PROCEDURE)
Page 1051 of 5267
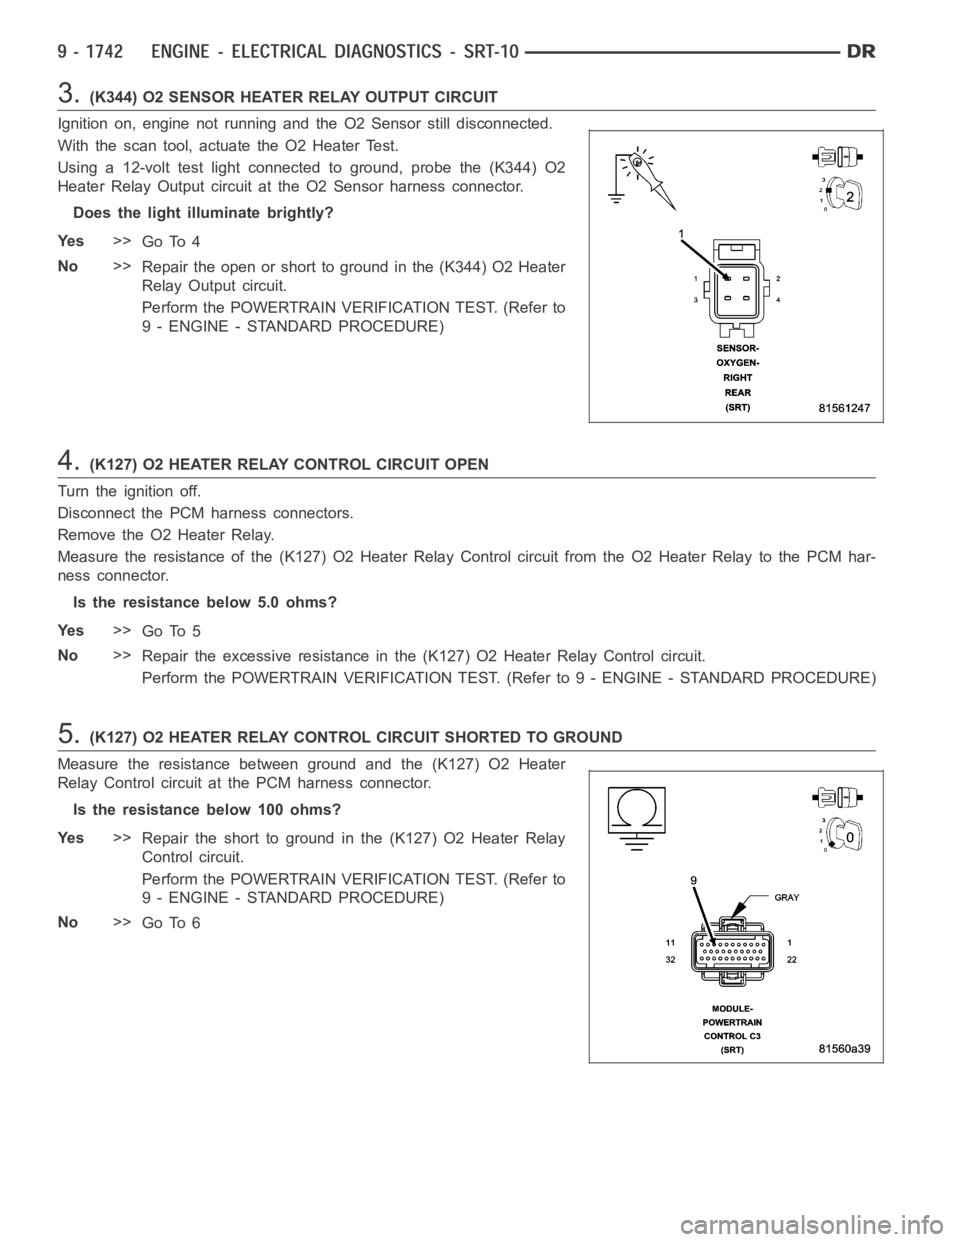
3.(K344) O2 SENSOR HEATER RELAY OUTPUT CIRCUIT
Ignition on, engine not running and the O2 Sensor still disconnected.
With the scan tool, actuate the O2 Heater Test.
Using a 12-volt test light connected to ground, probe the (K344) O2
Heater Relay Output circuit at the O2 Sensor harness connector.
Does the light illuminate brightly?
Ye s>>
Go To 4
No>>
Repair the open or short to ground in the (K344) O2 Heater
Relay Output circuit.
Perform the POWERTRAIN VERIFICATION TEST. (Refer to
9 - ENGINE - STANDARD PROCEDURE)
4.(K127) O2 HEATER RELAY CONTROL CIRCUIT OPEN
Turn the ignition off.
Disconnect the PCM harness connectors.
RemovetheO2HeaterRelay.
Measure the resistance of the (K127) O2 Heater Relay Control circuit from the O2 Heater Relay to the PCM har-
ness connector.
Is the resistance below 5.0 ohms?
Ye s>>
Go To 5
No>>
Repair the excessive resistance in the (K127) O2 Heater Relay Control circuit.
Perform the POWERTRAIN VERIFICATION TEST. (Refer to 9 - ENGINE - STANDARD PROCEDURE)
5.(K127) O2 HEATER RELAY CONTROL CIRCUIT SHORTED TO GROUND
Measure the resistance between ground and the (K127) O2 Heater
Relay Control circuit at the PCM harness connector.
Istheresistancebelow100ohms?
Ye s>>
Repair the short to ground in the (K127) O2 Heater Relay
Control circuit.
Perform the POWERTRAIN VERIFICATION TEST. (Refer to
9 - ENGINE - STANDARD PROCEDURE)
No>>
Go To 6
Page 1087 of 5267
When Monitored:
With battery voltage greater than 10.4 volts, the auto shutdown relay energized, injector pulse width less than
10ms, and engine speed less than 3000 rpm.
Set Condition:
This trouble code takes .64 to 10.0 seconds to set when no inductive kick is sensed .18ms after injector turn
off, and with no other injectors on.
Possible Causes
(K342) ASD RELAY OUTPUT CIRCUIT
(K11) INJECTOR CONTROL NO.1 CIRCUIT OPEN
(K11) INJECTOR CONTROL NO.1 CIRCUIT SHORTED TO GROUND
FUEL INJECTOR
PCM
Always perform the Pre-Diagnostic Troubleshooting procedure before proceeding. (Refer to 9 - ENGINE -
DIAGNOSIS AND TESTING).
Diagnostic Test
1.ACTIVE DTC
Ignition on, engine not running.
With a scan tool, read DTCs.
Is the DTC active at this time?
Ye s>>
Go To 2
No>>
Refer to the INTERMITTENT CONDITION Diagnostic Procedure.
Perform the POWERTRAIN VERIFICATION TEST. (Refer to 9 - ENGINE - STANDARD PROCEDURE)
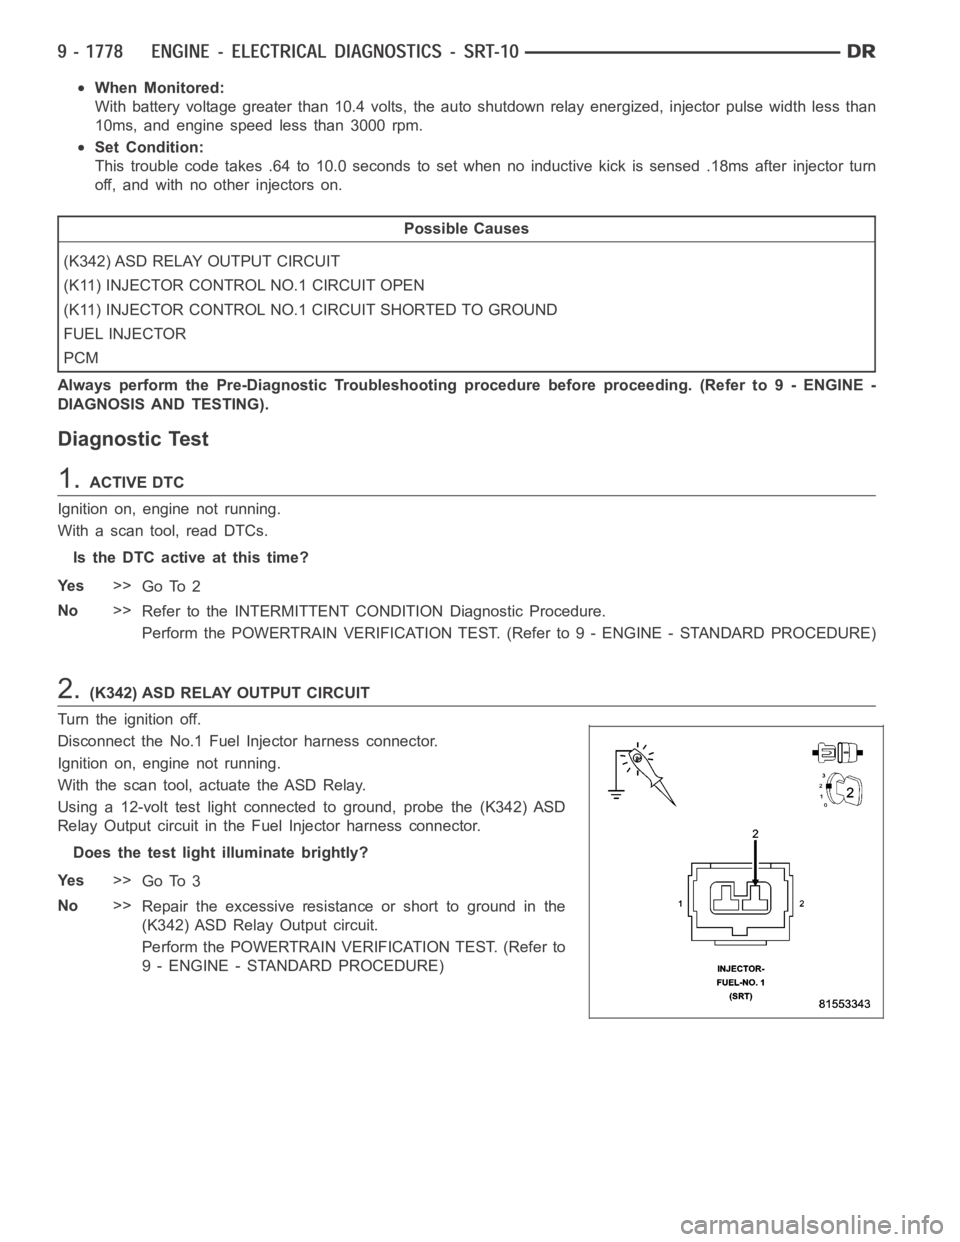
2.(K342) ASD RELAY OUTPUT CIRCUIT
Turn the ignition off.
Disconnect the No.1 Fuel Injector harness connector.
Ignition on, engine not running.
With the scan tool, actuate the ASD Relay.
Using a 12-volt test light connected to ground, probe the (K342) ASD
Relay Output circuit in the Fuel Injector harness connector.
Does the test light illuminate brightly?
Ye s>>
Go To 3
No>>
Repair the excessive resistanceorshorttogroundinthe
(K342) ASD Relay Output circuit.
Perform the POWERTRAIN VERIFICATION TEST. (Refer to
9 - ENGINE - STANDARD PROCEDURE)
Page 1091 of 5267
When Monitored:
With battery voltage greater than 10.4 volts, the auto shutdown relay energized, injector pulse width less than
10ms, and engine speed less than 3000 rpm.
Set Condition:
This trouble code takes .64 to 10.0 seconds to set when no inductive kick is sensed .18ms after injector turn
off, and with no other injectors on.
Possible Causes
(K342) ASD RELAY OUTPUT CIRCUIT
(K12) INJECTOR CONTROL NO.2 CIRCUIT OPEN
(K12) INJECTOR CONTROL NO.2 CIRCUIT SHORTED TO GROUND
FUEL INJECTOR
PCM
Always perform the Pre-Diagnostic Troubleshooting procedure before proceeding. (Refer to 9 - ENGINE -
DIAGNOSIS AND TESTING).
Diagnostic Test
1.ACTIVE DTC
Ignition on, engine not running.
With a scan tool, read DTCs.
Is the DTC active at this time?
Ye s>>
Go To 2
No>>
Refer to the INTERMITTENT CONDITION Diagnostic Procedure.
Perform the POWERTRAIN VERIFICATION TEST. (Refer to 9 - ENGINE - STANDARD PROCEDURE)
2.(K342) ASD RELAY OUTPUT CIRCUIT
Turn the ignition off.
Disconnect the No.2 Fuel Injector harness connector.
Ignition on, engine not running.
With the scan tool, actuate the ASD Relay.
Using a 12-volt test light connected to ground, probe the (K342) ASD Relay Output circuit in the No.2 Fuel Injector
harness connector.
Does the test light illuminate brightly?
Ye s>>
Go To 3
No>>
Repair the excessive resistance or short to ground in the (K342) ASD Relay Output circuit.
Perform the POWERTRAIN VERIFICATION TEST. (Refer to 9 - ENGINE - STANDARD PROCEDURE)
Page 1095 of 5267
When Monitored:
With battery voltage greater than 10.4 volts, the auto shutdown relay energized, injector pulse width less than
10ms, and engine speed less than 3000 rpm.
Set Condition:
This trouble code takes .64 to 10.0 seconds to set when no inductive kick is sensed .18ms after injector turn
off, and with no other injectors on.
Possible Causes
(K342) ASD RELAY OUTPUT CIRCUIT
(K13) INJECTOR CONTROL NO.3 CIRCUIT OPEN
(K13) INJECTOR CONTROL NO.3 CIRCUIT SHORTED TO GROUND
FUEL INJECTOR
PCM
Always perform the Pre-Diagnostic Troubleshooting procedure before proceeding. (Refer to 9 - ENGINE -
DIAGNOSIS AND TESTING).
Diagnostic Test
1.ACTIVE DTC
Ignition on, engine not running.
With a scan tool, read DTCs.
Is the DTC active at this time?
Ye s>>
Go To 2
No>>
Refer to the INTERMITTENT CONDITION Diagnostic Procedure.
Perform the POWERTRAIN VERIFICATION TEST. (Refer to 9 - ENGINE - STANDARD PROCEDURE)
2.(K342) ASD RELAY OUTPUT CIRCUIT
Turn the ignition off.
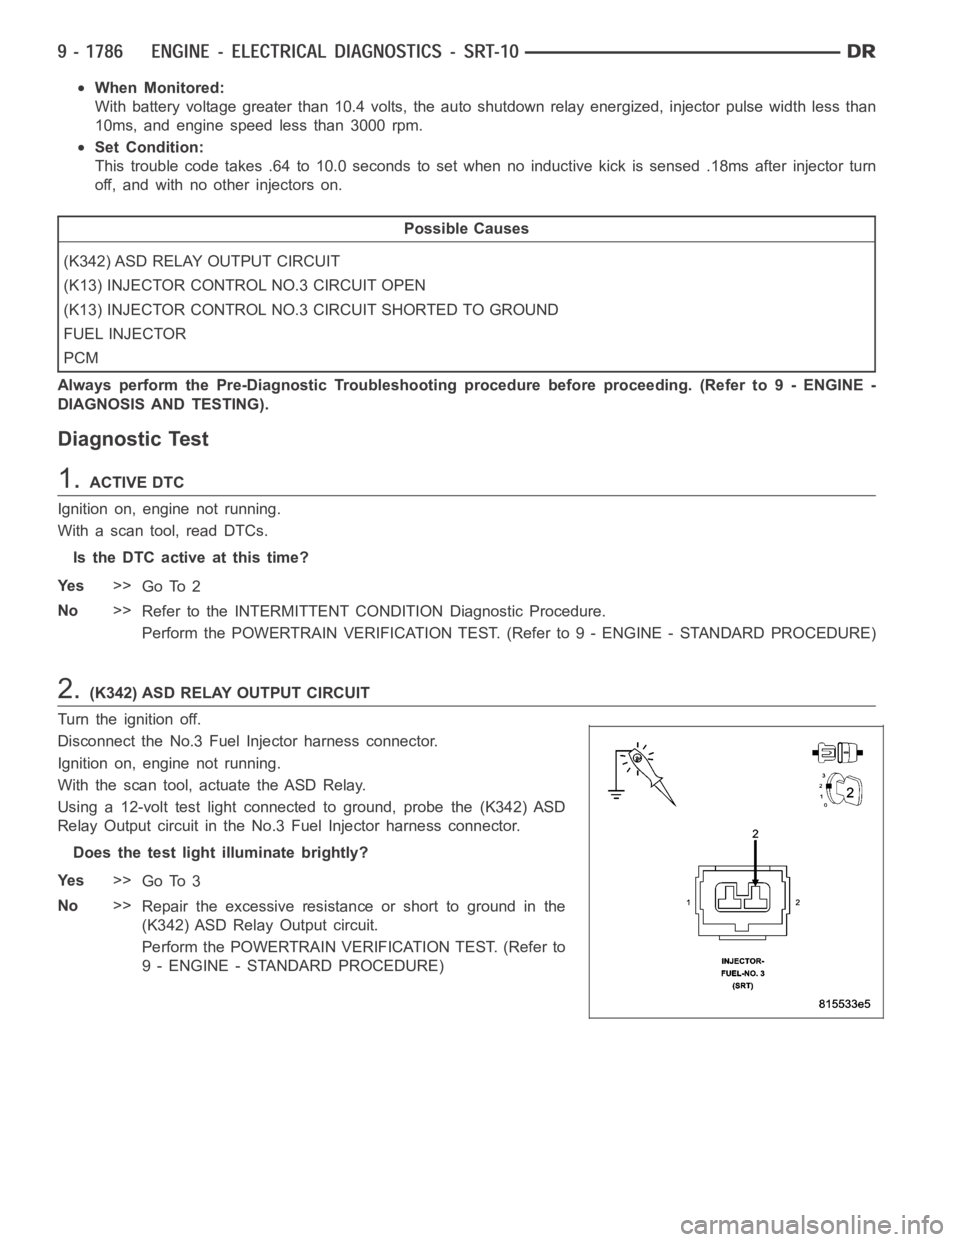
Disconnect the No.3 Fuel Injector harness connector.
Ignition on, engine not running.
With the scan tool, actuate the ASD Relay.
Using a 12-volt test light connected to ground, probe the (K342) ASD
Relay Output circuit in the No.3 Fuel Injector harness connector.
Does the test light illuminate brightly?
Ye s>>
Go To 3
No>>
Repair the excessive resistanceorshorttogroundinthe
(K342) ASD Relay Output circuit.
Perform the POWERTRAIN VERIFICATION TEST. (Refer to
9 - ENGINE - STANDARD PROCEDURE)
Page 1099 of 5267
When Monitored:
With battery voltage greater than 10.4 volts, the auto shutdown relay energized, injector pulse width less than
10ms, and engine speed less than 3000 rpm.
Set Condition:
This trouble code takes .64 to 10.0 seconds to set when no inductive kick is sensed .18ms after injector turn
off, and with no other injectors on.
Possible Causes
(K342) ASD RELAY OUTPUT CIRCUIT
(K14) INJECTOR CONTROL NO.4 CIRCUIT OPEN
(K14) INJECTOR CONTROL NO.4 CIRCUIT SHORTED TO GROUND
FUEL INJECTOR
PCM
Always perform the Pre-Diagnostic Troubleshooting procedure before proceeding. (Refer to 9 - ENGINE -
DIAGNOSIS AND TESTING).
Diagnostic Test
1.ACTIVE DTC
Ignition on, engine not running.
With a scan tool, read DTCs.
Is the DTC active at this time?
Ye s>>
Go To 2
No>>
Refer to the INTERMITTENT CONDITION Diagnostic Procedure.
Perform the POWERTRAIN VERIFICATION TEST. (Refer to 9 - ENGINE - STANDARD PROCEDURE)
2.(K342) ASD RELAY OUTPUT CIRCUIT
Turn the ignition off.
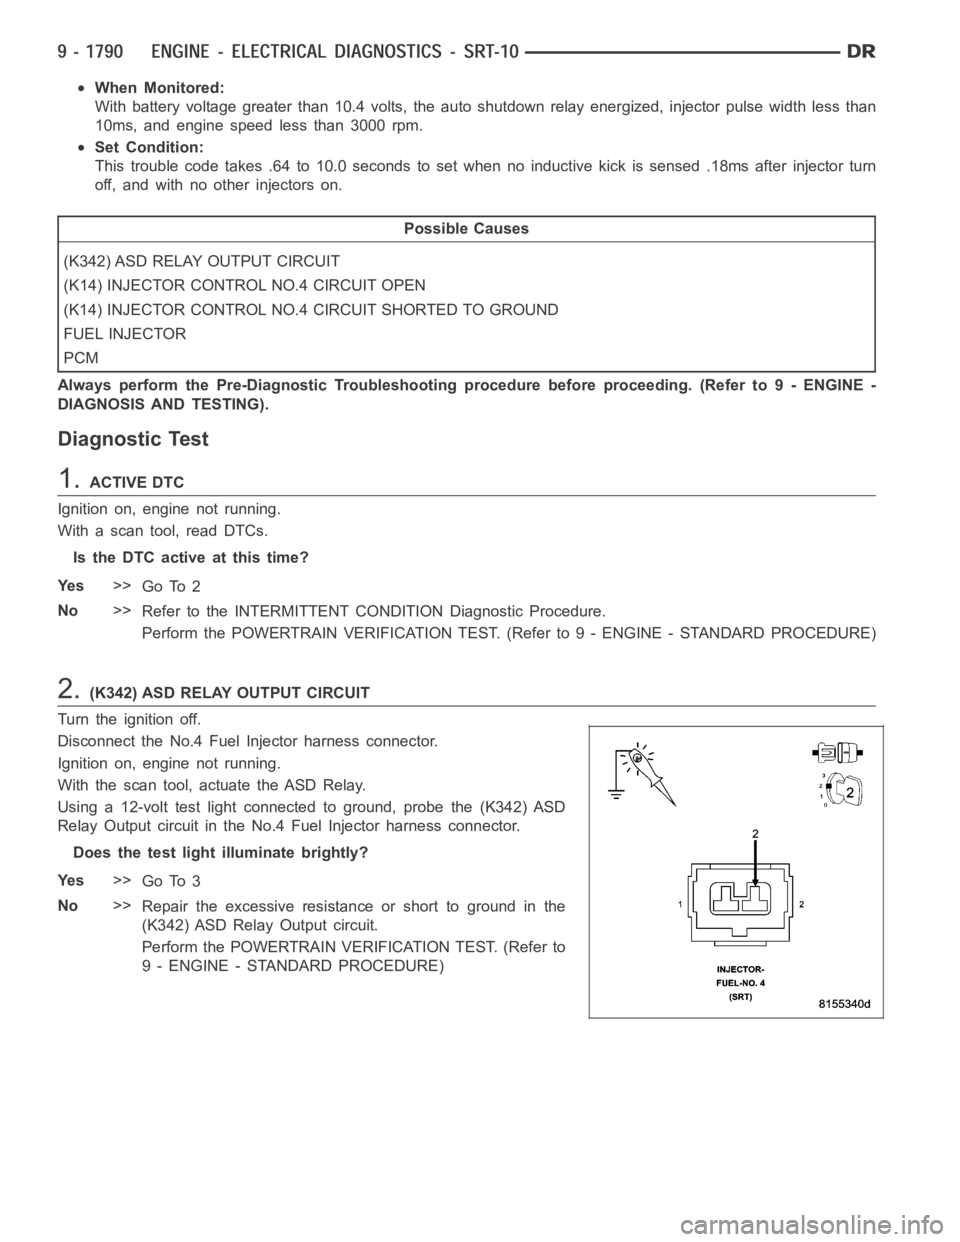
Disconnect the No.4 Fuel Injector harness connector.
Ignition on, engine not running.
With the scan tool, actuate the ASD Relay.
Using a 12-volt test light connected to ground, probe the (K342) ASD
Relay Output circuit in the No.4 Fuel Injector harness connector.
Does the test light illuminate brightly?
Ye s>>
Go To 3
No>>
Repair the excessive resistanceorshorttogroundinthe
(K342) ASD Relay Output circuit.
Perform the POWERTRAIN VERIFICATION TEST. (Refer to
9 - ENGINE - STANDARD PROCEDURE)
Page 1103 of 5267
When Monitored:
With battery voltage greater than 10.4 volts, the auto shutdown relay energized, injector pulse width less than
10ms, and engine speed less than 3000 rpm.
Set Condition:
This trouble code takes .64 to 10.0 seconds to set when no inductive kick is sensed .18ms after injector turn
off, and with no other injectors on.
Possible Causes
(K342) ASD RELAY OUTPUT CIRCUIT
(K38) INJECTOR CONTROL NO.5 CIRCUIT OPEN
(K38) INJECTOR CONTROL NO.5 CIRCUIT SHORTED TO GROUND
FUEL INJECTOR
PCM
Always perform the Pre-Diagnostic Troubleshooting procedure before proceeding. (Refer to 9 - ENGINE -
DIAGNOSIS AND TESTING).
Diagnostic Test
1.ACTIVE DTC
Ignition on, engine not running.
With a scan tool, read DTCs.
Is the DTC active at this time?
Ye s>>
Go To 2
No>>
Refer to the INTERMITTENT CONDITION Diagnostic Procedure.
Perform the POWERTRAIN VERIFICATION TEST. (Refer to 9 - ENGINE - STANDARD PROCEDURE)
2.(K342) ASD RELAY OUTPUT CIRCUIT
Turn the ignition off.
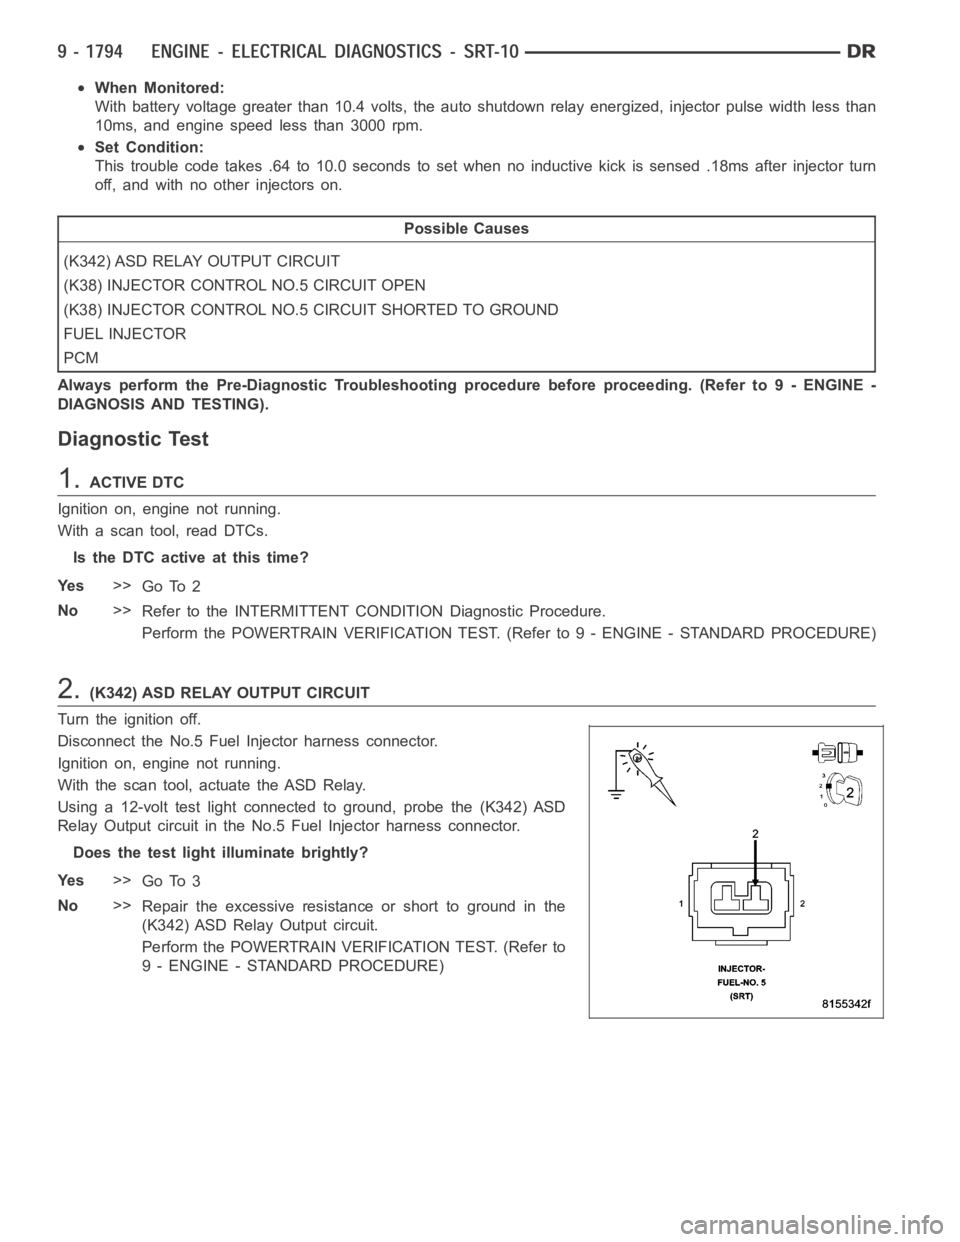
Disconnect the No.5 Fuel Injector harness connector.
Ignition on, engine not running.
With the scan tool, actuate the ASD Relay.
Using a 12-volt test light connected to ground, probe the (K342) ASD
Relay Output circuit in the No.5 Fuel Injector harness connector.
Does the test light illuminate brightly?
Ye s>>
Go To 3
No>>
Repair the excessive resistanceorshorttogroundinthe
(K342) ASD Relay Output circuit.
Perform the POWERTRAIN VERIFICATION TEST. (Refer to
9 - ENGINE - STANDARD PROCEDURE)