Page 873 of 2870

ME(H4SO)-4
MECHANICAL
General Description
Piston pinOuter diameter mm (in) 22.994 — 23.000 (0.9053 — 0.9055)
Standard clearance between piston and piston pin mm (in) 0.004 — 0.008 (0.0002 — 0.0003)
Degree of fitPiston pin must be fitted into position with
thumb at 20°C (68°F).
Piston ringRing closed gap mm (in)Top ringSTD 0.20 — 0.35 (0.0079 — 0.0138)
Limit 1.0 (0.039)
Second
ring2.0 LSTD 0.35 — 0.50 (0.0138 — 0.0197)
Limit 1.0 (0.039)
2.5 LSTD 0.37 — 0.52 (0.0146 — 0.0204)
Limit 1.0 (0.039)
Oil ringSTD 0.20 — 0.50 (0.0079 — 0.0197)
Limit 1.5 (0.059)
Ring groove gap mm (in)Top ringSTD 0.040 — 0.080 (0.0016 — 0.0031)
Limit 0.15 (0.0059)
Second
ringSTD 0.030 — 0.070 (0.0012 — 0.0028)
Limit 0.15 (0.0059)
Connecting
rodBend or twist per 100 mm
(3.94 in) in lengthmm (in) Limit 0.10 (0.0039)
Side clearance at large end mm (in)STD 0.070 — 0.330 (0.0028 — 0.0130)
Limit 0.4 (0.016)
Connecting
rod bearingOil clearance mm (in)STD 0.0158 — 0.0438 (0.0006 — 0.0017)
Limit 0.05 (0.0020)
Thickness at cen-
ter portionmm (in)2.0 LSTD 1.492 — 1.501 (0.0587 — 0.0591)
0.03 (0.0012) US 1.510 — 1.513 (0.0594 — 0.0596)
0.05 (0.0020) US 1.520 — 1.523 (0.0598 — 0.0600)
0.25 (0.0098) US 1.620 — 1.623 (0.0638 — 0.0639)
2.5 LSTD 1.492 — 1.503 (0.0587 — 0.0591)
0.03 (0.0012) US 1.510 — 1.513 (0.0594 — 0.0596)
0.05 (0.0020) US 1.520 — 1.523 (0.0598 — 0.0600)
0.25 (0.0098) US 1.620 — 1.623 (0.0638 — 0.0639)
Connecting
rod bushingClearance between piston pin
and bushingmm (in)STD 0 — 0.022 (0 — 0.0009)
Limit 0.030 (0.0012)
Page 874 of 2870

ME(H4SO)-5
MECHANICAL
General Description
CrankshaftBend limit mm (in) 0.035 (0.0014)
Crank pin and
crank journalmm (in)Out-of-roundness 0.020 (0.0008) or less
Grinding limit 0.250 (0.0098)
Crank pin outer diameter mm (in)STD 51.984 — 52.000 (2.0466 — 2.0472)
0.03 (0.0012) US 51.954 — 51.970 (2.0454 — 2.0461)
0.05 (0.0020) US 51.934 — 51.950 (2.0446 — 2.0453)
0.25 (0.0098) US 51.734 — 51.750 (2.0368 — 2.0374)
Crank journal
outer diametermm (in)#1, #3STD 59.992 — 60.008 (2.3619 — 2.3625)
0.03 (0.0012) US 59.962 — 59.978 (2.3607 — 2.3613)
0.05 (0.0020) US 59.942 — 59.958 (2.3599 — 2.3605)
0.25 (0.0098) US 59.742 — 59.758 (2.3520 — 2.3527)
#2, #4, #5STD 59.992 — 60.008 (2.3619 — 2.3625)
0.03 (0.0012) US 59.962 — 59.978 (2.3607 — 2.3613)
0.05 (0.0020) US 59.942 — 59.958 (2.3599 — 2.3605)
0.25 (0.0098) US 59.742 — 59.758 (2.3520 — 2.3527)
Side clearance mm (in)STD 0.030 — 0.115 (0.0012 — 0.0045)
Limit 0.25 (0.0098)
Oil clearance mm (in)#1STD 0.010 — 0.030 (0.0004 — 0.0012)
Limit 0.040 (0.0016)
#2STD 0.010 — 0.030 (0.0004 — 0.0012)
Limit 0.045 (0.0018)
#3STD 0.010 — 0.030 (0.0004 — 0.0012)
Limit 0.040 (0.0016)
#4STD 0.010 — 0.030 (0.0004 — 0.0012)
Limit 0.045 (0.0018)
#5STD 0.010 — 0.030 (0.0004 — 0.0012)
Limit 0.040 (0.0016)
Crankshaft
bearingCrankshaft bear-
ing thicknessmm (in)#1, #3STD 1.998 — 2.011 (0.0787 — 0.0792)
0.03 (0.0012) US 2.017 — 2.020 (0.0794 — 0.0795)
0.05 (0.0020) US 2.027 — 2.030 (0.0798 — 0.0799)
0.25 (0.0098) US 2.127 — 2.130 (0.0837 — 0.0839)
#2, #4, #5STD 2.000 — 2.013 (0.0787 — 0.0793)
0.03 (0.0012) US 2.019 — 2.022 (0.0795 — 0.0796)
0.05 (0.0020) US 2.029 — 2.032 (0.0799 — 0.0800)
0.25 (0.0098) US 2.129 — 2.132 (0.0838 — 0.0839)
Page 886 of 2870
ME(H4SO)-17
MECHANICAL
General Description
498457100 ENGINE STAND
ADAPTER LHUsed with ENGINE STAND (499817000).
498497100 CRANKSHAFT
STOPPERUsed for stopping rotation of flywheel when loos-
ening and tightening crank pulley bolt, etc.
498547000 OIL FILTER
WRENCHUsed for removing and installing oil filter.
(Outer diameter : 80 mm (3.15 in))
18332AA000 OIL FILTER
WRENCHUsed for removing and installing oil filter.
(Outer diameter : 68 mm (2.68 in)) ILLUSTRATION TOOL NUMBER DESCRIPTION REMARKS
ST-498457100
ST-498497100
ST-498547000
ST18332AA000
Page 887 of 2870
ME(H4SO)-18
MECHANICAL
General Description
18332AA010 OIL FILTER
WRENCHUsed for removing and installing oil filter.
(Outer diameter : 65 mm (2.56 in))
398744300
(2.0 L model)PISTON GUIDE Used for installing piston in cylinder.
498747300
(2.5 L model)PISTON GUIDE Used for installing piston in cylinder.
498857100 VALVE OIL SEAL
GUIDEUsed for press-fitting of intake and exhaust valve
guide oil seals. ILLUSTRATION TOOL NUMBER DESCRIPTION REMARKS
ST18332AA010
ST-398744300
ST-498747300
ST-498857100
Page 892 of 2870
ME(H4SO)-23
MECHANICAL
General Description
2. GENERAL TOOL
499817100 ENGINE STAND Stand used for engine disassembly and
assembly.
Used with ENGINE STAND ADAPTER RH
(498457000) & LH (498457100).
499977100 CRANK PULLEY
WRENCHUsed for stopping rotation of crank pulley when
loosening and tightening crank pulley bolts. (2.5
L model)
499977400 CRANK PULLEY
WRENCHUsed for stopping rotation of crank pulley when
loosening and tightening crank pulley bolts. (2.0
L model)
499987500 CRANKSHAFT
SOCKETUsed for rotating crankshaft.
TOOL NAME REMARKS
Compression gauge Used for measuring compression.
Tachometer (secondary pick-up type) Used for measuring idle speed.
Timing light Used for measuring ignition timing.ILLUSTRATION TOOL NUMBER DESCRIPTION REMARKS
ST-499817100
ST-499977100
ST-499977400
ST-499987500
Page 895 of 2870

ME(H4SO)-26
MECHANICAL
Idle Speed
3. Idle Speed
A: INSPECTION
1) Before checking idle speed, check the following:
(1) Ensure the air cleaner element is free from
clogging, ignition timing is correct, spark plugs
are in good condition, and the hoses are con-
nected properly.
(2) Ensure the malfunction indicator light does
not illuminate.
2) Warm-up the engine.
3) Stop the engine, and then turn the ignition switch
to OFF.
4) When using the Subaru Select Monitor, refer to
the following.
TOOL, PREPARATION TOOL, General Descrip-
tion.>
(1) Insert the cartridge to Subaru Select Moni-
tor.
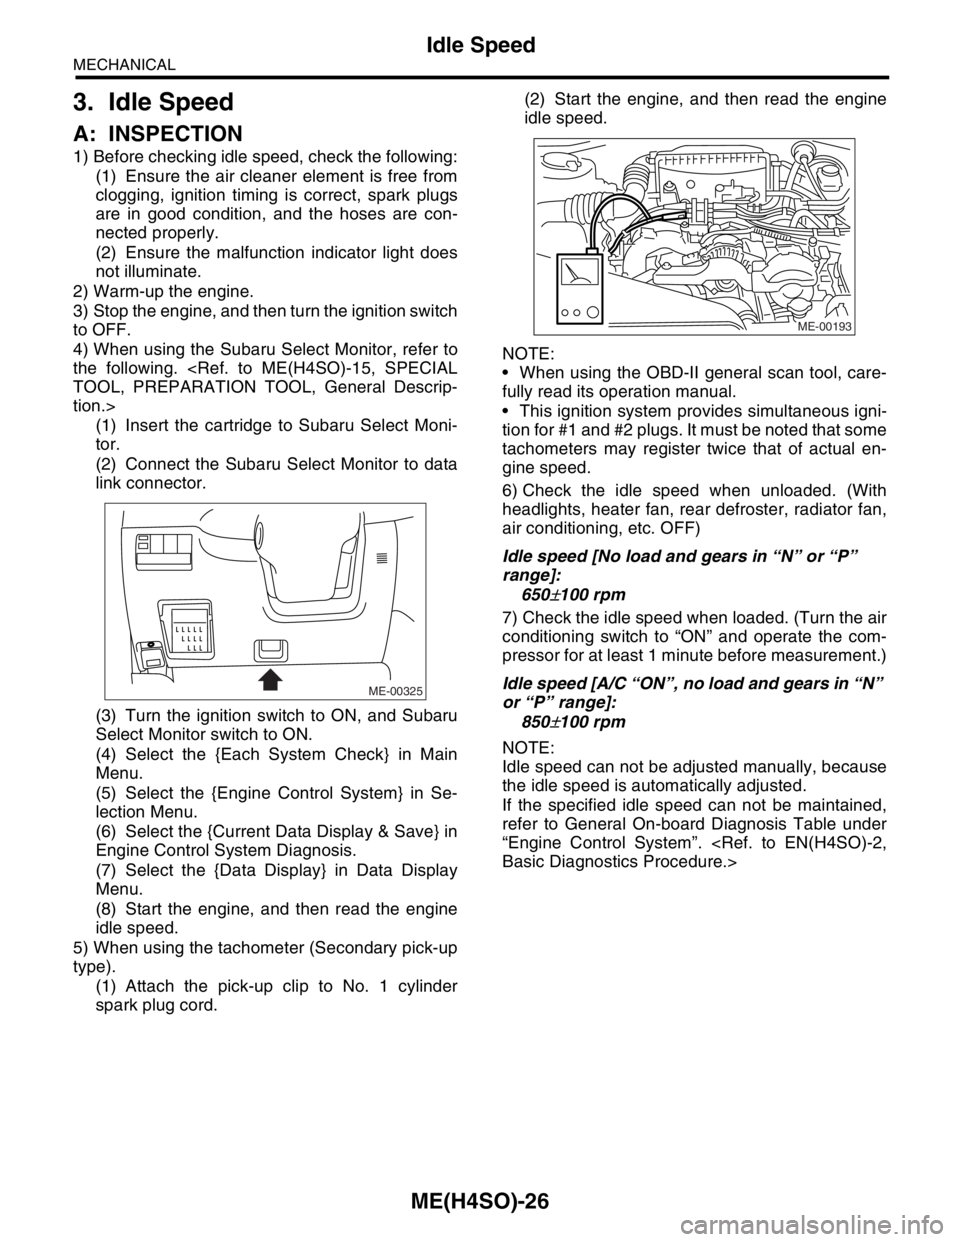
(2) Connect the Subaru Select Monitor to data
link connector.
(3) Turn the ignition switch to ON, and Subaru
Select Monitor switch to ON.
(4) Select the {Each System Check} in Main
Menu.
(5) Select the {Engine Control System} in Se-
lection Menu.
(6) Select the {Current Data Display & Save} in
Engine Control System Diagnosis.
(7) Select the {Data Display} in Data Display
Menu.
(8) Start the engine, and then read the engine
idle speed.
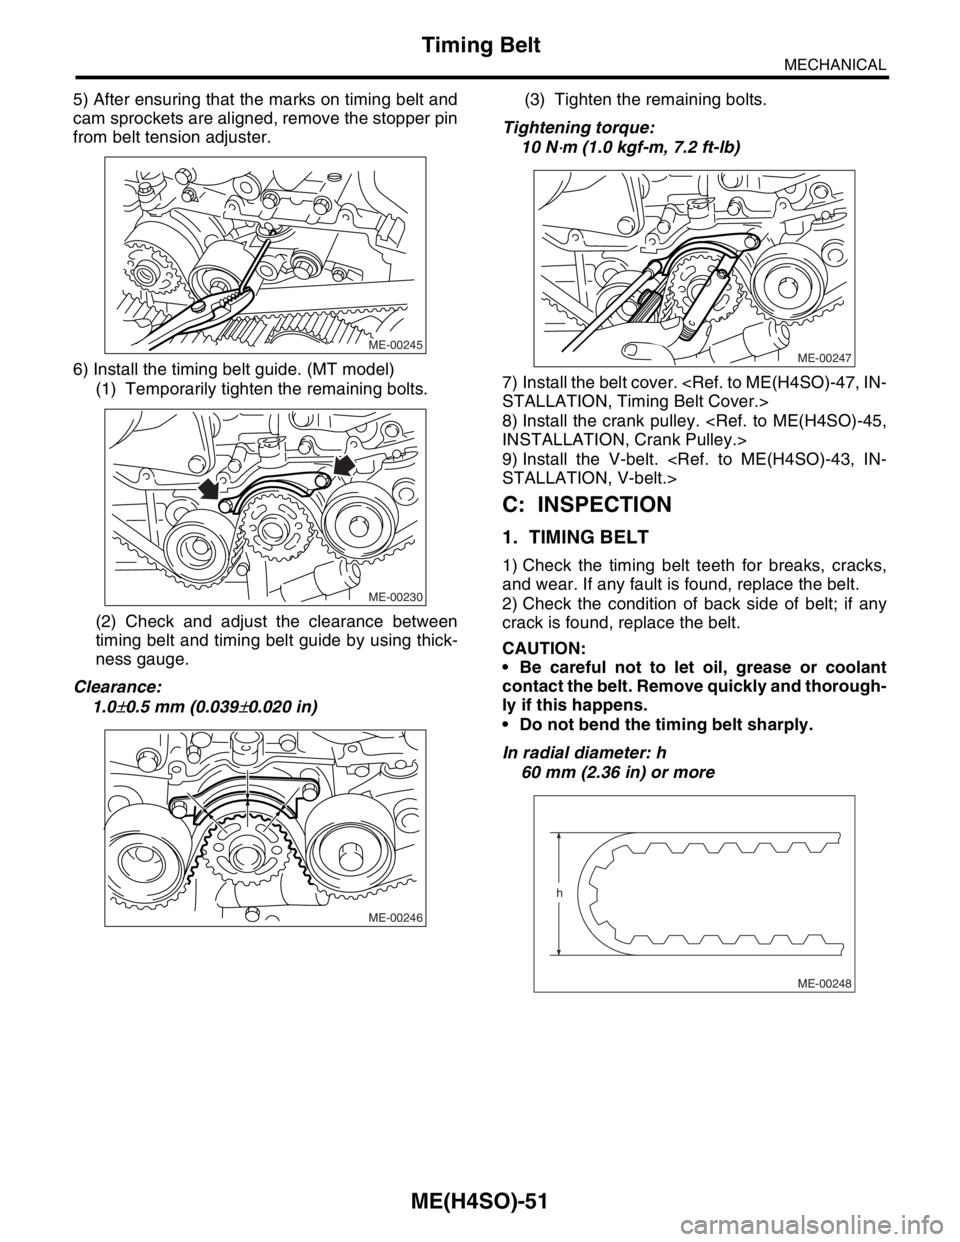
5) When using the tachometer (Secondary pick-up
type).
(1) Attach the pick-up clip to No. 1 cylinder
spark plug cord.(2) Start the engine, and then read the engine
idle speed.
NOTE:
When using the OBD-II general scan tool, care-
fully read its operation manual.
This ignition system provides simultaneous igni-
tion for #1 and #2 plugs. It must be noted that some
tachometers may register twice that of actual en-
gine speed.
6) Check the idle speed when unloaded. (With
headlights, heater fan, rear defroster, radiator fan,
air conditioning, etc. OFF)
Idle speed [No load and gears in “N” or “P”
range]:
650
±100 rpm
7) Check the idle speed when loaded. (Turn the air
conditioning switch to “ON” and operate the com-
pressor for at least 1 minute before measurement.)
Idle speed [A/C “ON”, no load and gears in “N”
or “P” range]:
850
±100 rpm
NOTE:
Idle speed can not be adjusted manually, because
the idle speed is automatically adjusted.
If the specified idle speed can not be maintained,
refer to General On-board Diagnosis Table under
“Engine Control System”.
Basic Diagnostics Procedure.>
ME-00325
ME-00193
Page 920 of 2870

ME(H4SO)-51
MECHANICAL
Timing Belt
5) After ensuring that the marks on timing belt and
cam sprockets are aligned, remove the stopper pin
from belt tension adjuster.
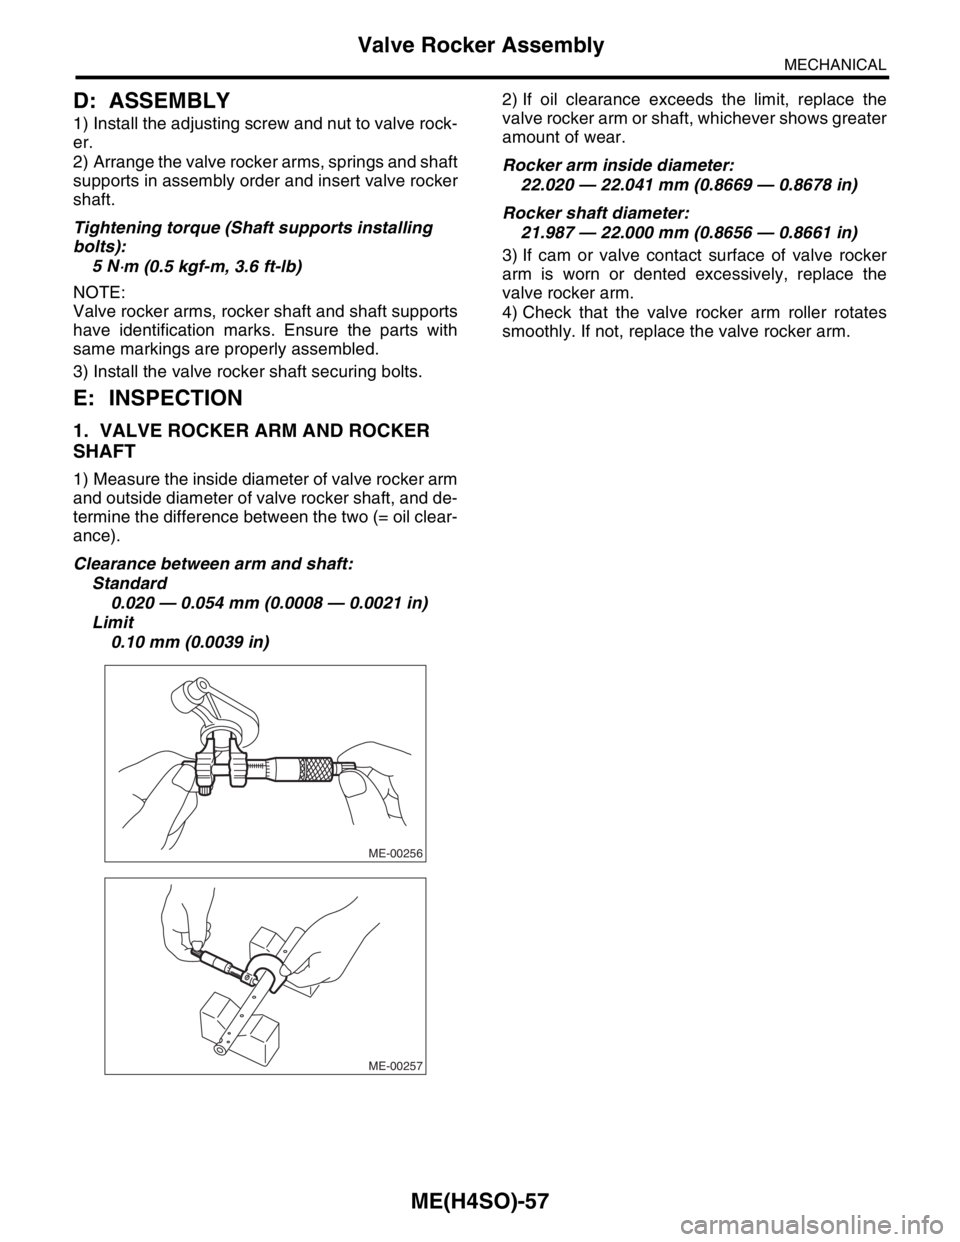
6) Install the timing belt guide. (MT model)
(1) Temporarily tighten the remaining bolts.
(2) Check and adjust the clearance between
timing belt and timing belt guide by using thick-
ness gauge.
Clearance:
1.0
±0.5 mm (0.039±0.020 in)(3) Tighten the remaining bolts.
Tightening torque:
10 N
⋅m (1.0 kgf-m, 7.2 ft-lb)
7) Install the belt cover.
STALLATION, Timing Belt Cover.>
8) Install the crank pulley.
INSTALLATION, Crank Pulley.>
9) Install the V-belt.
STALLATION, V-belt.>
C: INSPECTION
1. TIMING BELT
1) Check the timing belt teeth for breaks, cracks,
and wear. If any fault is found, replace the belt.
2) Check the condition of back side of belt; if any
crack is found, replace the belt.
CAUTION:
Be careful not to let oil, grease or coolant
contact the belt. Remove quickly and thorough-
ly if this happens.
Do not bend the timing belt sharply.
In radial diameter: h
60 mm (2.36 in) or more
ME-00245
ME-00230
ME-00246
ME-00247
ME-00248
h
Page 928 of 2870

ME(H4SO)-57
MECHANICAL
Valve Rocker Assembly
D: ASSEMBLY
1) Install the adjusting screw and nut to valve rock-
er.
2) Arrange the valve rocker arms, springs and shaft
supports in assembly order and insert valve rocker
shaft.
Tightening torque (Shaft supports installing
bolts):
5 N
⋅m (0.5 kgf-m, 3.6 ft-lb)
NOTE:
Valve rocker arms, rocker shaft and shaft supports
have identification marks. Ensure the parts with
same markings are properly assembled.
3) Install the valve rocker shaft securing bolts.
E: INSPECTION
1. VALVE ROCKER ARM AND ROCKER
SHAFT
1) Measure the inside diameter of valve rocker arm
and outside diameter of valve rocker shaft, and de-
termine the difference between the two (= oil clear-
ance).
Clearance between arm and shaft:
Standard
0.020 — 0.054 mm (0.0008 — 0.0021 in)
Limit
0.10 mm (0.0039 in)2) If oil clearance exceeds the limit, replace the
valve rocker arm or shaft, whichever shows greater
amount of wear.
Rocker arm inside diameter:
22.020 — 22.041 mm (0.8669 — 0.8678 in)
Rocker shaft diameter:
21.987 — 22.000 mm (0.8656 — 0.8661 in)
3) If cam or valve contact surface of valve rocker
arm is worn or dented excessively, replace the
valve rocker arm.
4) Check that the valve rocker arm roller rotates
smoothly. If not, replace the valve rocker arm.
ME-00256
ME-00257