Page 2795 of 3870

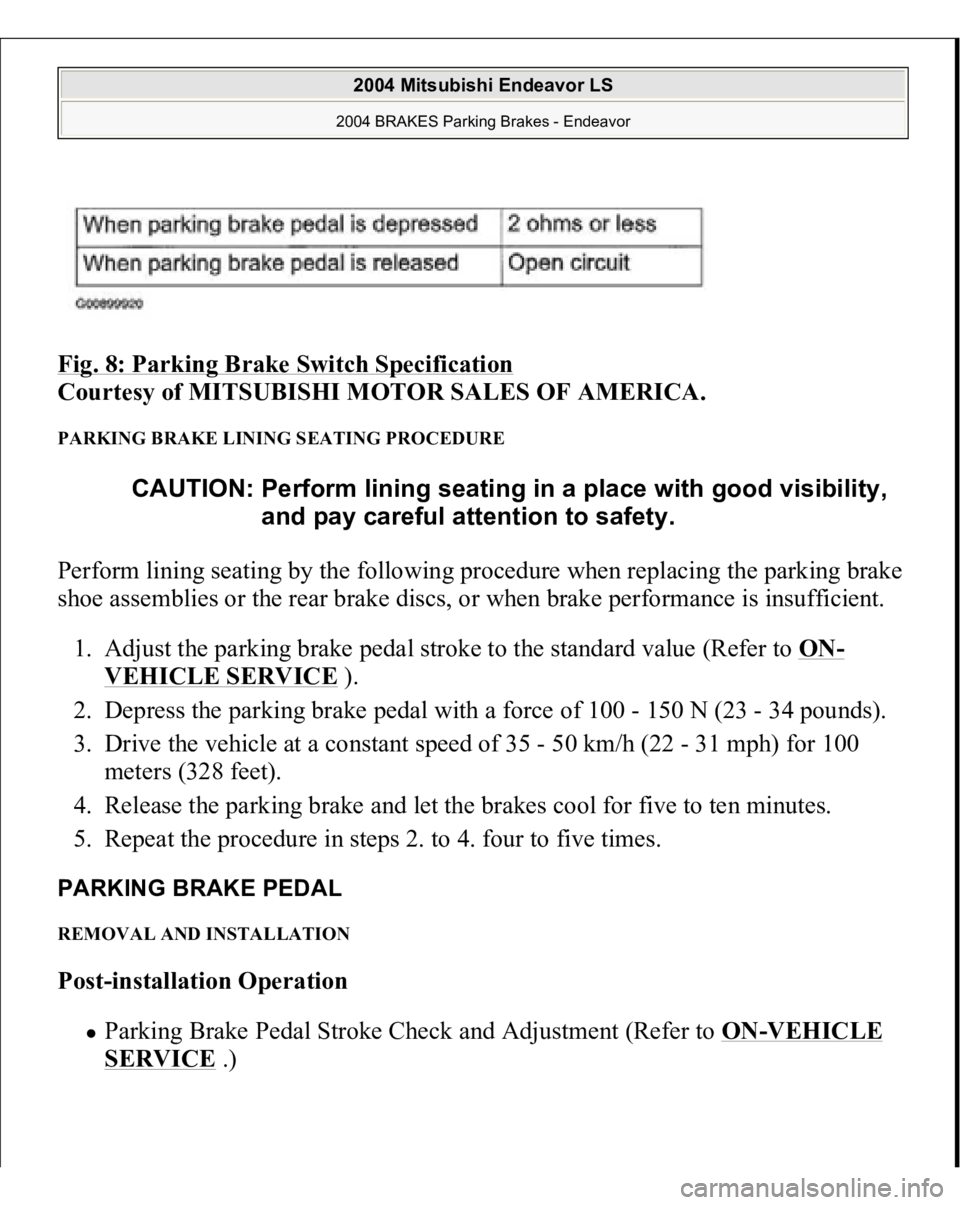
Fig. 8: Parking Brake Switch Specification
Courtesy of MITSUBISHI MOTOR SALES OF AMERICA.
PARKING BRAKE LINING SEATING PROCEDURE Perform lining seating by the following procedure when replacing the parking brake
shoe assemblies or the rear brake discs, or when brake performance is insufficient.
1. Adjust the parking brake pedal stroke to the standard value (Refer to ON
-
VEHICLE SERVICE
).
2. Depress the parking brake pedal with a force of 100 - 150 N (23 - 34 pounds).
3. Drive the vehicle at a constant speed of 35 - 50 km/h (22 - 31 mph) for 100
meters (328 feet).
4. Release the parking brake and let the brakes cool for five to ten minutes.
5. Repeat the procedure in steps 2. to 4. four to five times.
PARKING BRAKE PEDAL REMOVAL AND INSTALLATION Post-installation Operation
Parking Brake Pedal Stroke Check and Adjustment (Refer to ON
-VEHICLE
SERVICE
.)
CAUTION: Perform lining seating in a place with good visibility,
and pay careful attention to safety.
2004 Mitsubishi Endeavor LS 2004 BRAKES Parking Brakes - Endeavor
Page 2796 of 3870
Fig. 9: Exploded View Of Parking Brake Pedal Stroke
Courtesy of MITSUBISHI MOTOR SALES OF AMERICA.
INSTALLATION SERVICE POINT >>A<< FRONT PARKING BRAKE CABLE/PARKING BRAKE LEVER NUTS/PARKING BRAKE CABLE CLIP
2004 Mitsubishi Endeavor LS 2004 BRAKES Parking Brakes - Endeavor
Page 2799 of 3870
Fig. 12: Removing/Installing Rear Parking Brake Cable
Courtesy of MITSUBISHI MOTOR SALES OF AMERICA.
INSTALLATION SERVICE POINTS >>A<< FRONT PARKING BRAKE CABLE INSTALLATION Install the front parking brake cable securely to the cable support of the parking brake cable bracket.
CAUTION: Be careful not to widen the cable support slit when
installing the front parking brake cable.
2004 Mitsubishi Endeavor LS 2004 BRAKES Parking Brakes - Endeavor
Page 2803 of 3870
Fig. 16: Removing/Installing Parking Brake Lining And Drum (2 Of 2)
Courtesy of MITSUBISHI MOTOR SALES OF AMERICA.
REMOVAL SERVICE POINTS << A>> REAR BRAKE BOLT/REAR BRAKE CALIPER ASSEMBLY REMOVAL Remove the rear brake caliper assembly and support it with wire or something
similar.
2004 Mitsubishi Endeavor LS 2004 BRAKES Parking Brakes - Endeavor
Page 2806 of 3870
Fig. 19: Removing Rear Brake Chamber Retainer
Courtesy of MITSUBISHI MOTOR SALES OF AMERICA.
INSTALLATION SERVICE POINTS >>A<< REAR BRAKE CHAMBER RETAINER INSTALLATION Use
pliers or a similar tool to close the rear brake chamber retainer end onto the
pin.
2004 Mitsubishi Endeavor LS 2004 BRAKES Parking Brakes - Endeavor
Page 2814 of 3870
FASTENER TIGHTENING SPECIFICATIONSFig. 27: Fastener Tightening Specifications Chart
Courtesy of MITSUBISHI MOTOR SALES OF AMERICA.
SERVICE SPECIFICATIONS Fig. 28: Service Specifications Chart
Courtesy of MITSUBISHI MOTOR SALES OF AMERICA.
LUBRICANT Fig. 29: Lubricant Specifications Chart
Courtesy of MITSUBISHI MOTOR SALES OF AMERICA.
2004 Mitsubishi Endeavor LS 2004 BRAKES Parking Brakes - Endeavor
Page 2867 of 3870
Fig. 28: Removing Steering Wheel
Courtesy of MITSUBISHI MOTOR SALES OF AMERICA.
REMOVAL SERVICE POINT << A>> AIR BAG MODULE ASSEMBLY REMOVAL 1. Slide section A of the clock spring connector in the arrow direction shown in
illustration, and disconnect the connector.
2. Loosen the Torx screw and remove the air ba
g module assembl
y.
2004 Mitsubishi Endeavor LS
2004 STEERING Power Steering - Endeavor
Page 2868 of 3870
Fig. 29: Sliding Section A Of Clock Spring Connector In Direction Of Arrow
Courtesy of MITSUBISHI MOTOR SALES OF AMERICA.
REMOVAL SERVICE POINT << B>>STEERING WHEEL ASSEMBLY REMOVAL Use s
pecial tool MB990803 to remove the steerin
g wheel.
2004 Mitsubishi Endeavor LS
2004 STEERING Power Steering - Endeavor