Page 1270 of 3870
Fig. 1: Charging System Circuit Diagram (Up To December 2003)
Courtesy of MITSUBISHI MOTOR SALES OF AMERICA.
Fig. 2: Charging System Circuit Diagram (From January 2004)
Courtesy of MITSUBISHI MOTOR SALES OF AMERICA.
ADJUSTMENTS BELT TENSION
2004 Mitsubishi Endeavor Limited
2004 STARTING & CHARGING SYSTEMS Generators & Regulators - Endeavor
Page 1271 of 3870

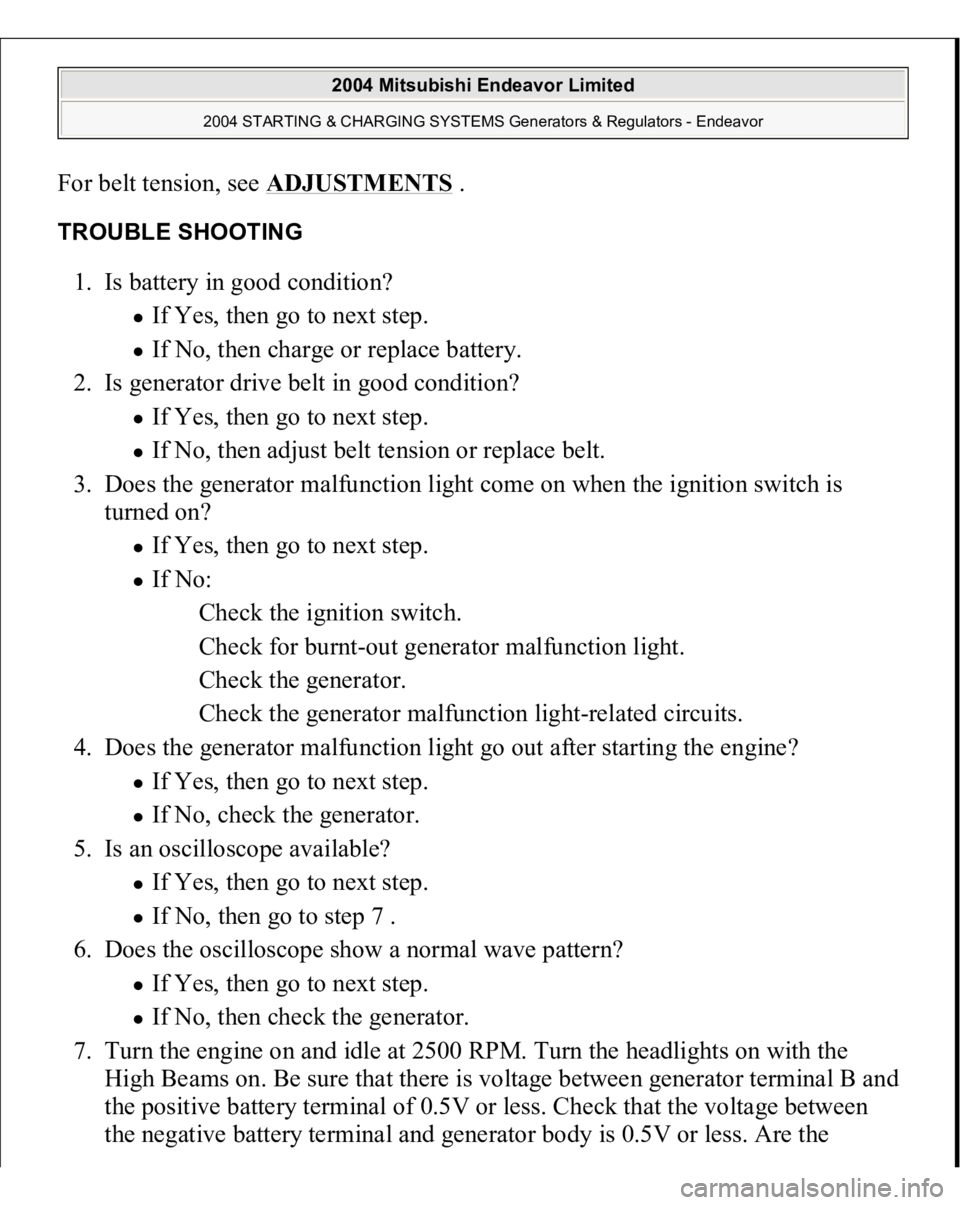
For belt tension, see ADJUSTMENTS
.
TROUBLE SHOOTING 1. Is battery in good condition?
If Yes, then go to next step. If No, then charge or replace battery.
2. Is generator drive belt in good condition? If Yes, then go to next step. If No, then adjust belt tension or replace belt.
3. Does the generator malfunction light come on when the ignition switch is
turned on? If Yes, then go to next step. If No:
Check the ignition switch.
Check for burnt-out generator malfunction light.
Check the generator.
Check the generator malfunction light-related circuits.
4. Does the generator malfunction light go out after starting the engine? If Yes, then go to next step. If No, check the generator.
5. Is an oscilloscope available? If Yes, then go to next step. If No, then go to step 7 .
6. Does the oscilloscope show a normal wave pattern? If Yes, then go to next step. If No, then check the generator.
7. Turn the engine on and idle at 2500 RPM. Turn the headlights on with the
High Beams on. Be sure that there is voltage between generator terminal B and
the positive battery terminal of 0.5V or less. Check that the voltage between
the negative batter
y terminal and
generator bod
y is 0.5V or less. Are the
2004 Mitsubishi Endeavor Limited
2004 STARTING & CHARGING SYSTEMS Generators & Regulators - Endeavor
Page 1272 of 3870
generator output line and ground line in good condition?
If Yes, then go to next step. If No, check the generator output line and ground line.
8. Is the output current normal? If Yes, then go to next step. If No, then check the generator.
9. Is the regulated voltage normal? If Yes, then go to next step. If No, then check the generator.
10. Is the voltage drop in the generator output line normal? If Yes, then generator is normal. Check other systems. If No, then check the output line.
ON-VEHICLE TESTING GENERATOR OUTPUT LINE VOLTAGE DROP TEST Required special tools: MB991958: Scan Tool MUT-III Sub Assembly,
MB991824: V.C.I., MB991827: MUT-III USB Cable, MB991910: MUT-III Main
Harness A.
This test determines whether the wiring from the generator B-terminal to positive batter
y terminal
(includin
g the fusible link
) is in
good condition or not. See Fig. 3
.
2004 Mitsubishi Endeavor Limited
2004 STARTING & CHARGING SYSTEMS Generators & Regulators - Endeavor
Page 1273 of 3870
Fig. 3: Generator Output Line Voltage Drop Test (Typical)
Courtesy of MITSUBISHI MOTOR SALES OF AMERICA.
1. Always be sure to check following before testing:
Generator installation. Generator drive belt tension. Fusible link. Abnormal noise form generator while engine is running.
2. Tune ignition switch to LOCK (OFF) position.
3. Disconnect ne
gative batter
y cable.
WARNING:Battery posts, terminals and related accessories
contain lead and lead compounds. Wash hands
after handling.
2004 Mitsubishi Endeavor Limited
2004 STARTING & CHARGING SYSTEMS Generators & Regulators - Endeavor
Page 1274 of 3870

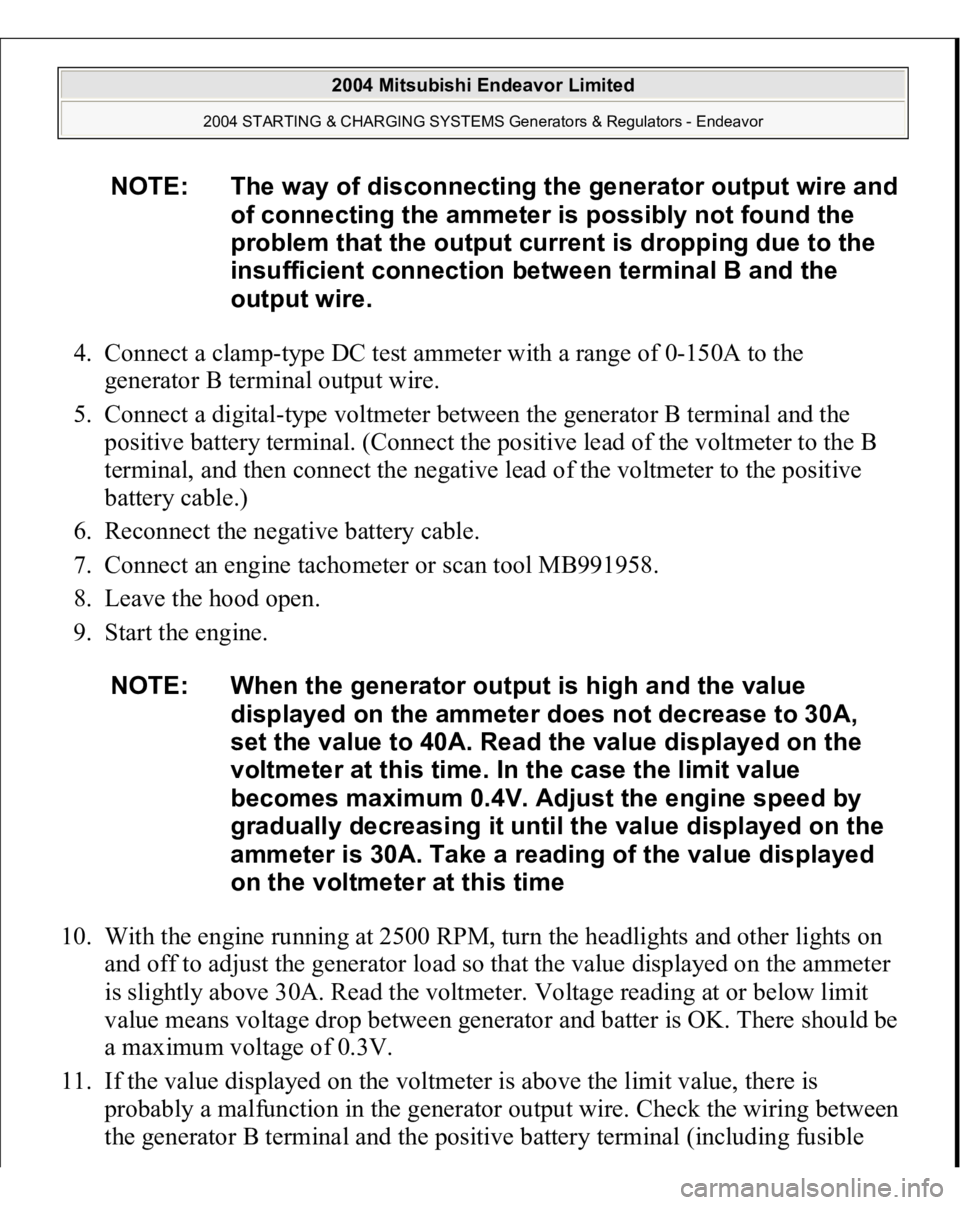
4. Connect a clamp-type DC test ammeter with a range of 0-150A to the
generator B terminal output wire.
5. Connect a digital-type voltmeter between the generator B terminal and the
positive battery terminal. (Connect the positive lead of the voltmeter to the B
terminal, and then connect the negative lead of the voltmeter to the positive
battery cable.)
6. Reconnect the negative battery cable.
7. Connect an engine tachometer or scan tool MB991958.
8. Leave the hood open.
9. Start the engine.
10. With the engine running at 2500 RPM, turn the headlights and other lights on
and off to adjust the generator load so that the value displayed on the ammeter
is slightly above 30A. Read the voltmeter. Voltage reading at or below limit
value means voltage drop between generator and batter is OK. There should be
a maximum voltage of 0.3V.
11. If the value displayed on the voltmeter is above the limit value, there is
probably a malfunction in the generator output wire. Check the wiring between
the
generator B terminal and the
positive batter
y terminal
(includin
g fusible
NOTE: The way of disconnecting the generator output wire and
of connecting the ammeter is possibly not found the
problem that the output current is dropping due to the
insufficient connection between terminal B and the
output wire.
NOTE: When the generator output is high and the value
displayed on the ammeter does not decrease to 30A,
set the value to 40A. Read the value displayed on the
voltmeter at this time. In the case the limit value
becomes maximum 0.4V. Adjust the engine speed by
gradually decreasing it until the value displayed on the
ammeter is 30A. Take a reading of the value displayed
on the voltmeter at this time
2004 Mitsubishi Endeavor Limited
2004 STARTING & CHARGING SYSTEMS Generators & Regulators - Endeavor
Page 1275 of 3870
link). If a terminal is not sufficiently tight or if the harness has become
discolored due to overheating, repair and then test again.
12. After the test, run the engine at idle.
13. Turn off all lights and turn the ignition switch to the LOCK (OFF) position.
14. Disconnect the negative battery cable.
15. Disconnect the ammeter and voltmeter.
16. Connect the negative battery cable.
17. Run engine for 10 minutes at an idle.
OUTPUT CURRENT TEST Required special tool: MB991958: Scan Tool MUT-III Sub Assembly, MB991824:
V.C.I., MB991827 MUT-III USB Cable, MB5991910: MUT-III Main Harness A.
This test determines whether the generator outputs normal current. For best results,
use a char
ging system tester. If not available, follow the ste
ps below. See Fig. 4
.
2004 Mitsubishi Endeavor Limited
2004 STARTING & CHARGING SYSTEMS Generators & Regulators - Endeavor
Page 1276 of 3870
Fig. 4: Output Current Test
Courtesy of MITSUBISHI MOTOR SALES OF AMERICA.
1. Before the test, always be sure to check the following.
Generator installation.
WARNING:Battery posts, terminals and related accessories
contain lead and lead compounds. Wash hands
after handling.
NOTE: The battery to be used should be slightly
discharged. The load in a fully-charged battery will
be insufficient and the test may not be able to be
carried out correctly.
2004 Mitsubishi Endeavor Limited
2004 STARTING & CHARGING SYSTEMS Generators & Regulators - Endeavor
Page 1277 of 3870

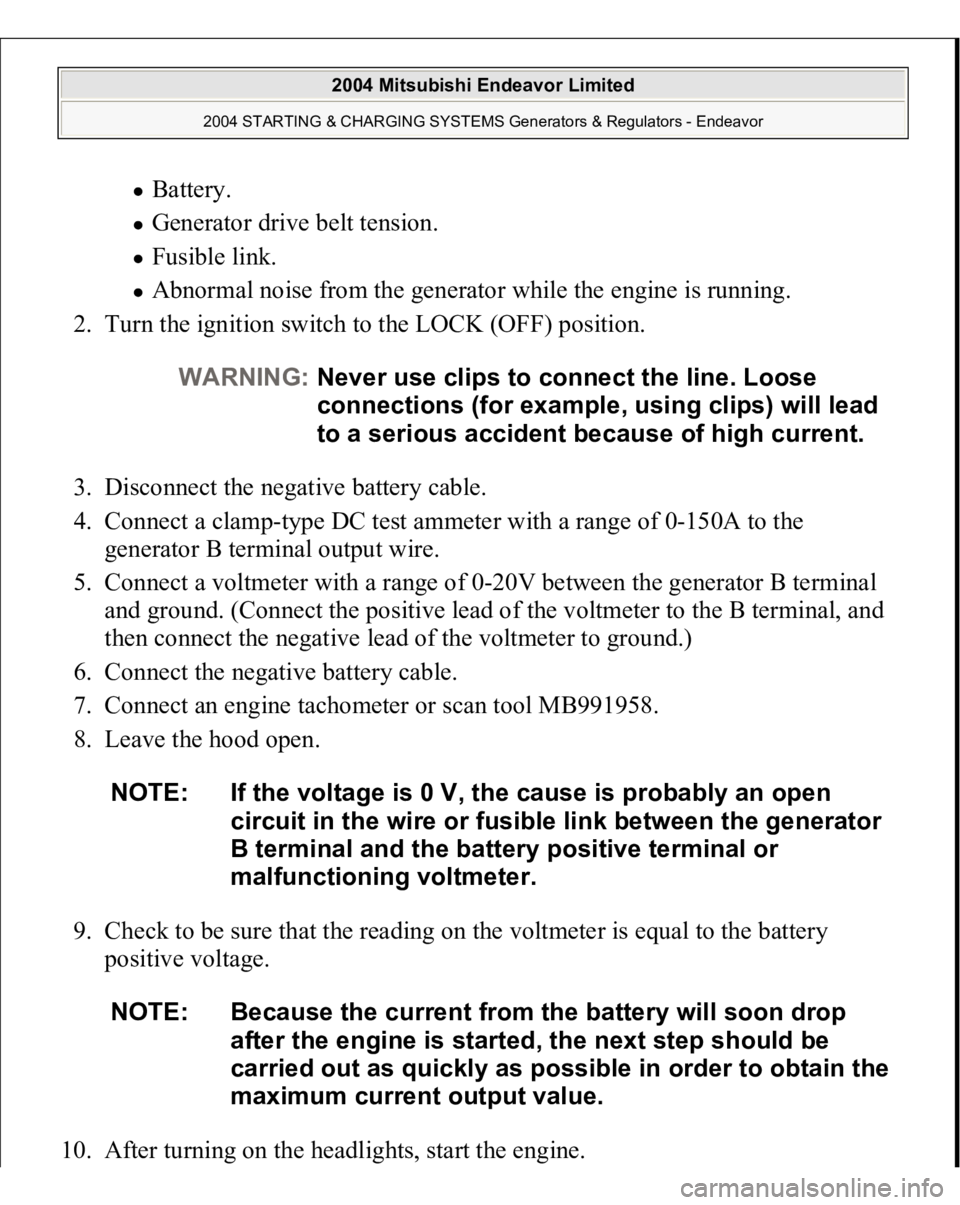
Battery. Generator drive belt tension. Fusible link. Abnormal noise from the generator while the engine is running.
2. Turn the ignition switch to the LOCK (OFF) position.
3. Disconnect the negative battery cable.
4. Connect a clamp-type DC test ammeter with a range of 0-150A to the
generator B terminal output wire.
5. Connect a voltmeter with a range of 0-20V between the generator B terminal
and ground. (Connect the positive lead of the voltmeter to the B terminal, and
then connect the negative lead of the voltmeter to ground.)
6. Connect the negative battery cable.
7. Connect an engine tachometer or scan tool MB991958.
8. Leave the hood open.
9. Check to be sure that the reading on the voltmeter is equal to the battery
positive voltage.
10. After turnin
g on the headli
ghts, start the en
gine.
WARNING:Never use clips to connect the line. Loose
connections (for example, using clips) will lead
to a serious accident because of high current.
NOTE: If the voltage is 0 V, the cause is probably an open
circuit in the wire or fusible link between the generator
B terminal and the battery positive terminal or
malfunctioning voltmeter.
NOTE: Because the current from the battery will soon drop
after the engine is started, the next step should be
carried out as quickly as possible in order to obtain the
maximum current output value.
2004 Mitsubishi Endeavor Limited
2004 STARTING & CHARGING SYSTEMS Generators & Regulators - Endeavor