Page 1073 of 4500
a. Connect the flexible hose with the union bolt and a new gasket.
Torque: 39 N.m (400 kgf.cm, 29 ft.lbf)
HINT:
Install the flexible hose lock securely in the lock hole in the caliper.
Fig. 105: Connecting Flexible Hose With Union Bolt And Gasket
Courtesy of TOYOTA MOTOR SALES, U.S.A., INC.
26.INSTALL DISC BRAKE PAD KIT REAR (PAD ONLY)
a. Right wheel:
Connect the pad wear indicator to the inner pads, and install a new clip.
HINT:
Page 1074 of 4500
Install the clip lock securely in the grooves of the pad.
Fig. 106: Connecting Pad Wear Indicator To Inner Pads
Courtesy of TOYOTA MOTOR SALES, U.S.A., INC.
b. Apply disc brake grease to the anti squeal shims and install them to each pad.
c. Install the pad wear indicator to the inner pad.
Page 1108 of 4500

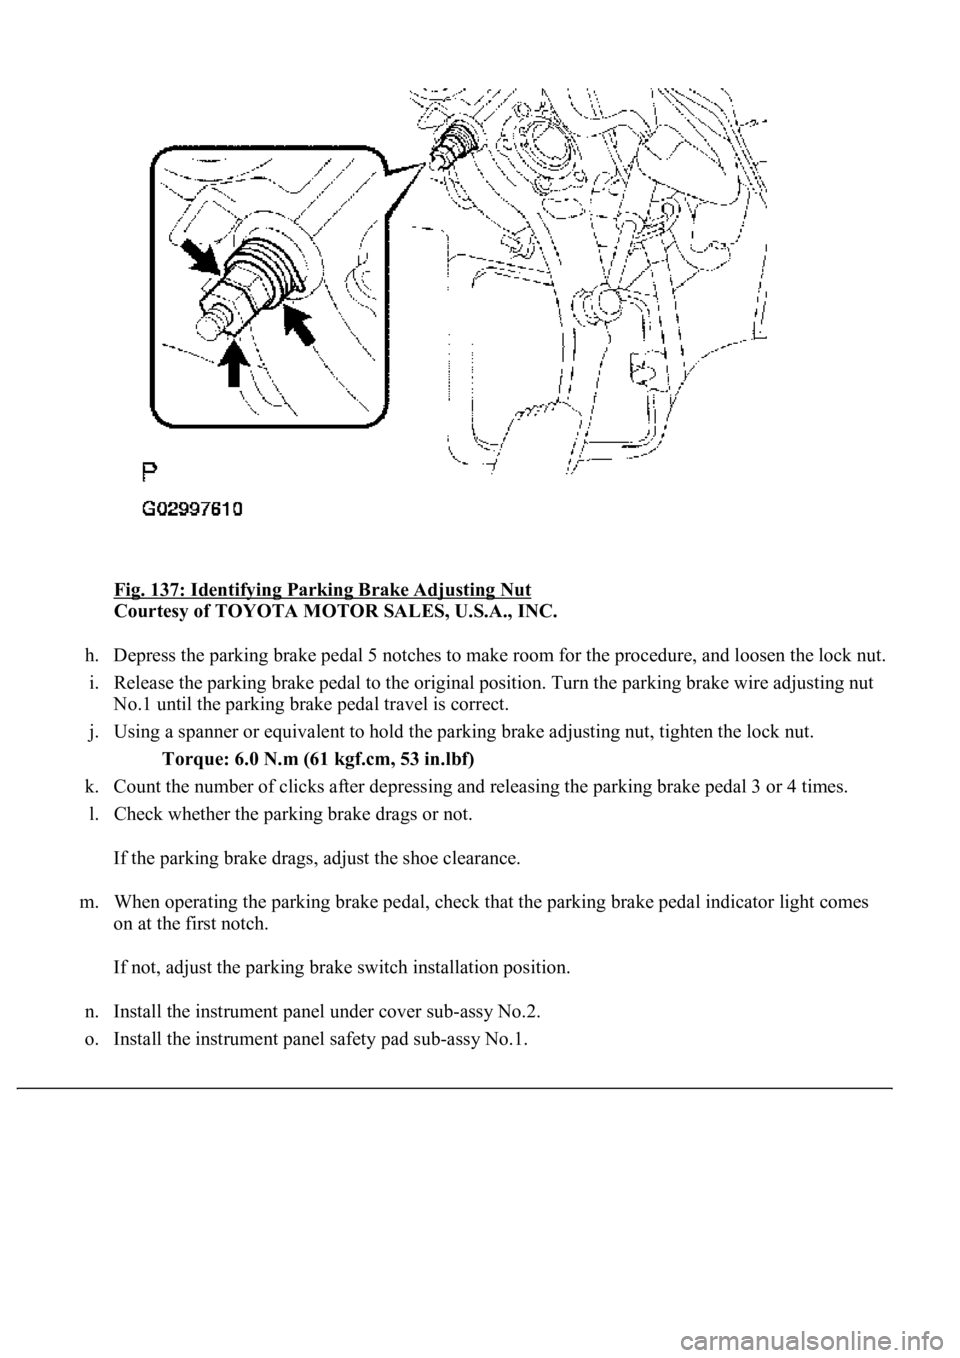
Fig. 137: Identifying Parking Brake Adjusting Nut
Courtesy of TOYOTA MOTOR SALES, U.S.A., INC.
h. Depress the parking brake pedal 5 notches to make room for the procedure, and loosen the lock nut.
i. Release the parking brake pedal to the original position. Turn the parking brake wire adjusting nut
<00310052001100140003005800510057004c004f00030057004b00480003005300440055004e004c0051004a0003004500550044004e004800030053004800470044004f000300570055004400590048004f0003004c005600030046005200550055004800
460057001100030003[
j. Using a spanner or equivalent to hold the parking brake adjusting nut, tighten the lock nut.
Torque: 6.0 N.m (61 kgf.cm, 53 in.lbf)
k. Count the number of clicks after depressing and releasing the parking brake pedal 3 or 4 times.
l. Check whether the parking brake drags or not.
If the parking brake drags, adjust the shoe clearance.
m. When operating the parking brake pedal, check that the parking brake pedal indicator light comes
on at the first notch.
If not, adjust the parking brake switch installation position.
n. Install the instrument panel under cover sub-assy No.2.
o. Install the instrument panel safet
y pad sub-assy No.1.
Page 1110 of 4500
Fig. 139: Exploded View Of Parking Brake Control Pedal Assy (2 Of 2)
Courtesy of TOYOTA MOTOR SALES, U.S.A., INC.
OVERHAUL
1.DISCONNECT BATTERY NEGATIVE TERMINAL (SEE PRECAUTION
)
2.RELEASE PARKING BRAKE PEDAL
3.REMOVE INSTRUMENT CLUSTER FINISH PANEL CENTER LOWER (SEE
REPLACEMENT
)
4.REMOVE INSTRUMENT CLUSTER FINISH PANEL END (SEE REPLACEMENT
)
5.REMOVE INSTRUMENT PANEL UNDER COVER SUB-ASSY NO.1 (SEE REPLACEMENT
)
6.REMOVE COIN BOX ASSY
7.REMOVE INSTRUMENT PANEL SAFETY PAD SUB-ASSY NO.1 (SEE REPLACEMENT
)
8.REMOVE INSTRUMENT PANEL AIR BAG ASSY LOWER NO.1 (SEE REPLACEMENT
)
9.SEPARATE PARKING BRAKE CABLE ASSY NO.1
a. Remove the lock nut, parkin
g brake wire adjusting nut w/spring.
Page 1111 of 4500
Fig. 140: Removing Lock Nut, Parking Brake Wire Adjusting Nut W/Spring
Courtesy of TOYOTA MOTOR SALES, U.S.A., INC.
b. Remove the clip.
Page 1116 of 4500
Fig. 145: Removing Bolts And Separate Parking Brake Release Cable Sub-Assy From Body
Courtesy of TOYOTA MOTOR SALES, U.S.A., INC.
d. Remove the 3 nuts and parking brake control pedal sub-assy from the body.
HINT:
To make room for the procedure, separate the instrument panel junction block assy with bracket from the
body.
Page 1120 of 4500
16.INSTALL PARKING PEDAL PAD
17.CONNECT PARKING BRAKE RELEASE CABLE SUB-ASSY
a. Connect the parking brake release cable sub-assy to the parking brake control pedal sub-assy.
18.INSTALL PARKING BRAKE SWITCH ASSY
a. Install the parking brake switch assy with the screw.
19.INSTALL PARKING BRAKE CONTROL PEDAL ASSY
a. Install the parking brake control pedal assy with the 3 nuts.
Torque: 13 N.m (130 kgf.cm, 9 ft.lbf)
b. Connect the instrument panel junction block assy with bracket.
Page 1126 of 4500
Fig. 154: Installing Clip To Parking Brake Control Pedal Sub-Assy
Courtesy of TOYOTA MOTOR SALES, U.S.A., INC.
d. Install the spring and temporarily tighten the wire adjusting nut and lock nut.