Page 1991 of 4500
Fig. 2: Defogger System Diagram
Courtesy of TOYOTA MOTOR SALES, U.S.A., INC.
Communication Table
COMMUNICATION TABLE
1.GENERAL
The rear window defogger system's thin heater wires are attached to the inside of the rear window and
defog the window surface quickly. The indicator lamp illuminates while the system is operating. The
system automatically turns off after approximately 15 minutes.
2.FUNCTION OF MAIN COMPONENT
SenderReceiverSignalLine
Multi-display(1)A/C control assemblyRear defogger switch
signalBEAN
Center cluster integration
panel
(2)
A/C control assemblyRear defogger switch
signalBEAN/AVC-LAN
(1)w/ LEXUS navigation system
(2)w/o LEXUS navigation system
Page 1992 of 4500

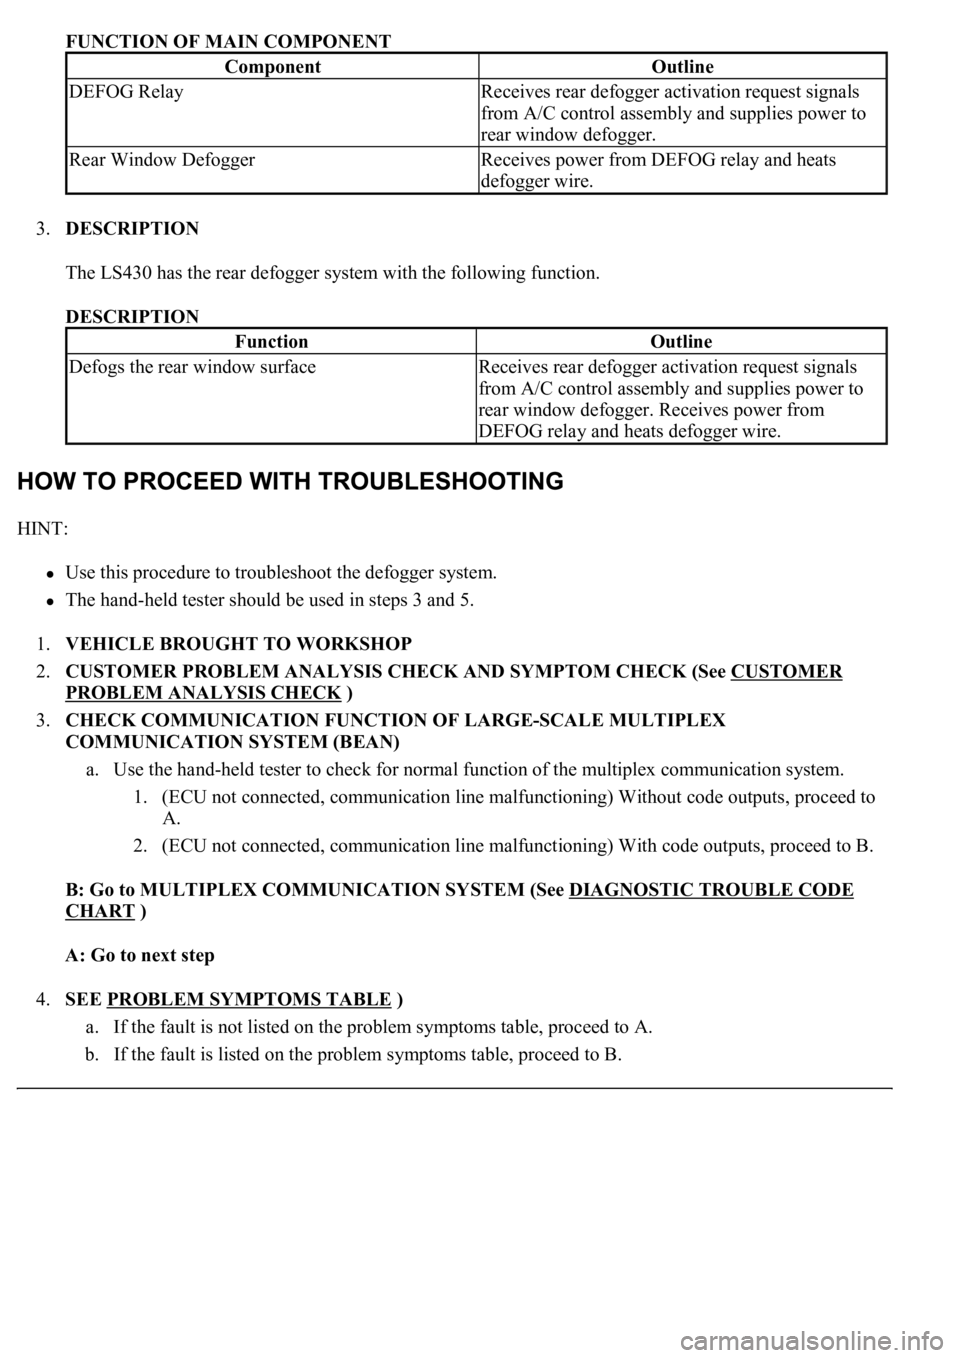
FUNCTION OF MAIN COMPONENT
3.DESCRIPTION
The LS430 has the rear defogger system with the following function.
DESCRIPTION
HINT:
<00380056004800030057004b004c00560003005300550052004600480047005800550048000300570052000300570055005200580045004f00480056004b00520052005700030057004b004800030047004800490052004a004a0048005500030056005c00
56005700480050001100030003[
<0037004b00480003004b0044005100470010004b0048004f0047000300570048005600570048005500030056004b00520058004f0047000300450048000300580056004800470003004c005100030056005700480053005600030016000300440051004700
030018001100030003[
1.VEHICLE BROUGHT TO WORKSHOP
2.CUSTOMER PROBLEM ANALYSIS CHECK AND SYMPTOM CHECK (See CUSTOMER
PROBLEM ANALYSIS CHECK )
3.CHECK COMMUNICATION FUNCTION OF LARGE-SCALE MULTIPLEX
COMMUNICATION SYSTEM (BEAN)
a. Use the hand-held tester to check for normal function of the multiplex communication system.
1. (ECU not connected, communication line malfunctioning) Without code outputs, proceed to
A.
2. (ECU not connected, communication line malfunctioning) With code outputs, proceed to B.
B: Go to MULTIPLEX COMMUNICATION SYSTEM (See DIAGNOSTIC TROUBLE CODE
CHART )
A: Go to next step
4.SEE PROBLEM SYMPTOMS TABLE
)
a. If the fault is not listed on the problem symptoms table, proceed to A.
b. If the fault is listed on the problem symptoms table, proceed to B.
ComponentOutline
DEFOG RelayReceives rear defogger activation request signals
from A/C control assembly and supplies power to
rear window defogger.
Rear Window DefoggerReceives power from DEFOG relay and heats
defogger wire.
FunctionOutline
Defogs the rear window surfaceReceives rear defogger activation request signals
from A/C control assembly and supplies power to
rear window defogger. Receives power from
DEFOG relay and heats defogger wire.
Page 1998 of 4500
c. Perform the ACTIVE TEST by following the directions on the tester screen.
A/C control assy:
A/C CONTROL ASSY - REFERENCE TABLE
CIRCUIT DESCRIPTION
When the defogger switch is turned on, a rear defogger activation request signal is input to the A/C control (A/C
ECU) from the multi-display
1 or center cluster integration panel2 . Then, the A/C control assembly outputs this
signal to the defogger relay (Marking: DEFOG) and the rear window defogger system is activated.
HINT:
1. w/ LEXUS navigation system
2. w/o LEXUS navigation system
WIRING DIAGRAM
ItemTest DetailsDiagnostic Note
DEFOGGER RLY-ROperate rear window defogger OFF/ON-
Page 1999 of 4500
Fig. 8: Rear Window Defogger System - Wiring Diagram
Courtesy of TOYOTA MOTOR SALES, U.S.A., INC.
INSPECTION PROCEDURE
1.INSPECT FUSE
a. Select the ACTIVE TEST, use the han
d-held tester to generate a control command, and then check
Page 2000 of 4500

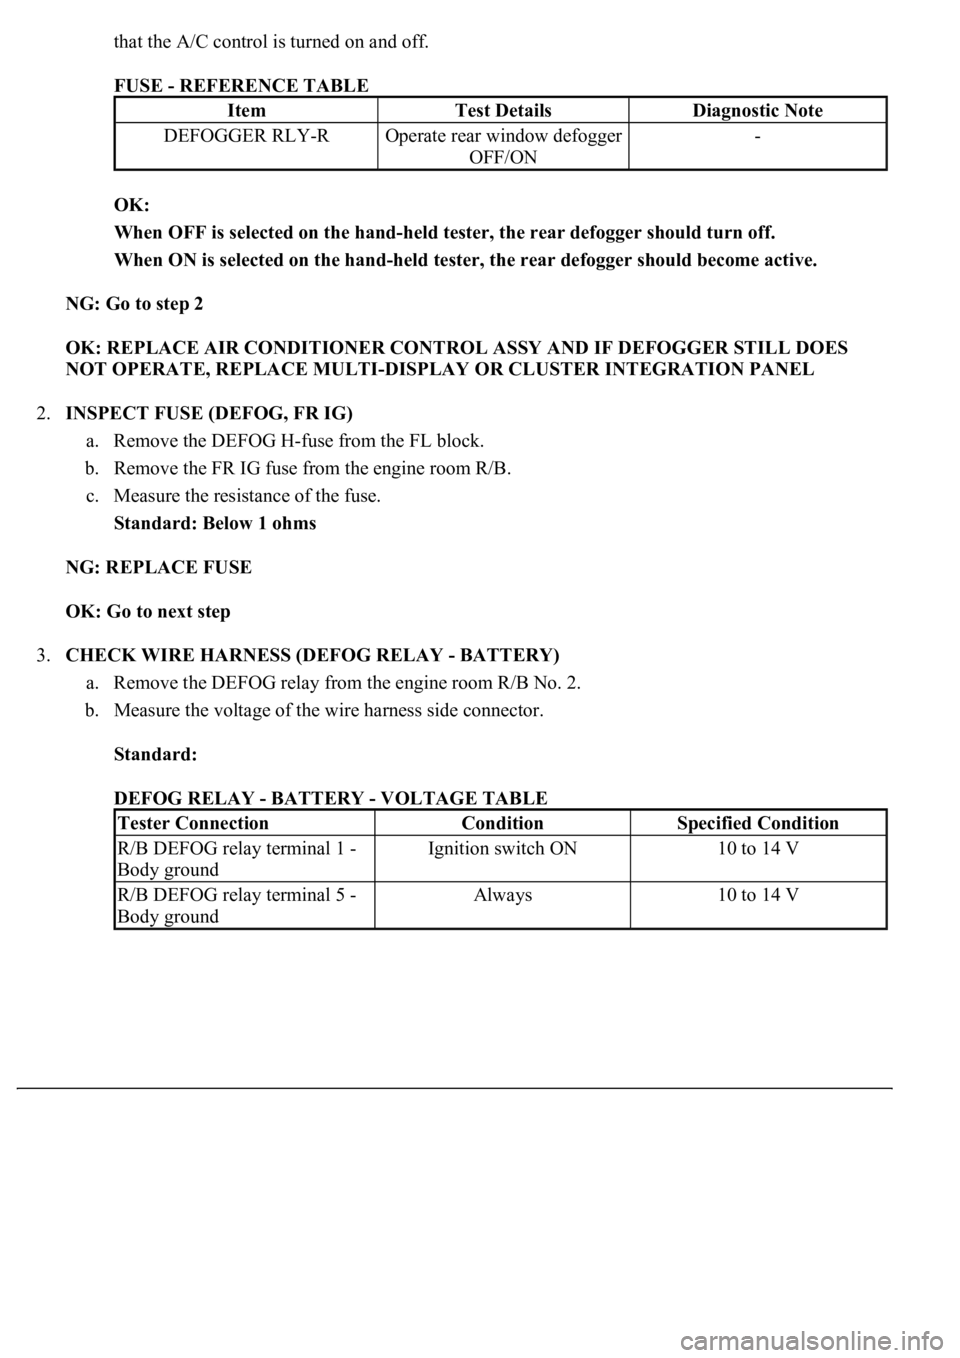
that the A/C control is turned on and off.
FUSE - REFERENCE TABLE
OK:
When OFF is selected on the hand-held tester, the rear defogger should turn off.
When ON is selected on the hand-held tester, the rear defogger should become active.
NG: Go to step 2
OK: REPLACE AIR CONDITIONER CONTROL ASSY AND IF DEFOGGER STILL DOES
NOT OPERATE, REPLACE MULTI-DISPLAY OR CLUSTER INTEGRATION PANEL
2.INSPECT FUSE (DEFOG, FR IG)
a. Remove the DEFOG H-fuse from the FL block.
b. Remove the FR IG fuse from the engine room R/B.
c. Measure the resistance of the fuse.
Standard: Below 1 ohms
NG: REPLACE FUSE
OK: Go to next step
3.CHECK WIRE HARNESS (DEFOG RELAY - BATTERY)
a. Remove the DEFOG relay from the engine room R/B No. 2.
b. Measure the voltage of the wire harness side connector.
Standard:
DEFOG RELAY - BATTERY - VOLTAGE TABLE
ItemTest DetailsDiagnostic Note
DEFOGGER RLY-ROperate rear window defogger
OFF/ON-
Tester ConnectionConditionSpecified Condition
R/B DEFOG relay terminal 1 -
Body groundIgnition switch ON10 to 14 V
R/B DEFOG relay terminal 5 -
Body groundAlways10 to 14 V
Page 2002 of 4500
Fig. 10: Inspecting Relay
Courtesy of TOYOTA MOTOR SALES, U.S.A., INC.
NG: REPLACE RELAY
OK: Go to next step
5.CHECK WIRE HARNESS (REAR WINDOW DEFOGGER - DEFOG RELAY AND BODY
GROUND)
a. Disconnect the R22 and R23 defogger connectors.
b. Disconnect the DEFOG relay from the engine room R/B No. 2.
c. Measure the resistance of the wire harness side connectors.
Standard:
REAR WINDOW DEFOGGER - DEFOG RELAY AND BODY GROUND - RESISTANCE
TABLE
Tester ConnectionSpecified Condition
R22-1 - R/B DEFOG relay terminal 3Below 1 ohms
R23-1 - Body groundBelow 1 ohms
Page 2003 of 4500
Fig. 11: Checking Wire Harness (Rear Window Defogger - Defog Relay And Body Ground)
Courtesy of TOYOTA MOTOR SALES, U.S.A., INC.
NG: REPAIR OR REPLACE HARNESS AND CONNECTOR
Page 2006 of 4500
Fig. 12: Checking Wire Harness (Defog Relay -A/C Control Assy)
Courtesy of TOYOTA MOTOR SALES, U.S.A., INC.
NG: REPAIR OR REPLACE HARNESS AND CONNECTOR
OK: Go to next step
7.INSPECT REAR WINDOW DEFOGGER (WIRE) (See step 3 in INSPECTION
)
NG: REPLACE REAR WINDOW DEFOGGER
OK: REPLACE AIR CONDITIONER CONTROL ASSY