Page 1916 of 2100
8F±40BODY STRUCTURE
Removal
1. Disconnect the battery ground cable.
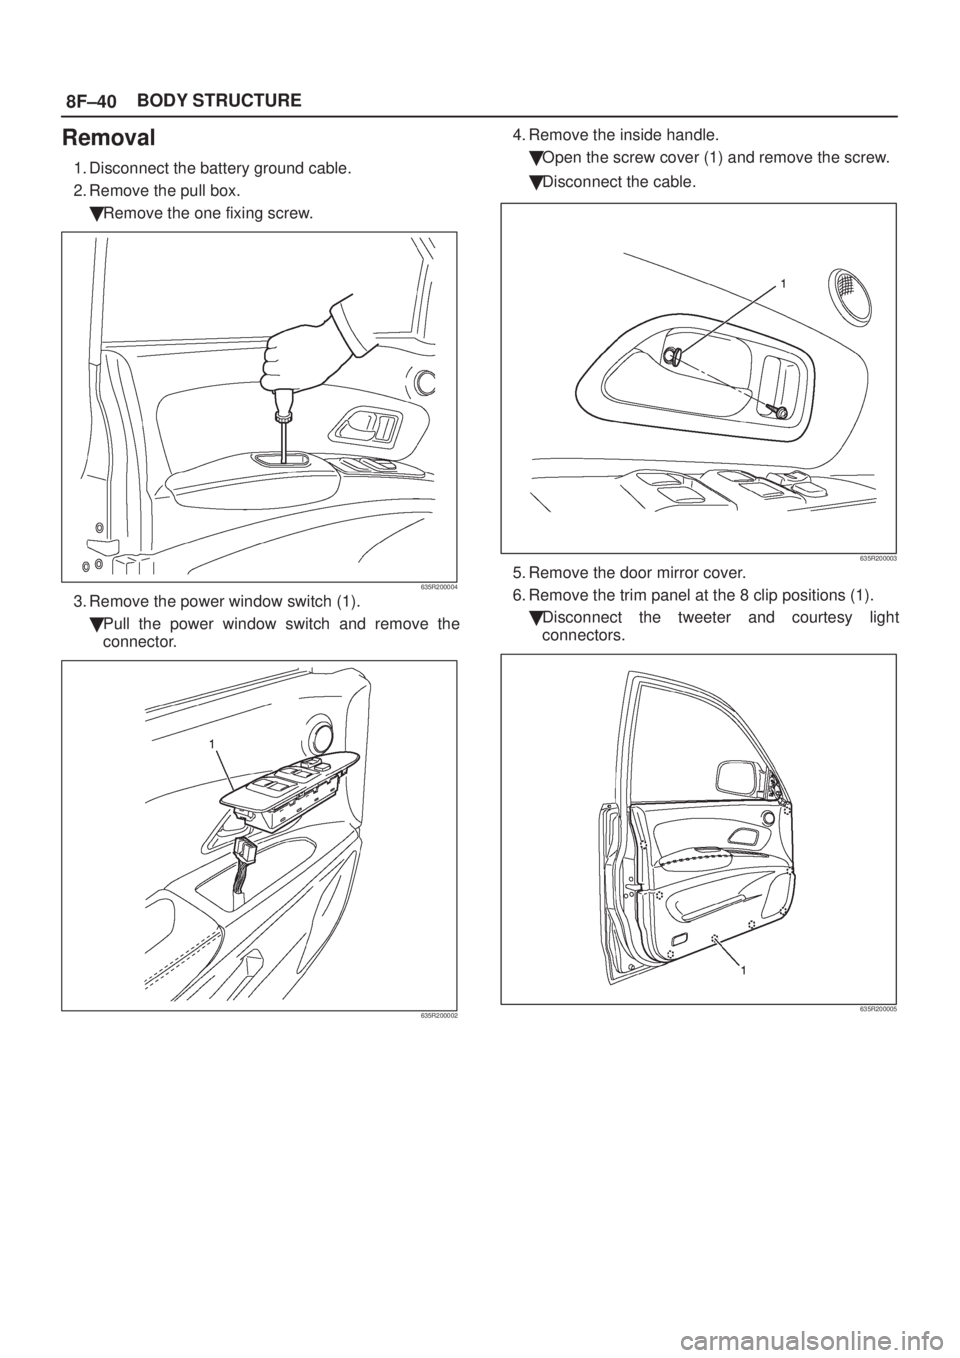
2. Remove the pull box.
�Remove the one fixing screw.
635R200004
3. Remove the power window switch (1).
�Pull the power window switch and remove the
connector.
635R200002
4. Remove the inside handle.
�Open the screw cover (1) and remove the screw.
�Disconnect the cable.
635R200003
5. Remove the door mirror cover.
6. Remove the trim panel at the 8 clip positions (1).
�Disconnect the tweeter and courtesy light
connectors.
635R200005
Page 1919 of 2100
8F±43 BODY STRUCTURE
Removal
1. Disconnect the battery ground cable.
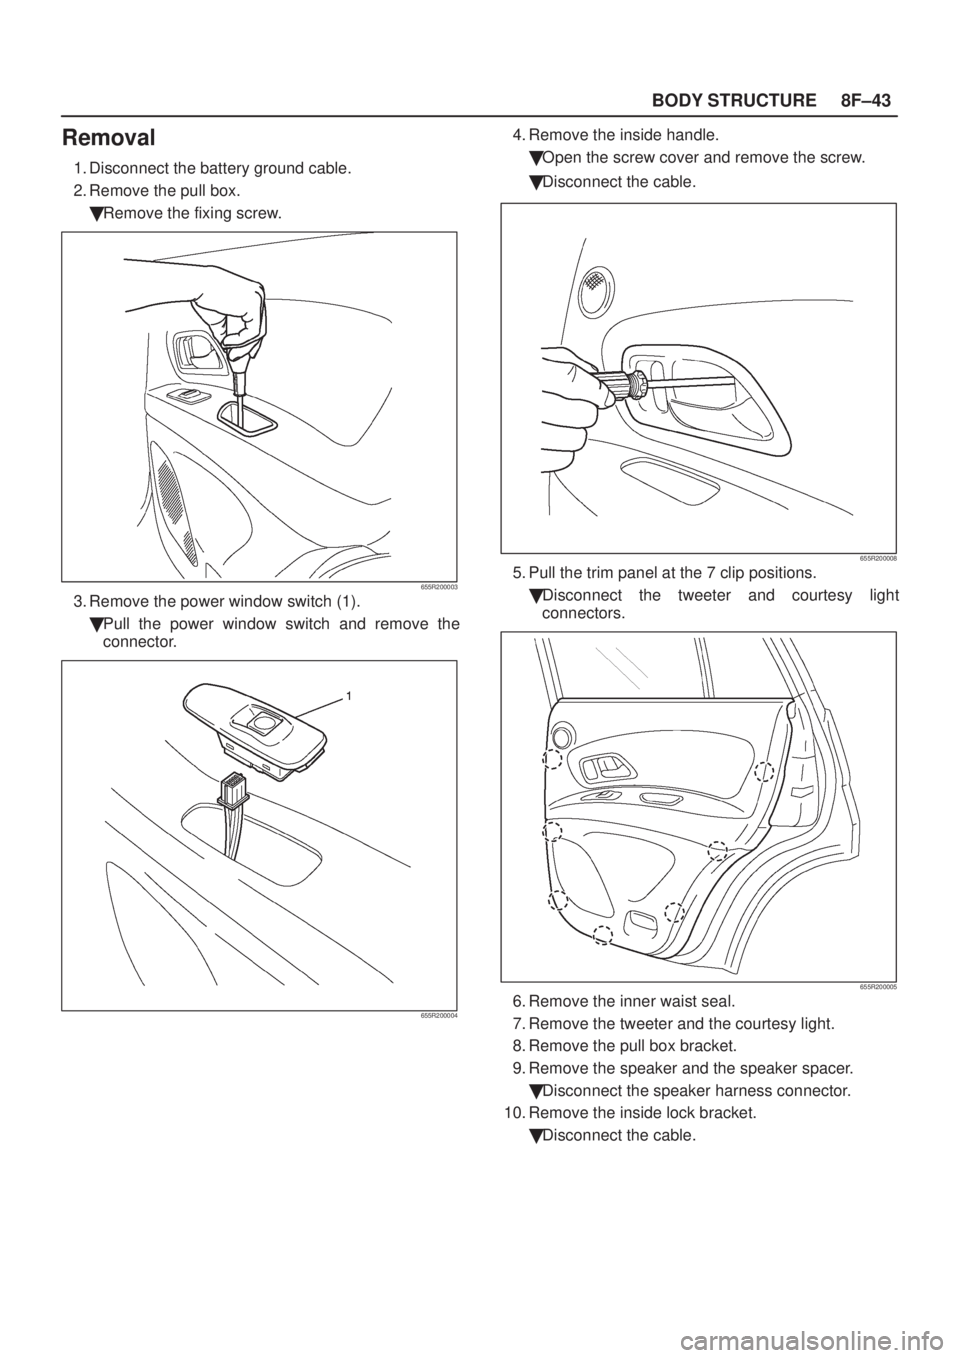
2. Remove the pull box.
�Remove the fixing screw.
655R200003
3. Remove the power window switch (1).
�Pull the power window switch and remove the
connector.
655R200004
4. Remove the inside handle.
�Open the screw cover and remove the screw.
�Disconnect the cable.
655R200008
5. Pull the trim panel at the 7 clip positions.
�Disconnect the tweeter and courtesy light
connectors.
655R200005
6. Remove the inner waist seal.
7. Remove the tweeter and the courtesy light.
8. Remove the pull box bracket.
9. Remove the speaker and the speaker spacer.
�Disconnect the speaker harness connector.
10. Remove the inside lock bracket.
�Disconnect the cable.
Page 1923 of 2100

8F±47 BODY STRUCTURE
Removal
1. Disconnect the battery ground cable.
2. Remove the rear roof trim cover.
�Pry the six clip positions free from the body panel.
3. Remove the tailgate upper center trim cover.
�Pry the four clip positions (1) free from the tailgate.
4. Remove the tailgate pull box.
�Pry the tailgate pull box from the tailgate assembly.
5. Remove the three clips.
6. Remove the tailgate lower trim cover.
�Pry the thirteen clip positions (1) free from the
tailgate.
7. Remove the tailgate upper side trim cover.
�Pry the three clip positions (1) free from the tail gate
(RH/LH).
681R200007
8. Disconnect the high mount stoplight and rear
defogger and tailgate lock harness connectors.
9. Pull out the washer hose.
10. Remove the tailgate hinges (RH/LH).
�Remove the two bolts.
11. Remove the tailgate stay assembly (RH/LH).
�Remove the two bolts.
12. Remove the tailgate assembly.
�Remove the tailgate assembly may require two
people.
�Carefully remove the tailgate assembly not to
damage the hinge.
13. Remove the tailgate upper cover assemblies
(RH/LH).
14. Remove the dove tails (RH/LH).
15. Remove the vent grills (RH/LH).
16. Remove the high mount stoplight.
17. Remove the rear wiper arm.
�Refer to
Rear Wiper Arm/Blade in Wiper/Washer
System section.
18. Remove the rear wiper motor assembly.19. Remove the tailgate lock assembly and outside
handle.
�Refer to
Tailgate Lock in Security And Locks
section.
20. Remove the license plate garnish (1).
�Remove the four screws (3) and the clip (2).
803R200010
21. Remove the license plate light.
22. Remove the tailgate harness.
Page 1927 of 2100
8F±51 BODY STRUCTURE
Windshield
Parts Location
607R200003
Legend
(1) Windshield Wiper Arm
(2) Windshield Upper Molding
(3) Windshield(4) Windshield Side Molding
(5) Windshield Support
(6) Front Cowl Cover
(7) Hood Rear Seal
Removal
1. Disconnect the battery ground cable.
2. Remove the front pillar trim cover.
�Turn up the finisher and pry the trim cover clips free
from the body panel.
3. Remove the sunvisors and sunvisor holders.
�Refer to
Headlining in Exterior/Interior Trim section.
4. Remove the interior mirror.
�Refer to
Interior Mirror Assembly in Exterior/Interior
Trim section.
5. Remove the windshield wiper arm.
�Refer to
Windshield Wiper Arm/Blade in
Wiper/Washer System section.
6. Remove the windshield side molding.
�Pull the molding out from drip rail.
7. Remove the front cowl cover.
Page 1931 of 2100
8F±55 BODY STRUCTURE
Rear Quarter Glass
Parts Location
641R200005
Legend
(1) Clip
(2) Rear Quarter Glass
(3) Adhesive
(4) Fastener Tape(5) Spacer
(6) Rear Quarter Trim Covers
(7) Air Outlet Garnish Assembly
(8) Rear Quarter Moulding
(9) Moulding
Removal
1. Disconnect the battery ground cable.
2. Remove the rear quarter trim covers.
�Refer to
Interior Trim Panels in Exterior/Interior Trim
section.
3. Remove the air outlet garnish assembly.
�Pry the two clip positions free from the body panel.
4. Remove the rear quarter moulding.
�Pry the five clip positions free from the body panel.5. Remove the rear quarter glass.
�Refer to
Windshield in this section.
Page 1933 of 2100
8F±57 BODY STRUCTURE
Tailgate Glass
Parts Location
641R200004
Legend
(1) Adhesive
(2) Sealing Dam
(3) Primer Coating Area (Glass Side)
(4) Tailgate Glass(5) Clip
(6) Primer Coating Area (Body Panel Side)
(7) Mark Stamping Location
(8) Fastner
Removal
1. Disconnect the battery ground cable.
2. Remove the tailgate trim covers.
�Refer to
Tail Gate in Body Structure section.
3. Remove the rear wiper arm.
�Refer to
Rear Wiper Arm/Blade in Wiper/Washer
System section.
4. Remove the license plate garnish.
�Refer to
Tailgate in this section.
5. Disconnect the high mount stoplight and rear
defogger harness connector.
6. Remove the high mount stoplight.
Page 1940 of 2100
8G±2SEATS
Front Seat Assembly
Front Seat Assembly and Associated Parts
750R200011
Legend
(1) Front Seat Assembly (Passenger's Seat Only)
(2) Hinge Cover
(3) Rear Cover
(4) Front Seat Belt Buckle Assembly
(5) Seat Adjuster
(6) Front Cover(7) Reclining Knob
(8) Side Cover
(9) Reclining Device
(10) Seat Back Assembly
(11) Guide Holder
(12) Headrest
Removal
1. Disconnect the battery ground cable.
2. Remove the front and rear covers.
3. Remove the front seat assembly.
�Remove the four fixing bolts.
Page 1943 of 2100

SEATS8G±5
Removal
1. Remove the adjuster bracket rear cover and the fixing
bolts on the rear side of the seat adjuster assembly.
�Before removal, slide the power seat assembly
forward.
2. Remove the adjuster bracket front cover and the
fixing bolts on the front side of the seat adjuster
assembly.
�Before removal, slide the power seat assembly
backward.
3. Disconnect the battery ground cable.
4. Remove the power seat assembly.
�Disconnect the power seat harness connectors and
the seat belt warning connector of the driver side.
CAUTION: When raising power seat assembly (1),
use the handle (2) not the cable (3). A bent cable
causes noise to occur during power seat operation.
�Please grip the handle (4).
�Don't grip the cable (5).
750R200012
5. Pull the switch knobs out.
6. Remove the outer side cover.
�Remove the two fixing screws and disconnect the
power seat switch connector.
7. Remove the power seat switch.
�Remove the two fixing screws.
8. Remove the power lumber switch.
�Remove the two fixing screws and connectors.
9. Remove the inner side cover.
10. Remove the headrest.
11. Remove the reclining device (2).
�Flip up the seat back trim cover (1) in order to
remove the reclining device fixing bolts.
�Disconnect the reclining motor harness connector
(3).
760R100037
12. Remove the reclining device covers.
13. Remove the trim cover and pad (Seat back side).
14. Remove the seat heater and connector (seat back
side).
15. Remove the power lumbar support assembly.
16. Remove the guide holder.
�Pull the guide holder out by holding the bottom end
of it from the seat back assembly.
17. Remove the seat adjuster assembly.
�Remove the four fixing bolts and disconnect the
sliding motor connector.
18. Remove the sliding motor cable (2).
�Remove the nuts of each side.
CAUTION: Be sure to maintain the same position for
both outer and inner seat adjust assembly (1).
760R100038
 Windshield Wiper Arm
(2) Windshield Upper Molding
(3) Windshield(4) Windshield Side Molding
(5) Windshield Support
(6) Front Cowl")
 Clip
(2) Rear Quarter Glass
(3) Adhesive
(4) Fastener Tape(5) Spacer
(6) Rear Quarter Trim Covers
(7) Air Outlet Garnish A")
 Adhesive
(2) Sealing Dam
(3) Primer Coating Area (Glass Side)
(4) Tailgate Glass(5) Clip
(6) Primer Coating Area (Body Panel S")
 Front Seat Assembly (Passengers Seat Only)
(2) Hinge Cover
(3) Rear Cover
(4) Front Seat Belt Buckle Asse")