Page 1971 of 2100
8I±2SUN ROOF/CONVERTIBLE TOP
Sunroof Glass
Sunroof Glass and Associated Parts
665R200003
Legend
(1) Sunroof Weatherstrip
(2) Sunroof Glass
Removal
1. Tilt the sunroof and open the sunshade.
2. Disconnect the battery ground cable.
3. Pull out the front of sight shield (2).
4. Remove four sunroof glass fixing Torx screws (3) to
remove the sunroof glass (1).
665R200004
Page 1973 of 2100
8I±4SUN ROOF/CONVERTIBLE TOP
Sunshade
Disassembled View
665RW012
Legend
(1) Sunroof Glass
(2) Sight Shield(3) Sunshade Stopper
(4) Sunshade
Removal
1. Tilt the sunroof.
2. Disconnect the battery ground cable.
3. Remove the sunroof glass.
�Refer to Sunroof Glass in this section.
4. Pull the sight shield upward using screwdriver.
665RW006
Page 1975 of 2100
8I±6SUN ROOF/CONVERTIBLE TOP
Sunroof Frame Complete Assembly
Sunroof Frame Complete Assembly and Associated Parts
665R200005
Legend
(1) Sunroof Drain Hose(2) Sunroof Frame Complete Assembly
(3) Headlining
Removal
1. Disconnect the battery ground cable.
2. Remove the headlining.
�Refer to Headlining in Exterior/Interior Trim section.
Page 1976 of 2100

SUN ROOF/CONVERTIBLE TOP8I±7
3. Disconnect the sunroof drain hose at the sunroof
frame side as shown in the figure.
665RW010
4. Disconnect the sunroof harness connection.
5. Remove two sunroof frame assembly fixing nuts
(front side) and six fixing bolts from the frame
complete assembly, and then remove the sunroof
frame complete assembly.
NOTE: Be sure to remove the frame assembly while
supporting it.
Installation
1. Install the sunroof frame assembly.
2. After installing the frame assembly, loosen the
sunroof glass fixing nuts and adjust the sunroof glass
setting position.
�Refer to Sunroof Glass in this section.
3. Install the sunroof drain hose.
4. Install the headlining.
�Refer to Headlining in Exterior/Interior Trim section.
Sunroof Switch
Removal
1. Disconnect the battery ground cable.
2. Remove the sunroof switch (1).
�Remove the switch by pushing the spring with the
tip of a screwdriver.
�Disconnect the switch connector.
825R200021
Installation
To install, follow the removal steps in the reverse order.
Page 1977 of 2100
8I±8SUN ROOF/CONVERTIBLE TOP
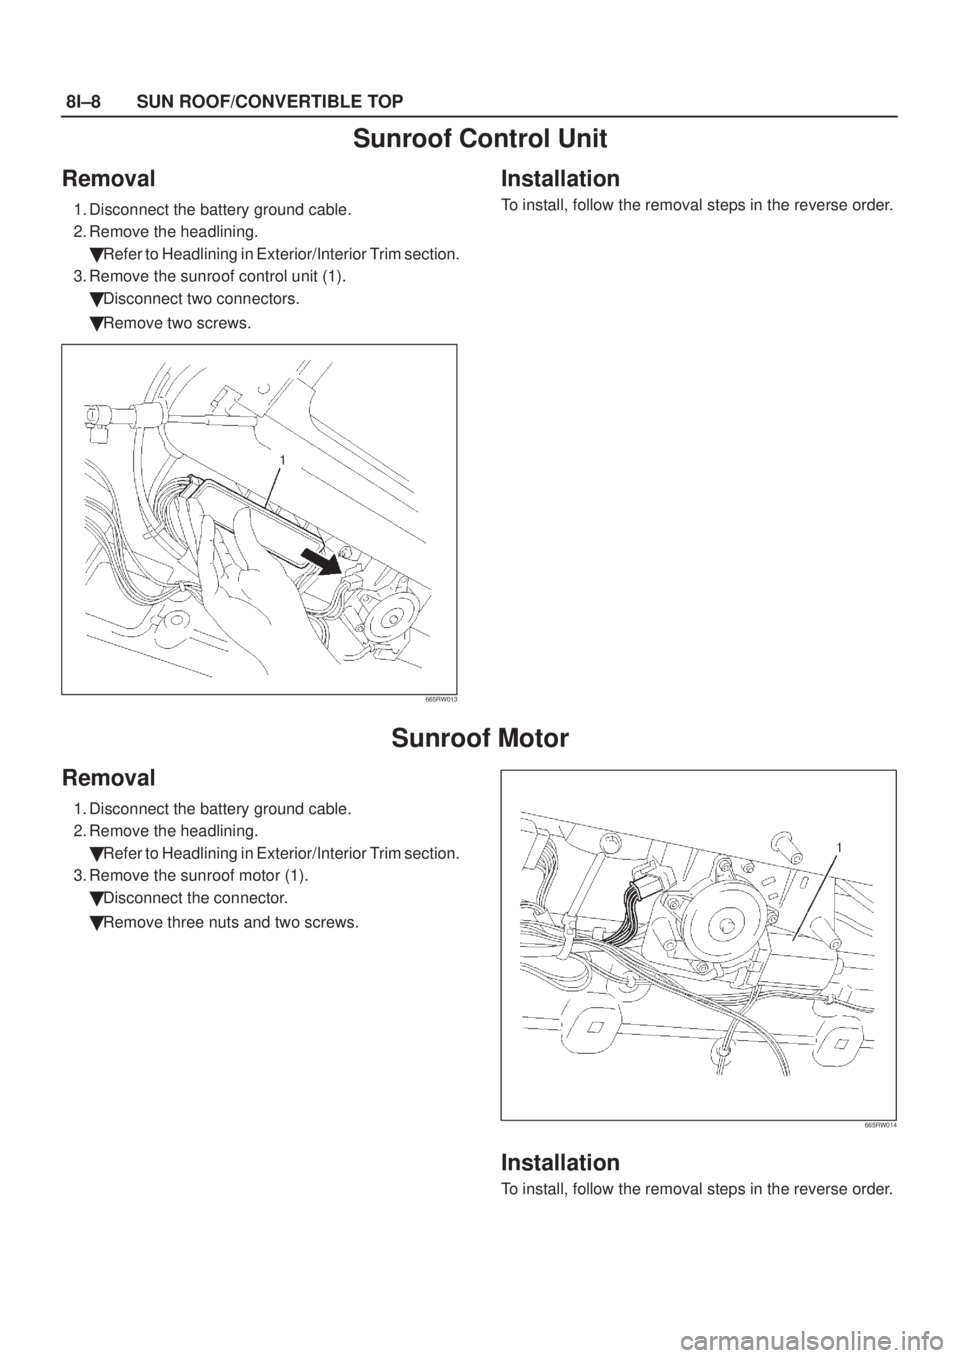
Sunroof Control Unit
Removal
1. Disconnect the battery ground cable.
2. Remove the headlining.
�Refer to Headlining in Exterior/Interior Trim section.
3. Remove the sunroof control unit (1).
�Disconnect two connectors.
�Remove two screws.
665RW013
Installation
To install, follow the removal steps in the reverse order.
Sunroof Motor
Removal
1. Disconnect the battery ground cable.
2. Remove the headlining.
�Refer to Headlining in Exterior/Interior Trim section.
3. Remove the sunroof motor (1).
�Disconnect the connector.
�Remove three nuts and two screws.
665RW014
Installation
To install, follow the removal steps in the reverse order.
Page 1981 of 2100
EXTERIOR/INTERIOR TRIM8J±3
Consoles
Consoles and Associated Parts
745R200005
Legend
(1) Cluster Upper Cover
(2) Center Cluster
(3) Knee Pad
(4) Seat Heater Switch (Required Option)
(5) Rear Console Assembly(6) CD Changer
(7) Rear Console Bracket
(8) Front Console Bracket
(9) Front Console Assembly
(10) Accessory Socket
Removal
1. Disconnect the battery ground cable.
2. Remove the cluster upper cover and connectors.
3. Pry the knee pads.
4. Remove the center cluster.
�Remove the six screws and pull out the center
cluster at the six clip positions.�Disconnect the connectors.
5. Remove the rear console assembly.
�Open the rear console lid and remove two screws.
6. Remove the front console assembly.
�Remove six fixing screws and disconnect the
accessory socket connectors.
�Disconnect the seat heater switch connectors (if so
equipped).
Page 1983 of 2100
EXTERIOR/INTERIOR TRIM8J±5
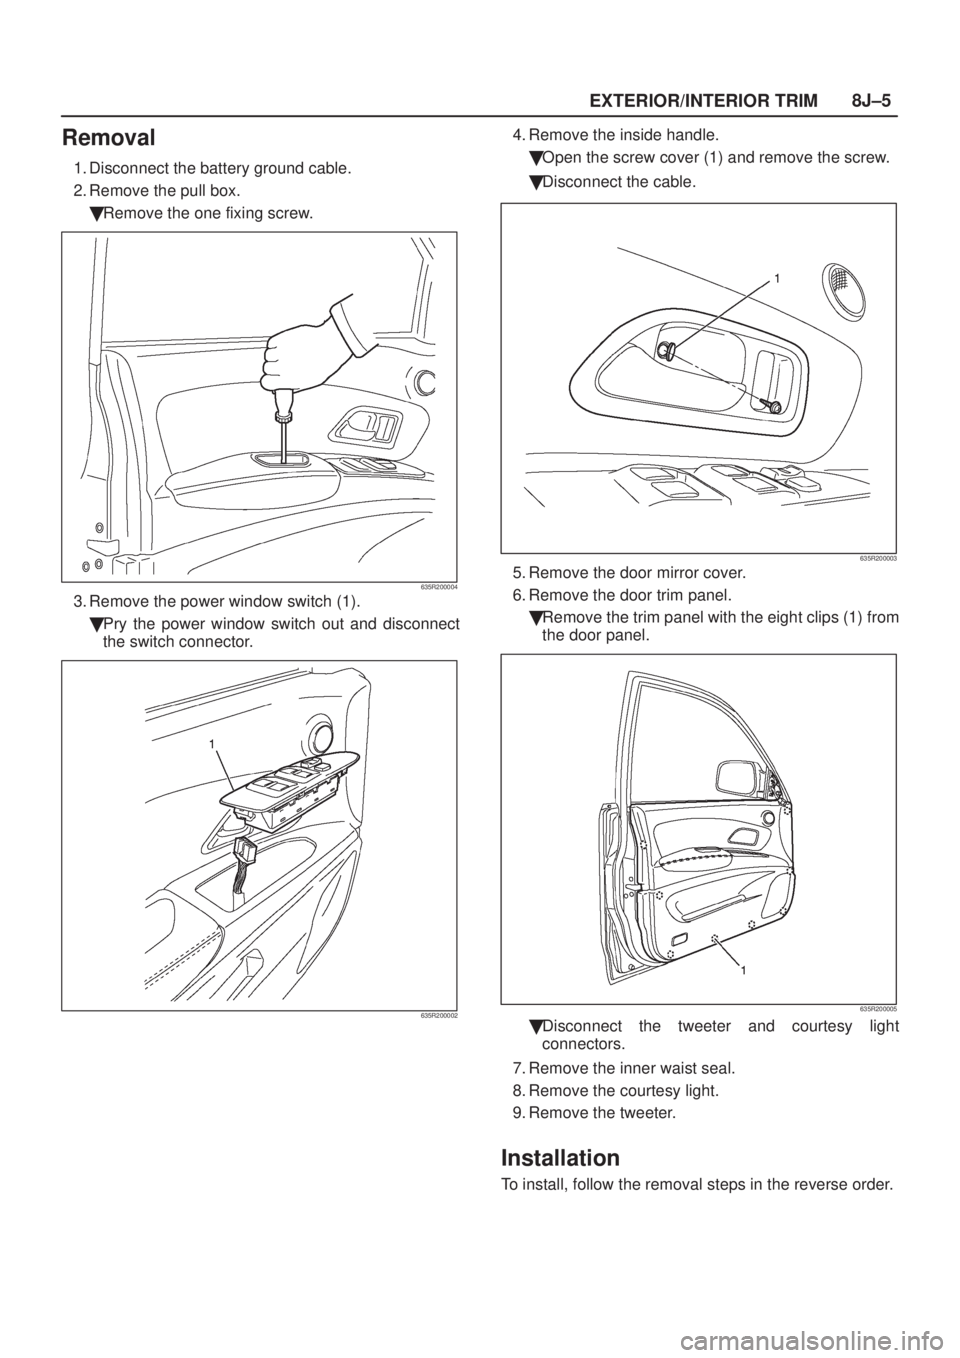
Removal
1. Disconnect the battery ground cable.
2. Remove the pull box.
�Remove the one fixing screw.
635R200004
3. Remove the power window switch (1).
�Pry the power window switch out and disconnect
the switch connector.
635R200002
4. Remove the inside handle.
�Open the screw cover (1) and remove the screw.
�Disconnect the cable.
635R200003
5. Remove the door mirror cover.
6. Remove the door trim panel.
�Remove the trim panel with the eight clips (1) from
the door panel.
635R200005
�Disconnect the tweeter and courtesy light
connectors.
7. Remove the inner waist seal.
8. Remove the courtesy light.
9. Remove the tweeter.
Installation
To install, follow the removal steps in the reverse order.
Page 1985 of 2100
EXTERIOR/INTERIOR TRIM8J±7
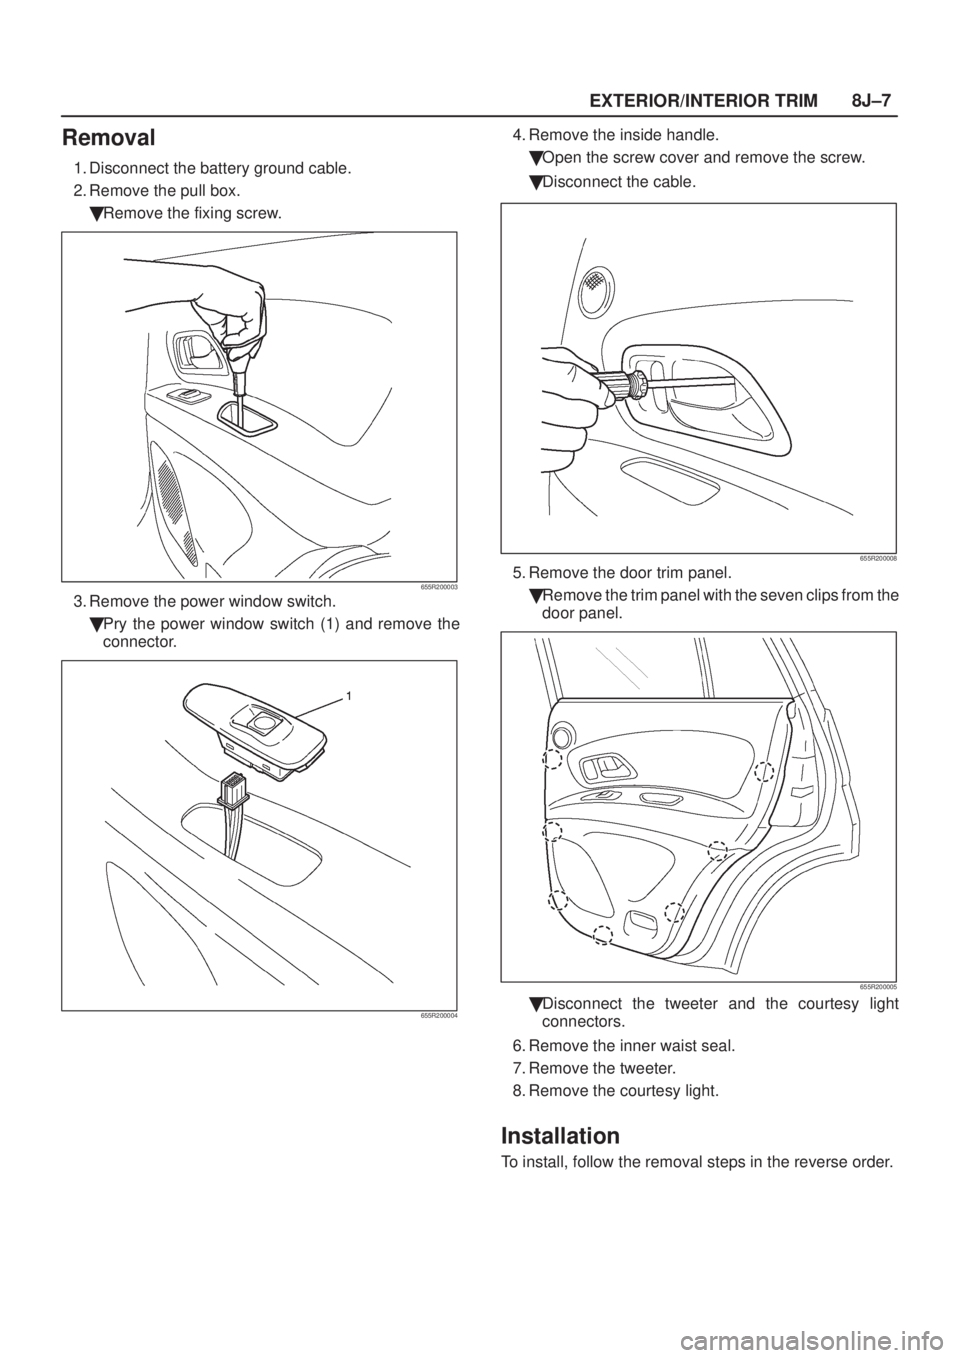
Removal
1. Disconnect the battery ground cable.
2. Remove the pull box.
�Remove the fixing screw.
655R200003
3. Remove the power window switch.
�Pry the power window switch (1) and remove the
connector.
655R200004
4. Remove the inside handle.
�Open the screw cover and remove the screw.
�Disconnect the cable.
655R200008
5. Remove the door trim panel.
�Remove the trim panel with the seven clips from the
door panel.
655R200005
�Disconnect the tweeter and the courtesy light
connectors.
6. Remove the inner waist seal.
7. Remove the tweeter.
8. Remove the courtesy light.
Installation
To install, follow the removal steps in the reverse order.
 Sunroof Weatherstrip
(2) Sunroof Glass
Removal
1. Tilt the sunroof and open the sunshade.
2. Discon")
 Sunroof Glass
(2) Sight Shield(3) Sunshade Stopper
(4) Sunshade
Removal
1. Tilt the sunroof.
2. Disconnect the battery grou")
 Sunroof Drain Hose(2) Sunroof Frame Complete Assembly
(3) Headl")
 Cluster Upper Cover
(2) Center Cluster
(3) Knee Pad
(4) Seat Heater Switch (Required Option)
(5) Rear Console A")