Page 1808 of 2100
8B±10WIPER/WASHER SYSTEM
Rear Washer Motor
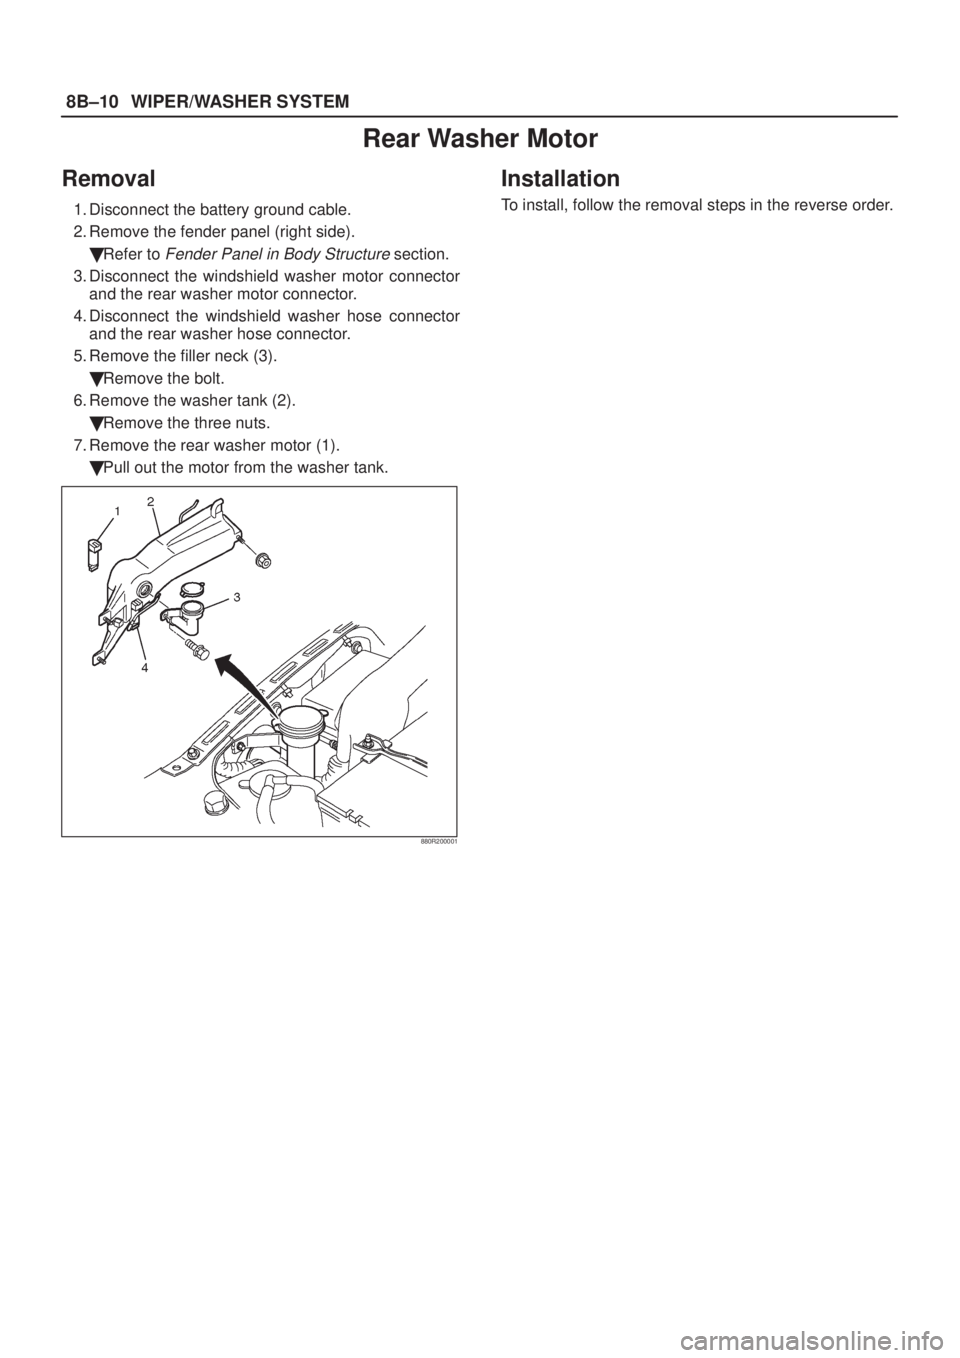
Removal
1. Disconnect the battery ground cable.
2. Remove the fender panel (right side).
�Refer to
Fender Panel in Body Structure section.
3. Disconnect the windshield washer motor connector
and the rear washer motor connector.
4. Disconnect the windshield washer hose connector
and the rear washer hose connector.
5. Remove the filler neck (3).
�Remove the bolt.
6. Remove the washer tank (2).
�Remove the three nuts.
7. Remove the rear washer motor (1).
�Pull out the motor from the washer tank.
880R200001
Installation
To install, follow the removal steps in the reverse order.
Page 1809 of 2100
WIPER/WASHER SYSTEM8B±11
Alarm and Relay Control Unit
Removal
1. Disconnect the battery ground cable.
2. Remove the grove box (1).
3. Remove the alarm and relay control unit (2).
Disconnect the connector.
826R200020
Installation
To install, follow the removal steps in the reverse order.
Rear Wiper Arm/Blade
Removal
1. Open the cap (2).
2. Remove the arm nut (3).
3. Remove the wiper arm/blade (1).
885R200011
Installation
Refer to Rear Wiper Motor in this section.
Page 1810 of 2100
8B±12WIPER/WASHER SYSTEM
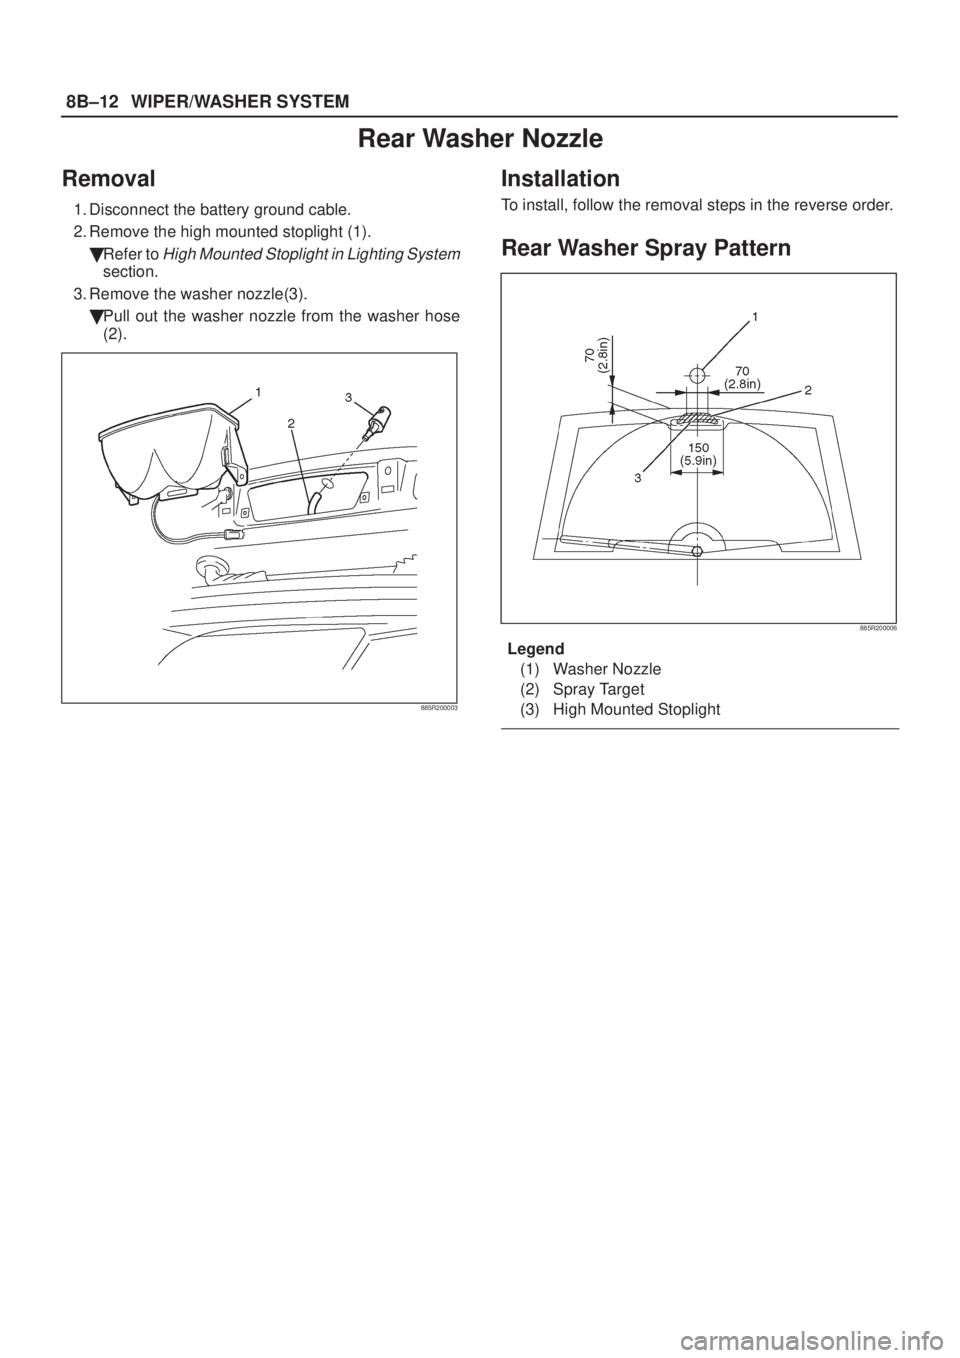
Rear Washer Nozzle
Removal
1. Disconnect the battery ground cable.
2. Remove the high mounted stoplight (1).
�Refer to
High Mounted Stoplight in Lighting System
section.
3. Remove the washer nozzle(3).
�Pull out the washer nozzle from the washer hose
(2).
885R200003
Installation
To install, follow the removal steps in the reverse order.
Rear Washer Spray Pattern
885R200006
Legend
(1) Washer Nozzle
(2) Spray Target
(3) High Mounted Stoplight
Page 1814 of 2100
8C±2ENTERTAINMENT
Cigarette Lighter
General Description
When the cigarette lighter is pushed in with the starter
switch at either ªACCº or ªONº position, a circuit is formed
in the cigarette lighter case to heat the lighter coil.
The cigarette lighter springs back to its original position
after the lighter coil is heated.
Removal
1. Disconnect the battery ground cable.
2. Remove the center cluster assembly (1).
�Refer to
Instrument Panel Assembly in Body
Structure section.
3. Remove the cigarette lighter assembly (2).
�Disconnect the connectors.
�Remove the socket (3) and nut (4).
826R200012
Installation
To install, follow the removal steps in the reverse order,
noting the following point:
1. When installing the bezel, align the projected portion
of the socket with the notch of the bezel.
Page 1815 of 2100
ENTERTAINMENT8C±3
Rod Type Antenna
Removal
1. Disconnect the battery ground cable.
2. Turn the antenna rod (1) counterclockwise to remove
it.
3. Remove three screws and nine clips to remove the
fender inner liner (5).
4. Disconnect the feeder cable connector (4) at the
inside of the vehicle.
5. Turning the lock nut (2) counterclockwise removes it
together with the base mold (3).
6. Pull down and remove the housing (7) from the panel.
7. Pull and remove the cable with the grommet (6).
890R200040
Installation
To install, follow the removal steps in the reverse order.
Page 1816 of 2100
8C±4ENTERTAINMENT
Accessory Socket
Front Accessory Socket
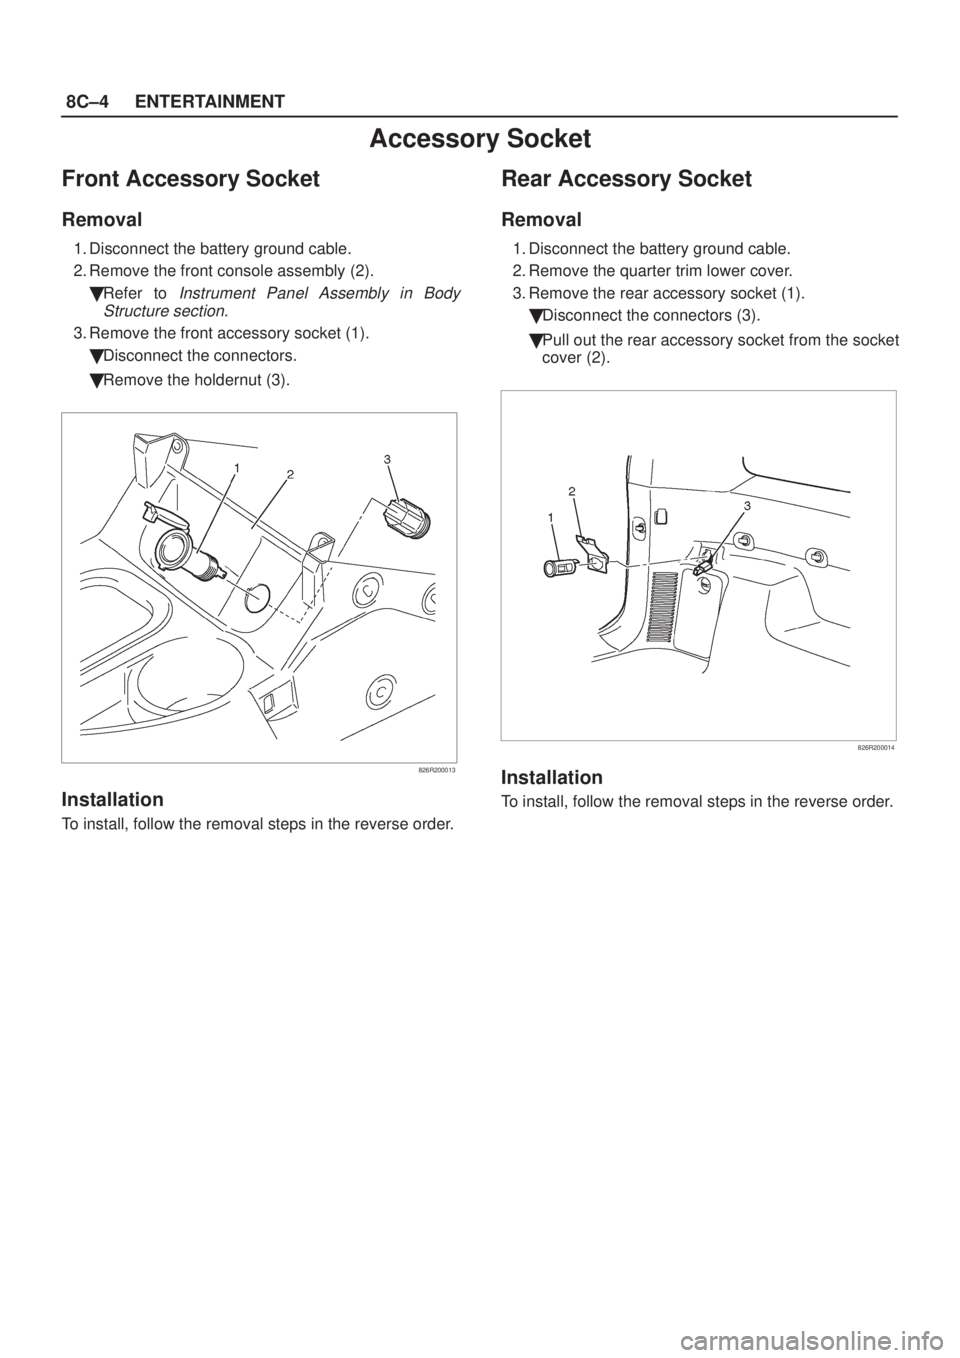
Removal
1. Disconnect the battery ground cable.
2. Remove the front console assembly (2).
�Refer to
Instrument Panel Assembly in Body
Structure section.
3. Remove the front accessory socket (1).
�Disconnect the connectors.
�Remove the holdernut (3).
826R200013
Installation
To install, follow the removal steps in the reverse order.
Rear Accessory Socket
Removal
1. Disconnect the battery ground cable.
2. Remove the quarter trim lower cover.
3. Remove the rear accessory socket (1).
�Disconnect the connectors (3).
�Pull out the rear accessory socket from the socket
cover (2).
826R200014
Installation
To install, follow the removal steps in the reverse order.
Page 1817 of 2100
ENTERTAINMENT8C±5
Audio
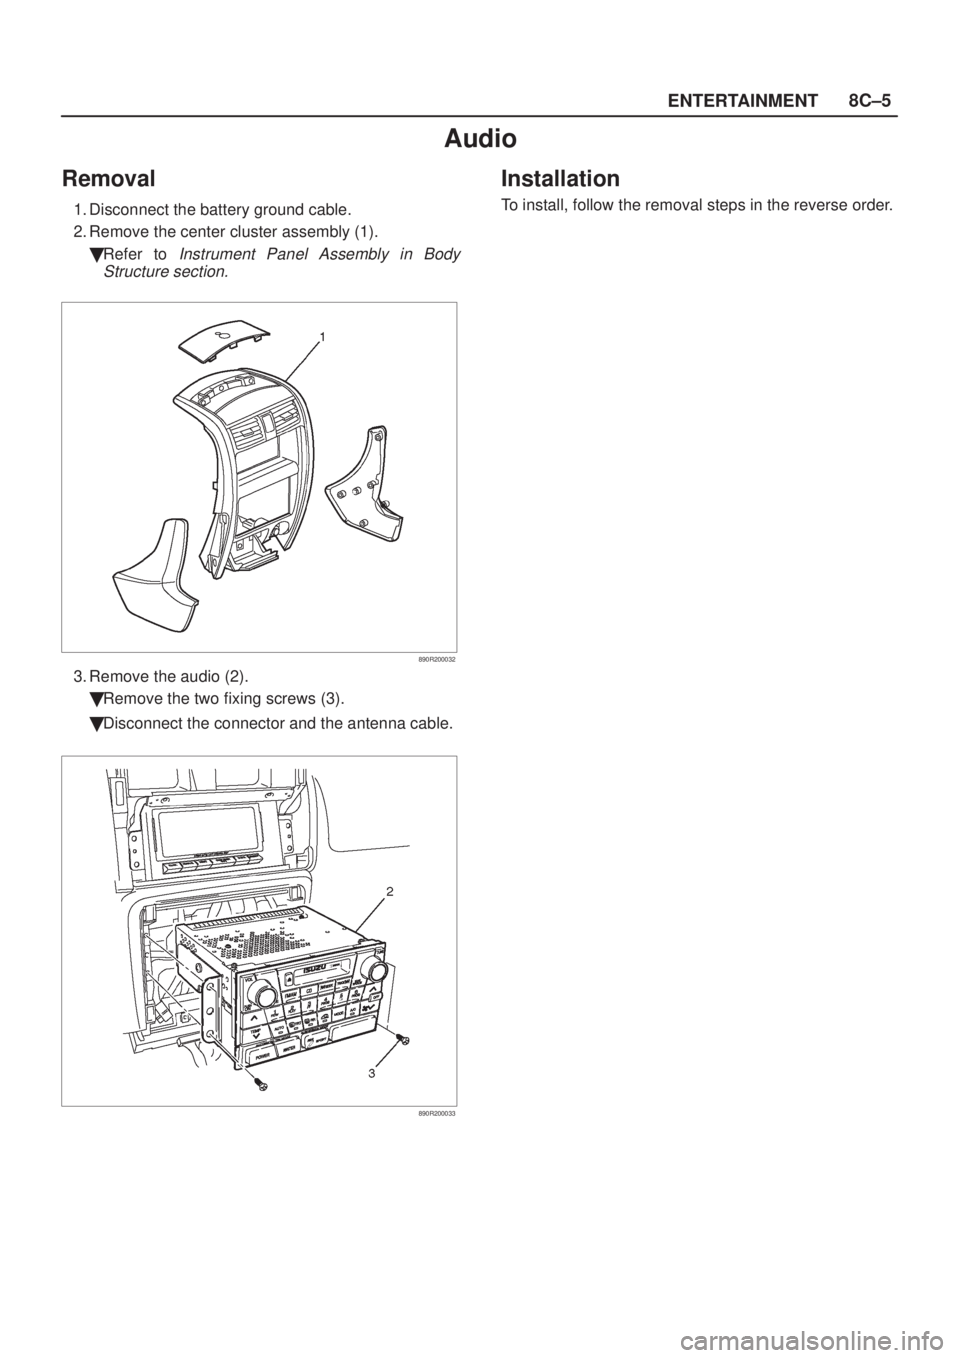
Removal
1. Disconnect the battery ground cable.
2. Remove the center cluster assembly (1).
�Refer to
Instrument Panel Assembly in Body
Structure section.
890R200032
3. Remove the audio (2).
�Remove the two fixing screws (3).
�Disconnect the connector and the antenna cable.
890R200033
Installation
To install, follow the removal steps in the reverse order.
Page 1818 of 2100
8C±6ENTERTAINMENT
Speaker
Front Speaker
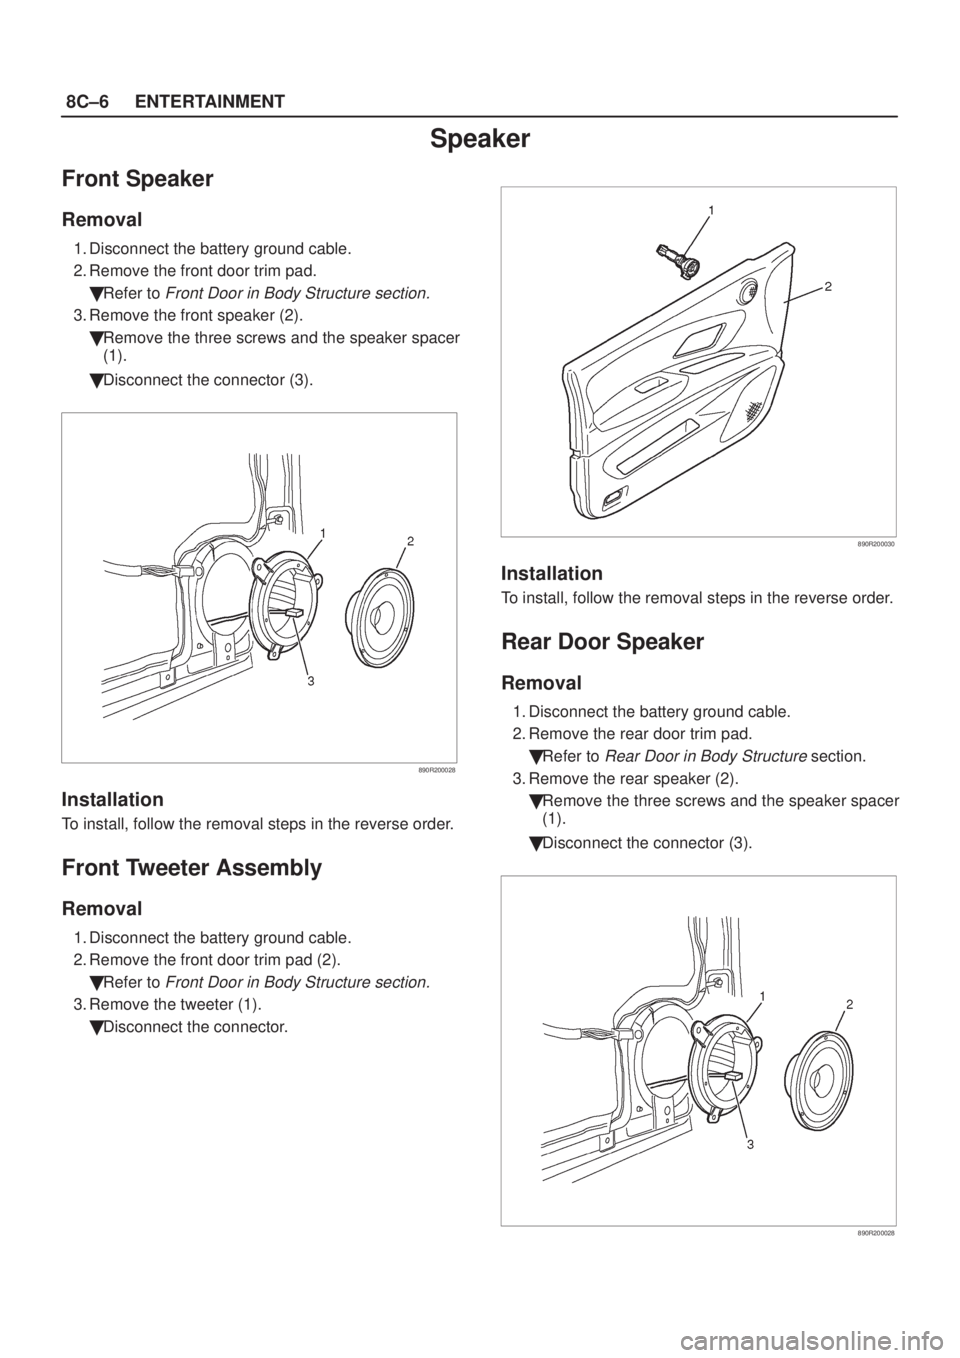
Removal
1. Disconnect the battery ground cable.
2. Remove the front door trim pad.
�Refer to
Front Door in Body Structure section.
3. Remove the front speaker (2).
�Remove the three screws and the speaker spacer
(1).
�Disconnect the connector (3).
890R200028
Installation
To install, follow the removal steps in the reverse order.
Front Tweeter Assembly
Removal
1. Disconnect the battery ground cable.
2. Remove the front door trim pad (2).
�Refer to
Front Door in Body Structure section.
3. Remove the tweeter (1).
�Disconnect the connector.
890R200030
Installation
To install, follow the removal steps in the reverse order.
Rear Door Speaker
Removal
1. Disconnect the battery ground cable.
2. Remove the rear door trim pad.
�Refer to
Rear Door in Body Structure section.
3. Remove the rear speaker (2).
�Remove the three screws and the speaker spacer
(1).
�Disconnect the connector (3).
890R200028
.
3. Remove the alarm and relay control unit (2).
Disconnect the conne")

 counterclockwise to remove
it.
3. Remove three screws and nine clips to remove the
fende")