Page 3119 of 4323
SA2349
SST
R11391SST
SA2348
SST
Z00641
SST
R04324
Matchmarks
± SUSPENSION AND AXLEREAR DIFFERENTIAL CARRIER
SA±115
3111 Author�: Date�:
2005 SEQUOIA (RM1146U)
(c) 4WD:
Using SST to hold the flange, remove the nut.
SST 09330±00021
(d) Using SST, remove the companion flange.
SST 09950±30012 (09951±03010, 09953±03010,
09954±03010, 09955±03030, 09956±03050)
9. REMOVE FRONT OIL SEAL
Using SST, remove the oil seal from the differential carrier.
SST 09308±10010
10. REMOVE FRONT BEARING AND BEARING SPACER
(a) Using SST, remove the bearing from the drive pinion.
SST 09556±22010
If the front bearing is damaged or worn, replace the front bear-
ing.
(b) Remove the 2 washers and bearing spacer.
11. REMOVE DIFFERENTIAL CASE
(a) Place matchmarks on the bearing cap and differential car-
rier.
(b) Remove the 4 bolts and bearing cap.
Page 3120 of 4323

R04325
SST
R02482
SST
R04326
Front: Rear:
R04327
Matchmarks SA±116
± SUSPENSION AND AXLEREAR DIFFERENTIAL CARRIER
3112 Author�: Date�:
2005 SEQUOIA (RM1146U)
(c) Using SST and a plastic hammer, remove the 2 side bear-
ing plate washers.
SST 09504±22012
HINT:
Measure the plate washer thickness and note it down.
(d) Remove the differential case with the bearing outer races
from the carrier.
HINT:
Tag the bearing outer races to show the location for reassem-
bling.
12. REMOVE DRIVE PINION FROM DIFFERENTIAL CAR-
RIER
Remove the drive pinion with the rear bearing.
13. REMOVE DRIVE PINION REAR BEARING
Using SST and a press, remove the bearing from the drive pin-
ion.
SST 09950±00020
HINT:
If the drive pinion or ring gear is damaged, replace them as a
set.
14. REMOVE FRONT AND REAR BEARING OUTER
RACES AND ADJUSTING WASHER
NOTICE:
Do not remove the outer races except when replacing the
bearings.
Using a brass bar and hammer, remove the outer races and ad-
justing washer from the carrier.
HINT:
Measure the adjusting washer thickness and note it down.
15. REMOVE RING GEAR
(a) Place matchmarks on the ring gear and differential case.
(b) Remove the 12 ring gear set bolts.
(c) Using a plastic hammer, tap on the ring gear to separate
it from the differential case.
16. CHECK DIFFERENTIAL CASE RUNOUT
(a) Install the differential case in the differential carrier (See
page SA±119).
Page 3124 of 4323

SA1143
Boiling Water
R04332
Matchmarks
Thread Lock
R04334
R04335
SST SA±120
± SUSPENSION AND AXLEREAR DIFFERENTIAL CARRIER
3116 Author�: Date�:
2005 SEQUOIA (RM1146U)
(b) Heat the ring gear to about 100°C (212°F) in boiling wa-
ter.
(c) Carefully take the ring gear out of the boiling water.
(d) After the moisture on the ring gear has completely evapo-
rated, quickly install the ring gear to the differential case.
HINT:
Align the matchmarks on the ring gear and differential case.
(e) After the ring gear has cooled sufficiently, torque the set
bolts to which thread lock has been applied.
Thread lock:
Part No. 08833±00100, THREE BOND 1360K or equiv-
alent.
Torque: 125 N´m (1,270 kgf´cm, 92 ft´lbf)
4. INSPECT RING GEAR RUNOUT
(a) Install the differential case into the carrier and install the
plate washers to where there is no play in the bearing
(See step 8.).
(b) Install the bearing cap (See step 11.).
(c) Using a dial indicator, measure the runout of the ring gear.
(d) Remove the bearing caps and differential case.
Maximum runout: 0.05 mm (0.0020 in.)
5. INSTALL DRIVE PINION BEARING OUTER RACES
AND ADJUSTING WASHER
(a) Using SST and a press, install a new front bearing outer
race to the carrier.
SST 09950±60020 (09951±00710),
09950±70010 (09951±07150)
(b) Using SST and a press, install a new adjusting washer
and a new rear bearing outer race to the carrier.
SST 09950±60020 (09951±00910),
09950±70010 (09951±07150)
Page 3125 of 4323

R00055
SST
R11163SST
F14486
40 mm
(1.57 in.)
F14485
SST
± SUSPENSION AND AXLEREAR DIFFERENTIAL CARRIER
SA±121
3117 Author�: Date�:
2005 SEQUOIA (RM1146U)
HINT:
First fit a washer with the same thickness as the washer which
was removed, then after checking the tooth contact pattern, re-
place the washer with a different thickness if necessary.
6. INSTALL DRIVE PINION REAR BEARING
Using SST and a press, install the rear bearing onto the drive
pinion.
SST 09506±35010
7. TEMPORARILY ADJUST DRIVE PINION PRELOAD
(a) Install the drive pinion and front bearing.
HINT:
After adjusting the ring gear tooth contact pattern, assemble the
spacer, washers and oil seal.
(b) Using SST, install the companion flange.
SST 09950±30012 (09951±03010, 09953±03010,
09954±03010, 09955±03030, 09956±03050)
(c) Coat the threads of a new nut with hypoid gear oil.
(d) 2WD:
Install the conpanion flange nut.
(1) Install the 3 stud bolts so that the heads come out
40 mm (1.57 in.).
(2) Set the SST and install the 3 nuts to the companion
flange.
SST 09213±58013
Page 3130 of 4323

R04554
R11163SST SA±126
± SUSPENSION AND AXLEREAR DIFFERENTIAL CARRIER
3122 Author�: Date�:
2005 SEQUOIA (RM1146U)
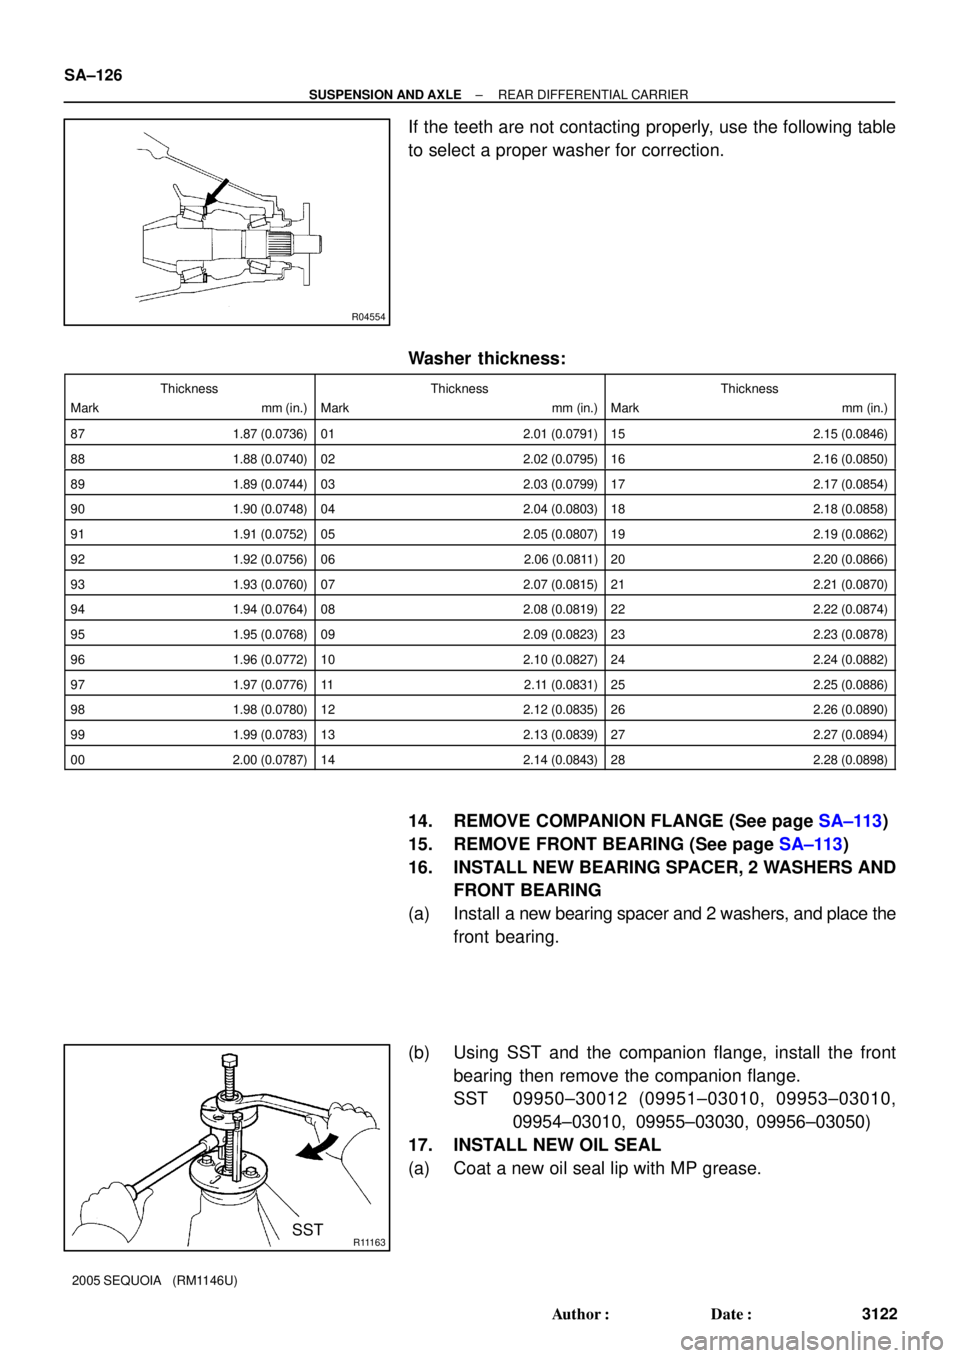
If the teeth are not contacting properly, use the following table
to select a proper washer for correction.
Washer thickness:
Thickness
Mark mm (in.)Thickness
Mark mm (in.)Thickness
Mark mm (in.)
87 1.87 (0.0736)01 2.01 (0.0791)15 2.15 (0.0846)
88 1.88 (0.0740)02 2.02 (0.0795)16 2.16 (0.0850)
89 1.89 (0.0744)03 2.03 (0.0799)17 2.17 (0.0854)
90 1.90 (0.0748)04 2.04 (0.0803)18 2.18 (0.0858)
91 1.91 (0.0752)05 2.05 (0.0807)19 2.19 (0.0862)
92 1.92 (0.0756)06 2.06 (0.0811)20 2.20 (0.0866)
93 1.93 (0.0760)07 2.07 (0.0815)21 2.21 (0.0870)
94 1.94 (0.0764)08 2.08 (0.0819)22 2.22 (0.0874)
95 1.95 (0.0768)09 2.09 (0.0823)23 2.23 (0.0878)
96 1.96 (0.0772)10 2.10 (0.0827)24 2.24 (0.0882)
97 1.97 (0.0776)11 2.11 (0.0831)25 2.25 (0.0886)
98 1.98 (0.0780)12 2.12 (0.0835)26 2.26 (0.0890)
99 1.99 (0.0783)13 2.13 (0.0839)27 2.27 (0.0894)
00 2.00 (0.0787)14 2.14 (0.0843)28 2.28 (0.0898)
14. REMOVE COMPANION FLANGE (See page SA±113)
15. REMOVE FRONT BEARING (See page SA±113)
16. INSTALL NEW BEARING SPACER, 2 WASHERS AND
FRONT BEARING
(a) Install a new bearing spacer and 2 washers, and place the
front bearing.
(b) Using SST and the companion flange, install the front
bearing then remove the companion flange.
SST 09950±30012 (09951±03010, 09953±03010,
09954±03010, 09955±03030, 09956±03050)
17. INSTALL NEW OIL SEAL
(a) Coat a new oil seal lip with MP grease.
Page 3866 of 4323
05_SEQUOIA_U (L/O 0408)
7
2005 SEQUOIA from Aug. '04 Prod. (OM34424U)
18. Ashtray
19. Cigarette lighter
20. Front drive control switches
21. Center differential lock switch
22. Cruise control switch
23. Tire pressure warning system reset
switch
24. Audio remote control switches
25. Tilt steering lock release lever
26. Roll sensing of curtain shield airbag off
switch
27. Instrument panel light control knob
Page 3870 of 4323
05_SEQUOIA_U (L/O 0408)
11
2005 SEQUOIA from Aug. '04 Prod. (OM34424U)
Automatic transmission indicator lights
Traction control system off indicator light
(two±wheel drive models)
Vehicle stability control system off indicator light
(four±wheel drive models) Slip indicator light
Headlight high beam indicator lightOverdrive±off indicator light
Turn signal indicator lights
Engine immobilizer/theft deterrent system
indicator light
Front passenger occupant classification
indicator light
Roll sensing of curtain shield airbags off
indicator light
Headlight low beam indicator light
Tail light indicator lightLow speed four±wheel drive indicator light*
2
High speed four±wheel drive indicator light*
2
Center differential lock indicator light*
2
(four±wheel drive models)
Page 4036 of 4323

05_SEQUOIA_U (L/O 0408)
177
2005 SEQUOIA from Aug. '04 Prod. (OM34424U)
If the automatic unlocking operation linked
to shift lever position is set, all doors are
automatically unlocked when the selector
lever is moved to ªPº position after the
ignition switch is turned to ªONº position.
For details, see ªÐAutomatic door locking
and unlocking functionsº on page 27 in
Section 1±2.
(i) Good driving practice
�If the transmission repeatedly shifts up
and down between fourth gear and
overdrive when climbing a gentle slope,
the overdrive should be turned off. Be
sure to turn the switch on immediately
afterward.
�When towing a trailer, in order to main-
tain engine braking efficiency, do not
use overdrive.
CAUTION
Always keep your foot on the brake
pedal while stopped with the engine
running. This prevents the vehicle
from creeping.
NOTICE
Always use the brake pedal or the
parking brake to hold the vehicle on
an upgrade. Do not attempt to hold
the vehicle using the accelerator ped-
al, as this can cause the transmission
to overheat.
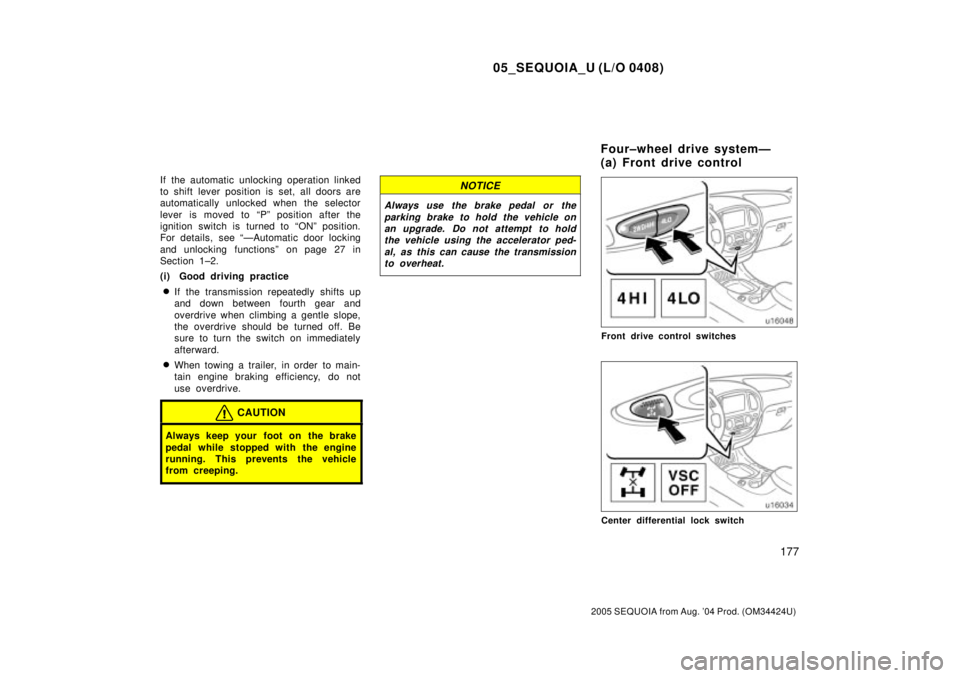
Front drive control switches
Center differential lock switch
Four±wheel drive systemÐ
(a) Front drive control