Page 2951 of 4323

± TRANSFERTRANSFER UNIT
TR±5
2943 Author�: Date�:
2005 SEQUOIA (RM1146U)
INSTALLATION
1. INSTALL TRANSFER
Raise the transfer and install it to t")
TR0DE±01
F19237
F19338
0 to 5 mm
(0 to 0.1968 in.)
± TRANSFERTRANSFER UNIT
TR±5
2943 Author�: Date�:
2005 SEQUOIA (RM1146U)
INSTALLATION
1. INSTALL TRANSFER
Raise the transfer and install it to the transmission with the 8
transfer mounting bolts.
Torque: 24 N´m (245 kgf´cm, 18 ft´lbf)
NOTICE:
Take care not to damage the lip of the transfer rear oil seal
with the transfer input shaft.
2. CONNECT VEHICLE SPEED SENSOR AND TRANS-
FER ACTUATOR CONNECTORS
3. INSTALL ENGINE REAR MOUNTING
Install the engine rear mounting to the transfer with the 4 bolts.
Torque: 65 N´m (660 kgf´cm, 48 ft´lbf)
4. INSTALL CROSS MEMBER
(a) Install the cross member with the 4 bolts and nuts.
Torque: 72 N´m (730 kgf´cm, 53 ft´lbf)
(b) Install the 4 set bolts of the engine rear mounting.
Torque: 18 N´m (185 kgf´cm, 13 ft´lbf)
(c) Remove the transmission jacks.
(d) Install the heat insulator with the 2 bolts.
Torque: 16 N´m (164 kgf´cm, 12 ft´lbf)
5. INSTALL FRONT AND REAR PROPELLER SHAFTS
(See page PR±9)
6. INSTALL LH AND RH FRONT EXHAUST PIPES
(See page EM±128)
7. INSTALL FRONT SUSPENSION MEMBER BRACKET
Install the 2 front suspension member brackets with the 8 bolts.
Torque: 33 N´m (336 kgf´cm, 24 ft´lbf)
8. FILL WITH TRANSFER OIL
(a) Remove the filler plug and gasket.
(b) Fill with transfer oil.
Oil grade: API GL±4 or GL±5
Viscosity: SAE 75W±90
Capacity: 1.4 liters (1.5 US qts, 1.2 lmp.qts)
NOTICE:
�When supplying oil, pour it slowly.
�Supply oil several times at several minute intervals.
HINT:
The oil level must be within 0 to 5 mm (0 to 0.1968 in.) down from
the lowest end of the hole for the filler plug.
(c) After leaving it for 5 minutes, check the oil level again.
(d) Install the filler plug with a new gasket.
Torque: 37 N´m (377 kgf´cm, 27 ft´lbf)
Page 2992 of 4323
PR01F±04
± PROPELLER SHAFTTROUBLESHOOTING
PR±1
2984 Author�: Date�:
2005 SEQUOIA (RM1146U)
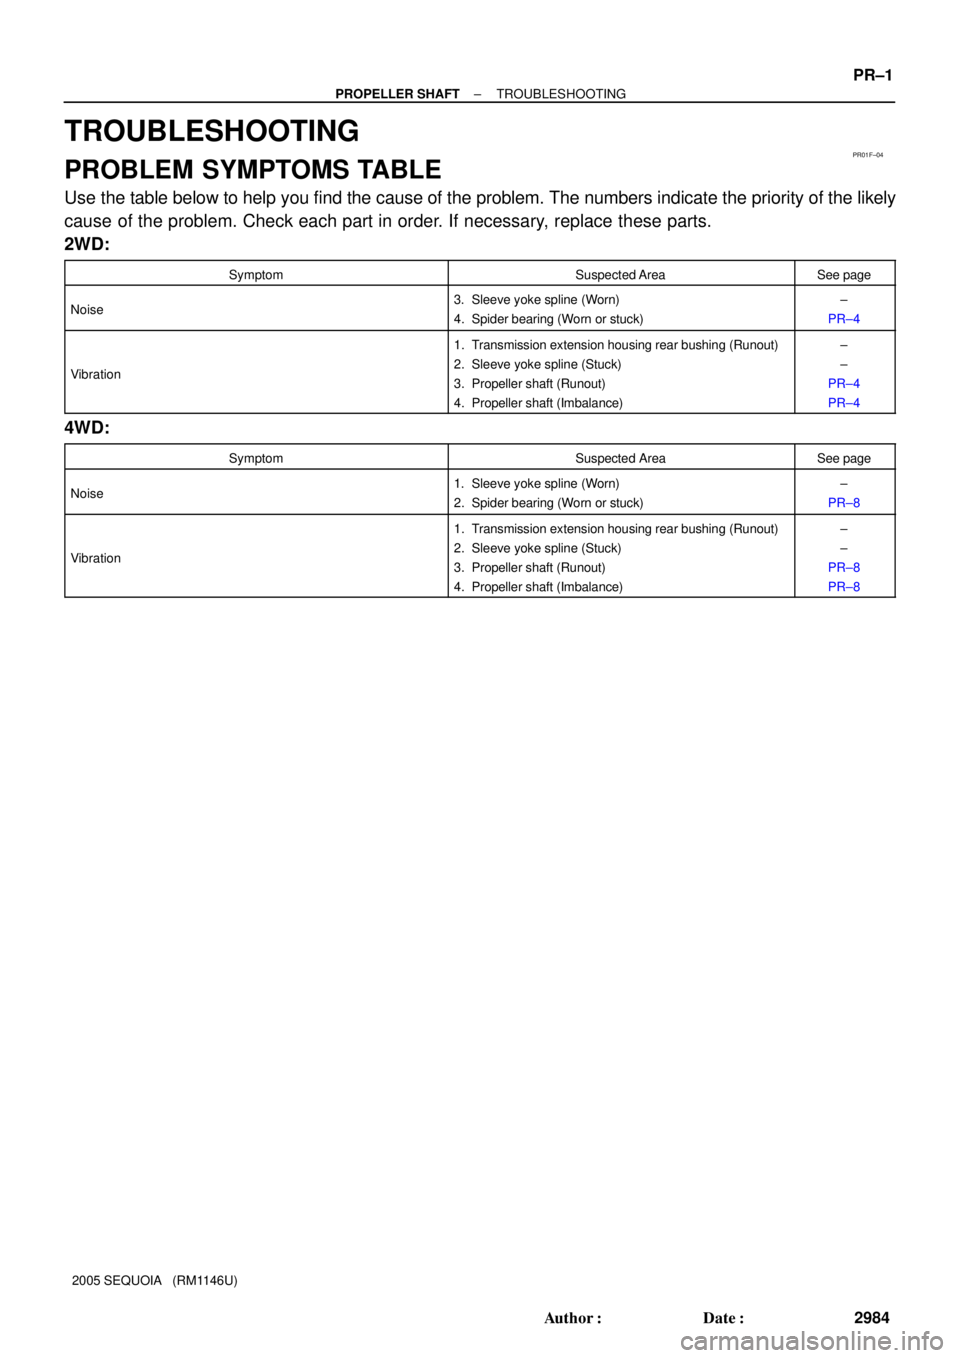
TROUBLESHOOTING
PROBLEM SYMPTOMS TABLE
Use the table below to help you find the cause of the problem. The numbers indicate the priority of the likely
cause of the problem. Check each part in order. If necessary, replace these parts.
2WD:
SymptomSuspected AreaSee page
Noise3. Sleeve yoke spline (Worn)
4. Spider bearing (Worn or stuck)±
PR±4
Vibration
1. Transmission extension housing rear bushing (Runout)
2. Sleeve yoke spline (Stuck)
3. Propeller shaft (Runout)
4. Propeller shaft (Imbalance)±
±
PR±4
PR±4
4WD:
SymptomSuspected AreaSee page
Noise1. Sleeve yoke spline (Worn)
2. Spider bearing (Worn or stuck)±
PR±8
Vibration
1. Transmission extension housing rear bushing (Runout)
2. Sleeve yoke spline (Stuck)
3. Propeller shaft (Runout)
4. Propeller shaft (Imbalance)±
±
PR±8
PR±8
Page 2995 of 4323
PR07K±02
Z04240
Z04241
PR±4
± PROPELLER SHAFTPROPELLER SHAFT ASSEMBLY (2WD)
2987 Author�: Date�:
2005 SEQUOIA (RM1146U)
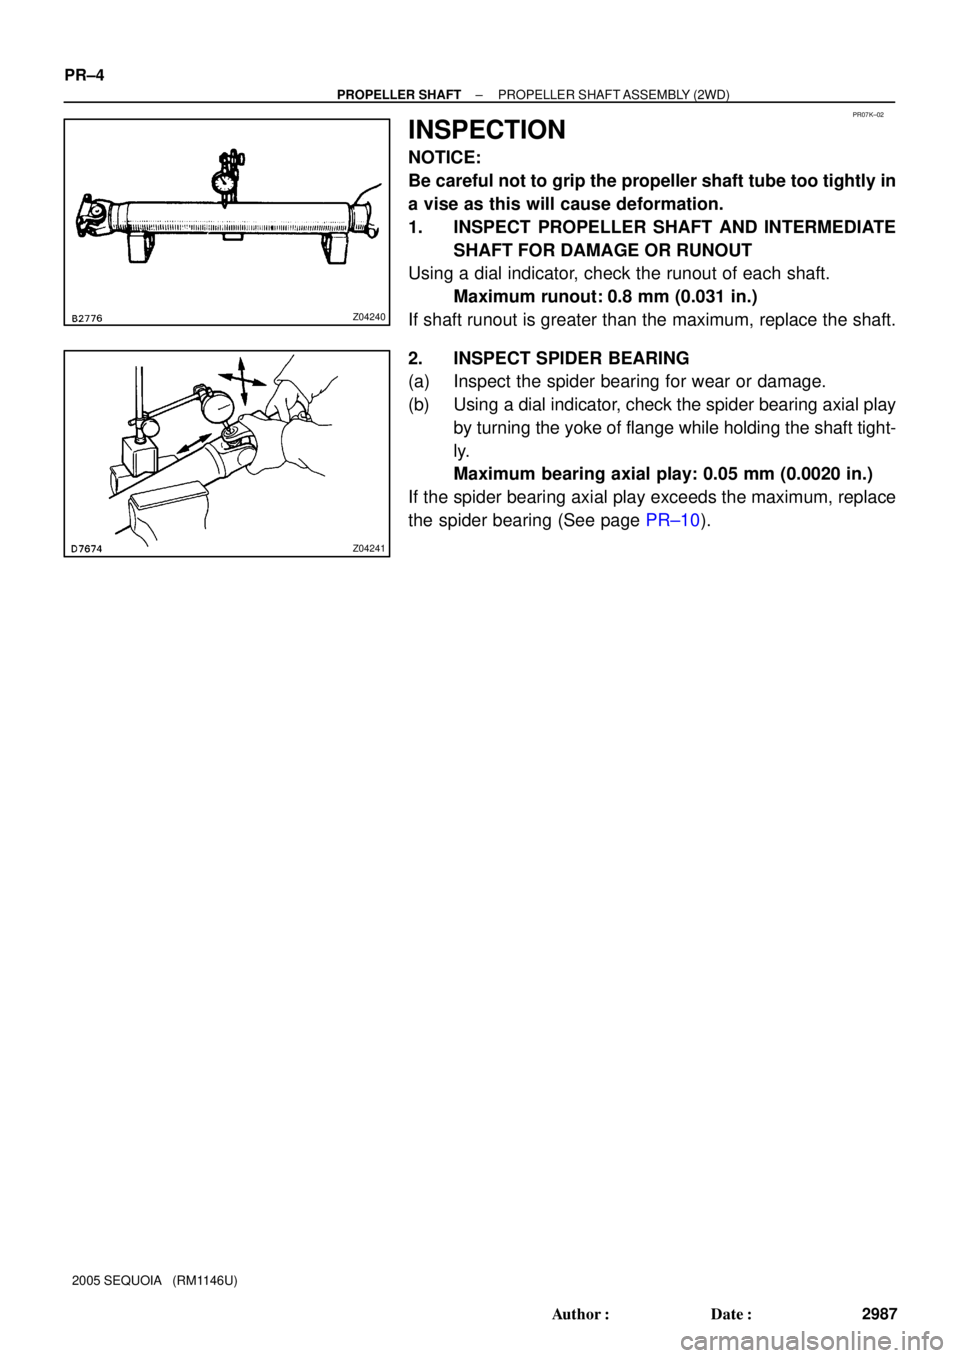
INSPECTION
NOTICE:
Be careful not to grip the propeller shaft tube too tightly in
a vise as this will cause deformation.
1. INSPECT PROPELLER SHAFT AND INTERMEDIATE
SHAFT FOR DAMAGE OR RUNOUT
Using a dial indicator, check the runout of each shaft.
Maximum runout: 0.8 mm (0.031 in.)
If shaft runout is greater than the maximum, replace the shaft.
2. INSPECT SPIDER BEARING
(a) Inspect the spider bearing for wear or damage.
(b) Using a dial indicator, check the spider bearing axial play
by turning the yoke of flange while holding the shaft tight-
ly.
Maximum bearing axial play: 0.05 mm (0.0020 in.)
If the spider bearing axial play exceeds the maximum, replace
the spider bearing (See page PR±10).
Page 2999 of 4323
PR07M±02
Z04240
Z04241
PR±8
± PROPELLER SHAFTPROPELLER SHAFT ASSEMBLY (4WD)
2991 Author�: Date�:
2005 SEQUOIA (RM1146U)
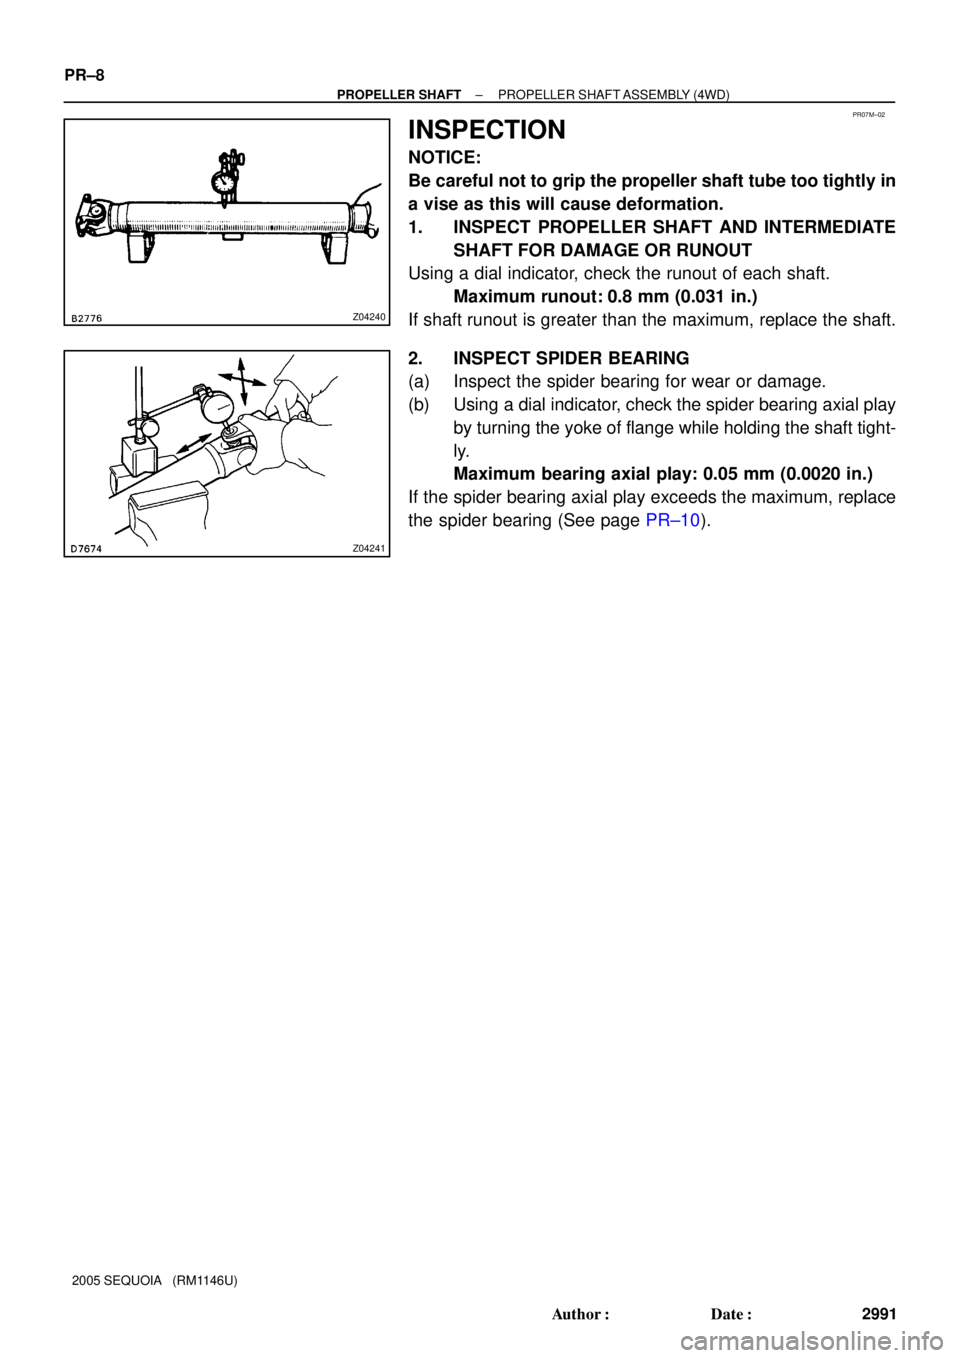
INSPECTION
NOTICE:
Be careful not to grip the propeller shaft tube too tightly in
a vise as this will cause deformation.
1. INSPECT PROPELLER SHAFT AND INTERMEDIATE
SHAFT FOR DAMAGE OR RUNOUT
Using a dial indicator, check the runout of each shaft.
Maximum runout: 0.8 mm (0.031 in.)
If shaft runout is greater than the maximum, replace the shaft.
2. INSPECT SPIDER BEARING
(a) Inspect the spider bearing for wear or damage.
(b) Using a dial indicator, check the spider bearing axial play
by turning the yoke of flange while holding the shaft tight-
ly.
Maximum bearing axial play: 0.05 mm (0.0020 in.)
If the spider bearing axial play exceeds the maximum, replace
the spider bearing (See page PR±10).
Page 3005 of 4323

TROUBLESHOOTING
PROBLEM SYMPTOMS TABLE
Use the table below to help you find the cause of the problem")
SA140±10
± SUSPENSION AND AXLETROUBLESHOOTING
SA±1
2997 Author�: Date�:
2005 SEQUOIA (RM1146U)
TROUBLESHOOTING
PROBLEM SYMPTOMS TABLE
Use the table below to help you find the cause of the problem. The numbers indicate the priority of the likely
cause of the problem. Check each part in order. If necessary, replace these parts.
SymptomSuspect AreaSee page
Bottoming
1. Vehicle (Overloaded)
2. Spring (Weak)
3. Shock absorber (Worn)±
SA±63
SA±135
SA±66
SA±135
Sways/pitches
1. Tire (Worn or improperly inflated)
2. Stabilizer bar (Bent or broken)
3. Shock absorber (Worn)SA±3
SA±90
SA±149
SA±66
SA±135
Front wheel shimmy
1. Tire (Worn or improperly inflated)
2. Wheel (Out of balance)
3. Shock absorber (Worn)
4. Wheel alignment (Incorrect)
5. Ball joints (Worn)
6. Hub bearing (Loose or worn)
7. Steering linkage (Loose or worn)
8. Steering gear (Out of adjustment or broken)SA±3
SA±3
SA±66
SA±4
SA±83
SA±88
SA±21
±
SR±37
Abnormal tire wear
1. Tire (Improperly inflated)
2. Wheel alignment (Incorrect)
3. Shock absorber (Worn)
4. Suspension parts (Worn)SA±3
SA±4
SA±66
SA±139
±
Noise in front differential
1. Oil level (Low or wrong grade)
2. Excessive backlash between pinion and ring gear
3. Ring, pinion or side gear (Worn or chipped)
4. Pinion shaft bearing (Worn)
5. Side bearing (Worn)
6. Differential bearing (Loose or worn)SA±38
SA±50
SA±50
SA±50
SA±50
SA±50
Oil leak from front differential
1. Oil level (Too high or wrong grade)
2. Front differential rear oil seal (Worn or damaged)
3. Side gear oil seal (Worn or damaged)
4. Companion flange (Loose or damaged)
5. Side gear shaft (Damaged)SA±38
SA±38
SA±50
SA±50
SA±50
Noise in rear axle
1. Oil level (Low or wrong grade)
2. Excessive backlash between pinion and ring gear
3. Ring, pinion or side gear (Worn or chipped)
4. Pinion shaft bearing (Worn)
5. Axle shaft bearing (Worn)
6. Differential bearing (Loose or worn)SA±105
SA±109
SA±109
SA±109
SA±94
SA±109
Oil leak from rear axle1. Oil seal (Worn or damaged)
2. Rear axle housing (Cracked)SA±94
±
Oil leak from rear differential
1. Oil level (Too high or wrong grade)
2. Oil seal (Worn or damaged)
3. Companion flange (Loose or damaged)SA±105
SA±105
SA±109
Page 3006 of 4323
.
Does the v")
SA28F±08
START
Preliminary Check
��Tire pressure
��Vehicle height
��Brake dragging ROAD TEST
Does the vehicle lead/pull?
Cross switch front tire & wheel
assemblies (left & right).
Does the vehicle lead/pull in the
same direction as before?
Check front wheel alignment.
Is it within specification?
Adjust front wheel alignment.Reverse the front left side
tire and rebalance it.
Does the vehicle
lead/pull to the left?
COMPLETE
Are the tires uni±directional type?
Choose the position of front tire & wheel
assemblies where there is the least amount of pull.
Increase left front camber and decrease
right front camber until lead/pull is eliminated.Increase right front camber and decrease
left front camber until lead/pull is eliminated.
NO
YES
YES
NO
YES
YES
NO
YES
NO COMPLETE
NONOYES NOIs there steering
off center?
Adjust front tie rods.
NO
YES
Is the lead/pull stronger
than before?
YES
NOTICE : Do not exceed 1° of cross camber.
Do not exceed adjustment range.
Select a flat road where the vehicle can be driven in a straight line for 100 meters at a constant speed
of 35mph. Please confirm safety and set the steering wheel to its straight position. Drive the vehicle in
a straight line for 100 meters at a constant speed of 35mph without holding the steering wheel.
(1) The vehicle can keep straight but the steering wheel has some angle.
STEERING OFF CENTER (See page SR±10)
(2) The vehicle cannot keep straight.
STEERING PULL
YES NO
YES ROAD TEST
Does the vehicle still lead/pull?
NO ROAD TEST
Does the vehicle still lead/pull? ROAD TEST
Does the vehicle still lead/pull?
ROAD TEST
Does the vehicle still lead/pull?NO
Contact your local retail tire distributor.YES
*
*
SA±2
± SUSPENSION AND AXLETROUBLESHOOTING
2998 Author�: Date�:
2005 SEQUOIA (RM1146U)
REPAIR PROCEDURES
HINT:
This is a flow chart for vehicle pull.
Page 3008 of 4323

FRONT WHEEL ALIGNMENT
INSPECTION
NOTICE:
Be sure to perf")
F01718F05219F14317
Front:
Rear:A
B
C
DSA23H±05
SA±4
± SUSPENSION AND AXLEFRONT WHEEL ALIGNMENT
3000 Author�: Date�:
2005 SEQUOIA (RM1146U)
FRONT WHEEL ALIGNMENT
INSPECTION
NOTICE:
Be sure to perform the zero point calibration of the steering
angle, master cylinder pressure, yaw rate and deceleration
sensors (See page DI±897).
1. MEASURE VEHICLE HEIGHT
Measuring points:
A: Ground clearance of the front drive shaft center
B: Ground clearance of the front adjusting cam bolt center
C: Ground clearance of the rear axle shaft center
D: Ground clearance of the rear lower control arm front bolt cen-
ter
Vehicle height (Except air suspension models):
UCK35L±GKBSKA
Tire size: P245/70R16
Front
Rear
Tire size: P265/70R16 and P265/65R17
Front
Rear
A ± B: 69.7 mm (2.74 in.)
C ± D: 76.2 mm (3.00 in.)
A ± B: 69.5 mm (2.74 in.)
C ± D: 75.5 mm (2.97 in.)
UCK35L±GKBLKA
Front
Rear
A ± B: 71.6 mm (2.82 in.)
C ± D: 77.3 mm (3.04 in.)
UCK45L±GKBSKA
Front
Rear
A ± B: 61.6 mm (2.43 in.)
C ± D: 63.8 mm (2.51 in.)
UCK45L±GKBLKA
Front
Rear
A ± B: 62.8 mm (2.47 in.)
C ± D: 65.2 mm (2.57 in.)
Vehicle height (Air suspension models):
UCK35L±GKBSKA
Tire size: P245/70R16
Front
Rear
Tire size: P265/70R16 and P265/65R17
Front
Rear
A ± B: 68.5 mm (2.69 in.)
C ± D: 74.8 ± 104.8 mm (2.94 ± 4.13 in.)
A ± B: 68.3 mm (2.69 in.)
C ± D: 74.1 ± 104.1 mm (2.92 ± 4.10 in.)
UCK35L±GKBLKA
Front
Rear
A ± B: 70.3 mm (2.77 in.)
C ± D: 74.6 ± 104.6 mm (2.94 ± 4.12 in.)
UCK45L±GKBSKA
Front
Rear
A ± B: 60.5 mm (2.38 in.)
C ± D: 61.0 ± 91.0 mm (2.40 ± 3.58 in.)
UCK45L±GKBLKA
Front
Rear
A ± B: 61.8 mm (2.43 in.)
C ± D: 61.3 ± 91.3 mm (2.41 ± 3.59 in.)
NOTICE:
Before inspecting the wheel alignment, adjust the vehicle
height to the specified value.
Page 3017 of 4323
SA2CQ±01
F16821
F16821
± SUSPENSION AND AXLETIRE PRESSURE MONITOR RECEIVER
SA±13
3009 Author�: Date�:
2005 SEQUOIA (RM1146U)
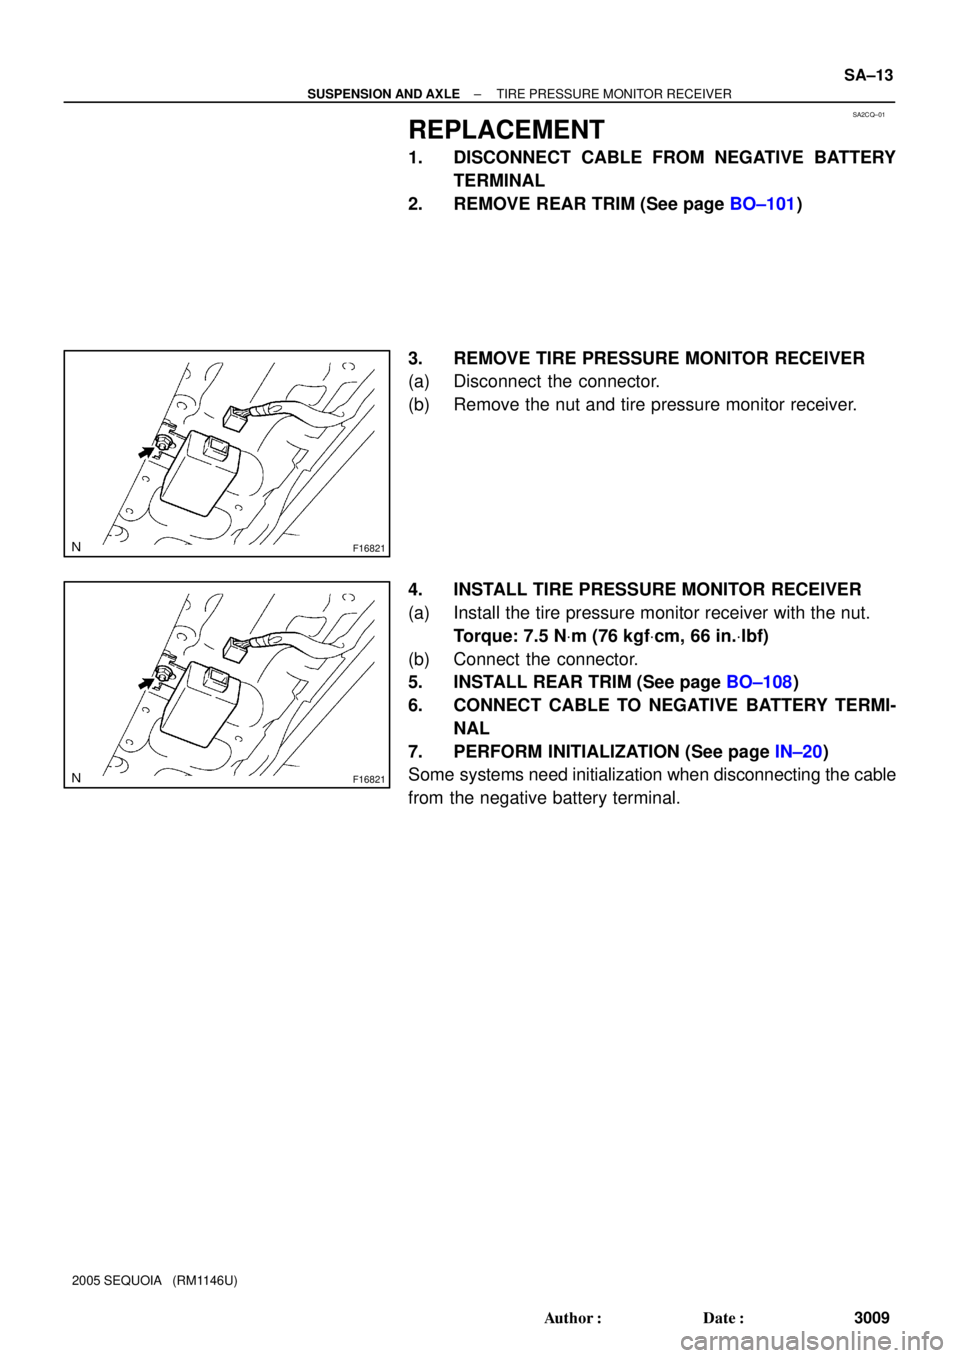
REPLACEMENT
1. DISCONNECT CABLE FROM NEGATIVE BATTERY
TERMINAL
2. REMOVE REAR TRIM (See page BO±101)
3. REMOVE TIRE PRESSURE MONITOR RECEIVER
(a) Disconnect the connector.
(b) Remove the nut and tire pressure monitor receiver.
4. INSTALL TIRE PRESSURE MONITOR RECEIVER
(a) Install the tire pressure monitor receiver with the nut.
Torque: 7.5 NVm (76 kgfVcm, 66 in.Vlbf)
(b) Connect the connector.
5. INSTALL REAR TRIM (See page BO±108)
6. CONNECT CABLE TO NEGATIVE BATTERY TERMI-
NAL
7. PERFORM INITIALIZATION (See page IN±20)
Some systems need initialization when disconnecting the cable
from the negative battery terminal.