Page 581 of 1456
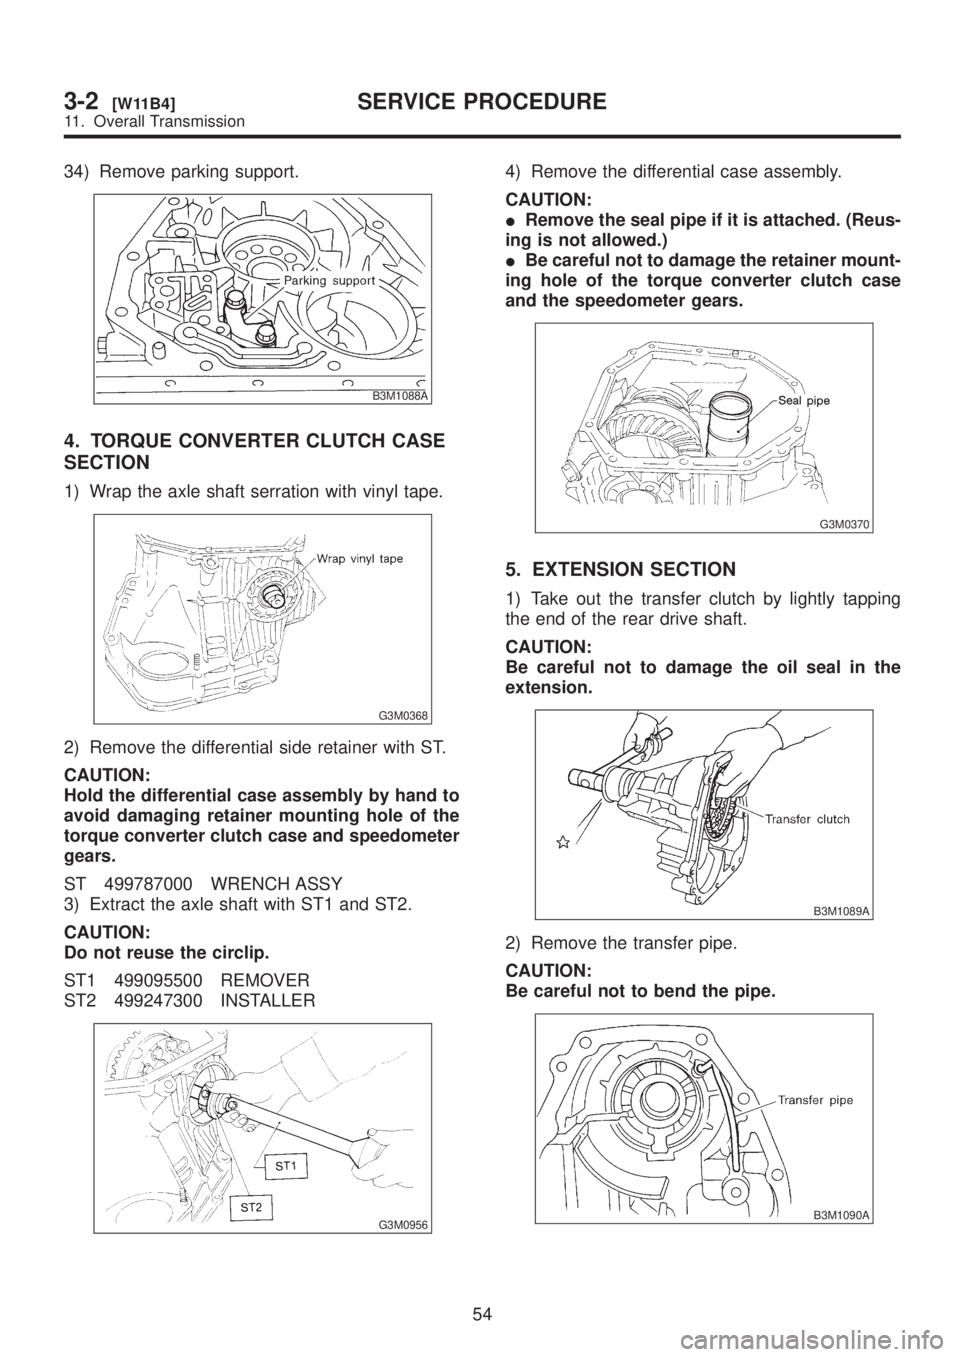
19) Take out the thrust needle bearing, planetary
gear assembly and the low clutch assembly.
B3M1076A
20) Remove snap ring.
B3M1077A
21) Take out 2-4 brake return spring.
B3M1078A
22) Take out 2-4 brake piston and piston retainer.
CAUTION:
When removing the brake piston 2-4 and piston
retainer, be careful not to rub or bump them
against the transmission case.
B3M1079A
23) Separate 2-4 brake piston and piston retainer.
B3M1080A
24) Pull out leaf spring.
CAUTION:
Be careful not to bend leaf spring during
removal.
B3M0956A
25) Remove snap ring.
B3M1081A
26) Take out retaining plate, drive plate, driven
plate and dish plate.
B3M1082
52
3-2[W11B3]SERVICE PROCEDURE
11. Overall Transmission
Page 582 of 1456
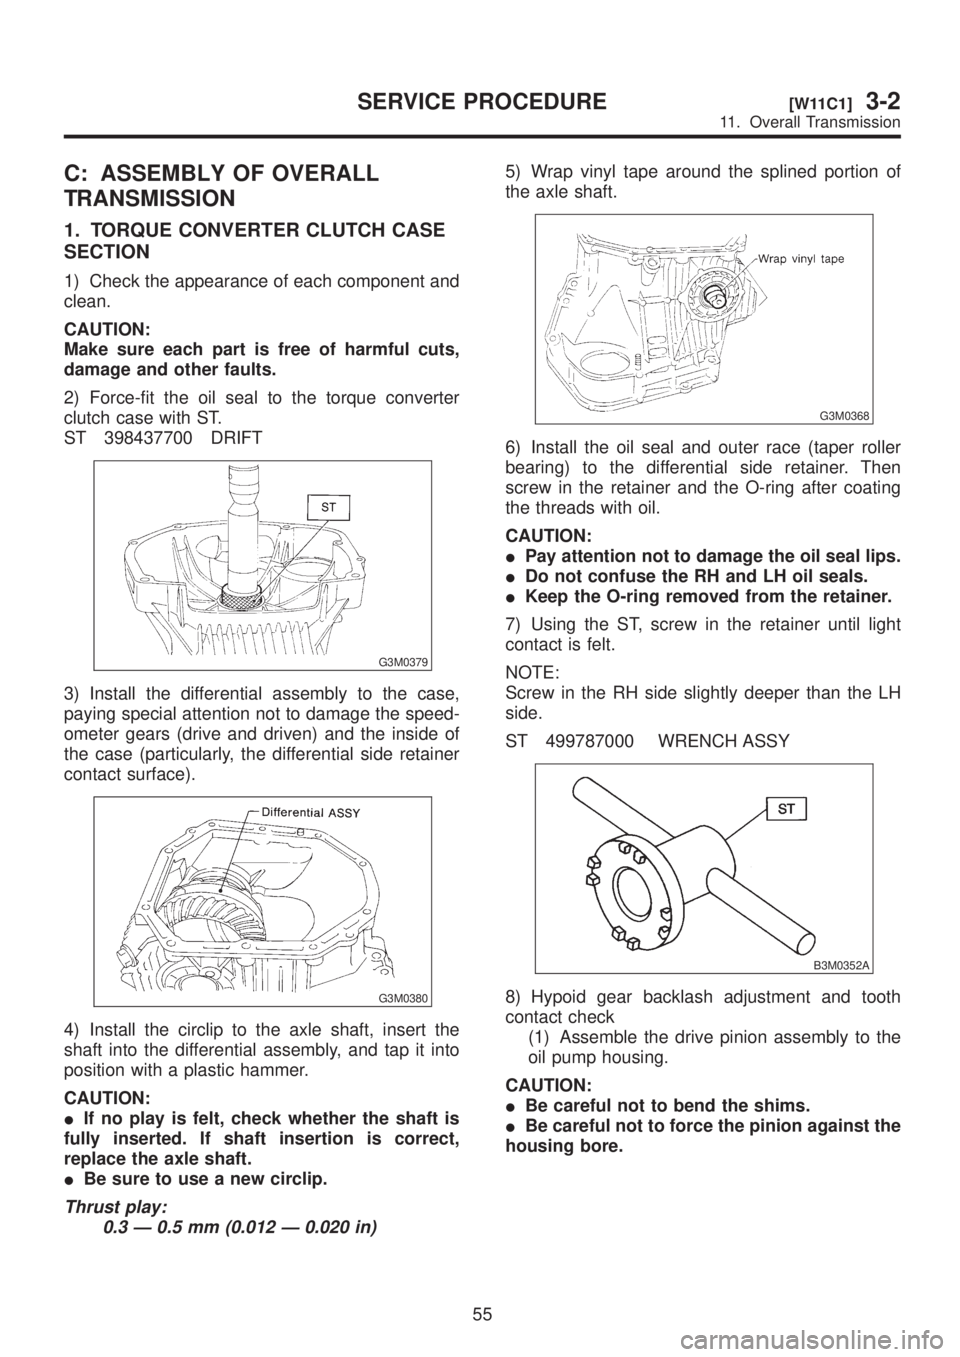
27) Turning the case upside down, take out the
one-way clutch inner race, retainer and wave
spring.
NOTE:
After loosening all socket bolts, place the side of
the transmission case on the floor.
B3M0958
28) Take out the low & reverse piston by applying
compressed air.
B3M0957
29) Using ST, remove ATF filter.
NOTE:
If any of the clutches or brakes are abnormally
worn, replace ATF filter and oil seal with new ones.
ST 498545400 OIL FILTER WRENCH
B3M1084A
30) Pull off the straight pin of manual lever.
B3M1083A
31) Remove bolts securing select lever, then
remove select lever, manual lever and parking rod.
CAUTION:
Be careful not to damage the lips of the press-
fitted oil seal in the case.
B3M1085A
32) Remove the detention spring.
B3M1086A
33) Remove the inhibitor switch.
B3M1087A
53
[W11B3]3-2SERVICE PROCEDURE
11. Overall Transmission
Page 583 of 1456

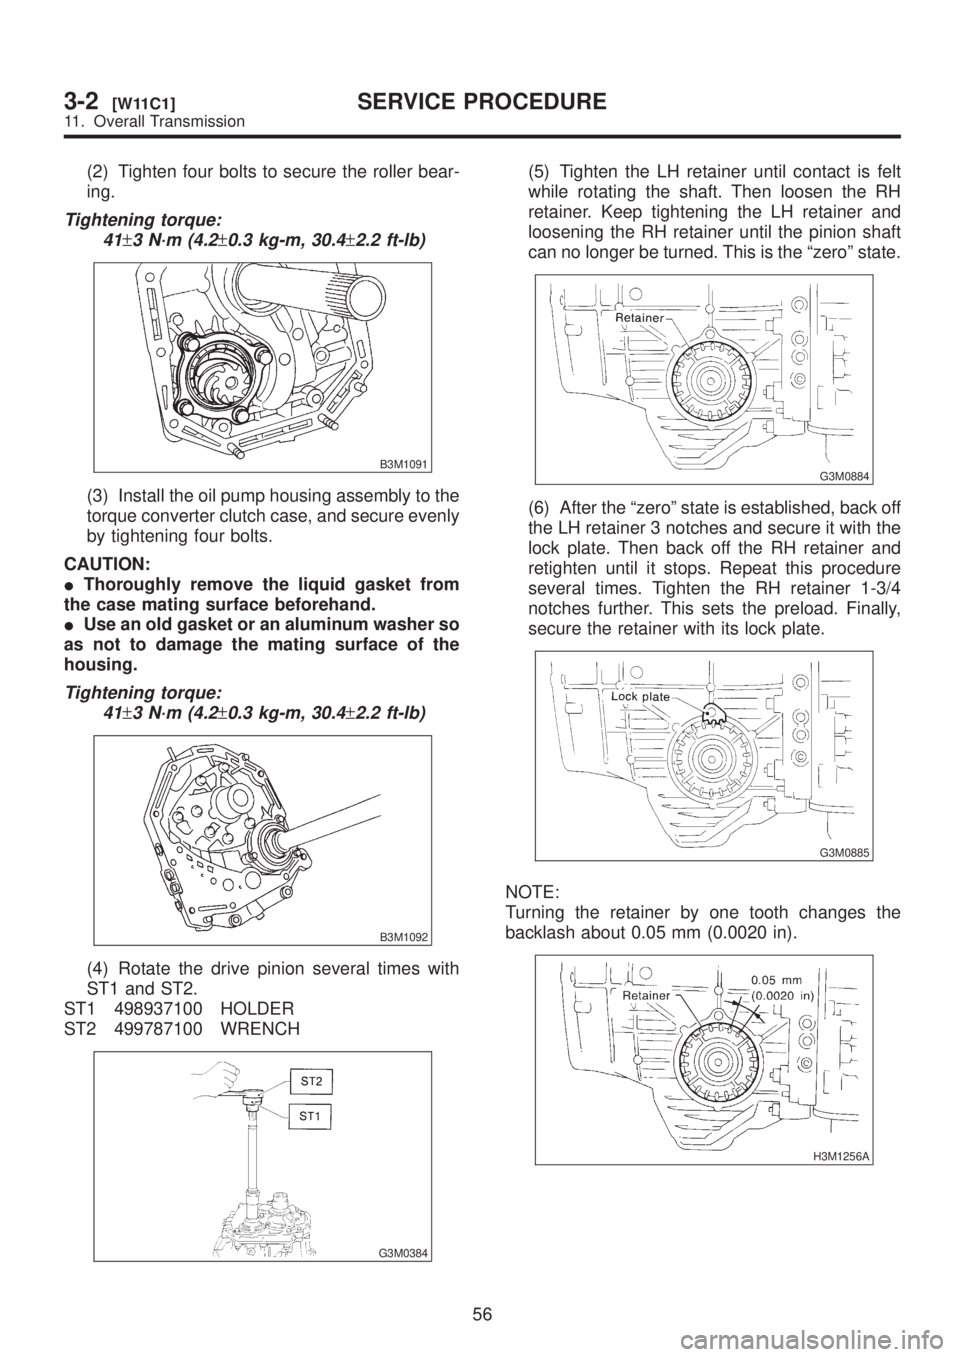
34) Remove parking support.
B3M1088A
4. TORQUE CONVERTER CLUTCH CASE
SECTION
1) Wrap the axle shaft serration with vinyl tape.
G3M0368
2) Remove the differential side retainer with ST.
CAUTION:
Hold the differential case assembly by hand to
avoid damaging retainer mounting hole of the
torque converter clutch case and speedometer
gears.
ST 499787000 WRENCH ASSY
3) Extract the axle shaft with ST1 and ST2.
CAUTION:
Do not reuse the circlip.
ST1 499095500 REMOVER
ST2 499247300 INSTALLER
G3M0956
4) Remove the differential case assembly.
CAUTION:
IRemove the seal pipe if it is attached. (Reus-
ing is not allowed.)
IBe careful not to damage the retainer mount-
ing hole of the torque converter clutch case
and the speedometer gears.
G3M0370
5. EXTENSION SECTION
1) Take out the transfer clutch by lightly tapping
the end of the rear drive shaft.
CAUTION:
Be careful not to damage the oil seal in the
extension.
B3M1089A
2) Remove the transfer pipe.
CAUTION:
Be careful not to bend the pipe.
B3M1090A
54
3-2[W11B4]SERVICE PROCEDURE
11. Overall Transmission
Page 584 of 1456

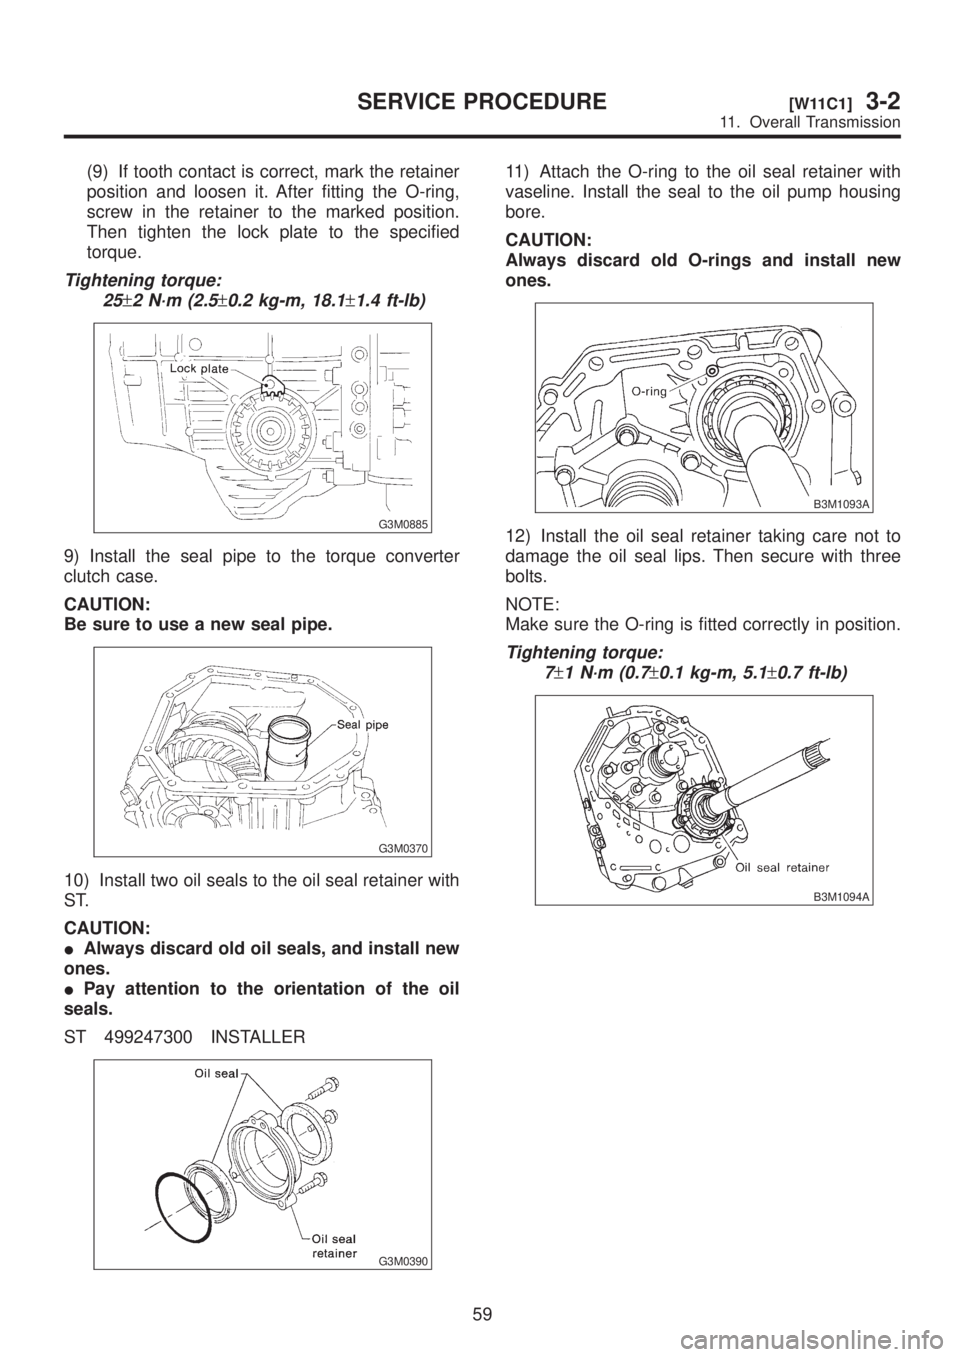
C: ASSEMBLY OF OVERALL
TRANSMISSION
1. TORQUE CONVERTER CLUTCH CASE
SECTION
1) Check the appearance of each component and
clean.
CAUTION:
Make sure each part is free of harmful cuts,
damage and other faults.
2) Force-fit the oil seal to the torque converter
clutch case with ST.
ST 398437700 DRIFT
G3M0379
3) Install the differential assembly to the case,
paying special attention not to damage the speed-
ometer gears (drive and driven) and the inside of
the case (particularly, the differential side retainer
contact surface).
G3M0380
4) Install the circlip to the axle shaft, insert the
shaft into the differential assembly, and tap it into
position with a plastic hammer.
CAUTION:
IIf no play is felt, check whether the shaft is
fully inserted. If shaft insertion is correct,
replace the axle shaft.
IBe sure to use a new circlip.
Thrust play:
0.3 Ð 0.5 mm (0.012 Ð 0.020 in)
5) Wrap vinyl tape around the splined portion of
the axle shaft.
G3M0368
6) Install the oil seal and outer race (taper roller
bearing) to the differential side retainer. Then
screw in the retainer and the O-ring after coating
the threads with oil.
CAUTION:
IPay attention not to damage the oil seal lips.
IDo not confuse the RH and LH oil seals.
IKeep the O-ring removed from the retainer.
7) Using the ST, screw in the retainer until light
contact is felt.
NOTE:
Screw in the RH side slightly deeper than the LH
side.
ST 499787000 WRENCH ASSY
B3M0352A
8) Hypoid gear backlash adjustment and tooth
contact check
(1) Assemble the drive pinion assembly to the
oil pump housing.
CAUTION:
IBe careful not to bend the shims.
IBe careful not to force the pinion against the
housing bore.
55
[W11C1]3-2SERVICE PROCEDURE
11. Overall Transmission
Page 585 of 1456

(2) Tighten four bolts to secure the roller bear-
ing.
Tightening torque:
41
±3 N´m (4.2±0.3 kg-m, 30.4±2.2 ft-lb)
B3M1091
(3) Install the oil pump housing assembly to the
torque converter clutch case, and secure evenly
by tightening four bolts.
CAUTION:
IThoroughly remove the liquid gasket from
the case mating surface beforehand.
IUse an old gasket or an aluminum washer so
as not to damage the mating surface of the
housing.
Tightening torque:
41
±3 N´m (4.2±0.3 kg-m, 30.4±2.2 ft-lb)
B3M1092
(4) Rotate the drive pinion several times with
ST1 and ST2.
ST1 498937100 HOLDER
ST2 499787100 WRENCH
G3M0384
(5) Tighten the LH retainer until contact is felt
while rotating the shaft. Then loosen the RH
retainer. Keep tightening the LH retainer and
loosening the RH retainer until the pinion shaft
can no longer be turned. This is the ªzeroº state.
G3M0884
(6) After the ªzeroº state is established, back off
the LH retainer 3 notches and secure it with the
lock plate. Then back off the RH retainer and
retighten until it stops. Repeat this procedure
several times. Tighten the RH retainer 1-3/4
notches further. This sets the preload. Finally,
secure the retainer with its lock plate.
G3M0885
NOTE:
Turning the retainer by one tooth changes the
backlash about 0.05 mm (0.0020 in).
H3M1256A
56
3-2[W11C1]SERVICE PROCEDURE
11. Overall Transmission
Page 588 of 1456

(9) If tooth contact is correct, mark the retainer
position and loosen it. After fitting the O-ring,
screw in the retainer to the marked position.
Then tighten the lock plate to the specified
torque.
Tightening torque:
25
±2 N´m (2.5±0.2 kg-m, 18.1±1.4 ft-lb)
G3M0885
9) Install the seal pipe to the torque converter
clutch case.
CAUTION:
Be sure to use a new seal pipe.
G3M0370
10) Install two oil seals to the oil seal retainer with
ST.
CAUTION:
IAlways discard old oil seals, and install new
ones.
IPay attention to the orientation of the oil
seals.
ST 499247300 INSTALLER
G3M0390
11) Attach the O-ring to the oil seal retainer with
vaseline. Install the seal to the oil pump housing
bore.
CAUTION:
Always discard old O-rings and install new
ones.
B3M1093A
12) Install the oil seal retainer taking care not to
damage the oil seal lips. Then secure with three
bolts.
NOTE:
Make sure the O-ring is fitted correctly in position.
Tightening torque:
7
±1 N´m (0.7±0.1 kg-m, 5.1±0.7 ft-lb)
B3M1094A
59
[W11C1]3-2SERVICE PROCEDURE
11. Overall Transmission
Page 589 of 1456
13) Apply vaseline to the groove on the oil pump
cover, and install two (R) seal rings and two (H)
seal rings.
NOTE:
IFit the seal ring after compressing, and rub
vaseline into the seal ring to avoid expansion.
IThe ªRº seal ring has a large diameter, while ªHº
has small diameter.
B3M1095A
14) Install the rubber seal to the torque converter
clutch case.
CAUTION:
Be careful not to lose the rubber seal.
G3M0394
2. TRANSMISSION CASE SECTION
1) Using a plastic hammer, force-fit the oil seal.
G3M0396
2) Install parking support to transmission case.
Tightening torque:
25
±2 N´m (2.5±0.2 kg-m, 18.1±1.4 ft-lb)
B3M1088A
3) Install inhibitor switch to transmission case.
NOTE:
Temporary tighten inhibitor switch.
B3M1087A
4) Install detention spring to transmission case.
Tightening torque:
6
±1 N´m (0.6±0.1 kg-m, 4.3±0.7 ft-lb)
B3M1086A
60
3-2[W11C2]SERVICE PROCEDURE
11. Overall Transmission
Page 590 of 1456
5) Insert range select lever, and tighten bolt.
Tightening torque:
6
±1 N´m (0.6±0.1 kg-m, 4.3±0.7 ft-lb)
B3M1096A
6) Insert manual lever and parking rod.
B3M1085A
7) Insert spring pin to manual lever.
B3M1083A
8) Install the low and reverse piston.
CAUTION:
IBe careful not to tilt the piston when install-
ing.
IBe careful not to damage the lip seal.
B3M1097A
9) Install return spring.
B3M1098A
10) Install spring retainer.
B3M1099A
11) Install the one-way clutch inner race.
61
[W11C2]3-2SERVICE PROCEDURE
11. Overall Transmission