Page 38 of 2267
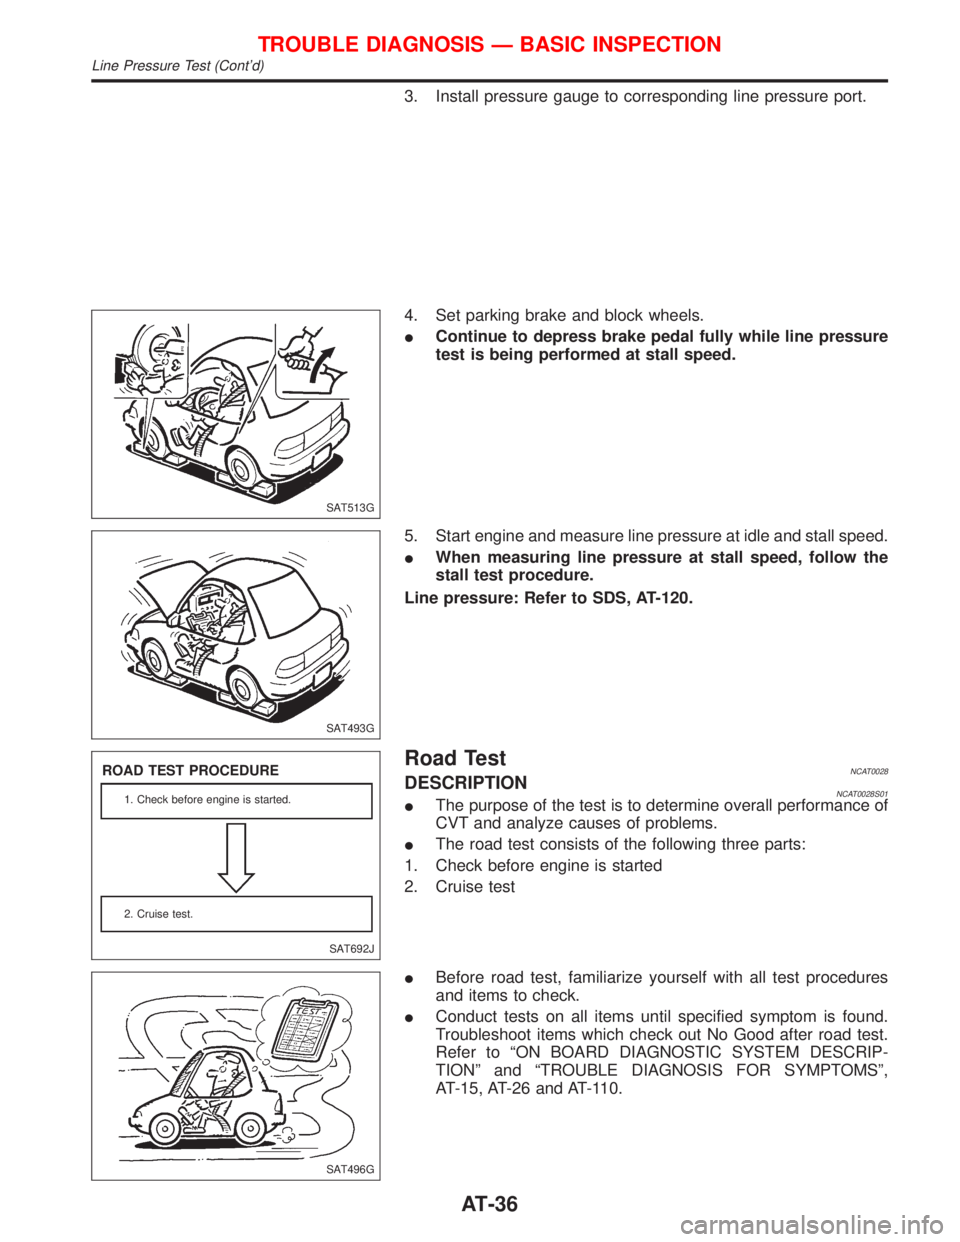
3. Install pressure gauge to corresponding line pressure port.
4. Set parking brake and block wheels.
IContinue to depress brake pedal fully while line pressure
test is being performed at stall speed.
5. Start engine and measure line pressure at idle and stall speed.
IWhen measuring line pressure at stall speed, follow the
stall test procedure.
Line pressure: Refer to SDS, AT-120.
Road TestNCAT0028DESCRIPTIONNCAT0028S01IThe purpose of the test is to determine overall performance of
CVT and analyze causes of problems.
IThe road test consists of the following three parts:
1. Check before engine is started
2. Cruise test
IBefore road test, familiarize yourself with all test procedures
and items to check.
IConduct tests on all items until specified symptom is found.
Troubleshoot items which check out No Good after road test.
Refer to ªON BOARD DIAGNOSTIC SYSTEM DESCRIP-
TIONº and ªTROUBLE DIAGNOSIS FOR SYMPTOMSº,
AT-15, AT-26 and AT-110.
SAT513G
SAT493G
SAT692J
ROAD TEST PROCEDURE
1. Check before engine is started.
2. Cruise test.
SAT496G
TROUBLE DIAGNOSIS Ð BASIC INSPECTION
Line Pressure Test (Cont'd)
AT-36
Page 39 of 2267
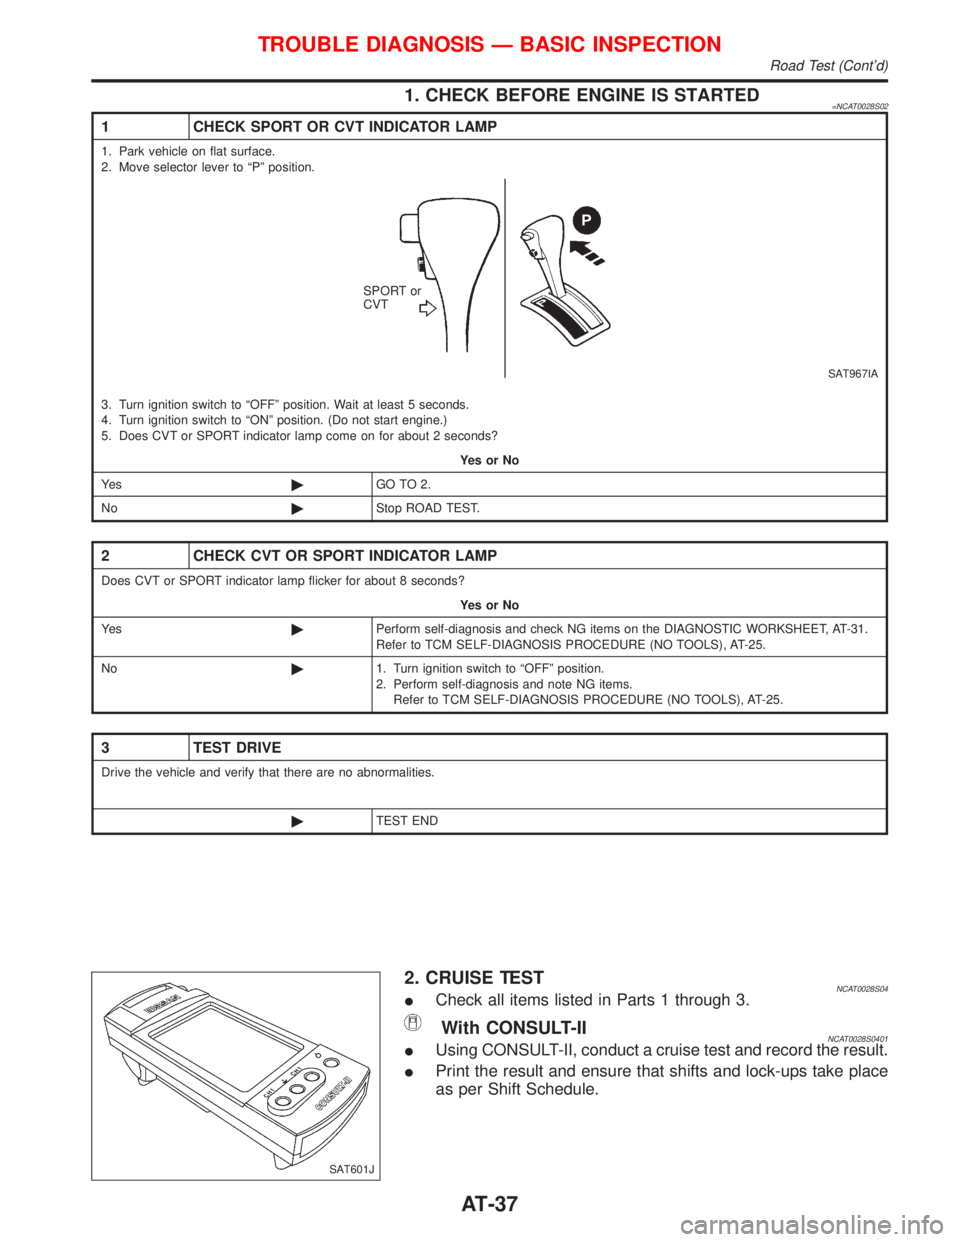
1. CHECK BEFORE ENGINE IS STARTED=NCAT0028S02
1 CHECK SPORT OR CVT INDICATOR LAMP
1. Park vehicle on flat surface.
2. Move selector lever to ªPº position.
SAT967IA
SPORT or
CVT
3. Turn ignition switch to ªOFFº position. Wait at least 5 seconds.
4. Turn ignition switch to ªONº position. (Do not start engine.)
5. Does CVT or SPORT indicator lamp come on for about 2 seconds?
YesorNo
Ye s©GO TO 2.
No©Stop ROAD TEST.
2 CHECK CVT OR SPORT INDICATOR LAMP
Does CVT or SPORT indicator lamp flicker for about 8 seconds?
YesorNo
Ye s©Perform self-diagnosis and check NG items on the DIAGNOSTIC WORKSHEET, AT-31.
Refer to TCM SELF-DIAGNOSIS PROCEDURE (NO TOOLS), AT-25.
No©1. Turn ignition switch to ªOFFº position.
2. Perform self-diagnosis and note NG items.
Refer to TCM SELF-DIAGNOSIS PROCEDURE (NO TOOLS), AT-25.
3 TEST DRIVE
Drive the vehicle and verify that there are no abnormalities.
©TEST END
2. CRUISE TESTNCAT0028S04ICheck all items listed in Parts 1 through 3.
With CONSULT-IINCAT0028S0401IUsing CONSULT-II, conduct a cruise test and record the result.
IPrint the result and ensure that shifts and lock-ups take place
as per Shift Schedule.
SAT601J
TROUBLE DIAGNOSIS Ð BASIC INSPECTION
Road Test (Cont'd)
AT-37
Page 48 of 2267
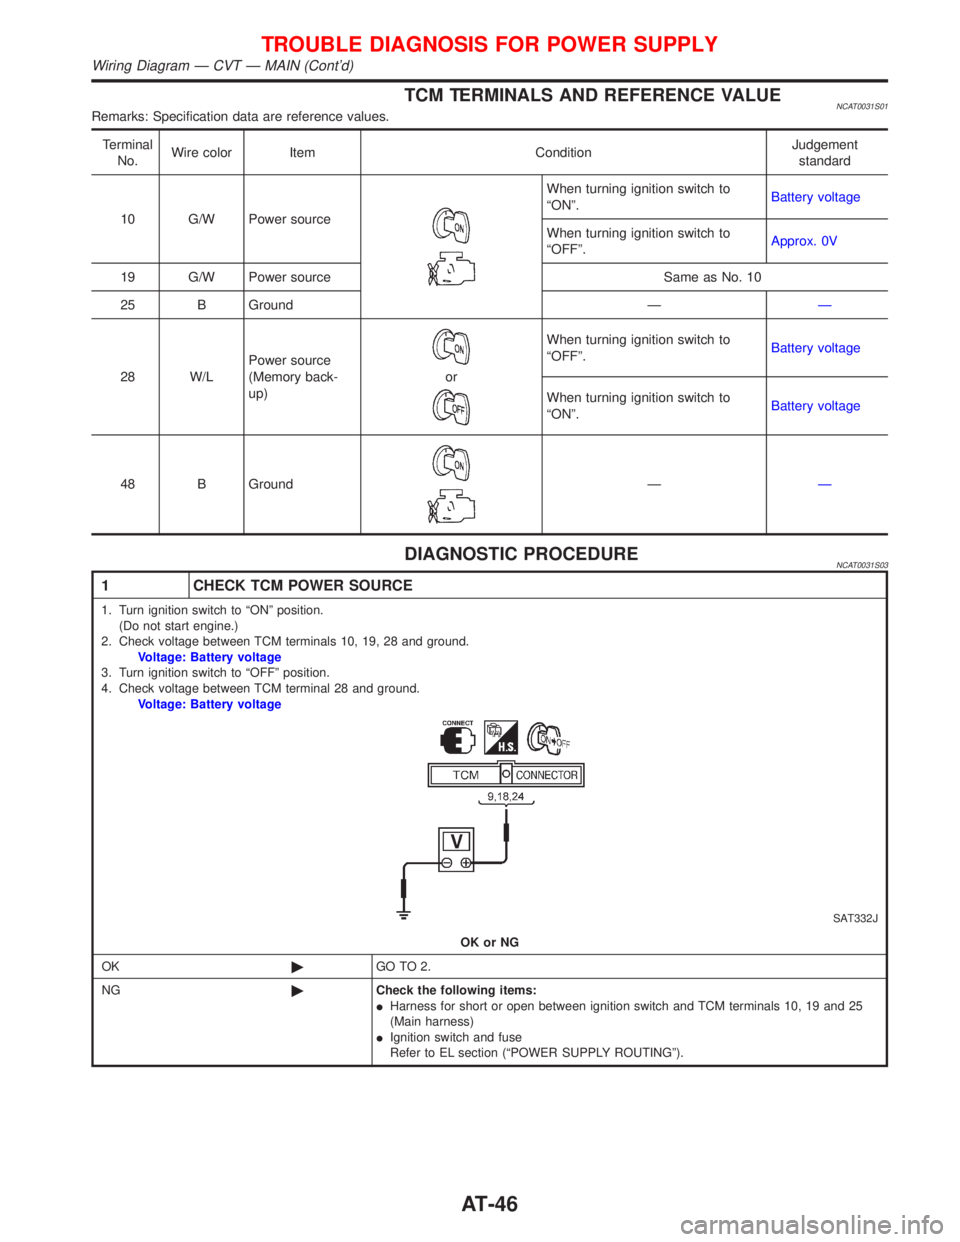
TCM TERMINALS AND REFERENCE VALUENCAT0031S01Remarks: Specification data are reference values.
Terminal
No.Wire color Item ConditionJudgement
standard
10 G/W Power source
When turning ignition switch to
ªONº.Battery voltage
When turning ignition switch to
ªOFFº.Approx. 0V
19 G/W Power source Same as No. 10
25 B Ground ÐÐ
28 W/LPower source
(Memory back-
up)
or
When turning ignition switch to
ªOFFº.Battery voltage
When turning ignition switch to
ªONº.Battery voltage
48 B Ground
ÐÐ
DIAGNOSTIC PROCEDURENCAT0031S03
1 CHECK TCM POWER SOURCE
1. Turn ignition switch to ªONº position.
(Do not start engine.)
2. Check voltage between TCM terminals 10, 19, 28 and ground.
Voltage: Battery voltage
3. Turn ignition switch to ªOFFº position.
4. Check voltage between TCM terminal 28 and ground.
Voltage: Battery voltage
SAT332J
OK or NG
OK©GO TO 2.
NG©Check the following items:
IHarness for short or open between ignition switch and TCM terminals 10, 19 and 25
(Main harness)
IIgnition switch and fuse
Refer to EL section (ªPOWER SUPPLY ROUTINGº).
TROUBLE DIAGNOSIS FOR POWER SUPPLY
Wiring Diagram Ð CVT Ð MAIN (Cont'd)
AT-46
Page 51 of 2267
DIAGNOSTIC TROUBLE CODE (DTC) CONFIRMATION
PROCEDURE
NCAT0032S03CAUTION:
Always drive vehicle at a safe speed.
NOTE:
If ªDIAGNOSTIC TROUBLE CODE CONFIRMATION PROCE-
DUREº has been previously conducted, always turn ignition
switch ªOFFº and wait at least 5 seconds before conducting
the next test.
After the repair, perform the following procedure to confirm the
malfunction is eliminated.
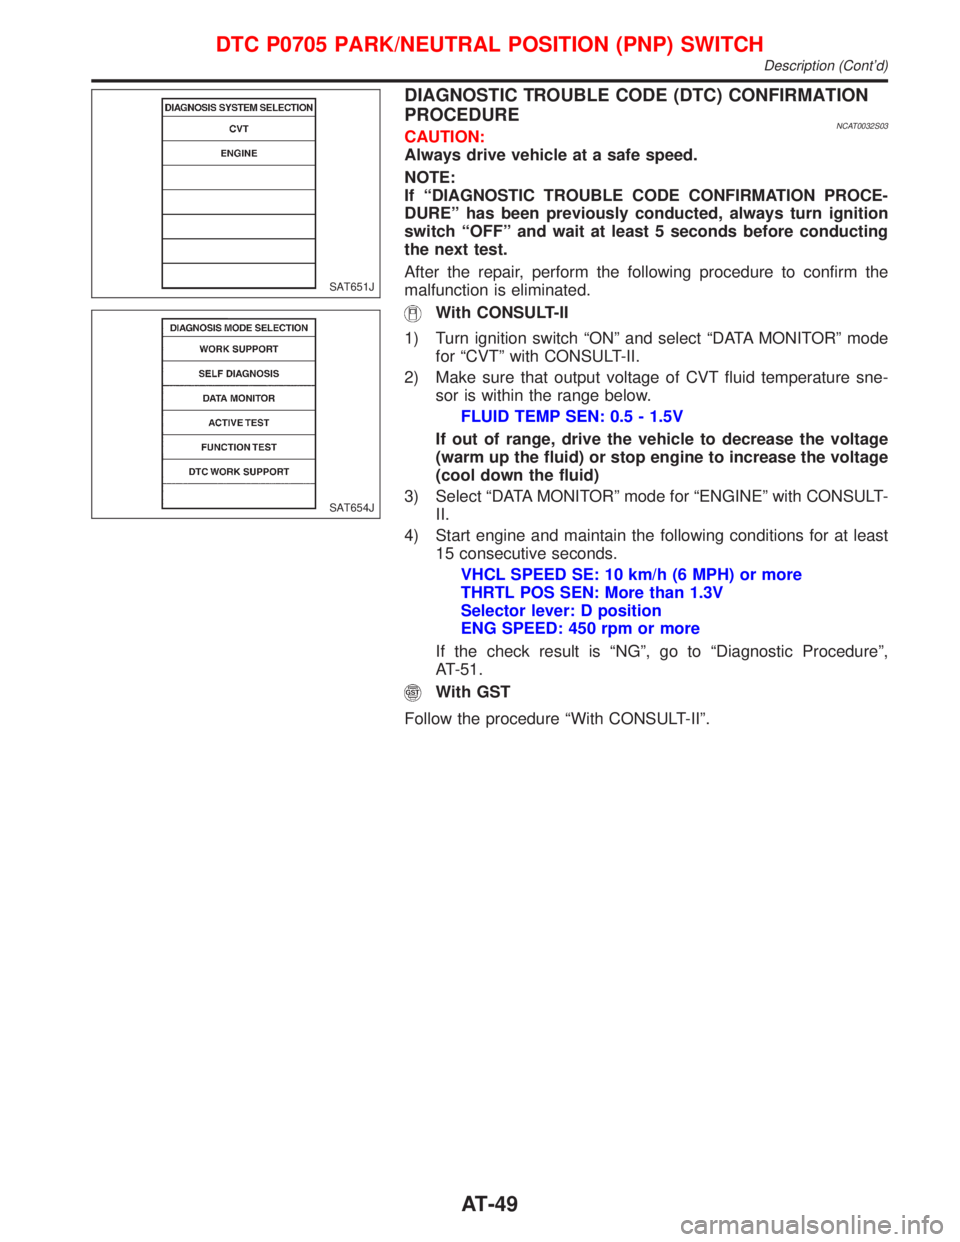
With CONSULT-II
1) Turn ignition switch ªONº and select ªDATA MONITORº mode
for ªCVTº with CONSULT-II.
2) Make sure that output voltage of CVT fluid temperature sne-
sor is within the range below.
FLUID TEMP SEN: 0.5 - 1.5V
If out of range, drive the vehicle to decrease the voltage
(warm up the fluid) or stop engine to increase the voltage
(cool down the fluid)
3) Select ªDATA MONITORº mode for ªENGINEº with CONSULT-
II.
4) Start engine and maintain the following conditions for at least
15 consecutive seconds.
VHCL SPEED SE: 10 km/h (6 MPH) or more
THRTL POS SEN: More than 1.3V
Selector lever: D position
ENG SPEED: 450 rpm or more
If the check result is ªNGº, go to ªDiagnostic Procedureº,
AT-51.
With GST
Follow the procedure ªWith CONSULT-IIº.
SAT651J
SAT654J
DTC P0705 PARK/NEUTRAL POSITION (PNP) SWITCH
Description (Cont'd)
AT-49
Page 53 of 2267
Diagnostic ProcedureNCAT0033
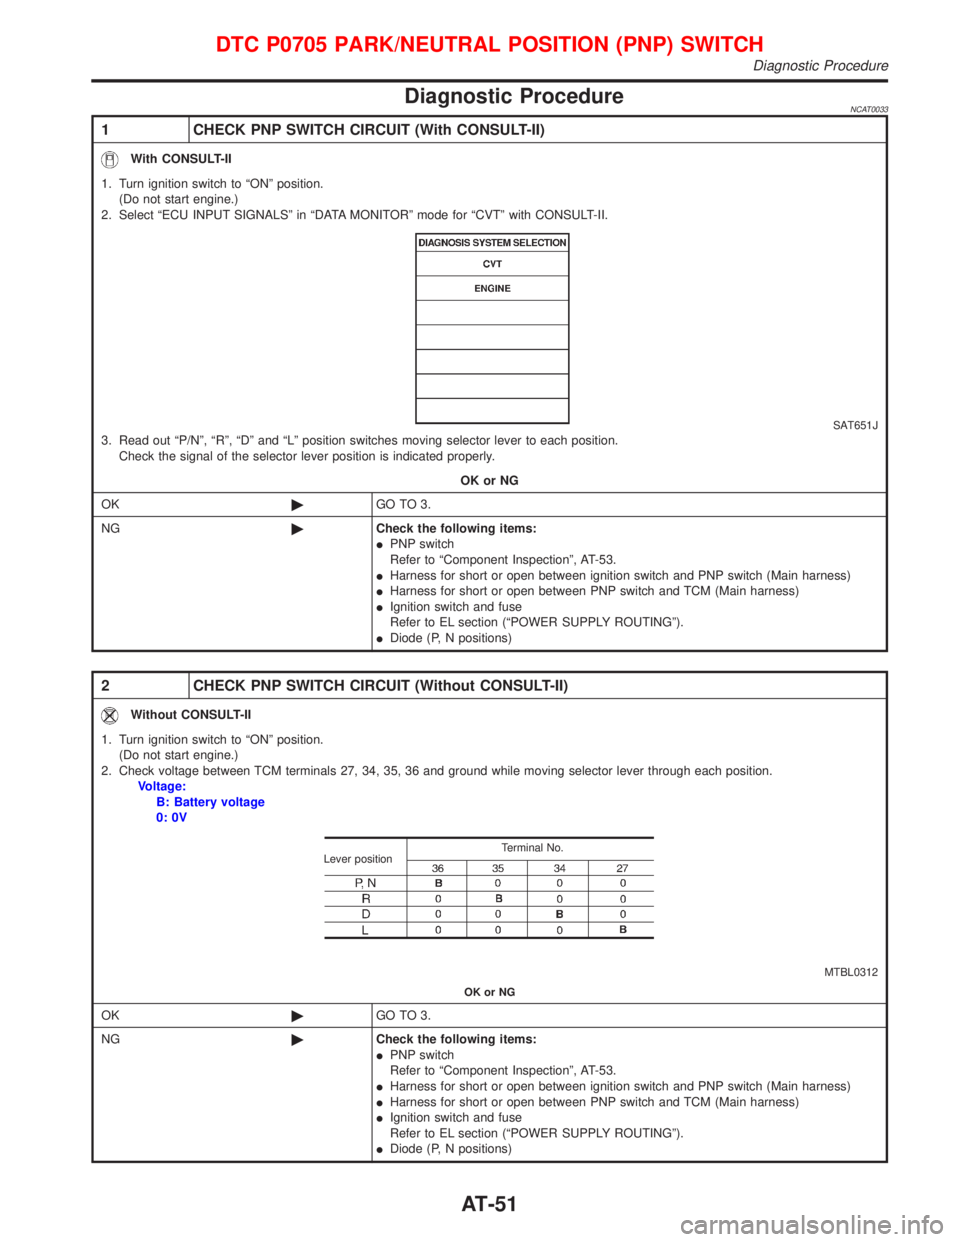
1 CHECK PNP SWITCH CIRCUIT (With CONSULT-II)
With CONSULT-II
1. Turn ignition switch to ªONº position.
(Do not start engine.)
2. Select ªECU INPUT SIGNALSº in ªDATA MONITORº mode for ªCVTº with CONSULT-II.
SAT651J3. Read out ªP/Nº, ªRº, ªDº and ªLº position switches moving selector lever to each position.
Check the signal of the selector lever position is indicated properly.
OK or NG
OK©GO TO 3.
NG©Check the following items:
IPNP switch
Refer to ªComponent Inspectionº, AT-53.
IHarness for short or open between ignition switch and PNP switch (Main harness)
IHarness for short or open between PNP switch and TCM (Main harness)
IIgnition switch and fuse
Refer to EL section (ªPOWER SUPPLY ROUTINGº).
IDiode (P, N positions)
2 CHECK PNP SWITCH CIRCUIT (Without CONSULT-II)
Without CONSULT-II
1. Turn ignition switch to ªONº position.
(Do not start engine.)
2. Check voltage between TCM terminals 27, 34, 35, 36 and ground while moving selector lever through each position.
Voltage:
B: Battery voltage
0: 0V
MTBL0312 Terminal No.
Lever position
OK or NG
OK©GO TO 3.
NG©Check the following items:
IPNP switch
Refer to ªComponent Inspectionº, AT-53.
IHarness for short or open between ignition switch and PNP switch (Main harness)
IHarness for short or open between PNP switch and TCM (Main harness)
IIgnition switch and fuse
Refer to EL section (ªPOWER SUPPLY ROUTINGº).
IDiode (P, N positions)
DTC P0705 PARK/NEUTRAL POSITION (PNP) SWITCH
Diagnostic Procedure
AT-51
Page 57 of 2267
DIAGNOSTIC TROUBLE CODE (DTC) CONFIRMATION
PROCEDURE
NCAT0035S04CAUTION:
Always drive vehicle at a safe speed.
NOTE:
If ªDIAGNOSTIC TROUBLE CODE CONFIRMATION PROCE-
DUREº has been previously conducted, always turn ignition
switch ªOFFº and wait at least 5 seconds before conducting
the next test.
After the repair, perform the following procedure to confirm the
malfunction is eliminated.
With CONSULT-II
1) Turn ignition switch ªONº and select ªDATA MONITORº mode
for ªENGINEº with CONSULT-II.
2) Start engine and maintain the following conditions for at least
10 minutes (Total). (It is not necessary to maintain continu-
ously.)
ENG SPEED: 450 rpm or more
VHCL SPEED SE: 10 km/h (6 MPH) or more
THRTL POS SEN: More than 1.3 V
Selector lever: D position
If the check result is NG, go to ªDiagnostic Procedureº, AT-57.
With GST
Follow the procedure ªWith CONSULT-IIº.
SAT651J
SAT654J
DTC P0710 CVT FLUID TEMPERATURE SENSOR CIRCUIT
Description (Cont'd)
AT-55
Page 59 of 2267
Diagnostic ProcedureNCAT0036
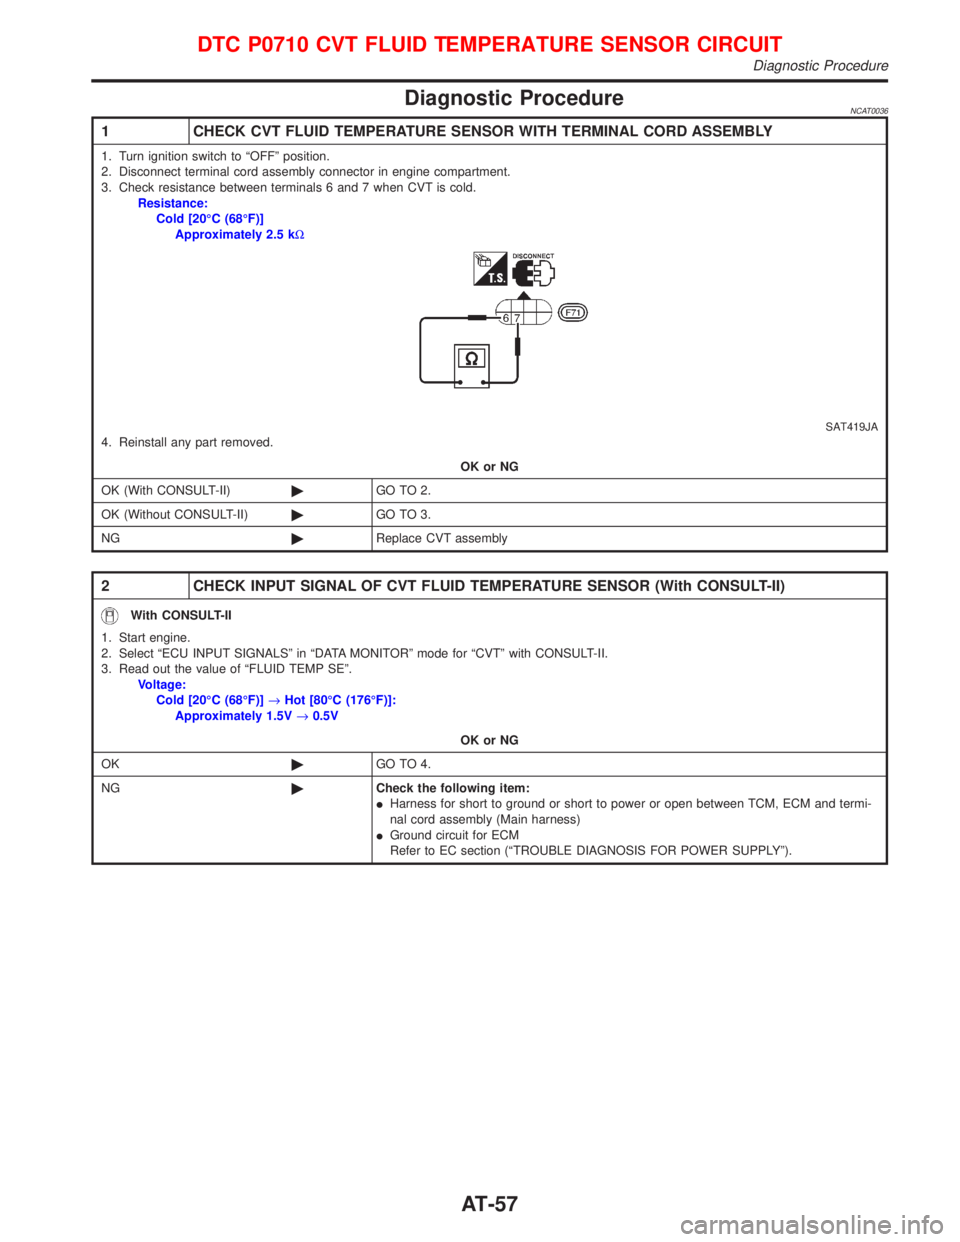
1 CHECK CVT FLUID TEMPERATURE SENSOR WITH TERMINAL CORD ASSEMBLY
1. Turn ignition switch to ªOFFº position.
2. Disconnect terminal cord assembly connector in engine compartment.
3. Check resistance between terminals 6 and 7 when CVT is cold.
Resistance:
Cold [20ÉC (68ÉF)]
Approximately 2.5 kW
SAT419JA4. Reinstall any part removed.
OK or NG
OK (With CONSULT-II)©GO TO 2.
OK (Without CONSULT-II)©GO TO 3.
NG©Replace CVT assembly
2 CHECK INPUT SIGNAL OF CVT FLUID TEMPERATURE SENSOR (With CONSULT-II)
With CONSULT-II
1. Start engine.
2. Select ªECU INPUT SIGNALSº in ªDATA MONITORº mode for ªCVTº with CONSULT-II.
3. Read out the value of ªFLUID TEMP SEº.
Voltage:
Cold [20ÉC (68ÉF)]®Hot [80ÉC (176ÉF)]:
Approximately 1.5V®0.5V
OK or NG
OK©GO TO 4.
NG©Check the following item:
IHarness for short to ground or short to power or open between TCM, ECM and termi-
nal cord assembly (Main harness)
IGround circuit for ECM
Refer to EC section (ªTROUBLE DIAGNOSIS FOR POWER SUPPLYº).
DTC P0710 CVT FLUID TEMPERATURE SENSOR CIRCUIT
Diagnostic Procedure
AT-57
Page 60 of 2267
3 CHECK INPUT SIGNAL OF CVT FLUID TEMPERATURE SENSOR (Without CONSULT-II)
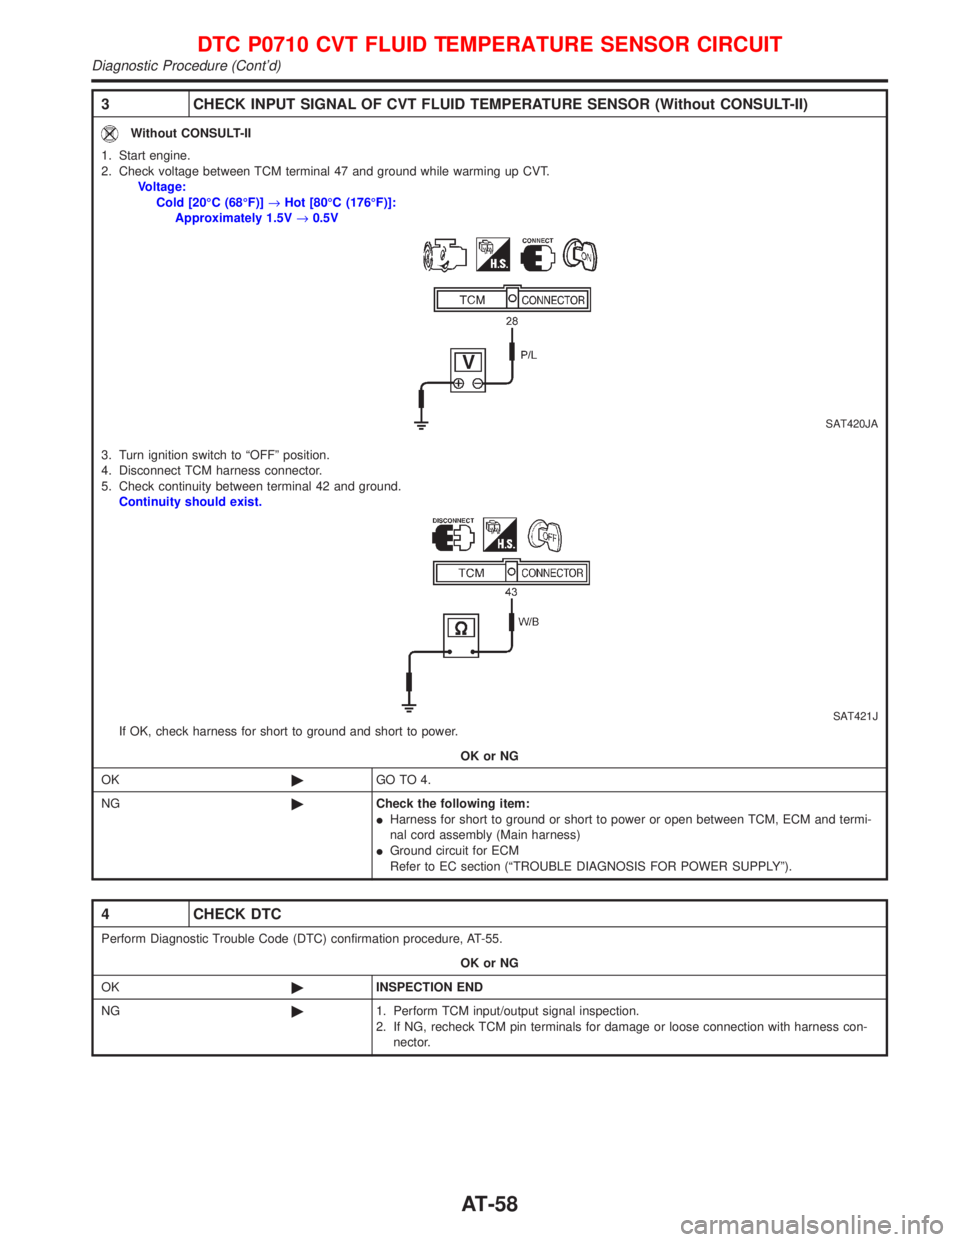
Without CONSULT-II
1. Start engine.
2. Check voltage between TCM terminal 47 and ground while warming up CVT.
Voltage:
Cold [20ÉC (68ÉF)]®Hot [80ÉC (176ÉF)]:
Approximately 1.5V®0.5V
SAT420JA
3. Turn ignition switch to ªOFFº position.
4. Disconnect TCM harness connector.
5. Check continuity between terminal 42 and ground.
Continuity should exist.
SAT421JIf OK, check harness for short to ground and short to power.
OK or NG
OK©GO TO 4.
NG©Check the following item:
IHarness for short to ground or short to power or open between TCM, ECM and termi-
nal cord assembly (Main harness)
IGround circuit for ECM
Refer to EC section (ªTROUBLE DIAGNOSIS FOR POWER SUPPLYº).
4 CHECK DTC
Perform Diagnostic Trouble Code (DTC) confirmation procedure, AT-55.
OK or NG
OK©INSPECTION END
NG©1. Perform TCM input/output signal inspection.
2. If NG, recheck TCM pin terminals for damage or loose connection with harness con-
nector.
DTC P0710 CVT FLUID TEMPERATURE SENSOR CIRCUIT
Diagnostic Procedure (Cont'd)
AT-58