Page 977 of 2890
G3M1023
10) Remove side oil seal with ST.
ST 398527700 PULLER ASSY
G3M1024
11) Drive in a new side oil seal with ST.
CAUTION:
Apply chassis grease between the oil seal lips.
ST 398437700 DRIFT
G3M1025
12) Insert the DOJ into rear differential.
(1) Install ST to rear differential.
ST 28099PA090 SIDE OIL SEAL PROTECTOR
G3M1026
(2) Insert the spline shaft until the spline portion is
inside the side oil seal.
(3) Remove ST.
ST 28099PA090 SIDE OIL SEAL PROTECTOR
13) Hereafter, re-assemble in reverse order of disassem-
bly.
18
3-4SERVICE PROCEDURE
2. Rear Differential
Page 986 of 2890

E: ASSEMBLY
1) Precautions for assembling
(1) Assemble in the reverse order of disassembling.
(2) Check and adjust each part during assembly.
(3) Keep the shims and washers in order, so that they
are not misinstalled.
(4) Thoroughly clean the surfaces on which the shims,
washers and bearings are to be installed.
(5) Apply gear oil when installing the bearings and
thrust washers.
(6) Be careful not to mix up the right and left hand cups
of the bearings.
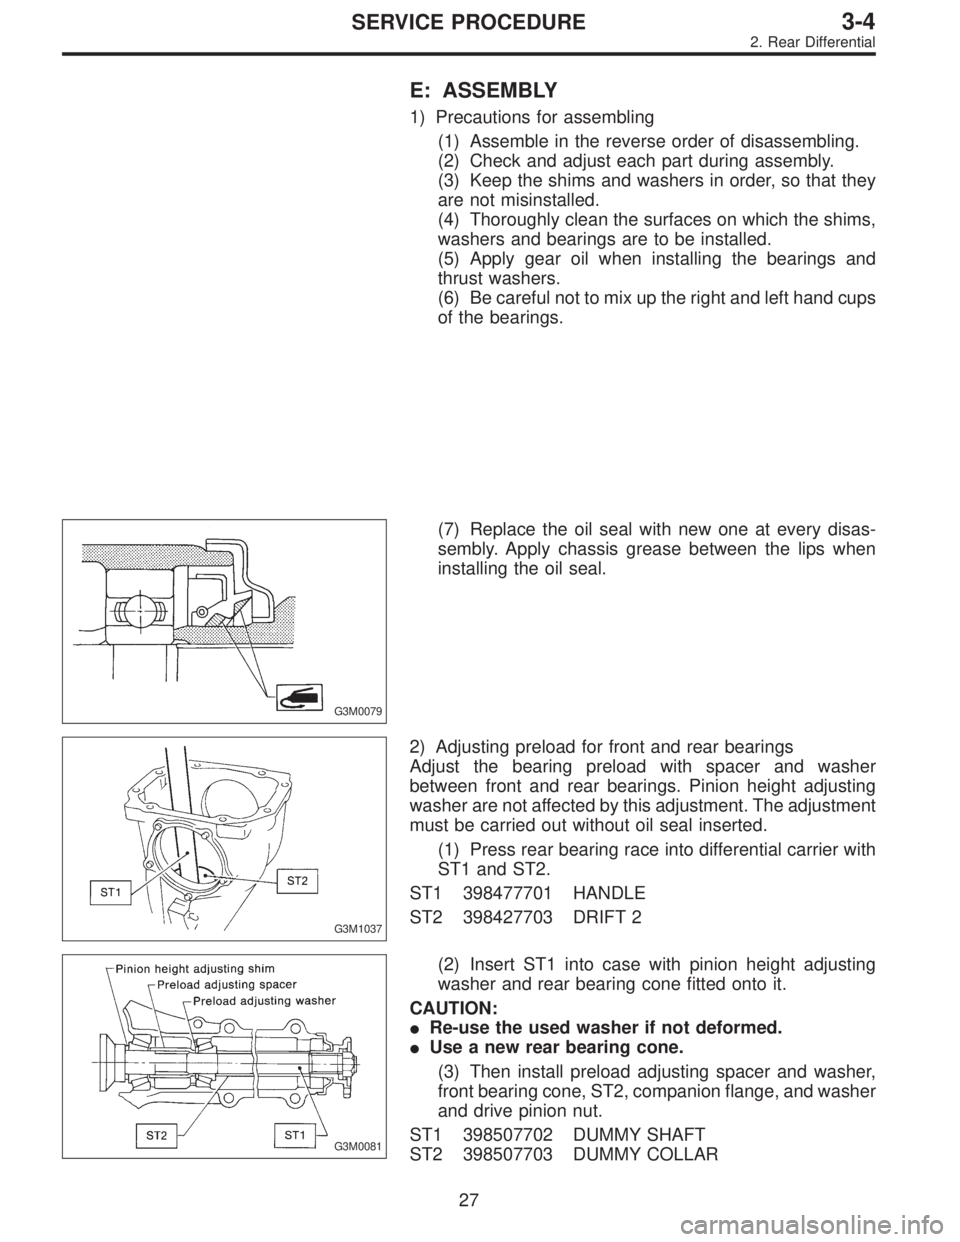
G3M0079
(7) Replace the oil seal with new one at every disas-
sembly. Apply chassis grease between the lips when
installing the oil seal.
G3M1037
2) Adjusting preload for front and rear bearings
Adjust the bearing preload with spacer and washer
between front and rear bearings. Pinion height adjusting
washer are not affected by this adjustment. The adjustment
must be carried out without oil seal inserted.
(1) Press rear bearing race into differential carrier with
ST1 and ST2.
ST1 398477701 HANDLE
ST2 398427703 DRIFT 2
G3M0081
(2) Insert ST1 into case with pinion height adjusting
washer and rear bearing cone fitted onto it.
CAUTION:
�Re-use the used washer if not deformed.
�Use a new rear bearing cone.
(3) Then install preload adjusting spacer and washer,
front bearing cone, ST2, companion flange, and washer
and drive pinion nut.
ST1 398507702 DUMMY SHAFT
ST2 398507703 DUMMY COLLAR
27
3-4SERVICE PROCEDURE
2. Rear Differential
Page 1848 of 2890

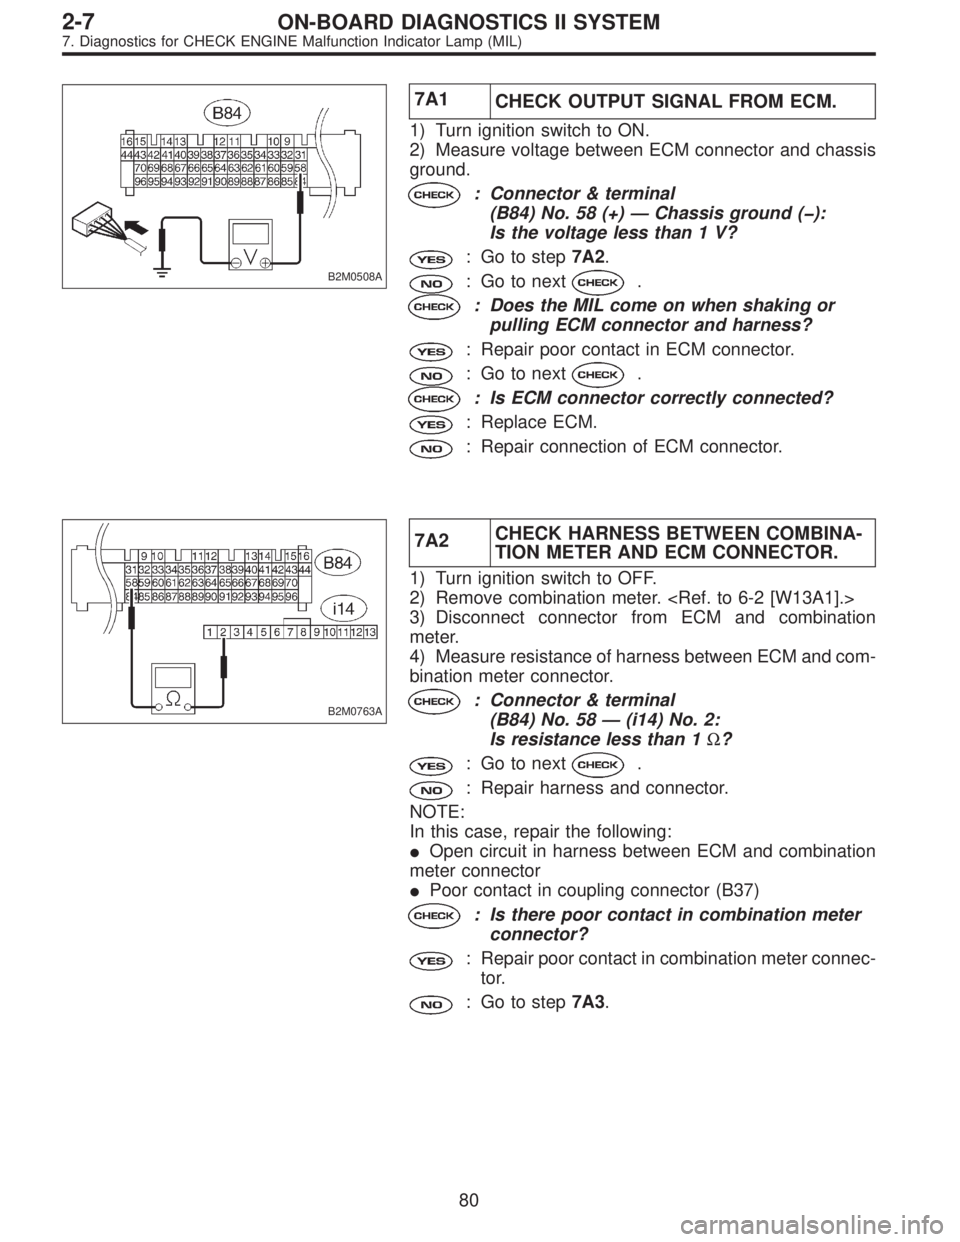
B2M0508A
7A1
CHECK OUTPUT SIGNAL FROM ECM.
1) Turn ignition switch to ON.
2) Measure voltage between ECM connector and chassis
ground.
: Connector & terminal
(B84) No. 58 (+) — Chassis ground (�):
Is the voltage less than 1 V?
: Go to step7A2.
: Go to next.
: Does the MIL come on when shaking or
pulling ECM connector and harness?
: Repair poor contact in ECM connector.
: Go to next.
: Is ECM connector correctly connected?
: Replace ECM.
: Repair connection of ECM connector.
B2M0763A
7A2CHECK HARNESS BETWEEN COMBINA-
TION METER AND ECM CONNECTOR.
1) Turn ignition switch to OFF.
2) Remove combination meter.
3) Disconnect connector from ECM and combination
meter.
4) Measure resistance of harness between ECM and com-
bination meter connector.
: Connector & terminal
(B84) No. 58 — (i14) No. 2:
Is resistance less than 1Ω?
: Go to next.
: Repair harness and connector.
NOTE:
In this case, repair the following:
�Open circuit in harness between ECM and combination
meter connector
�Poor contact in coupling connector (B37)
: Is there poor contact in combination meter
connector?
: Repair poor contact in combination meter connec-
tor.
: Go to step7A3.
80
2-7ON-BOARD DIAGNOSTICS II SYSTEM
7. Diagnostics for CHECK ENGINE Malfunction Indicator Lamp (MIL)
Page 1849 of 2890
B2M0510A
7A3CHECK HARNESS BETWEEN COMBINA-
TION METER AND IGNITION SWITCH
CONNECTOR.
1) Turn ignition switch to ON.
2) Measure voltage between combination meter connector
and chassis ground.
: Connector & terminal
(i14) No. 11 (+)—Chassis ground (�):
Is voltage more than 10 V?
: Go to next.
: Check the following and repair if necessary.
�Blown out fuse (No. 15).
NOTE:
If replaced fuse (No. 15) blows easily, check the harness
for short circuit of harness between fuse (No. 15) and com-
bination meter connector.
�Open or short circuit in harness between fuse (No. 15)
and combination meter connector
�Open or short circuit in harness between fuse (No. 15)
and ignition switch connector
�Poor contact in ignition switch connector
: Is there poor contact in combination meter
connector?
: Repair poor contact in combination meter connec-
tor.
: Replace bulb or combination meter.
81
2-7ON-BOARD DIAGNOSTICS II SYSTEM
7. Diagnostics for CHECK ENGINE Malfunction Indicator Lamp (MIL)
Page 1852 of 2890

B2M0470C
7C1CHECK OPERATION OF CHECK ENGINE
MALFUNCTION INDICATOR LAMP (MIL).
1) Turn ignition switch to OFF.
2) Disconnect test mode connector.
3) Turn ignition switch to ON.
: Does the MIL come on?
: Go to step7C2.
: Repair the MIL circuit.
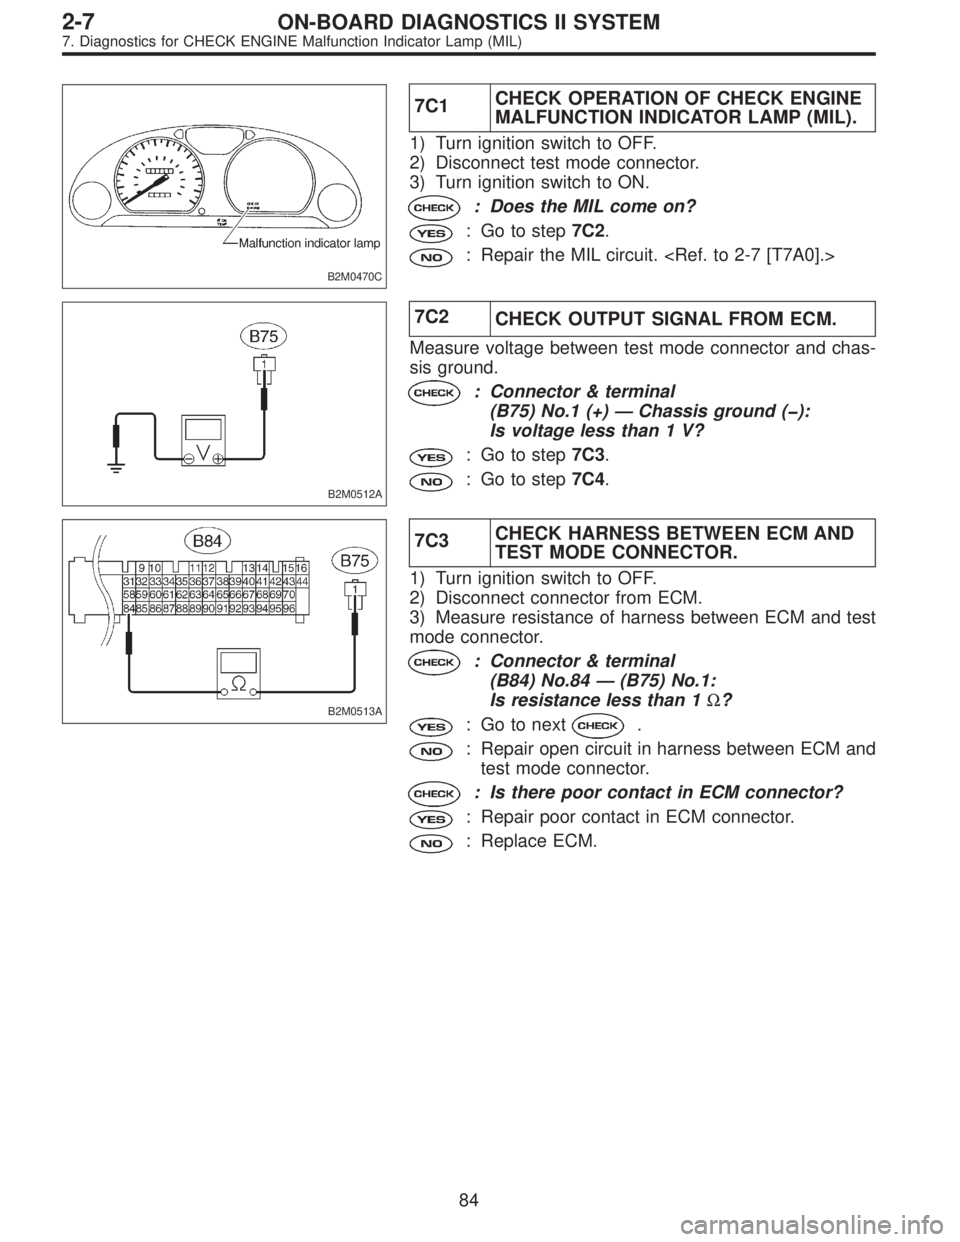
B2M0512A
7C2
CHECK OUTPUT SIGNAL FROM ECM.
Measure voltage between test mode connector and chas-
sis ground.
: Connector & terminal
(B75) No.1 (+)—Chassis ground (�):
Is voltage less than 1 V?
: Go to step7C3.
: Go to step7C4.
B2M0513A
7C3CHECK HARNESS BETWEEN ECM AND
TEST MODE CONNECTOR.
1) Turn ignition switch to OFF.
2) Disconnect connector from ECM.
3) Measure resistance of harness between ECM and test
mode connector.
: Connector & terminal
(B84) No.84—(B75) No.1:
Is resistance less than 1Ω?
: Go to next.
: Repair open circuit in harness between ECM and
test mode connector.
: Is there poor contact in ECM connector?
: Repair poor contact in ECM connector.
: Replace ECM.
84
2-7ON-BOARD DIAGNOSTICS II SYSTEM
7. Diagnostics for CHECK ENGINE Malfunction Indicator Lamp (MIL)
Page 1853 of 2890
B2M0514A
7C4
CHECK GROUND CIRCUIT.
1) Turn ignition switch to OFF.
2) Measure resistance of harness between test mode con-
nector and chassis ground.
: Connector & terminal
(B76) No.1—Chassis ground:
Is resistance less than 5Ω?
: Repair poor contact in test mode connector.
: Repair harness and connector.
NOTE:
In this case, repair the following:
�Open circuit in harness between test mode and coupling
connector (B22)
�Open circuit in harness between coupling connector
(B22) and engine grounding terminal
�Poor contact in coupling connector (B22)
85
2-7ON-BOARD DIAGNOSTICS II SYSTEM
7. Diagnostics for CHECK ENGINE Malfunction Indicator Lamp (MIL)
Page 1855 of 2890
B2M0515A
7D1CHECK HARNESS BETWEEN ECM CON-
NECTOR AND ENGINE GROUNDING
TERMINAL.
1) Turn ignition switch to OFF.
2) Disconnect connector from ECM.
3) Measure resistance of harness between ECM connec-
tor and chassis ground.
: Connector & terminal
(B84) No.84—Chassis ground:
Is resistance less than 5Ω?
: Repair short circuit in harness between ECM and
test mode connector.
: Replace ECM.
87
2-7ON-BOARD DIAGNOSTICS II SYSTEM
7. Diagnostics for CHECK ENGINE Malfunction Indicator Lamp (MIL)
Page 1860 of 2890

4) Install SBF No. 4 to main fuse box.
5) Turn ignition switch to ON.
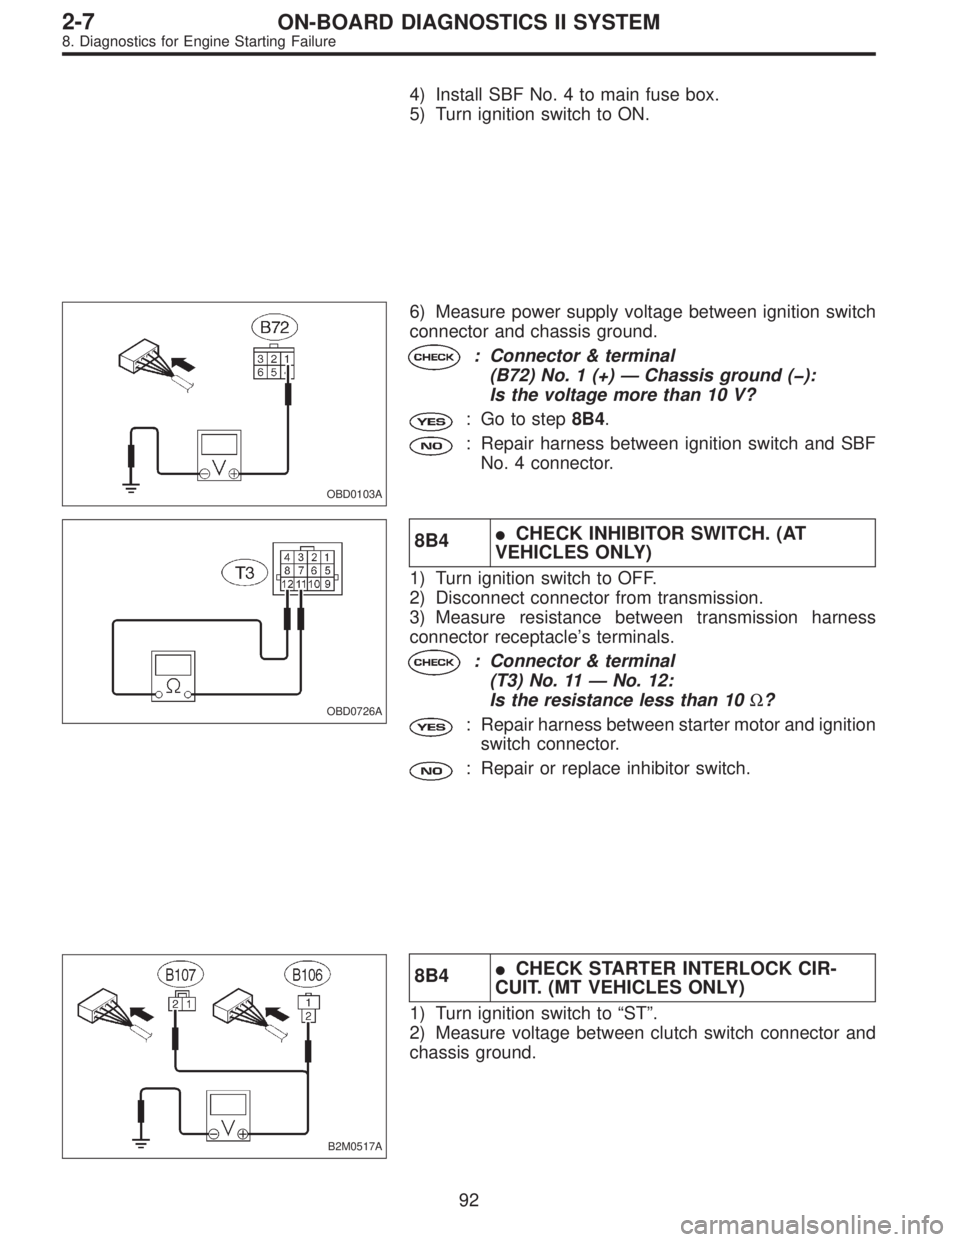
OBD0103A
6) Measure power supply voltage between ignition switch
connector and chassis ground.
: Connector & terminal
(B72) No. 1 (+)—Chassis ground (�):
Is the voltage more than 10 V?
: Go to step8B4.
: Repair harness between ignition switch and SBF
No. 4 connector.
OBD0726A
8B4�CHECK INHIBITOR SWITCH. (AT
VEHICLES ONLY)
1) Turn ignition switch to OFF.
2) Disconnect connector from transmission.
3) Measure resistance between transmission harness
connector receptacle’s terminals.
: Connector & terminal
(T3) No. 11—No. 12:
Is the resistance less than 10Ω?
: Repair harness between starter motor and ignition
switch connector.
: Repair or replace inhibitor switch.
B2M0517A
8B4�CHECK STARTER INTERLOCK CIR-
CUIT. (MT VEHICLES ONLY)
1) Turn ignition switch to“ST”.
2) Measure voltage between clutch switch connector and
chassis ground.
92
2-7ON-BOARD DIAGNOSTICS II SYSTEM
8. Diagnostics for Engine Starting Failure