Page 888 of 2543
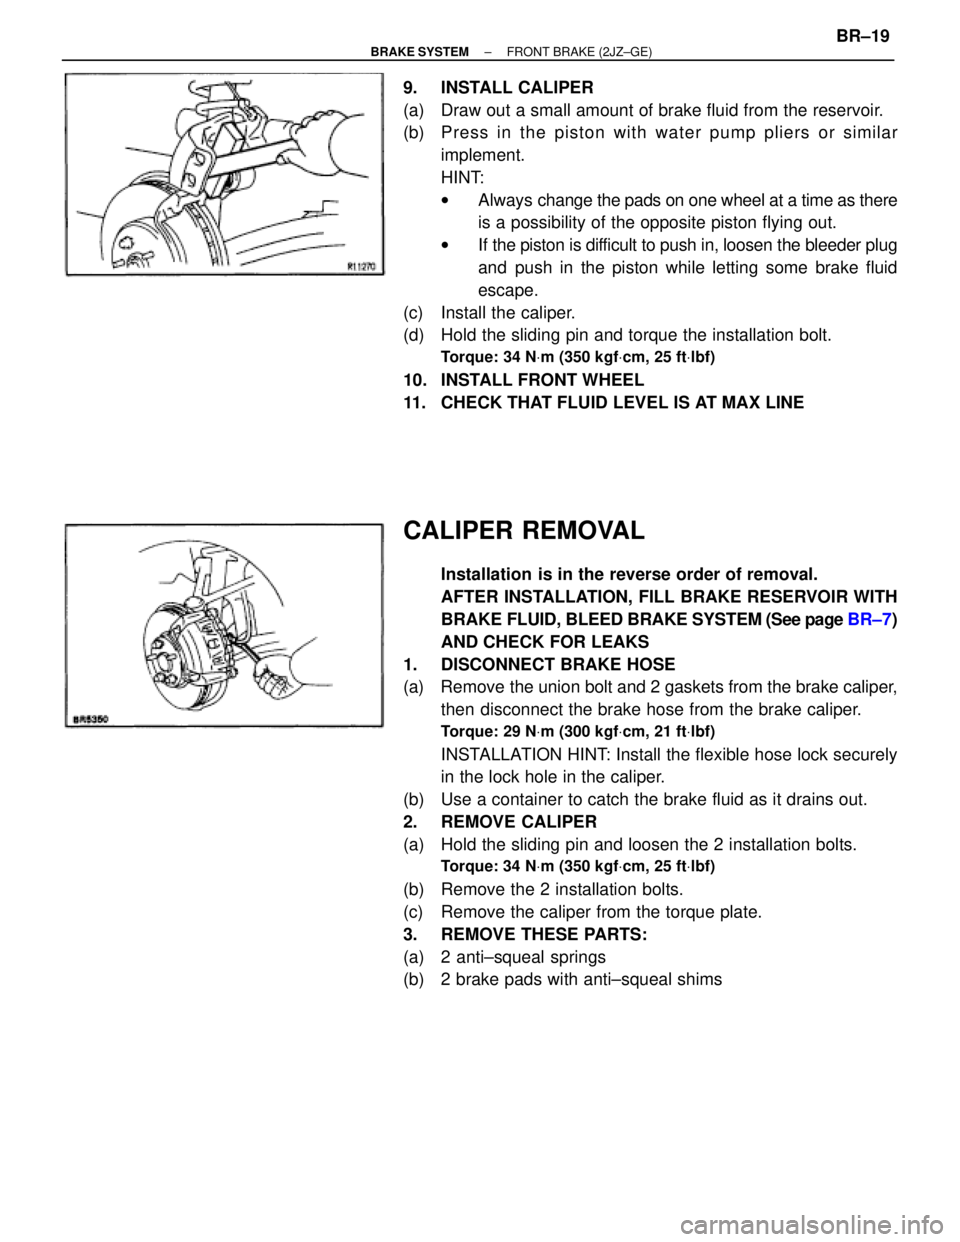
9. INSTALL CALIPER
(a) Draw out a small amount of brake fluid from the reservoir.
(b) P re ss in th e pisto n with wa te r pu mp plie rs or simila r
implement.
HINT:
wAlways change the pads on one wheel at a time as there
is a possibility of the opposite piston flying out.
wIf the piston is difficult to push in, loosen the bleeder plug
and push in the piston while letting some brake fluid
escape.
(c) Install the caliper.
(d) Hold the sliding pin and torque the installation bolt.
Torque: 34 NVm (350 kgfVcm, 25 ftVlbf)
10. INSTALL FRONT WHEEL
11. CHECK THAT FLUID LEVEL IS AT MAX LINE
CALIPER REMOVAL
Installation is in the reverse order of removal.
AFTER INSTALLATION, FILL BRAKE RESERVOIR WITH
BRAKE FLUID, BLEED BRAKE SYSTEM (See page BR±7)
AND CHECK FOR LEAKS
1. DISCONNECT BRAKE HOSE
(a) Remove the union bolt and 2 gaskets from the brake caliper,
then disconnect the brake hose from the brake caliper.
Torque: 29 NVm (300 kgfVcm, 21 ftVlbf)
INSTALLATION HINT: Install the flexible hose lock securely
in the lock hole in the caliper.
(b) Use a container to catch the brake fluid as it drains out.
2. REMOVE CALIPER
(a) Hold the sliding pin and loosen the 2 installation bolts.
Torque: 34 NVm (350 kgfVcm, 25 ftVlbf)
(b) Remove the 2 installation bolts.
(c) Remove the caliper from the torque plate.
3. REMOVE THESE PARTS:
(a) 2 anti±squeal springs
(b) 2 brake pads with anti±squeal shims
± BRAKE SYSTEMFRONT BRAKE (2JZ±GE)BR±19
Page 897 of 2543
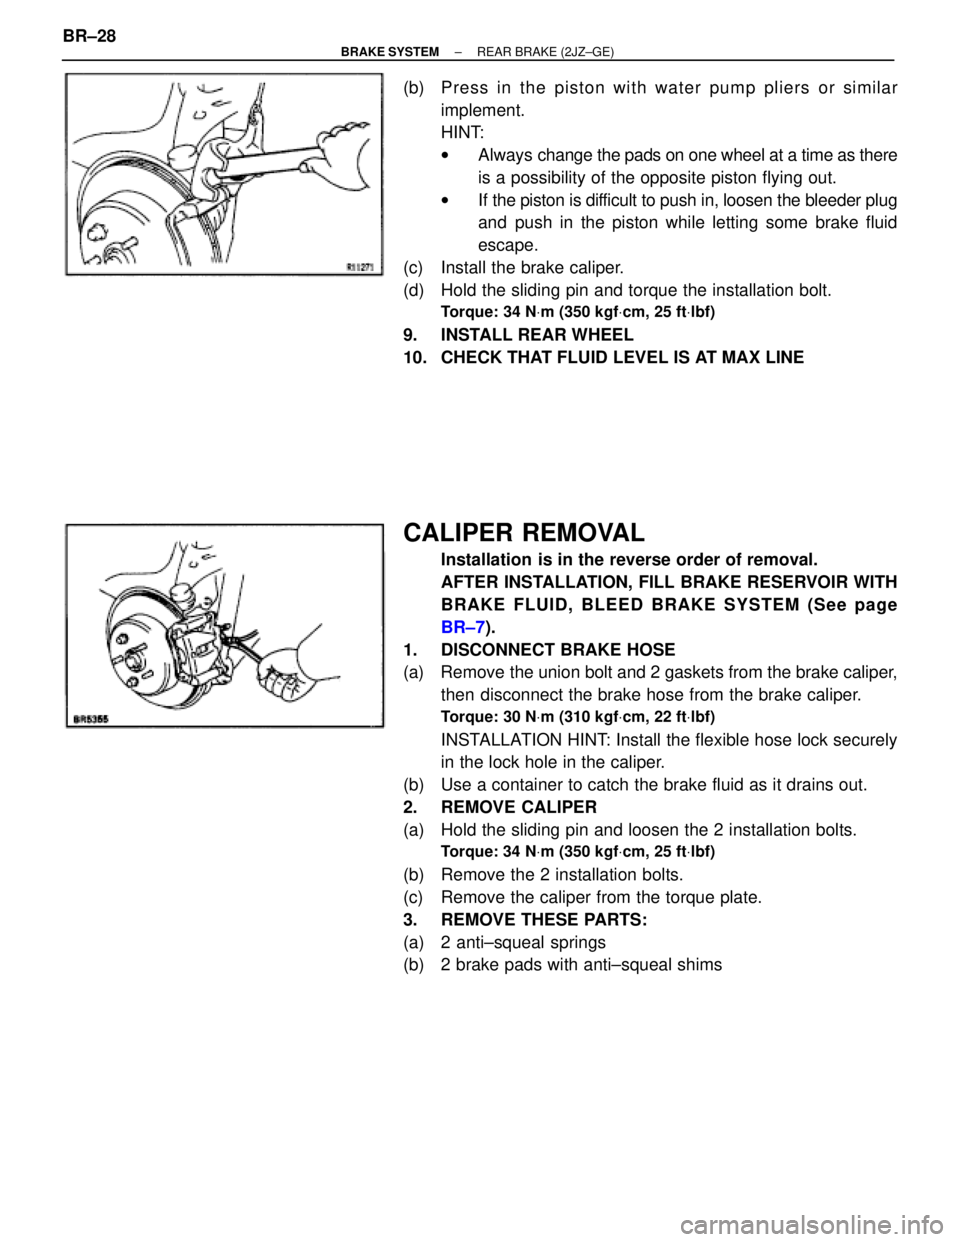
(b) Press in the piston with water pump pliers or similar
implement.
HINT:
wAlways change the pads on one wheel at a time as there
is a possibility of the opposite piston flying out.
wIf the piston is difficult to push in, loosen the bleeder plug
and push in the piston while letting some brake fluid
escape.
(c) Install the brake caliper.
(d) Hold the sliding pin and torque the installation bolt.
Torque: 34 NVm (350 kgfVcm, 25 ftVlbf)
9. INSTALL REAR WHEEL
10. CHECK THAT FLUID LEVEL IS AT MAX LINE
CALIPER REMOVAL
Installation is in the reverse order of removal.
AFTER INSTALLATION, FILL BRAKE RESERVOIR WITH
BRAKE FLUID, BLEED BRAKE SYSTEM (See page
BR±7).
1. DISCONNECT BRAKE HOSE
(a) Remove the union bolt and 2 gaskets from the brake caliper,
then disconnect the brake hose from the brake caliper.
Torque: 30 NVm (310 kgfVcm, 22 ftVlbf)
INSTALLATION HINT: Install the flexible hose lock securely
in the lock hole in the caliper.
(b) Use a container to catch the brake fluid as it drains out.
2. REMOVE CALIPER
(a) Hold the sliding pin and loosen the 2 installation bolts.
Torque: 34 NVm (350 kgfVcm, 25 ftVlbf)
(b) Remove the 2 installation bolts.
(c) Remove the caliper from the torque plate.
3. REMOVE THESE PARTS:
(a) 2 anti±squeal springs
(b) 2 brake pads with anti±squeal shims BR±28
± BRAKE SYSTEMREAR BRAKE (2JZ±GE)
Page 904 of 2543
REAR BRAKE (Parking Brake)
COMPONENTS
PARKING BRAKE DISASSEMBLY
1. REMOVE REAR WHEEL
2. REMOVE REAR DISC BRAKE ASSEMBLY
(a) Remove the 2 mounting bolts and remove the disc brake
assembly.
(b) Suspend the disc brake securely and so the hose is not
stretched.
3. REMOVE DISC
(a) Place matchmarks on the disc and rear axle hub.
(b) Remove the disc.
HINT: If the disc cannot be removed easily, return the shoe
adjuster until the disc turns freely.
± BRAKE SYSTEMREAR BRAKE (Parking Brake)BR±35
Page 908 of 2543
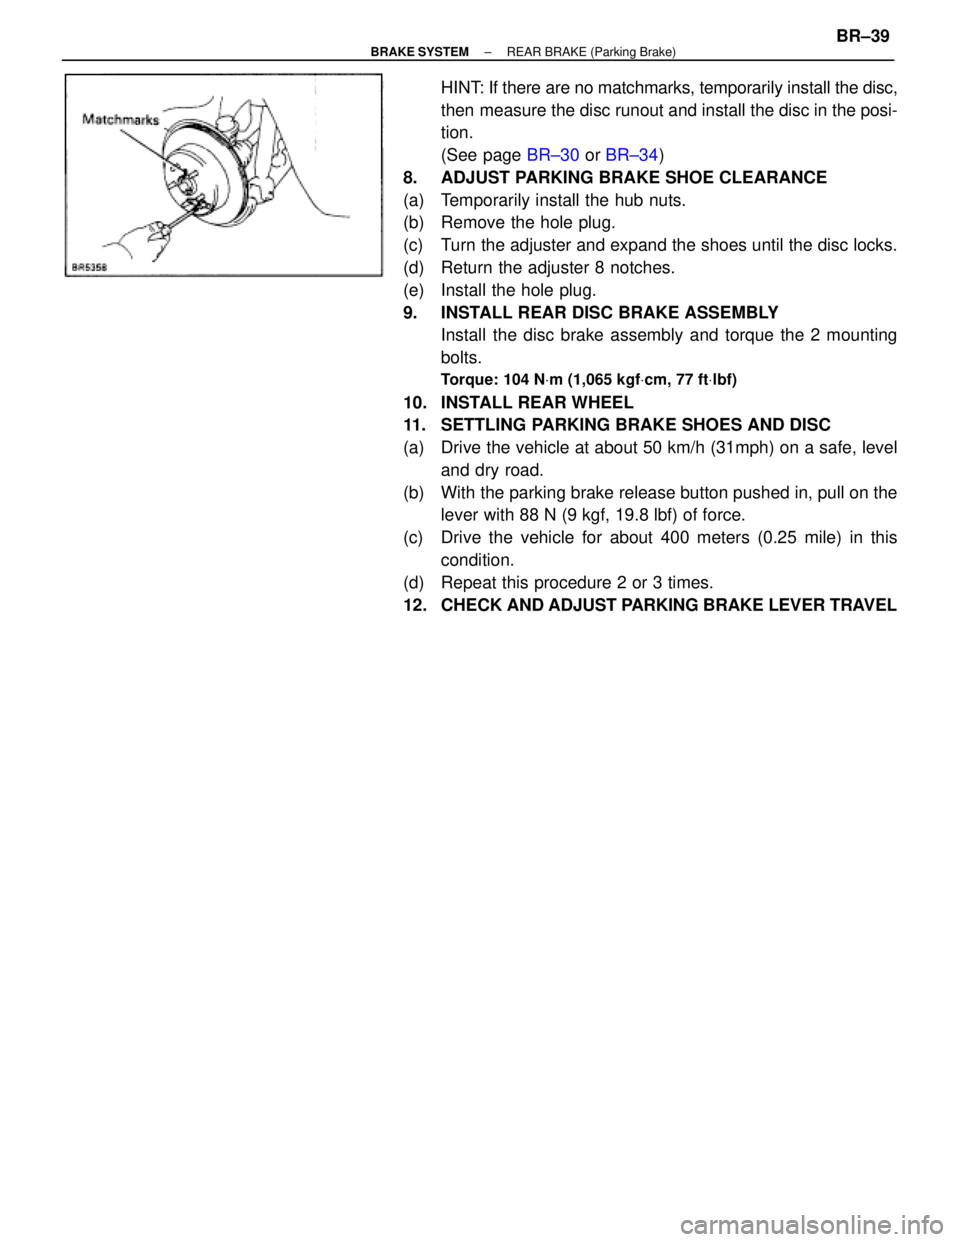
HINT: If there are no matchmarks, temporarily install the disc,
then measure the disc runout and install the disc in the posi-
tion.
(See page BR±30 or BR±34)
8. ADJUST PARKING BRAKE SHOE CLEARANCE
(a) Temporarily install the hub nuts.
(b) Remove the hole plug.
(c) Turn the adjuster and expand the shoes until the disc locks.
(d) Return the adjuster 8 notches.
(e) Install the hole plug.
9. INSTALL REAR DISC BRAKE ASSEMBLY
Install the disc brake assembly and torque the 2 mounting
bolts.
Torque: 104 NVm (1,065 kgfVcm, 77 ftVlbf)
10. INSTALL REAR WHEEL
11. SETTLING PARKING BRAKE SHOES AND DISC
(a) Drive the vehicle at about 50 km/h (31mph) on a safe, level
and dry road.
(b) With the parking brake release button pushed in, pull on the
lever with 88 N (9 kgf, 19.8 lbf) of force.
(c) Drive the vehicle for about 400 meters (0.25 mile) in this
condition.
(d) Repeat this procedure 2 or 3 times.
12. CHECK AND ADJUST PARKING BRAKE LEVER TRAVEL
± BRAKE SYSTEMREAR BRAKE (Parking Brake)BR±39
Page 1071 of 2543
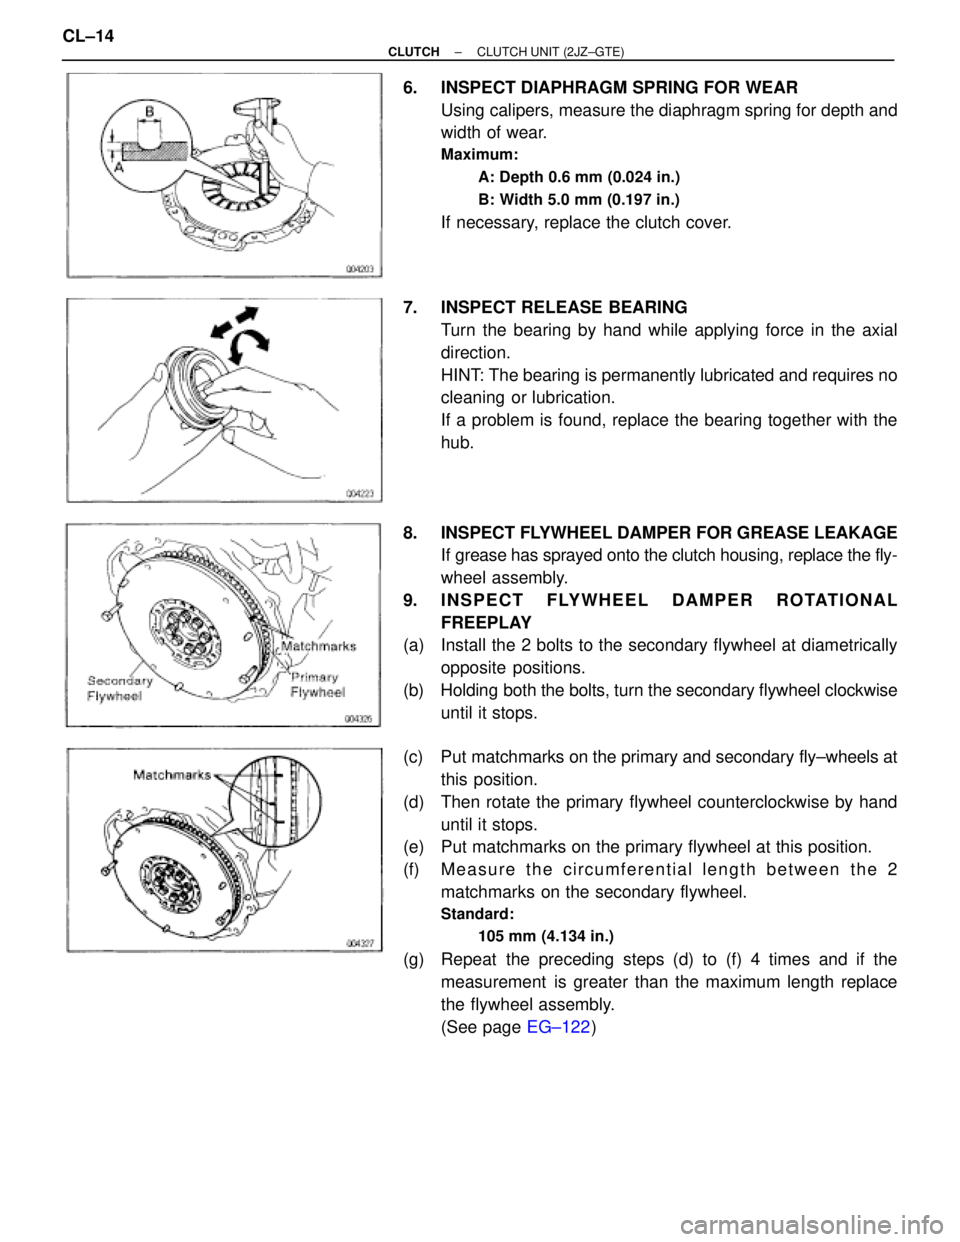
6. INSPECT DIAPHRAGM SPRING FOR WEAR
Using calipers, measure the diaphragm spring for depth and
width of wear.
Maximum:
A: Depth 0.6 mm (0.024 in.)
B: Width 5.0 mm (0.197 in.)
If necessary, replace the clutch cover.
7. INSPECT RELEASE BEARING
Turn the bearing by hand while applying force in the axial
direction.
HINT: The bearing is permanently lubricated and requires no
cleaning or lubrication.
If a problem is found, replace the bearing together with the
hub.
8. INSPECT FLYWHEEL DAMPER FOR GREASE LEAKAGE
If grease has sprayed onto the clutch housing, replace the fly-
wheel assembly.
9. INSPECT FLYWHEEL DAMPER ROTATIONAL
FREEPLAY
(a) Install the 2 bolts to the secondary flywheel at diametrically
opposite positions.
(b) Holding both the bolts, turn the secondary flywheel clockwise
until it stops.
(c) Put matchmarks on the primary and secondary fly±wheels at
this position.
(d) Then rotate the primary flywheel counterclockwise by hand
until it stops.
(e) Put matchmarks on the primary flywheel at this position.
(f) M e a s u r e t h e c i r c u m f e r e n t i a l length between the 2
matchmarks on the secondary flywheel.
Standard:
105 mm (4.134 in.)
(g) Repeat the preceding steps (d) to (f) 4 times and if the
measurement is greater than the maximum length replace
the flywheel assembly.
(See page EG±122) CL±14
± CLUTCHCLUTCH UNIT (2JZ±GTE)
Page 1072 of 2543
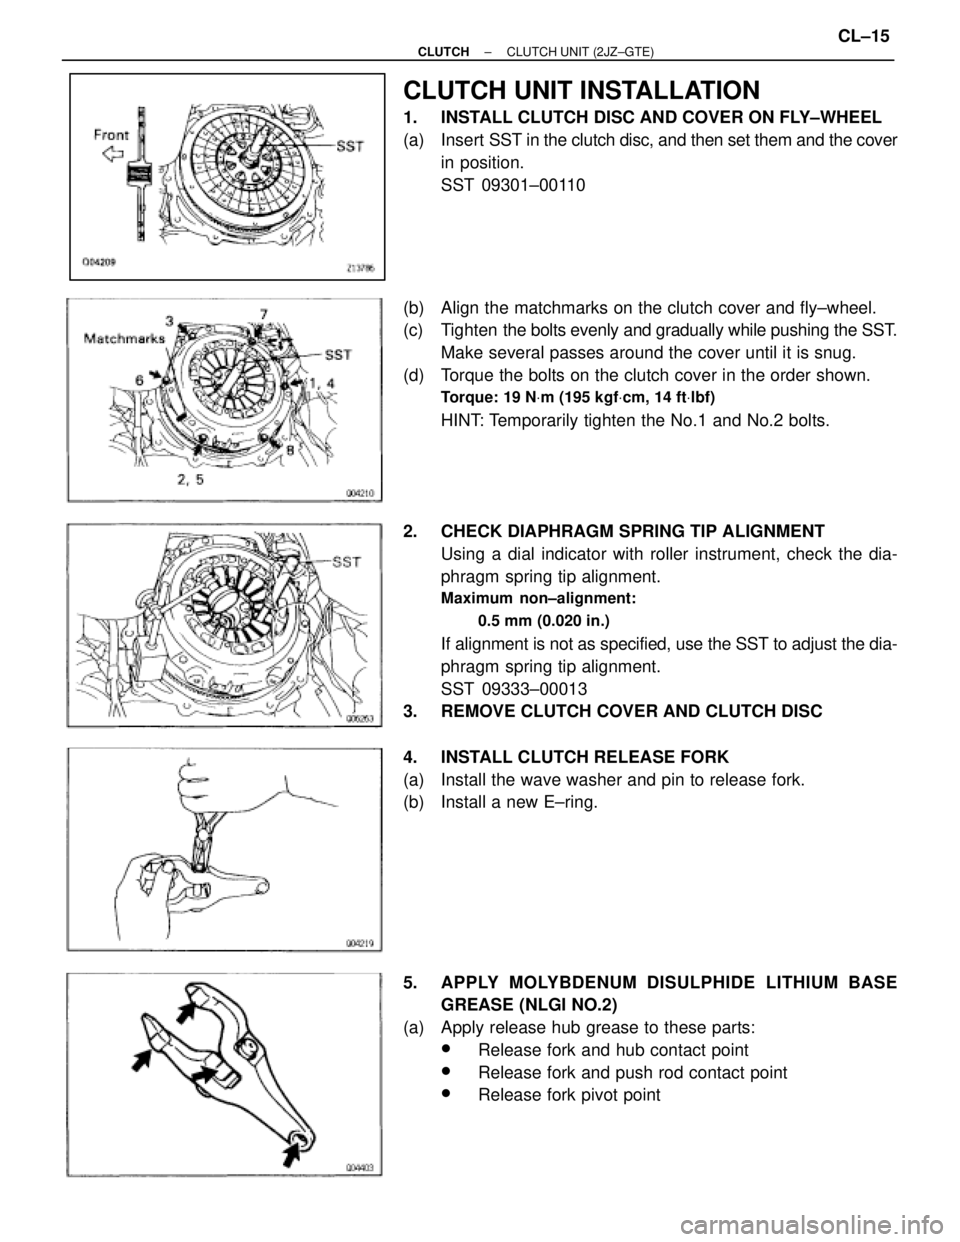
CLUTCH UNIT INSTALLATION
1. INSTALL CLUTCH DISC AND COVER ON FLY±WHEEL
(a) Insert SST in the clutch disc, and then set them and the cover
in position.
SST 09301±00110
(b) Align the matchmarks on the clutch cover and fly±wheel.
(c) Tighten the bolts evenly and gradually while pushing the SST.
Make several passes around the cover until it is snug.
(d) Torque the bolts on the clutch cover in the order shown.
Torque: 19 NVm (195 kgfVcm, 14 ftVlbf)
HINT: Temporarily tighten the No.1 and No.2 bolts.
2. CHECK DIAPHRAGM SPRING TIP ALIGNMENT
Using a dial indicator with roller instrument, check the dia-
phragm spring tip alignment.
Maximum non±alignment:
0.5 mm (0.020 in.)
If alignment is not as specified, use the SST to adjust the dia-
phragm spring tip alignment.
SST 09333±00013
3. REMOVE CLUTCH COVER AND CLUTCH DISC
4. INSTALL CLUTCH RELEASE FORK
(a) Install the wave washer and pin to release fork.
(b) Install a new E±ring.
5. APPLY MOLYBDENUM DISULPHIDE LITHIUM BASE
GREASE (NLGI NO.2)
(a) Apply release hub grease to these parts:
wRelease fork and hub contact point
wRelease fork and push rod contact point
wRelease fork pivot point
± CLUTCHCLUTCH UNIT (2JZ±GTE)CL±15
Page 1075 of 2543
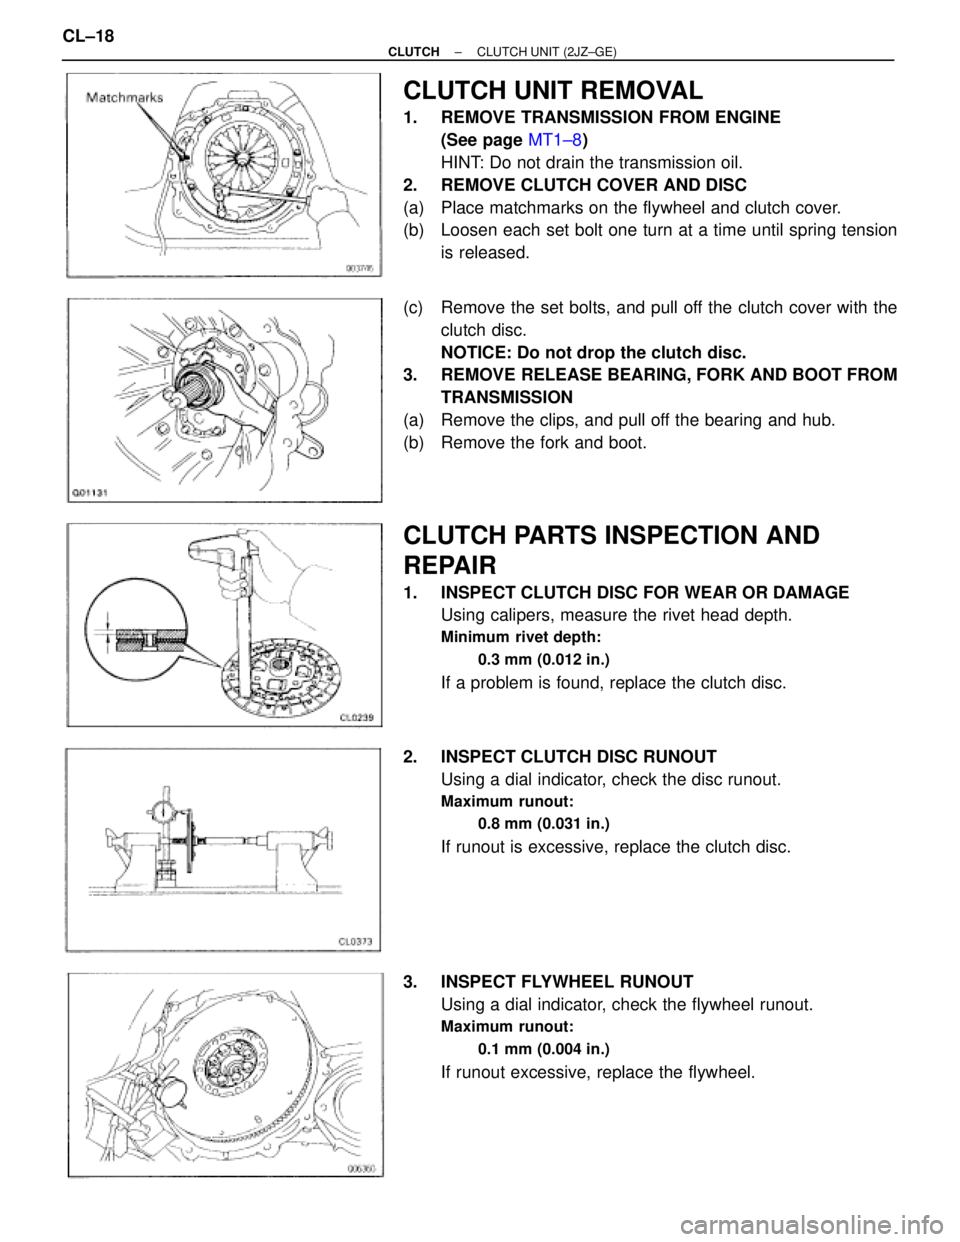
CLUTCH UNIT REMOVAL
1. REMOVE TRANSMISSION FROM ENGINE
(See page MT1±8)
HINT: Do not drain the transmission oil.
2. REMOVE CLUTCH COVER AND DISC
(a) Place matchmarks on the flywheel and clutch cover.
(b) Loosen each set bolt one turn at a time until spring tension
is released.
(c) Remove the set bolts, and pull off the clutch cover with the
clutch disc.
NOTICE: Do not drop the clutch disc.
3. REMOVE RELEASE BEARING, FORK AND BOOT FROM
TRANSMISSION
(a) Remove the clips, and pull off the bearing and hub.
(b) Remove the fork and boot.
CLUTCH PARTS INSPECTION AND
REPAIR
1. INSPECT CLUTCH DISC FOR WEAR OR DAMAGE
Using calipers, measure the rivet head depth.
Minimum rivet depth:
0.3 mm (0.012 in.)
If a problem is found, replace the clutch disc.
2. INSPECT CLUTCH DISC RUNOUT
Using a dial indicator, check the disc runout.
Maximum runout:
0.8 mm (0.031 in.)
If runout is excessive, replace the clutch disc.
3. INSPECT FLYWHEEL RUNOUT
Using a dial indicator, check the flywheel runout.
Maximum runout:
0.1 mm (0.004 in.)
If runout excessive, replace the flywheel. CL±18
± CLUTCHCLUTCH UNIT (2JZ±GE)
Page 1077 of 2543
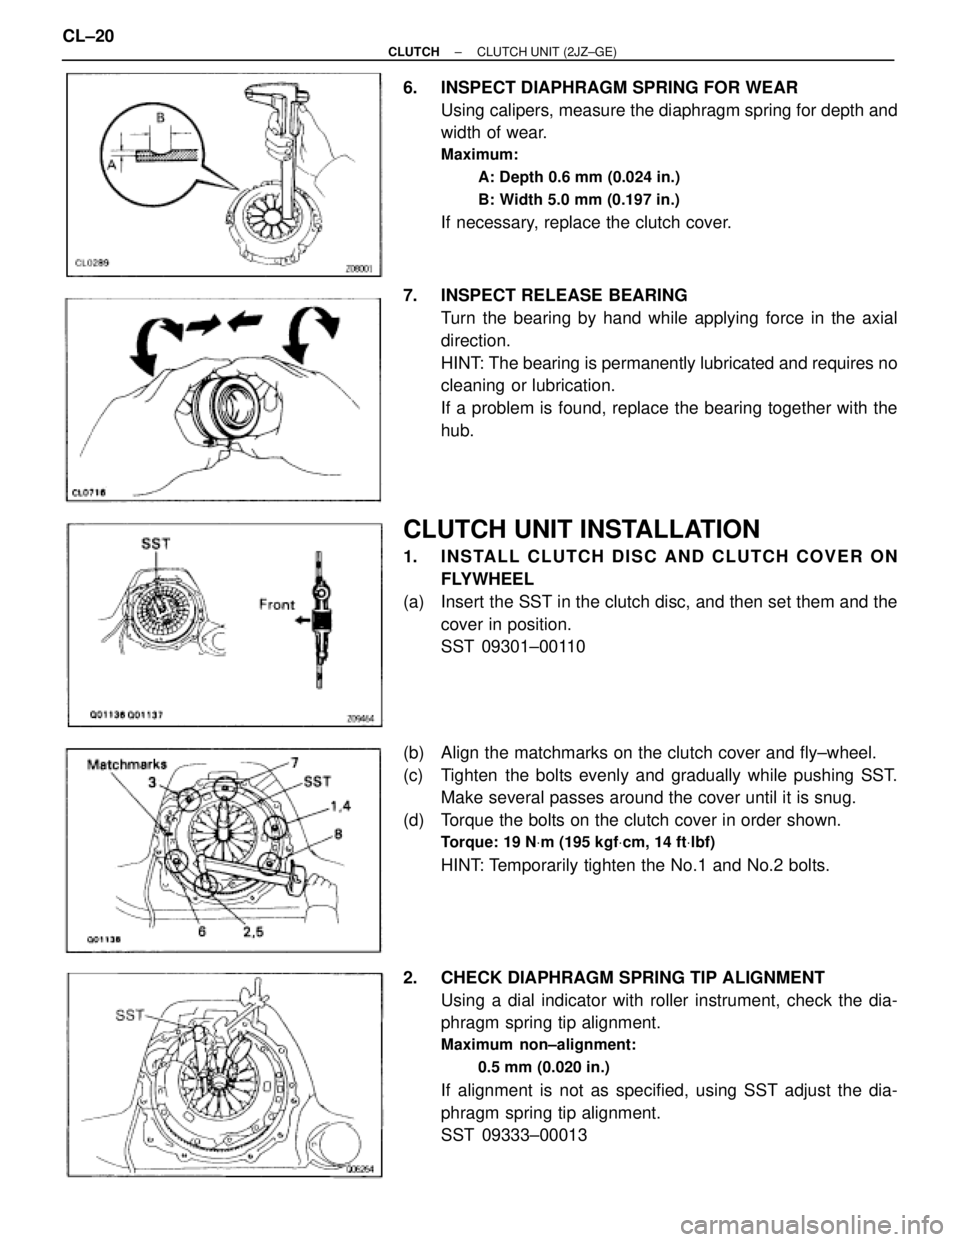
6. INSPECT DIAPHRAGM SPRING FOR WEAR
Using calipers, measure the diaphragm spring for depth and
width of wear.
Maximum:
A: Depth 0.6 mm (0.024 in.)
B: Width 5.0 mm (0.197 in.)
If necessary, replace the clutch cover.
7. INSPECT RELEASE BEARING
Turn the bearing by hand while applying force in the axial
direction.
HINT: The bearing is permanently lubricated and requires no
cleaning or lubrication.
If a problem is found, replace the bearing together with the
hub.
CLUTCH UNIT INSTALLATION
1. INSTALL CLUTCH DISC AND CLUTCH COVER ON
FLYWHEEL
(a) Insert the SST in the clutch disc, and then set them and the
cover in position.
SST 09301±00110
(b) Align the matchmarks on the clutch cover and fly±wheel.
(c) Tighten the bolts evenly and gradually while pushing SST.
Make several passes around the cover until it is snug.
(d) Torque the bolts on the clutch cover in order shown.
Torque: 19 NVm (195 kgfVcm, 14 ftVlbf)
HINT: Temporarily tighten the No.1 and No.2 bolts.
2. CHECK DIAPHRAGM SPRING TIP ALIGNMENT
Using a dial indicator with roller instrument, check the dia-
phragm spring tip alignment.
Maximum non±alignment:
0.5 mm (0.020 in.)
If alignment is not as specified, using SST adjust the dia-
phragm spring tip alignment.
SST 09333±00013 CL±20
± CLUTCHCLUTCH UNIT (2JZ±GE)