Page 1387 of 1771

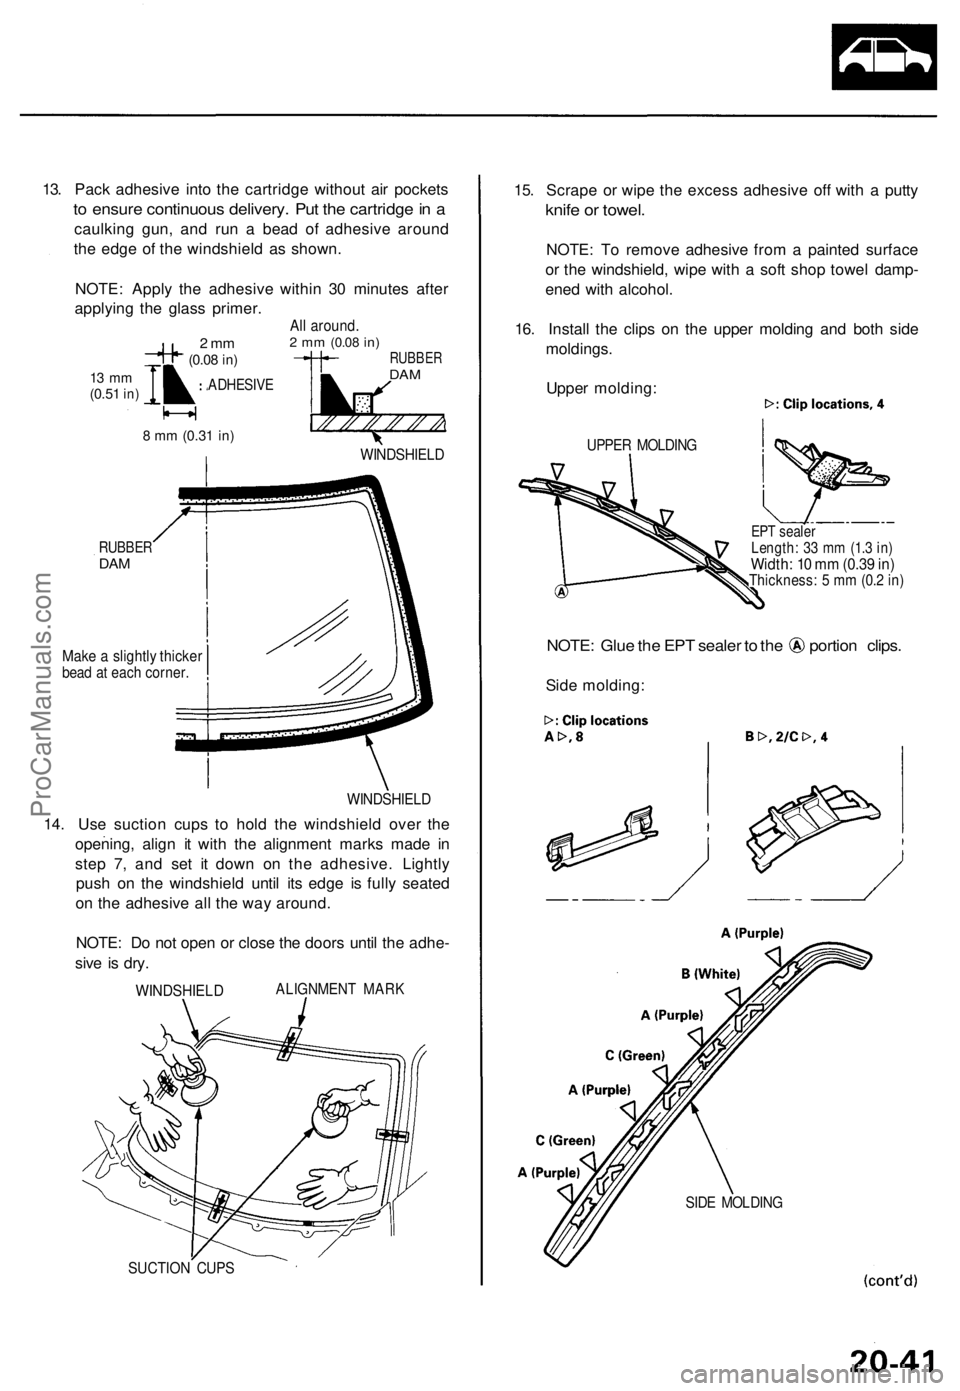
RUBBERDAM
RUBBE RDAM
Mak e a slightl y thicke rbead a t eac h corner .
WINDSHIEL D
14. Us e suctio n cup s t o hol d th e windshiel d ove r th e
opening , alig n i t wit h th e alignmen t mark s mad e i n
ste p 7 , an d se t i t dow n o n th e adhesive . Lightl y
pus h o n th e windshiel d unti l it s edg e i s full y seated
o n th e adhesiv e al l th e wa y around .
NOTE : D o no t ope n o r clos e th e door s unti l th e adhe -
siv e i s dry .
ALIGNMEN T MAR KWINDSHIEL D
SUCTION CUP S
15. Scrap e o r wip e th e exces s adhesiv e of f wit h a putt y
knife o r towel .
NOTE : T o remov e adhesiv e fro m a painte d surfac e
o r th e windshield , wip e wit h a sof t sho p towe l damp -
ene d wit h alcohol .
16 . Instal l th e clip s o n th e uppe r moldin g an d bot h sid e
moldings .
Uppe r molding :
UPPER MOLDIN G
EPT seale rLength : 3 3 m m (1. 3 in )Width : 1 0 m m (0.3 9 in )Thickness : 5 m m (0. 2 in )
NOTE : Glu e th e EP T seale r t o th e portio n clips .
Side molding :
SIDE MOLDIN G
13. Pac k adhesiv e int o th e cartridg e withou t ai r pocket s
to ensur e continuou s delivery . Pu t th e cartridg e in a
caulkin g gun , an d ru n a bea d o f adhesiv e aroun d
th e edg e o f th e windshiel d a s shown .
NOTE : Appl y th e adhesiv e withi n 3 0 minute s afte r
applyin g th e glas s primer .
ADHESIV E
WINDSHIEL D
22 mm(0.08 in)
13 m m(0.5 1 in)
8 m m (0.3 1 in)
All around .2 m m (0.0 8 in)
ProCarManuals.com
Page 1563 of 1771

Starting Syste m
Starter Brus h Holde r Tes t
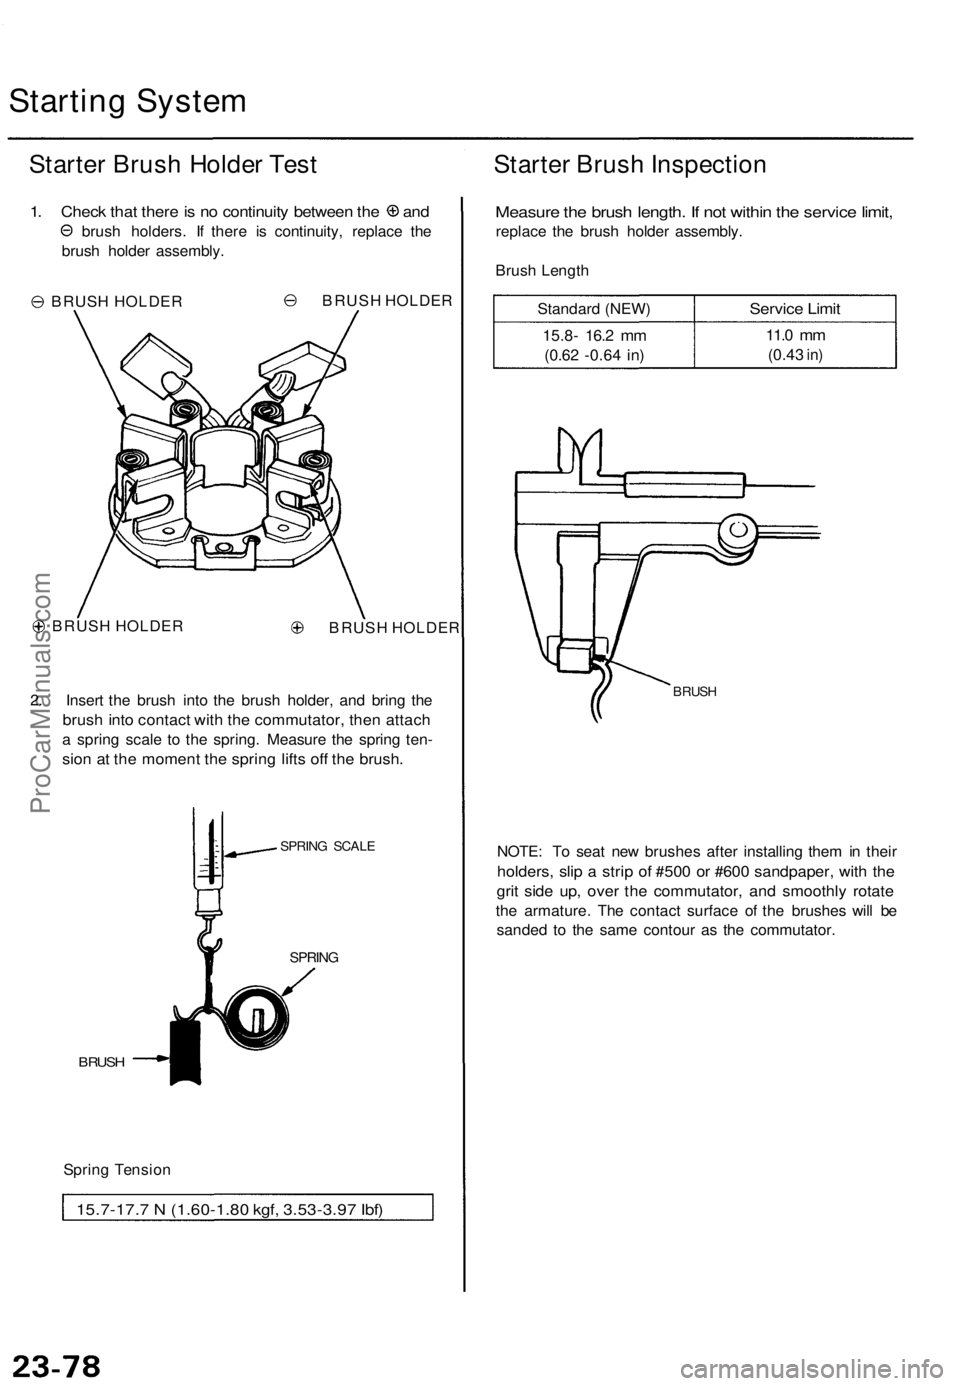
1. Chec k tha t ther e is n o continuit y betwee n th e an d
brush holders . I f ther e i s continuity , replac e th e
brus h holde r assembly .
BRUS H HOLDE R BRUS
H HOLDE R
BRUS H HOLDE R
BRUSH HOLDE R
2 . Inser t th e brus h int o th e brus h holder , an d brin g th e
brus h int o contac t wit h th e commutator , the n attac h
a sprin g scal e t o th e spring . Measur e th e sprin g ten -
sion a t th e momen t th e sprin g lift s of f th e brush .
SPRIN G SCAL E
BRUSH
SPRIN G
Spring Tensio n
15.7-17. 7 N (1.60-1.8 0 kgf , 3.53-3.9 7 Ibf )
Starte r Brus h Inspectio n
Measure th e brus h length . I f no t withi n th e servic e limit ,
replac e th e brus h holde r assembly .
Brus h Lengt h
Standar d (NEW )
15.8- 16. 2 mm
(0.6 2 -0.6 4 in)
Servic e Limi t
11.0 mm
(0.4 3 in)
BRUS H
NOTE : T o sea t ne w brushe s afte r installin g the m in thei r
holders , sli p a stri p of #50 0 o r #60 0 sandpaper , wit h th e
grit sid e up , ove r th e commutator , an d smoothl y rotat e
the armature . Th e contac t surfac e o f th e brushe s wil l b e
sande d t o th e sam e contou r a s th e commutator .
ProCarManuals.com
Page 1585 of 1771

Charging System
Rectifier Test
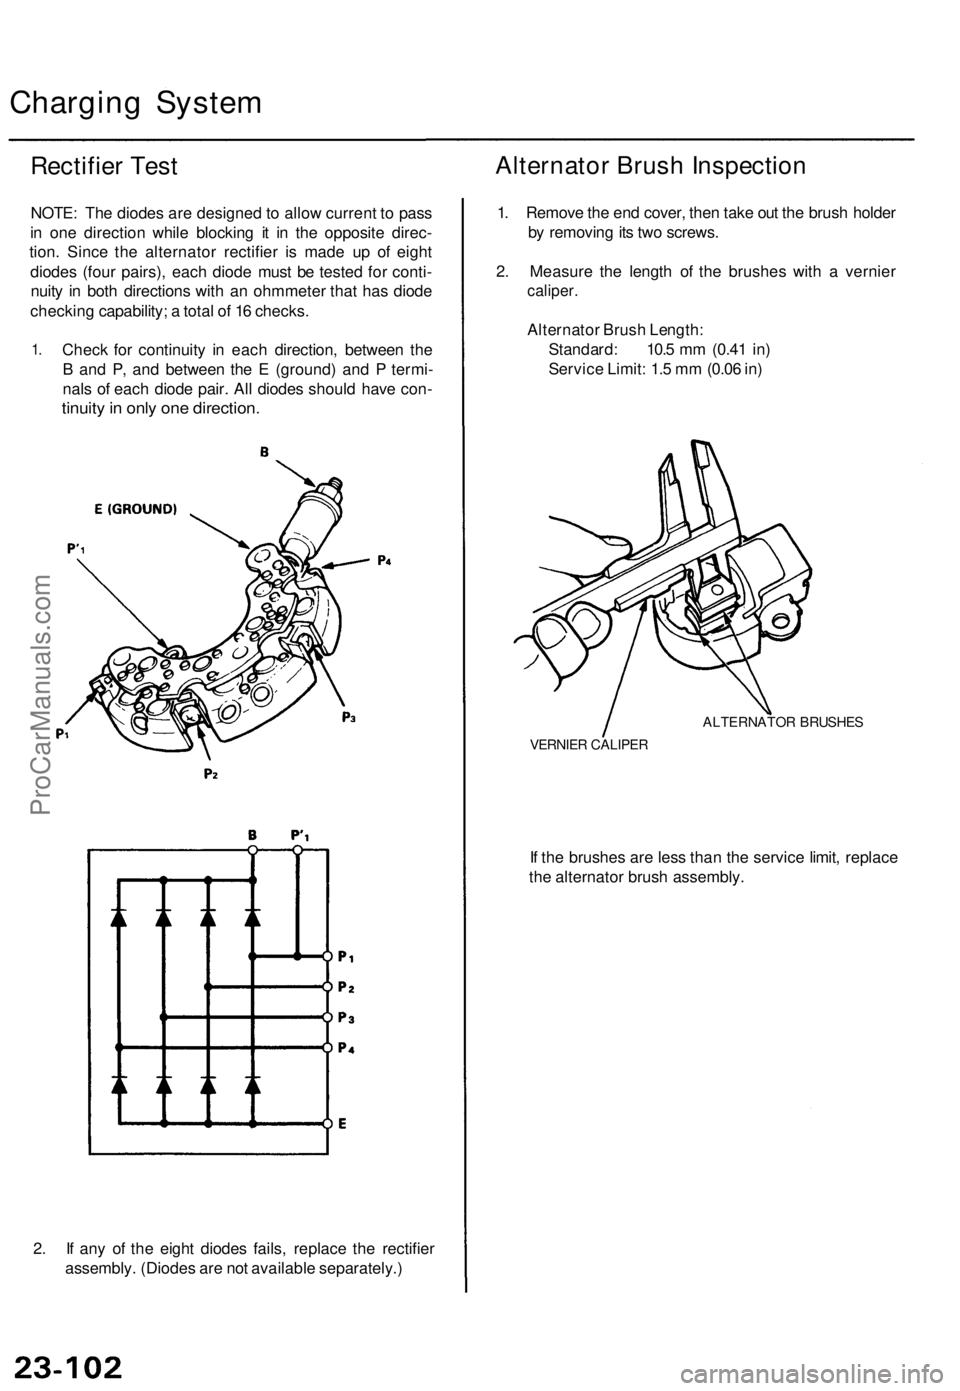
NOTE: The diodes are designed to allow current to pass
in one direction while blocking it in the opposite direc-
tion. Since the alternator rectifier is made up of eight
diodes (four pairs), each diode must be tested for conti-
nuity in both directions with an ohmmeter that has diode
checking capability; a total of 16 checks.
1.
Check for continuity in each direction, between the
B and P, and between the E (ground) and P termi-
nals of each diode pair. All diodes should have con-
tinuity in only one direction.
2. If any of the eight diodes fails, replace the rectifier
assembly. (Diodes are not available separately.)
Alternator Brush Inspection
1. Remove the end cover, then take out the brush holder
by removing its two screws.
2. Measure the length of the brushes with a vernier
caliper.
Alternator Brush Length:
Standard: 10.5 mm (0.41 in)
Service Limit: 1.5 mm (0.06 in)
ALTERNATOR BRUSHES
VERNIER CALIPER
If the brushes are less than the service limit, replace
the alternator brush assembly.ProCarManuals.com