1990 MITSUBISHI SPYDER oil filter
[x] Cancel search: oil filterPage 1385 of 2103
AUTOMATIC TRANSAXLE
I
I
‘Id
0
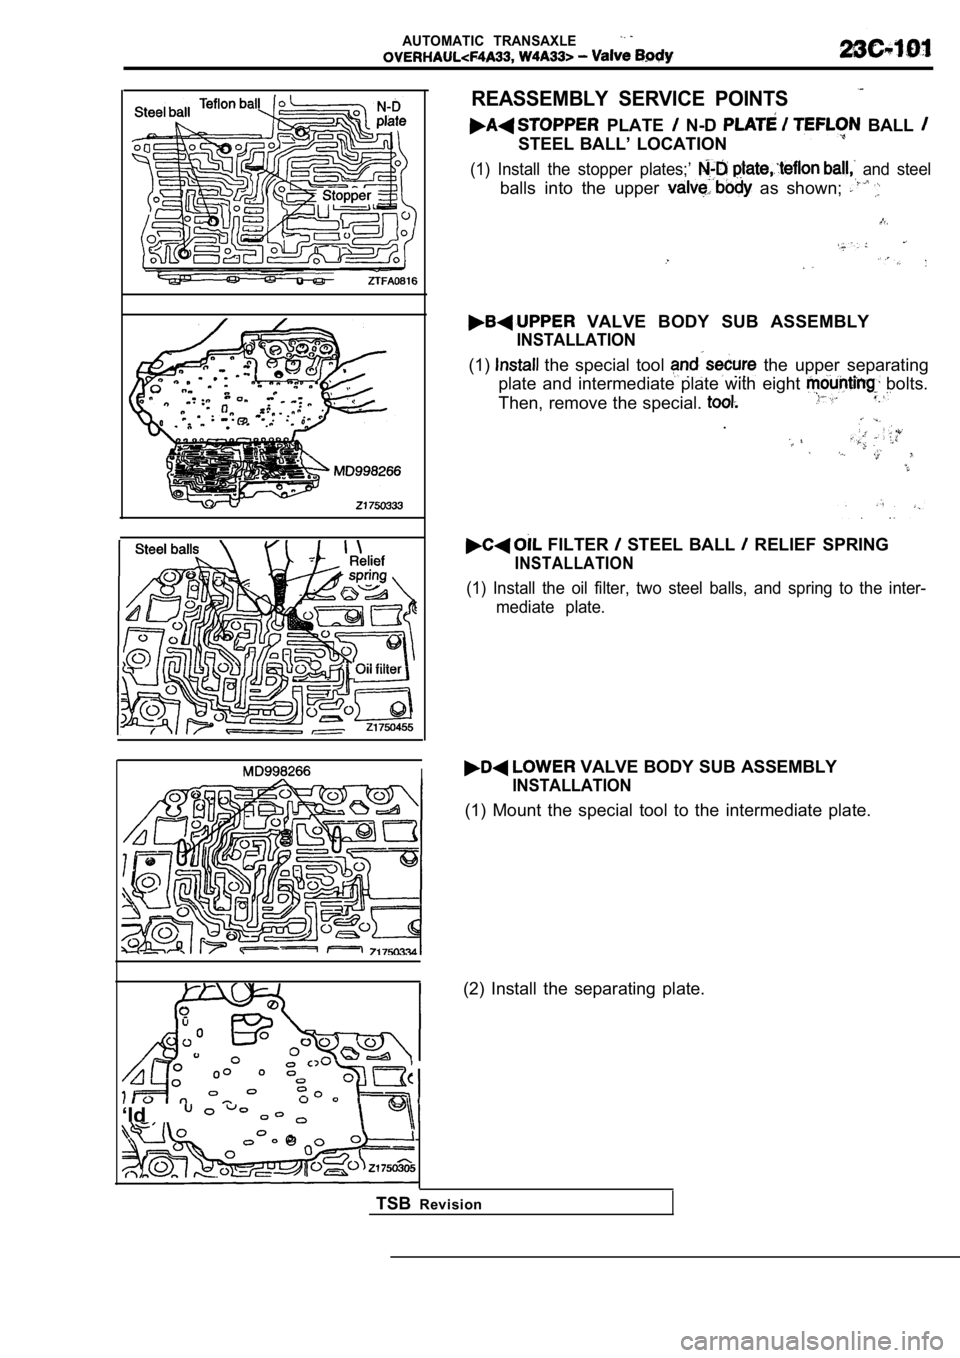
REASSEMBLY SERVICE POINTS
PLATE N-D BALL
STEEL BALL’ LOCATION
(1) Install the stopper plates;’ and steel
balls into the upper as shown;
VALVE BODY SUB ASSEMBLY
INSTALLATION
(1) the special tool the upper separating
plate and intermediate plate with eight
bolts.
Then, remove the special.
.
FILTER STEEL BALL RELIEF SPRING
INSTALLATION
(1) Install the oil filter, two steel balls, and sp ring to the inter-
mediate plate.
VALVE BODY SUB ASSEMBLY
INSTALLATION
(1) Mount the special tool to the intermediate plat e.
(2) Install the separating plate.
TSB Revision
Page 1415 of 2103
AUTOMATIC TRANSAXLE OVERHAUL
DISASSEMBLY
Caution
Do not intermix clutch discs or plates, or might
fall.
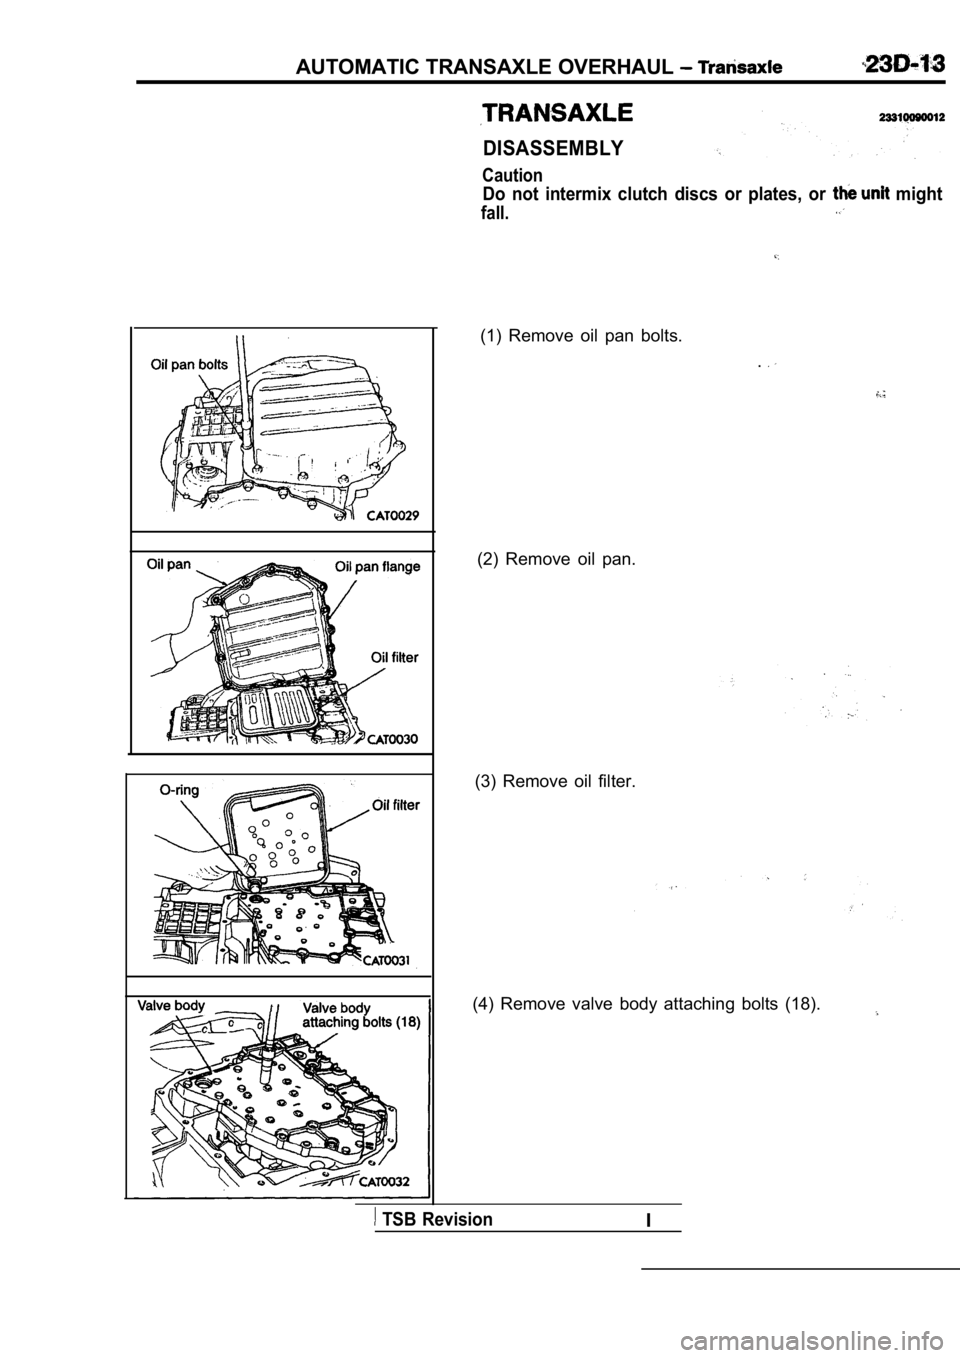
(1) Remove oil pan bolts..
(2) Remove oil pan.
(3) Remove oil filter.
(4) Remove valve body attaching bolts (18).
TSB RevisionI
Page 1450 of 2103
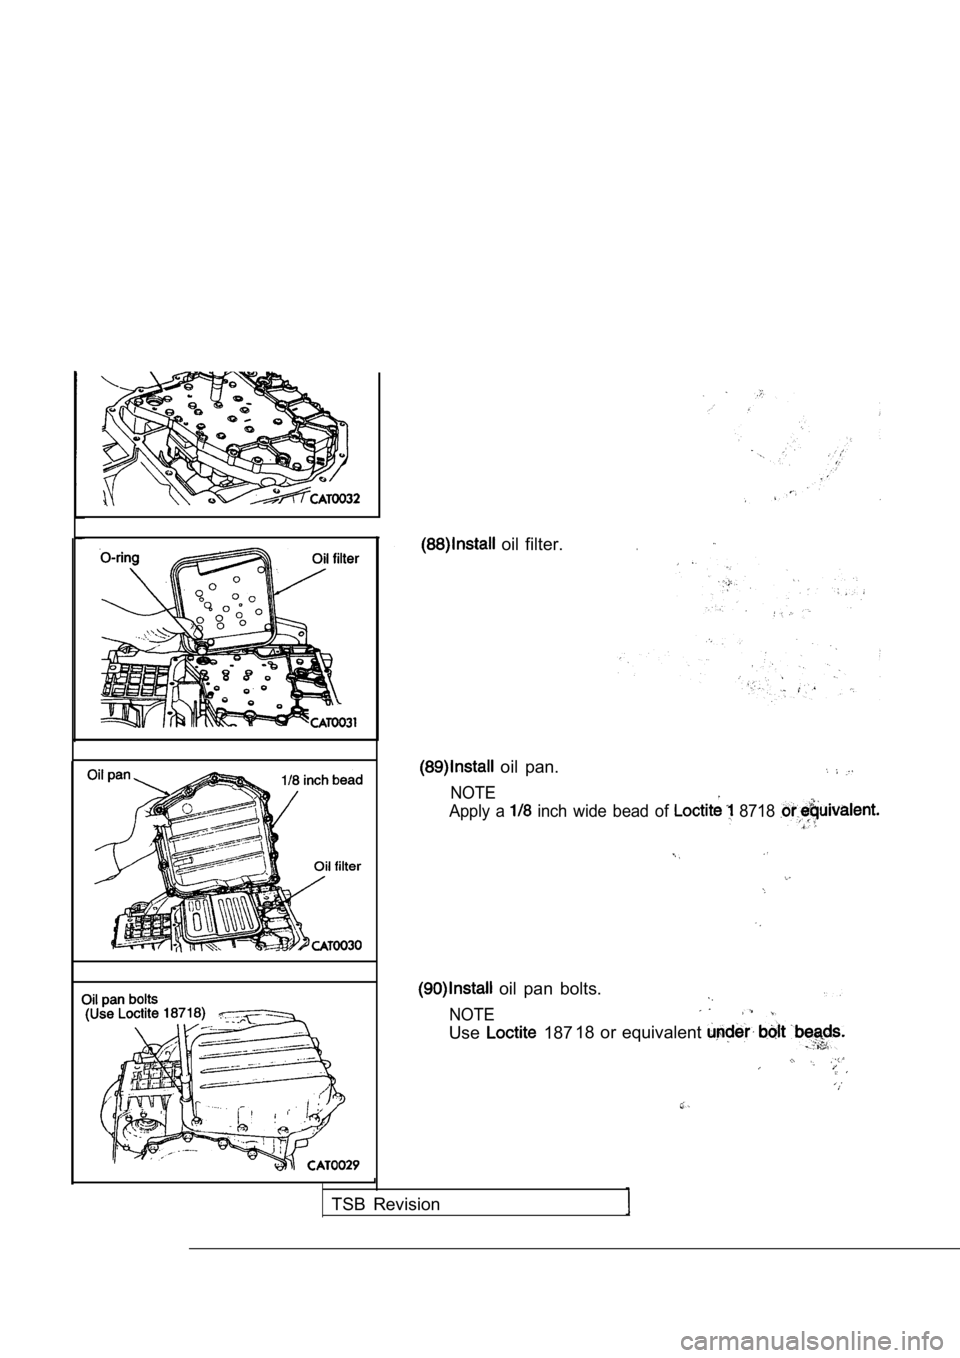
oil filter..
oil pan.
NOTE
Apply a
inch wide bead of 8718
oil pan bolts.
NOTE
Use 18718 or equivalent
TSB Revision
Page 1466 of 2103

AUTOMATIC TRANSAXLE’
Before removing any transaxle plug all
openings and thoroughly clean preferably
by steam.Cleanliness and
assembly cannot be.
When
each part should be washed suitable dried
by compressed air. Do not
All
mating surfaces in the transaxles are accurately ma chined;
therefore, careful
of all parts must be to
avoid nicks or burrs.
all as they removed
for reassembly identification.
Oil pan bolts
DISASSEMBLY
(1) Remove oil pan bolts.
(2) Remove oil pan.
(3) Remove oil filter.
TSB Revision
Page 1473 of 2103
I
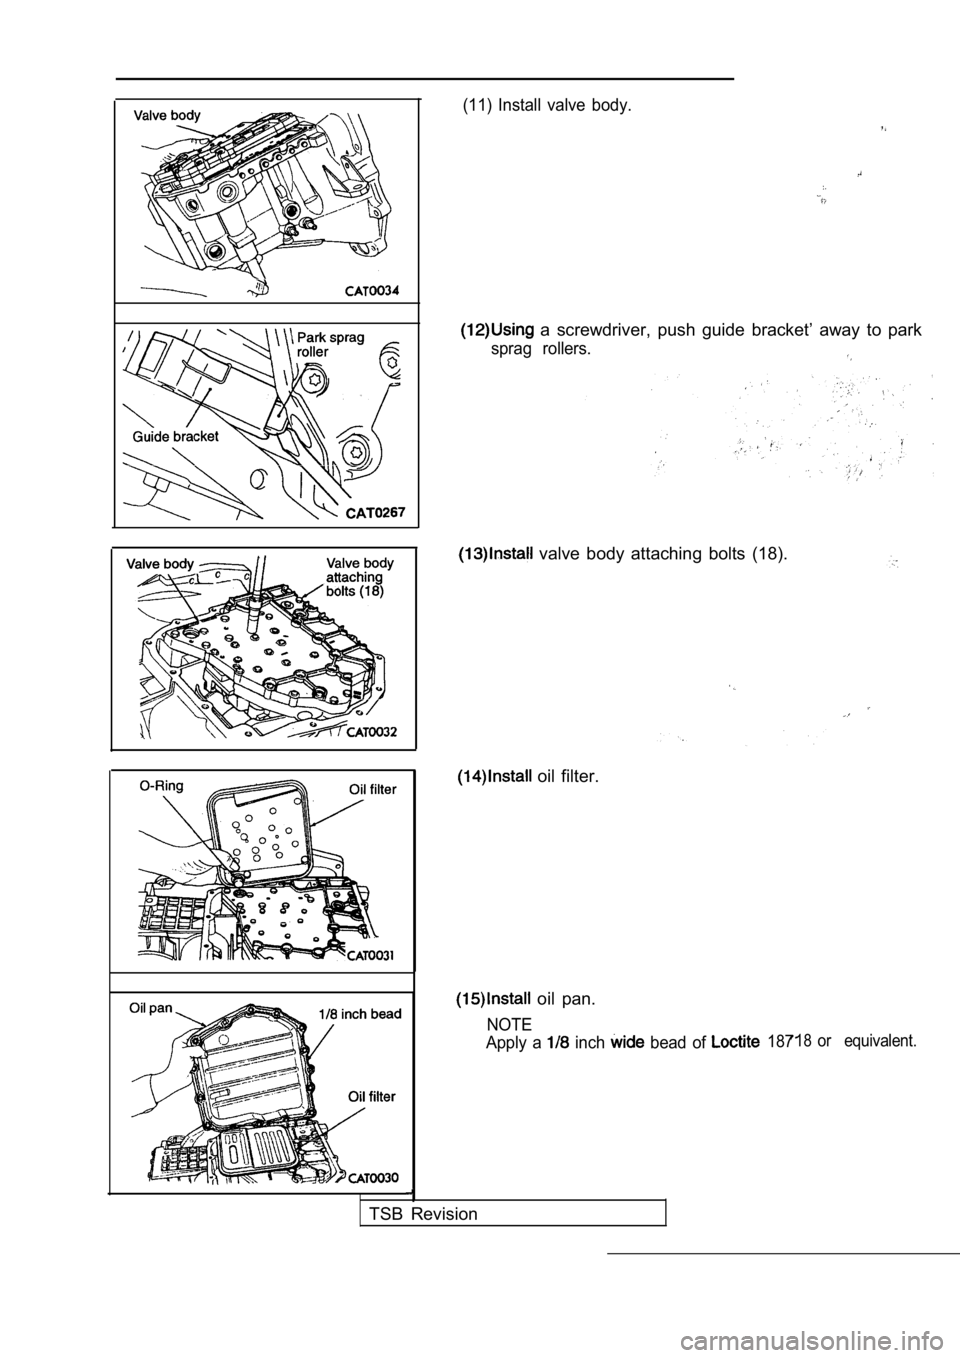
(11) Install valve body.
a screwdriver, push guide bracket’ away to park
sprag rollers.
valve body attaching bolts (18).
oil filter.
oil pan.
NOTE
Apply a
inch bead of 18718or equivalent.
TSB Revision
Page 1783 of 2103
STEERING On-vehicle
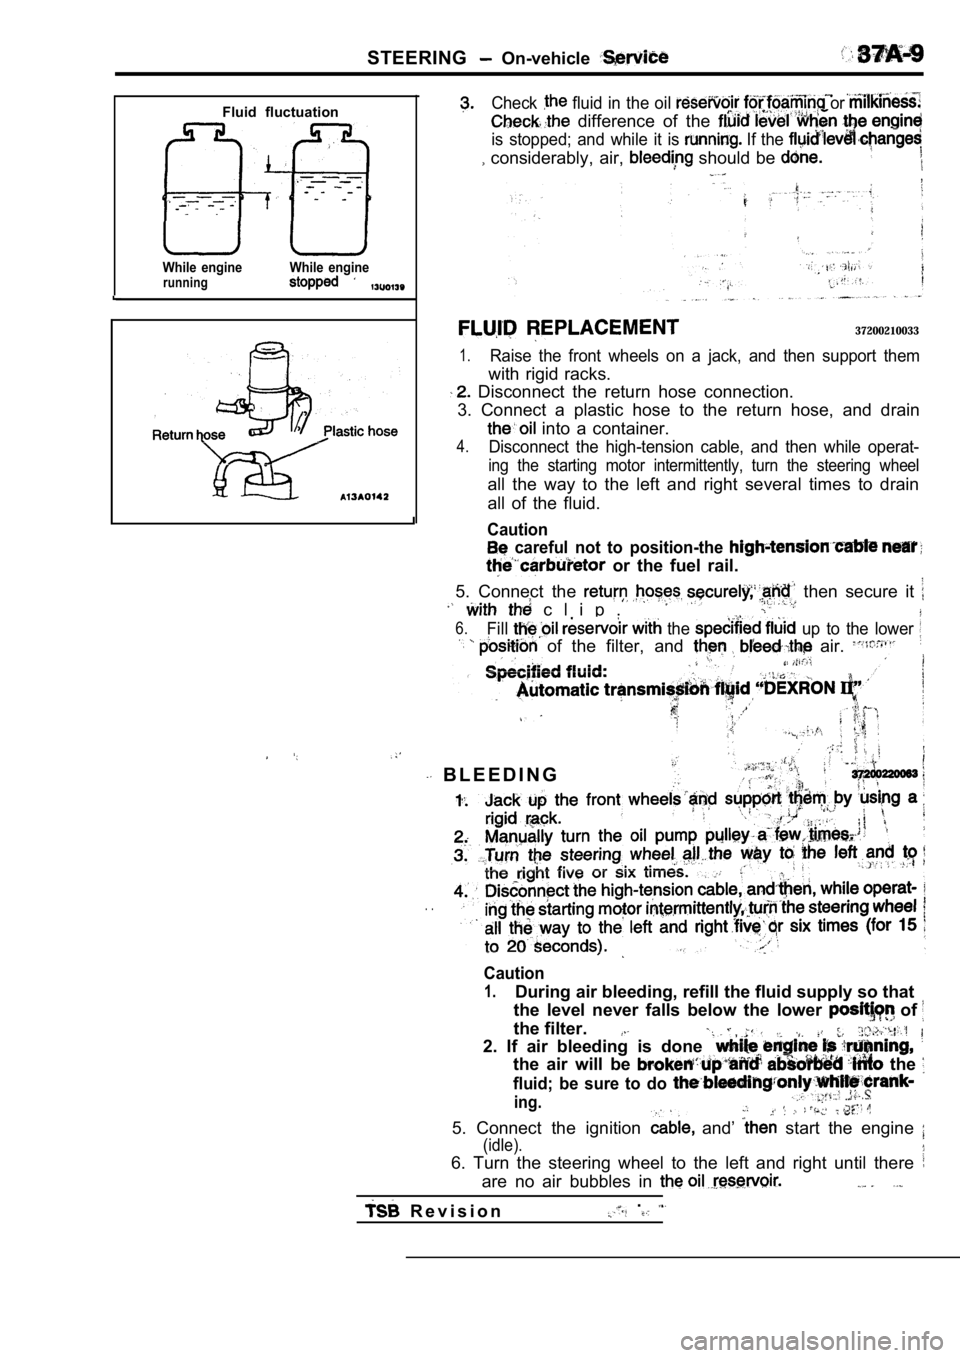
Fluid fluctuation
While enginerunningWhile engine
Check fluid in the oil or
difference of the
is stopped; and while it is If the
considerably, air, should be
37200210033
1.Raise the front wheels on a jack, and then support them
with rigid racks.
Disconnect the return hose connection.
3. Connect a plastic hose to the return hose, and d rain
into a container.
4.Disconnect the high-tension cable, and then while operat-
ing the starting motor intermittently, turn the steering wheel
all the way to the left and right several times to drain
all of the fluid.
Caution
careful not to position-the
or the fuel rail.
5. Connect the then secure it
c l i p .
6.Fill the up to the lower
of the filter, and air.
B L E E D I N G
. .
Caution
1.During air bleeding, refill the fluid supply so tha t
the level never falls below the lower
of
the filter.
2. If air bleeding is done
the air will be the
fluid; be sure to do
ing.
5. Connect the ignition and’ start the engine
(idle).
6. Turn the steering wheel to the left and right un til there
are no air bubbles in
R e v i s i o n.
Page 2044 of 2103
55-4HEATER, AIR
AND VENTILATION General Information
SAFETY PRECAUTIONS
Because R-l refrigerant is a, hydrofluorocarbon
(HFC) which contains hydrogen atoms in place of
chlorine atoms, it will not cause damage to the
ozone layer.
Ozone filters out harmful radiation from the sun.
To assist in protecting the ozone layer, Chrysler
Corporation recommends an R-l refrigerant re-
cycling device.
Refrigerant R-l is transparent and colorless
in both the liquid and vapor state. Since it has
a boiling point of at atmospher-
ic pressure, it will be a vapor at all normal tempe ra-
tures and pressures. The vapor is heavier than
air, non-flammable, and nonexplosive. The follow-
ing precautions must be observed when handling
R-l
Caution
Wear safety goggles when servicing the refrig-
eration system.
R-l evaporates so rapidly at normal atmospher-
ic pressures and temperatures that it tends to free ze
anything it contacts. For this reason, extreme care
must be taken to prevent any liquid refrigerant fro m
contacting the skin and especially the eyes. Always
wear safety goggles when servicing the refrigeratio n
part of the A/C system. Keep a bottle of sterile
mineral oil handy when working on the refrigeration
system. Should any liquid refrigerant get into the
eyes, use a few drops of mineral oil to wash them
out. is rapidly absorbed by the oil. Next
splash the eyes with plenty of cool water. Call your
doctor immediately even though irritation has
ceased after treatment.
Caution
Do not heat above
In most instances, moderate heat is required to
bring the pressure of the refrigerant inits
above the pressure of the system when charging
or adding refrigerant.
A bucket or large pan of hot water
over
is all the heat required for this purpose.
Do not heat the refrigerant container with a blow
torch or any other means that would raise tempera-
ture and pressure above this temperature. Do not
weld or steam clean on or near the system compo-
nents or refrigerant lines.
Caution
Keep
containers upright when charging
the system.
When adding into the refrigeration system
keep the supply tank or cans in an upright
position.
If the refrigerant container is on its or upside
down, liquid refrigerant will enter the
damage the compressor.
Caution
1.A leak detector designed
be used to check refrigerant gas
2.Do not allow liquid refrigerant to
metal.
Refrigerant will tarnish bright metal and chrome
surfaces, and in combination with moisture can
severely corrode all metal surfaces.
TSB Revision
Page 2093 of 2103

ALPHABETICAL
A
ABS OPERATIONCheck. . . . . . . . . . . . . . . . . . . . . . . . . . . . . . . . . . .
. . . . . . . . . . . . . . . . . . . . . . . . . . . . . . . . . . .
ABS-ECU. . . . . . . . . . . . . . . . . . . . . . . . . . . . . . . . . . . . . . . . .
. . . . . . . . . . . . . . . . . . . . . . . . . . . . . . . . . . . . . . . . .
ACCELERATOR CABLE. . . . . . . . . . . . . . . . . . . . . . . . . . . . . . . .Adjustment. . . . . . . . . . . . . . . . . . . . . . . . . . . . . . . . . . . . . . . . .
Check. . . . . . . . . . . . . . . . . . . . . . . . . . . . . . . . . . . . . . . . . . . . .ACCELERATOR PEDAL. . . . . . . . . . . . . . . . . . . . . . . . . . . . . . . .
ADAPTER, Transfer Case . . . . . . . . . . . . . . . . . .
AERO PARTS. . . . . . . . . . . . . . . . . . . . . . . . . . . . . . . . . . . . . . . .
AIR BAG CONTROL UNIT (SRS-ECU), SRS. . . . . . . . . . .AIR BAG MODULES. . . . . . . . . . . . . . . . . . . . . . . . . . . . . . . . .
Deployed Disposal Procedures. . . . . . . . . . . . . . . . . . . . .
Disposal Procedures. . . . . . . . . . . . . . . . . . . . . . . . . . . . .
Disposal. . . . . . . . . . . . . . . . . . . . . . . . . . . . .
AIR CLEANER ELEMENT, Maintenance. . . . . . . . . . . . . . . . . .AIR CONDITIONING SWITCH
ENGINE (NON-TURBO)>. . . . . . . . . . . . . . ENGINE (TURBO) AND .AIR COOLER, charge. . . . . . . . . . . . . . . . . . . . . . . . . . . . . . . . . . .
AIR FILTER. . . . . . . . . . . . . . . . . . . . . . . . . . . . . . . . . . . . . . . . . .
ALIGNMENT
Front Wheel, Check and Adjustment. . . . . . . . . . . . . . . . .
Wheel, Rear, Check and Adjustment. . . . . . . . . . . . . . . . . . .AMPLIFIER. . . . . . . . . . . . . . . . . . . . . . . . . . . . . . . . . . . . . . . . . .
GEAR AND TRANSFER DRIVE GEAR SET
. . . . . . . . . . . . . . . . . . . . . . . . . . . . . . . .
. . . . . . . . . . . . . . . . . . . . . . . . . . . . . . . . . . . . . . . .
ANTENNA.
ARM Compression, Lower
. . . . . . . . . . . . . . . . . . . . . . . . . . . . . . .Lateral, Lower. . . . . . . . . . . . . . . . . . . . . . . . . . . . . . . . . . .
Lower. . . . . . . . . . . . . . . . . . . . . . . . . . . . . . . . . . . . . . . . . . . . .
Toe Control. . . . . . . . . . . . . . . . . . . . . . . . . . . . . . . . . . . . . . . .
Trailing. . . . . . . . . . . . . . . . . . . . . . . . . . . . . . . . . . . . . . . . . . . .
Upper
Suspension>. . . . . . . . . . . . . . . . . . . . . . . . . . .ARMS, Rocker . . . . . . . . . . . . . . . . . . . . . . . . . . .11AUTO-CRUISE CONTROL. . . . . . . . . . . . . . . . . . . . . . . . . . . . .
AUTO-CRUISE CONTROL CABLE, Check andAdjustment. . . . . . . . . . . . . . . . . . . . . . . . . . . . . . . . . . . . . . . . . . .
AUTO-CRUISE CONTROL COMPONENT, Check. . . . . . . . .AUTO-CRUISE CONTROL SYSTEM, Operation Check. . . .AUTOMATIC TRANSAXLE FLUID, Maintenance. . . . . . . . . .AUTOMATIC TRANSAXLE CONTROL COMPONENTCheck
ENGINE (NON-TURBO)>.. . . . . . . . . . . .Layout ENGINE (NON-TURBO)>. . . . . . . . . . . .AUTOMATIC TRANSAXLE KEY INTERLOCK AND SHIFT LOCKMECHANISMS
ENGINE (NON-TURBO)>. . . . . . . . . . . . . . . . . . .
ENGINE (TURBO) AND ENGINE>.. . . . . . .AXLE
Rear, Total Backlash Check. . . . . . . . . . . . . . . . . . . . . . . . . .
AXLE OIL
Rear, Maintenance
. . . . . . . . . . . . . . . . . . . . . . . . . . . . . . . . .
BACK-UP LIGHT. . . . . . . . . . . . . . . . . . . . . . . . . . . . . . . . . . . . .BALL JOINT, Tie Rod End, Breakaway Torque Check. . . . .BALL JOINT SEALS, Maintenance. . . . . . . . . . . . . . . . . . . . . .
BARStabilizer Suspension>. . . . . . . . . . . . . . . . . . . . .
Suspension>. . . . . . . . . . . . . . . . . . . . . . . .
BASIC IDLE SPEED, Adjustment ENGINE (TURBO)
AND ENGINE>. . . . . . . . . . . . . . . . . . . . . . . . . . . . . . . .
BATTERY
Charging
. . . . . . . . . . . . . . . . . . . . . . . . . . . . . . . . . . . . . . . . . .
Check. . . . . . . . . . . . . . . . . . . . . . . . . . . . . . . . . . . . . . . . . . ..Testing Procedure. . . . . . . . . . . . . . . . . . . . . . . . . . . . .. . .
BELT
Compressor, Adjustment. . . . . . . . . . . . . . . . . . . . . . . . .
(For Generator), Maintenance. . . . . . . . . . . .. . . . . (For Power steering pump), Maintenance. . . . . . . . . (For Water pump), Maintenance. . . . . . . . .. .. . .Timing. . . . . . . . . . . . . . . . . . . .
. . . . . . . . . . . . . . . . . . . . . . . . . . .
Timing. . . . . . . . . . . . . . . . . . . . . . . . . . . . .
. . . . . . . . . . . . . . . . . . . . . ... . . . . . . . .
. . . .Timing, Maintenance. . . . . . . . . . . . . . . . . . . . . . . . . . . . . . . .
BLEEDING
ABS. . . . . . . . . . . . . . . . . . . . . . . . . . . . . . . . . . . . . . . . . . . .
Basic Brakes. . . . . . . . . . . . . . . . . . . . . . . . . . . . . . . . . . . .
Clutch. . . . . . . . . . . . . . . . . . . . . . . . . . . . . . . . . . .. . . . . . .. . . . . . . . . . . . . . . . . . . . . . . . . . . . . . . . . . . . . . . . . .
BLOWER. . . . . . . . . . . . . . . . . . . . . . . . . . . . . . . . . . . . . . . . . . . .
BOLTHub, Replacement . . . . . . . . . . . . . . . . . . .. . . . .
. . . . . . . . . . . . . . . . . . . . . .
. . . . . . . . . . . . . . . . . . . . . . 2 7 4 1
BOOSTER
Brake. . . . . . . . . . . . . . . . . . . . . . . . . . . . . . . . . . . .
. . . . . . . . . . . . . . . . . . . . . . . . . . . . .
Brake, Operating Test. . . . . . . . . . . . . . . . . . . . . . . . . . . . . O-IBOOTS, Shaft, Maintenance. . . . . . . . . . . . . . . . . . . . . . .
BRACKET. . . . . . . . . . . . . . . . . . . . . . . . . . . . . .
BRAKE
. . . . . . . . . . . . . . . . . . . . . . . . . . . . . . . . . . . . . .
Disc, Rear. . . . . . . . . . . . . . . . . . . . . . . . . . . . . . . . . . . . . . .
Low-reverse. . . . . . . . . .. . . . . . . .. . . . . . . . . . . . . . . . . . . . . . . . . . . .
BRAKE BOOSTER
. . . . . . . . . . . . . . . . . . . . . . . . . . . . . . . . . . . . . . . . . .
Test. . . . . . . . . . . . . . . . . . . . . . . . . . . . . . . . . . . .
BRAKE DISC
Front, Run-out Check. . . . . . . . . . . . . . . . . . . . . . . . . .. Run-out Correction. . . . . . . . . . . . . . . . . . . . . . . . . .
Front, Thickness Check. . . . . . . . . . . . . . . . . . . . . . . . . . .
Rear, Run-out Check.. . . . . . . . . . . . . . . . . . . . . . . . . . . . .
Rear, Run-out Correction. . . . . . . . . . . . . . . . . . . . . . . . . .
Rear, Thickness Check. . . . . . . . . . . . . . . . . . . . . . . . . . . .
BRAKE DRUM
Inside Diameter Check with Rear Drum . . . . . . . . . . . . . . . . . . . . . . . . . . . . . . . . . . . . . . . . . . . . . . . . .
BRAKE FLUID LEVEL SENSOR, Check. . . . . . . . . . . . . . . .
BRAKE HOSES, Maintenance. . . . . . . . . . . . . . . . . . . . . . . . . .
BRAKE LINING
Thickness. . . . . . . . . . . . . . . . . . . . . . . . . . . . . . . . . .
BRAKE PAD
Disc, Front, Check and Replacement
. . . . . . . . . . . . . . . .Disc, Rear, Check and Replacement. . . . . . . . . . . . . . . .
BRAKE PEDAL. . . . . . . . . . . . . . . . . . . . . . . . . . . . . . . . . . . . .
Check and Adjustment. . . . . . . . . . . . . . . . . . . .. . . . . . .BRAKE ROTOR, Disc, Front, Check. . . . . . . . . . . . . . . . .BREAKAWAY TORQUE, Rod End Ball Joint, . . .BUMPERFront. . . . . . . . . . . . . . . . . . . . . . . . . . . . . . . . . . . . . . . . . . . . . . .Rear. . . . . . . . . . . . . . . . . . . . . . . . . . . . . . . . . . . . . . . ......